How Do I Paint My Car at Home? A Complete DIY Guide to Prep, Spray, and Finish
Thinking about painting your own car can bring up images of botched jobs and wasted weekends. I’ve been there, with my oxidized ’95 Miata, and I know that precise guidance cuts through the fear.
We will walk through choosing the right paint and safety gear, performing detailed surface preparation, applying smooth, even coats, and finishing with polish and protection.
Deviate from this process, and you risk a finish full of imperfections like orange peel, runs, and early failure.
What to Know Before You Start: Key Takeaways
Let’s talk straight. Painting a car is not detailing. It is a major project.
I have corrected paint on my black BMW for years. Applying new paint is a different world. You need to set expectations before you touch a sander.
- Difficulty Level: Advanced. This requires the patience of a detailer, the technique of a craftsman, and the tolerance for frustration of a saint.
- Total Time: Think in days or weeks, not hours. A proper job involves 90% preparation and 10% spraying. Rushing any step shows in the final finish, guaranteed.
- Cost Range: A basic DIY setup with an HVLP gun, compressor, materials, and quality paint can easily run $800 to $1,500. A professional job starts around $3,000 and goes up fast. You are trading cash for your own labor and accepting a different standard of finish.
This is not a quick weekend fix for a scratched bumper. It is a commitment to completely refinishing a vehicle’s largest surface.
So, is it worth it? Only you can answer. The satisfaction of saying “I painted that” is real. I felt it restoring the single-stage red on my ’95 Miata. But the finish will have flaws-some orange peel, maybe a dust nib, a slight texture difference on a panel. A professional booth, with its filtered air and experienced painter, exists to eliminate those flaws. If you seek showroom perfection, hire a pro. If you want to save money on an older car, learn a tremendous skill, and achieve a very good “10-foot” finish, then roll up your sleeves.
The Detailer’s Arsenal: Tools, Chemicals, and Paint
In detailing, you can sometimes get by with a good microfiber and spray wax. In painting, every tool in the chain matters. Skimping here does not save money. It wastes every dollar you spend on paint. This is the investment section.
Your Non-Negotiable Safety Kit
This comes first. The chemicals in modern paints and primers are not to be breathed or absorbed.
- Respirator: A NIOSH-approved organic vapor respirator with pink cartridges. A dust mask or cheap painter’s mask is useless. Your brain and lungs need this.
- Gloves: Heavy-duty nitrile gloves. Change them often.
- Coveralls: Disposable ones. Paint dust gets everywhere.
- Safety Glasses: Seal-type goggles are better when sanding.
Ventilation is a health requirement, not a suggestion. Work in a well-ventilated garage with the door open, or better yet, use a fan to pull fumes out. I will not teach you how to paint a car without stressing this.
Surface Prep Tools (The “Boring” Stuff That Matters Most)
The quality of your paint job is decided here, before a drop of color is mixed. This is where my detailer’s mindset is crucial.
- DA Polisher/Sander: A dual-action polisher can be used with sanding pads. It’s forgiving for beginners. You need one that can handle the runtime.
- Sanding Pads & Paper: Hook-and-loop interface pads for your DA. You will need sandpaper in a sequence: 320 grit for stripping old paint and feathering edges, 500 for smoothing primer, 800-1000 for scuffing primer before basecoat, and 1500 for wet-sanding between clearcoat layers.
- Tack Cloths: Sticky cheesecloth wipers to remove every speck of dust before painting. Use them constantly.
- Body Filler Kit: For dents you cannot hammer out. Includes filler, hardener, and spreaders.
Keep a “Grit Guard” mentality. Have separate bins or bags for each grit of sandpaper. Never let a 320-grit paper touch a surface you’ve already sanded to 800. Contamination is the enemy.
Spraying Equipment: Guns, Air, and Environment
This is the delivery system. It must be clean and consistent.
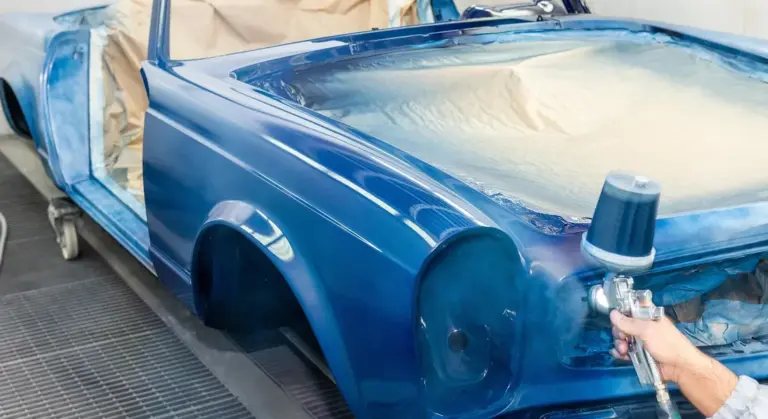
Spray Gun vs. Cans: Rattle cans are for small touch-ups, not whole cars. They lay down thin, uneven coats and cannot apply proper clearcoat. A full-size HVLP (High Volume, Low Pressure) gun is the correct tool. It uses air efficiently and gives you control.
Compressor: HVLP guns are hungry for air. You need a compressor that can deliver at least 12-15 CFM at 40 PSI, with a minimum 30-gallon tank. A small pancake compressor will run constantly and never keep up, ruining your paint.
Essential Extras:
- An in-line air filter and water separator that screws into your gun’s inlet. This stops oil and moisture from your compressor lines from spraying onto your panel.
- Paint strainers (like cone-shaped filters) to pour every liquid through before it goes in the gun.
- Graduated mixing cups for precise ratios of paint, hardener, and reducer.
Your Makeshift Booth: You need a clean, still, lit space. Hang plastic sheeting from the ceiling to create walls. Wet the concrete floor to keep dust down. Use portable LED work lights from multiple angles so you can see your reflection and coverage. Do all your sanding outside the booth, then wipe everything down and move the car in. Dust is your final boss.
Choosing Your Paint System
Modern automotive paint is a system of layers, each with a job.
- Primer/Surfacer: This bonds to the bare metal or old paint. It fills minor sanding scratches and provides a uniform surface for the color to stick to. Epoxy primer is the gold standard for adhesion.
- Basecoat: This is your color. It provides the pigment but very little gloss or protection. Modern basecoats are often water-based or require specific reducers.
- Clearcoat: A thick, transparent layer of urethane. This is what gives the depth, gloss, and UV protection. You will sand and polish this final layer, just like in detailing.
Single-Stage vs. Base/Clear: Single-stage paint has the color and gloss in one layer, like the old red on my Miata. It’s simpler but harder to spray evenly and lacks the depth of a base/clear system. For a DIYer, base/clear is more forgiving. If you get a run in the clear, you can sand it out without affecting the color.
Paint Types: Urethane is the durable, modern standard. Acrylic Enamel is older tech. Use a urethane system. In the broader landscape of automotive paint types, urethane finishes are prized for durability and gloss. Other types exist, but urethane remains a common baseline.
Getting Paint: Find your vehicle’s paint code on the door jamb or firewall. Take it to a local automotive paint supplier. They can mix it precisely and, more importantly, give you the right reducer and hardener for your climate and the correct spray-out cards to check color.
“How much does spray paint for a car cost?” For a mid-size car, a gallon of quality basecoat, a gallon of clear, primer, and all activators can cost $500-$800. This does not include the tools or professional car paint.
“What’s in a DIY car painting kit?” Be wary. These often include a low-quality gun, a few filters, and small amounts of generic paint. They rarely include a capable compressor or the full range of sandpaper you need. You are usually better off sourcing each component separately for your specific project, especially when trying to paint a car on a budget.
The Make-or-Break Prep Work: A Strict Order of Operations
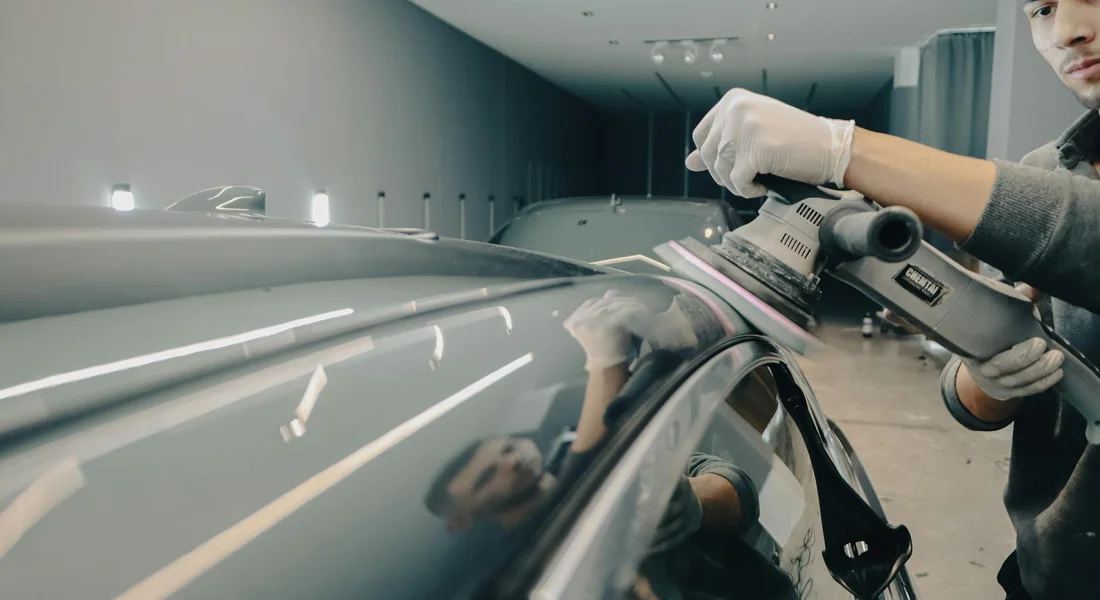
Let’s be clear. The paint you spray is just the final layer. It reveals everything underneath it. Good prep makes paint look deep and perfect. Bad prep makes paint show every mistake, like a spotlight on a dirty floor. This is 90% of the job. Follow this list in order. Do not skip steps.
Step 1: Deep Clean and Disassembly
You cannot paint over dirt. Start with a full wash. I use the two-bucket method on my black BMW here, because I want zero new scratches before I even start sanding. After washing, you must decontaminate. Spray an iron remover over the whole car. It will turn purple as it dissolves invisible brake dust and rail dust. Rinse it off.
Next, clay bar the entire surface. This pulls out bonded contaminants that feel like sandpaper. If you skip this and sand, you are grinding that grit into the paint. Make sure to use a clay bar that is safe for your car’s paint. Dry the car completely with a clean microfiber towel.
Now, start taking things off. Remove badges, side mirrors, door handles, and trim if you can. Tape off anything you cannot remove. On my Miata project, I spent an hour removing the tail lights and side markers. That saved me two hours of tricky masking and gave me a cleaner edge for the paint. More time removing now means less headache later.
Step 2: Sanding and Surface Repair
This step creates the “tooth,” a uniform, slightly rough surface for the primer to grip. You cannot have a smooth finish without starting with a consistently rough surface.
Start with 500-grit sandpaper on a dual-action sander. You are sanding the old clear coat and paint until the shine is completely gone and the surface is a flat, matte color. Work in sections. Keep the sander moving. After the whole car is done with 500, move to 800-grit by hand or machine to smooth out the sanding scratches. Wipe the dust away frequently. Then you can proceed with wet sanding the paint to refine the finish. Wet sanding helps keep dust down and cools the surface, revealing any remaining scratches.
For small dents and dings, this is where you use body filler. Mix it exactly as the directions say. Apply it sparingly, let it cure, and then sand it smooth with 80-grit, moving up to 180, then 320 until it’s flush with the panel. Your hand should not feel any transition between the metal and the filler.
I get asked one question more than any other: “Can I paint my car without sanding?” The answer is no. If you paint over old, shiny clear coat, the new paint has nothing to grab. It will peel, chip, and fail in months. It will look terrible. Sanding is non-negotiable.
Step 3: Final Wipe, Masking, and the Tack Rag
The car is sanded. It is covered in dust, oils from your hands, and sanding residue. Do not spray yet.
Get a dedicated wax and grease remover (WGR). Pour it on a clean, lint-free towel. Wipe down the entire sanded surface. Then, take a second, dry, clean towel and immediately wipe the panel dry. This two-towel method lifts and removes the contamination instead of spreading it around.
Now, mask like a pro. Use plastic sheeting to cover windows, wheels, the engine bay, and the undercarriage. Overspray travels everywhere. For sharp paint edges, like around a window trim, use fine-line tape. It gives you that crisp, factory edge. On my Miata’s fender, I used it along the edge of the headlight bucket. It made all the difference.
Your final act before spraying is the tack cloth. This is a sticky, cheesecloth-like rag. Unfold it, gently pass it over the entire surface you will paint. It picks up the last tiny specks of dust that will otherwise get stuck in your fresh paint. Do this meticulously. Then, do not touch the surface again.
The Spraying Process: A Step-by-Step Guide for Beginners
The key to spraying is rhythm. Slow, even, and overlapping. Your first time will feel awkward. My first time spraying the Miata’s fender, I was nervous. My hand shook. I got a run. I fixed it. You will learn. Breathe. Move your whole arm, not just your wrist. Keep that gun moving.
Spraying Primer: Your New Canvas
Primer seals the sanded surface and gives you a uniform color to apply your basecoat to. Mix it exactly as the product data sheet says. Strain it through a paint filter into your spray gun cup. Before you touch the car, test your spray pattern and fluid adjustment on a big piece of cardboard. You want a wide, even fan. Mastering car paint primer application sets up a smooth, durable base. With the primer done right, the basecoat will look even and last longer.
Technique is everything. Start spraying just before the edge of the panel, keep the gun moving in a straight line across it, and stop spraying just after you pass the other edge. Keep the gun nozzle 6 to 8 inches from the surface. Overlap each pass by 50%. Apply 2 to 3 medium-wet coats, letting the primer “flash” or become tacky between coats.
Once the primer is fully cured, you will sand it smooth again with 500 or 600-grit sandpaper. This ensures your color coat goes on a perfectly flat surface. Wipe it clean with your WGR and a tack cloth again.
Spraying Color: The Basecoat
This is the exciting part. Strain your mixed basecoat. It will look very thin and see-through. That is normal. Put on your respirator. Ensure your space is ventilated.
Your first coat should be a light “tack coat.” Just a misty, 50% coverage layer. This gives the next coats something to stick to without causing runs. Let it flash for a few minutes. Then, apply your first full wet coat. Move a little slower. You will see the color start to become solid. Let it flash. Apply a second full wet coat, and often a third, until the color is completely even and opaque. There is no more grey primer showing through.
Do not panic when you see “orange peel.” This is a textured, dimpled surface that looks like the skin of an orange. It is completely normal for basecoat and is actually desired. The final clear coat will flow out and bury this texture, so do not try to make the basecoat glossy. Your job here is complete, even color.
Spraying Clearcoat: The Protective Glass
This is where the magic happens. Clearcoat is thick. It is the protective layer that provides UV resistance, depth, and that wet-look gloss. You absolutely need it. A car with only basecoat will fade and fail quickly. Make sure to ask how many clearcoat layers were applied when buying a used car.
Mix and strain your clear. Your technique changes slightly. You need to apply it “heavy but moving.” This means moving slow enough to lay down a wet, glossy coat, but not so slow that the paint pools and runs. Apply the first coat evenly. Let it flash until it’s tacky. Apply a second heavy, wet coat. This is where the gloss builds. A third coat is common for maximum protection.
A run in clear coat is a major pain to fix, requiring sanding and re-spraying. Watch the surface as you spray. If you see a shiny, wet spot building, you’ve lingered too long. Keep the gun moving. When you’re done, you will see the deep, reflective gloss appear as it flows out. That is your sign of a job well done.
After the Paint Dries: Finishing and Protecting Your Work
The last spray of clear coat hits the panel. You wipe your brow. It looks wet and glossy. You might think the hard part is over. It is not. The real test of a paint job happens in the weeks that follow. Rushing the finish will ruin all your prep work.
This final phase is about patience and precision. It turns a fresh paint job into a lasting, showroom-quality finish.
The Cure Time Patience Game
Paint dries in stages. Knowing the difference saves heartache. Dry-to-touch means the solvents on the surface have evaporated. You can gently wave your hand over it. Fully cured means the paint has hardened all the way through, a chemical process that takes much longer.
For a typical two-stage (basecoat/clearcoat) job in a home garage, clear will be dry to the touch in a few hours. Full cure takes weeks.
Follow these strict rules to avoid sticking tape, fingerprints, or soft paint.
- Do not remove masking tape for at least 12-24 hours. Pulling it off too soon can peel the fresh paint edge.
- Do not reinstall trim, badges, or handles for several days, preferably a week. The pressure can imprint the soft clear coat.
- Do not wax or seal the paint for a minimum of 30 days, and 60 days is safer. Sealants trap solvents trying to escape, which can cause hazing or poor adhesion later.
People always ask, “How long does it take to repaint a car at home?” The honest answer has two parts. The active work—sanding, masking, spraying—might be 40-80 hours spread over a week or two. The passive cure time, where you must leave the car completely alone, adds another 4-8 weeks before it’s truly safe for daily use and protection. Good work cannot be rushed.
Wet Sanding and Polishing: Removing Orange Peel
Once the clear coat is fully cured (wait the 30-60 days), you can address orange peel. That bumpy, textured look is normal in fresh paint. Removing it reveals the deep, mirror finish.
You need a spray bottle with water and a drop of soap, wet sanding paper (2000 then 3000 grit), and a dual-action polisher.
Wet sanding levels the high spots of the orange peel texture by cutting them down to the low points. Always keep the surface and paper soaked. Use a soft sanding block. Work in small, 2×2 foot sections. Sand with 2000 grit until the surface looks uniformly dull. Then, repeat with 3000 grit. This creates a much finer scratch pattern that is easier to polish out. Your goal is a smooth, flat, uniformly hazy surface.
Now, you polish. This is where my BMW, the “Swirl Magnet,” teaches a harsh lesson. Poor technique here will inflict swirls and holograms worse than any car wash.
- Start with a heavy-cut compound and a firm foam cutting pad on your polisher. Work the compounded area until the sanding haze is gone and a faint gloss returns.
- Switch to a fine polish and a soft foam polishing pad. This step removes the micro-scratches from the compound and brings the deep gloss and clarity.
- Wipe the panel clean with a premium microfiber towel. The transition from dull sanded mess to liquid mirror is the most rewarding part of the entire job.
Long-Term Protection for Your New Paint
You have invested a hundred hours. Now, protect that investment from day one. After the mandatory cure period, apply a durable protective layer.
A high-quality synthetic sealant will offer 6-12 months of protection. A consumer-grade ceramic coating can provide 2-5 years of superior chemical resistance and easier cleaning. For a home-painted car, a robust sealant is often the perfect choice. It shields the paint without the permanent commitment of a professional coating.
The protection is only as good as your wash technique. Immediately commit to the two-bucket wash method. One bucket with soapy water for washing. One bucket with clean water for rinsing your mitt. This simple practice, which my black BMW desperately needed from day one, prevents dragging dirt across your fresh paint and instilling swirls. Use a gentle car shampoo and dry with a clean, soft drying towel.
Your new paint is soft for its first year. Be kind to it. That careful maintenance is the final, ongoing step of your DIY paint job.
Keeping That Finish Fresh
Your paint job lives or dies by the prep work. Do that right, and the spraying almost takes care of itself.
Neglect it, and you’ll be fixing peeling paint instead of admiring your handiwork.
Relevant Resources for Further Exploration
- Painting a Car at Home Part 1: Preparation, Preparation, Preparation | Articles | Grassroots Motorsports
- “HOW TO PAINT A CAR”- AT HOME-BY YOURSELF! – YouTube
- The Poor Mans Paint Job : 5 Steps (with Pictures) – Instructables
Max Gunther
Max is an automotive enthusiast having worked as a car mechanical and in interior detailing service for over 25 years. He is very experienced in giving your old car, a new fresh vibe. He has detailed many cars and removed very tough smells and stains from all kinds of cars and models, always ensuring that his work and advice helps his customers. He brings his first hand experience to his blog AutoDetailPedia, to help readers breath new life into their car interiors.