How Do You Mix Car Paint for a Professional Spray Application?
Mixing paint incorrectly guarantees a streaky or orange-peel finish that screams “amateur hour” from across the parking lot. I’ve fixed too many botched touch-ups on my own black BMW to let you start off wrong.
Here, I’ll share the hands-on method I use for detailing touch-ups and corrections, covering finding your exact paint code, selecting the right reducer and hardener, nailing the mixing ratios, and preparing the paint for your specific spray gun.
Wing the ratios, and you’ll spray a permanent, cloudy flaw right onto your clear coat.
Before You Start: The Quick Truth and Safety Non-Negotiables
I remember mixing single-stage paint for a touch-up on my ’95 Mazda Miata. The classic red had oxidized to a chalky pink on the rear bumper. Holding that mixing cup, I felt like I was about to fail a test. It is intimidating. Let me be clear: if you follow the rules, you can do this—especially for DIY car paint touch-up.
Here is what you are signing up for.
- Time Required: About 45 minutes for a proper mix, not including setup or cleanup.
- Difficulty: Moderate. It is more about precision than skill.
- Cure Times: These vary wildly. A 1K touch-up paint dries in hours. A 2K clear coat needs days to fully harden.
- The Core Rule: The ratio is everything. Get it wrong, and the paint fails.
Your health and the environment are not optional concerns in this process. Automotive paint releases volatile organic compounds (VOCs), which are harmful vapors. You must work in a spray booth or an extremely well-ventilated space, like a wide-open garage with fans moving air out. A NIOSH-approved organic vapor respirator is mandatory from the moment you open a can. Knowing how to use chemicals in car paint safely is crucial.
You might ask, “does NAPA mix paint for cars?” Yes, absolutely. Professional shops use computerized machines to mix base coats for full repaints. That service is perfect for color matching a quart of paint for a large job. Learning to mix yourself gives you control for small touch-ups, blending paint, or customizing a mix for a specific spray gun. It turns you from a passenger into the driver.
The 30-Second Mixing Cheat Sheet
If you only remember four things, remember these.
- Perfect Ratio: Follow the product sheet exactly. Do not estimate.
- Clean Tools: Use new, dedicated mixing cups and sticks. Contamination ruins everything.
- Thorough Mixing: Stir for at least two full minutes. Scrape the sides and bottom of the cup.
- Patience for Induction: After mixing, many paints need 10-15 minutes to “rest” before spraying. This is non-negotiable.
Think of it like baking a cake where precise measurements are non-negotiable. Doubling the eggs does not make a better cake. It makes a mess. Paint chemistry works the same way.
Safety Gear: What You Must Wear
Do not skip this. Your skin and lungs are vulnerable.
- Nitrile Gloves: Solvents can seep through skin. Disposable nitrile gloves are a barrier.
- Safety Glasses: A splash of reducer in the eye is a trip to the emergency room.
- Respirator: You need a half-mask respirator with organic vapor cartridges (like 3M’s 6001 series).
Cheap paper dust masks are worthless for solvent vapors; they only stop dust. The vapors will go right through and into your lungs. A proper respirator is the most important tool on your bench.
Your Paint Mixing Arsenal: Tools & Chemicals
Mixing paint is a surgical procedure. You need the right instruments. Gather these tools before you pour a single drop.
- Paint Mixing Cups: Several graduated plastic cups with ratio marks (like 4:1:1).
- Digital Scale: For weight-based ratios, accurate to 0.1 grams for small batches.
- Mixing Sticks: A box of wooden or plastic paddles. You will use many.
- Permanent Marker or Label Maker: To note the mix code, ratio, and date on every cup.
- Clean, Lint-Free Rags: For immediate spills.
The Measuring Tools
Accuracy is born from your tools.
Car paint mixing cups are your visual guide. They are clear plastic cups with printed lines for common ratios (like 4 parts paint to 1 part hardener). You need several because you should never reuse a contaminated cup. For my Miata’s touch-up, I used a small 100ml cup for precision.
A digital kitchen scale is perfect for weight-based mixes. It is often more accurate than volume for very small batches, like mixing an ounce of clear coat for a chip repair. Place your cup on the scale, tare it to zero, and add each component to the exact gram.
Mixing sticks seem simple, but use a fresh one each time. A used stick can have dried paint fragments that fall into your new mix. A label maker or a sharpie lets you mark the cup immediately. This prevents tragic mistakes if you step away for a moment.
Choosing the Right Mixing Cup
You will see two main types: volume cups and weight cups. Volume cups have lines for fluid ounces or milliliters. Weight cups are designed to be used on a scale and often have a flat bottom. The best practice is to use a new, clean cup for every single mix to prevent contamination. Do not try to save a few cents by reusing a cup. A fleck of dried hardener from a previous job can cause a fish-eye crater in your fresh paint.
The Chemicals: Paint, Reducer, Hardener
These are the ingredients. You must know what each one does.
- Paint: This is the pigment and binder. It provides color and film strength.
- Reducer or Thinner: This adjusts viscosity for your spray gun and controls drying time. Fast reducer for hot days, slow for cold.
- Hardener or Catalyst: This is for 2K (two-component) systems. It triggers a chemical cure, creating a much harder, more durable finish.
Always use products from the same brand and “system” for guaranteed compatibility. Do not mix a Brand A paint with a Brand B hardener. The chemicals are formulated to work together. Sticking to one family prevents gelling, poor curing, or adhesion failure.
You might wonder about a car paint mixing machine price. Professional body shops use mechanical shakers that cost thousands of dollars to perfectly mix gallons of base coat. For a detailer or DIYer doing touch-ups, panel blends, or mixing clear coat, hand mixing is completely sufficient. Your arm and a stir stick are all you need.
Chemical Handling and Storage
Treat these chemicals with respect. Always check the product data sheet (PDS) for the specific gravity or mixing ratio by weight. Some paints are heavier than others. The PDS has all the answers. Always store your paint, reducers, and hardeners in a cool, dark place, tightly sealed. Heat and light degrade the chemicals. I keep mine on a shelf in my temperature-controlled garage, away from any direct sunlight. This extends their shelf life and ensures consistent results every time.
The Core Process: How to Mix Car Paint Step-by-Step
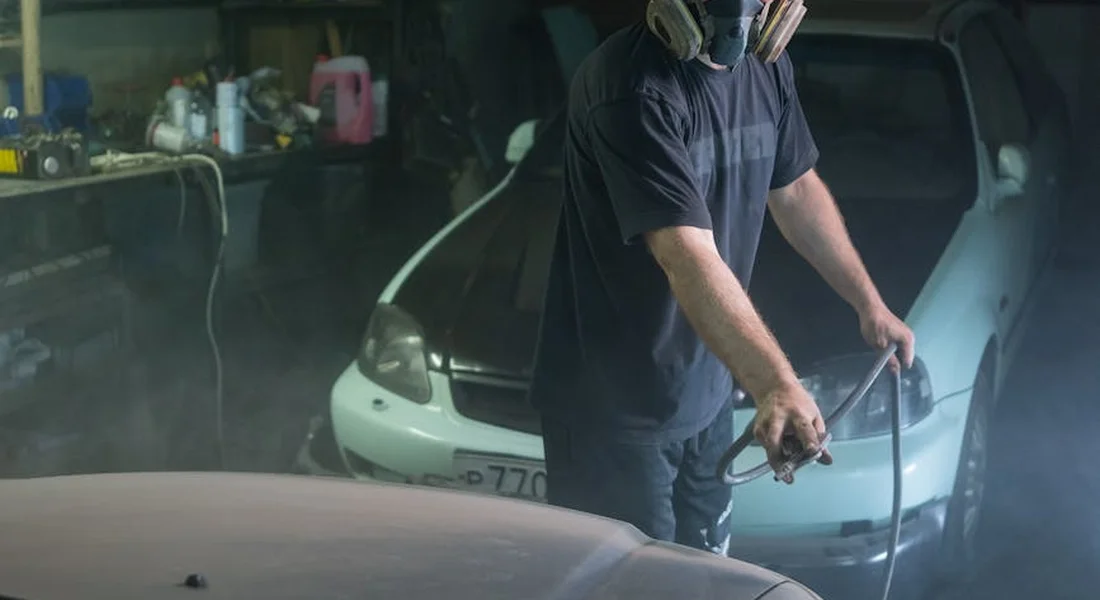
This is the method I use every time. I learned it the hard way, matching the deep black on my BMW and the perfect red on the Porsche. Follow these steps in order. Do not skip ahead, especially when trying to find the correct car paint code.
Step 1: Read the Tech Sheet and Find Your Ratio
Forget what you heard online or from a friend. The technical data sheet is your only source of truth. Find it printed on the can lid or search for it online using the product name and code. The tech sheet tells you exactly how to mix that specific paint for your specific conditions.
A ratio like 4:1:1 means four parts of one thing, one part of another, and one part of a third. The first number is almost always the paint itself. The following numbers are for the hardener and reducer. A simple 2:1 ratio means two parts paint to one part hardener. I save all my tech sheets as PDFs on my phone. You should too.
Step 2: Measure With Precision, Don’t Guess
You need graduated mixing cups. Eyeballing it does not work. Pour your first component, usually the paint, slowly to the exact line for the amount you need. Then add the next component to its corresponding line on the cup. The lines are marked for different ratios. This is how you mix car paint before spraying anything on car parts.
For a full repaint, you might mix quarts. For a door ding on your Tesla or a scratch on the Fender, you mix ounces. The principle is the same. Precise measurement is the foundation of a perfect finish.
Using a Paint Mixing Ratio Chart
A general chart is a helpful starting point. Remember, your product’s tech sheet overrules this chart every time.
- Primer/Surfacer: Often 4:1:1 (primer: hardener: reducer)
- Basecoat: Usually 1:1 (paint: reducer) but can vary widely.
- Clearcoat (2K): Very commonly 4:1:1 (clear: hardener: reducer) or 2:1.
Step 3: The Correct Order of Addition
There is a golden rule for the order you pour components into the cup. Pour the reducer or thinner in first. Then add the paint. Finally, add the hardener last if your system uses one. This order helps the components blend together more smoothly from the start.
When you mix car paint and hardener for a 2K system, you start a chemical clock. The “pot life” listed on the tech sheet begins. You must spray all the mixed material within that time before it turns to jelly in your cup and gun.
Step 4: Mix Thoroughly – This is Where Most Fail
Stirring for ten seconds is not mixing. Take a clean mixing stick. Scrape the entire bottom of the cup. Pull the stick up along the sides. Fold the material over itself. Do this aggressively for a full two minutes. Incomplete mixing is the main cause of streaks, soft cure, and adhesion failure.
Technique Tweak: The Whisk Method for Laboratory Consistency
Hold the mixing stick like a pencil. Use a fast, tight figure-eight motion that forces the material from the bottom corners up to the top. You are not gently stirring. You are whipping it. The finish should look completely uniform, like a thick cream with no ribbons or streaks of color. After mixing, some paints need an “induction time” of 10-15 minutes to chemically marry. Your tech sheet will tell you.
Paint-Specific Mixing Guides: Base, Clear, 2K, and More
Not all paint mixes the same way. Here is how to handle the common types you will encounter in detailing and touch-up work.
How to Mix Base Coat Car Paint
Basecoat is typically just paint and reducer. No hardener. The mixing ratio directly controls viscosity, which is how it flows out of the gun. A properly reduced basecoat will lay down smoothly and allow you to blend spray paint on a car seamlessly. Too thick, and it will look rough and not blend. Too thin, and it will run.
How to Mix 2K Car Paint (Urethanes)
This is a serious paint. “2K” means two-component, with a hardener that causes a chemical cure. Think of it like two-part epoxy. Once the hardener is added, the reaction cannot be stopped. You must wear proper PPE a respirator with organic vapor cartridges, gloves, and coveralls when mixing and spraying 2K products. The hardener ratio is critical for hardness and durability. Get it wrong, and the paint may never fully harden or may crack.
How to Mix Acrylic Car Paint
You need to know which type you have. Acrylic Lacquer uses lacquer thinner. Acrylic Enamel uses a reducer and often a hardener. These paints generally have faster flash times, meaning they dry to the touch quickly. The amount of thinner or reducer you add changes that dry time. Follow the tech sheet for the weather conditions you are spraying in.
Mixing Clearcoat for Depth and Protection
This is the final, protective layer. A common mix ratio is 4 parts clear, 1 part hardener, and 1 part reducer. This is not the place to guess. Undermixing the hardener gives you a soft, cloudy finish that will wash and swirl like the holograms on my black BMW. Adding too much reducer makes it runny and prone to drips. A perfectly mixed clearcoat is what gives the Porsche its deep, wet look, whether over paint or its PPF.
Single-Stage and Color Blending for Touch-Ups
Older cars like my ’95 Miata have single-stage paint, where the color and clear are one layer. Mixing car paint colors for a perfect match on these is an art. For the most accurate match, start with your car’s paint color code. It’s usually listed on the door jamb sticker or in your owner’s manual. You often need to blend custom colors using a scale. For most DIYers, the best move is to find a local automotive paint shop. Search for “car paint mixing near me.” They can put your car’s color code into a mixing machine and give you a perfect match in a small touch-up bottle or aerosol can. This is ideal for rock chips and small scratches.
When Things Go Wrong: Troubleshooting Your Mixture
I had a moment with the hood of my old Ford F-150. I mixed a batch of clearcoat, rushed the process, and sprayed. The result was a nasty case of orange peel, that rough, dimpled texture that looks like the skin of the fruit. The problem wasn’t my spray gun. It was my mixture. Most paint application failures can be traced back to a simple error during the mixing stage. Let’s solve those common headaches.
Inconsistent Texture, Orange Peel, or Poor Flow
When your paint doesn’t lay down smooth, it feels like a personal insult. You prepped for hours, and now the finish is rough. This is almost always a viscosity issue.
- Wrong Reducer for the Temperature: This is the most common culprit. Using a “slow” reducer in hot, dry conditions makes the paint dry too fast before it can level out. Using a “fast” reducer in cold, damp air prevents it from flowing properly. Always match your reducer speed to your shop’s ambient temperature, not the calendar.
- Incorrect Mixing Ratio: Too much hardener or reducer changes the paint’s body. Too much reducer makes it watery and weak, causing sags. Too little makes it thick and pebbly. Go back to your tech sheet and measure again with a proper mixing cup.
- Inadequate Mixing: If you just swirled the paint in the cup, the heavier pigments and metallics settle. The first spray is thin, the last spray is sludge. You must stir vigorously for a full two to three minutes, scraping the bottom and sides of the cup.
The fix? If you’re mid-job and see orange peel, stop. Strain your mixed paint into a clean cup through a fine filter (like a paint strainer). This can remove any unmixed clumps. Check your temperature and consider a reducer adjustment for the next batch. On my BMW’s black paint, a poorly mixed clearcoat left a textured surface I had to wet sand and respray. It was a long lesson. Still, it was better than dealing with peeling paint.
Color Match Failures and Blending Problems
A mismatched paint patch stares back at you. On solid colors, it might be a tone shift. On metallics or pearls, like my Tesla’s white or the Porsche’s red, the flake might look too dense or too sparse. This often starts in the cup.
Metallic paints have tiny aluminum flakes. Pearl has mica particles. If you don’t mix them thoroughly, these particles won’t be evenly distributed. When you spray, one area gets more flake and looks darker, another gets less and looks lighter. Improper mixing alters the color’s personality before it even hits the panel.
Always, always test spray your mixed paint. Use a white or grey primer card. Spray a few light, overlapping coats and let it flash off. Hold it next to the vehicle in different lights (sun, shade, garage). Does it match? If the metallics look off, you likely need more mixing. If the hue is wrong, double-check your tint formula and basecoat ratio. This ten-minute test can save you from a complete redo, especially when you’re color matching automotive paint.
Your Paint Mixing FAQs Answered
What do I do with leftover mixed paint?
This depends on the paint type. For a 2K (two-component) clearcoat or primer with hardener, you must discard it after its pot life expires, usually 45-90 minutes. It will cure solid in the cup. For leftover basecoat (color), you can try to save it. Pour it back into its original can, seal it tightly, and store it upside down. This creates a better seal. Label it with the date and mix ratio.
Should you leave room in the mixing cup?
Yes. Fill your mixing cup only 2/3 to 3/4 full. You need room for the mixing stick to agitate the paint properly without sloshing over the sides. This space also lets you add a final, small adjustment of reducer if needed.
Are there universal ratio charts?
You can find general guides, but they are not reliable. The tech sheet for your specific brand and product line is the only document you should trust. A SPI clearcoat mixes differently than a Sherwin-Williams clearcoat. Relying on a generic chart is a fast track to failure.
What about a ‘car paint mixing course’?
If you plan to do this regularly, especially for custom work or blending, hands-on training is invaluable. Look for a local vocational school, a community college auto body program, or a workshop hosted by a paint supplier like PPG or BASF. Watching a pro manage viscosity and color in real-time teaches more than any video.
How do you mix car paint, in a nutshell?
- Gather your safety gear (gloves, respirator, goggles) and clean tools.
- Find the technical data sheet for your exact paint product.
- Using graduated mixing cups, measure the paint, then hardener, then reducer in that order, following the sheet’s ratios exactly.
- Stir aggressively for 2-3 minutes, scraping the cup’s bottom and sides.
- Strain the mixed paint into your spray gun’s cup through a fine filter.
- Perform a test spray on a card to check color and flow before touching the car.
Your Path to a Perfect Paint Job
The most critical rule is to respect the paint manufacturer’s instructions for ratios and thinner. Precision in measurement and thorough, patient stirring are the non-negotiable foundations for a smooth, even coat.
Deviate from this, and you risk a finish full of sags, orange peel, or poor adhesion that will force you to strip it all off and start again.
Related Guides and Information
- How To Mix Car Paint For A Flawless Finish – E-Z MIX
- Custom Automotive Paint Mixing | O’Reilly Auto Parts
- Understanding Automotive Paint Mixing Ratios – The Garage™
Max Gunther
Max is an automotive enthusiast having worked as a car mechanical and in interior detailing service for over 25 years. He is very experienced in giving your old car, a new fresh vibe. He has detailed many cars and removed very tough smells and stains from all kinds of cars and models, always ensuring that his work and advice helps his customers. He brings his first hand experience to his blog AutoDetailPedia, to help readers breath new life into their car interiors.