How Do You Fix Paint Chips and Scratches with a DIY Touch-Up?
That fresh scratch on your door or the cluster of chips on the bumper isn’t just a cosmetic headache; it’s an open invitation for rust to start its quiet work. I feel that sting every time I find a new one on my jet black BMW, the car I call the Swirl Magnet.
This article will teach you my hands-on method for a professional-looking repair, covering finding your exact paint code, properly cleaning and degreasing the chip, applying touch-up paint in thin layers, and blending the repair for a seamless finish.
Rush through this or use the wrong technique, and you will lock in a cloudy, raised blob that is far more noticeable than the original chip.
Key Takeaways: The DIY Touch-Up Reality Check
Let’s get real about what we’re fixing. This process is for small, isolated problems. Think about the stone chips on the hood of my F-150 or the fine scratches from a rogue branch on the Miata’s door. We’re targeting damage where you can see a different colored layer underneath-the light grey of primer or the dull silver of bare metal.
A well-executed DIY touch-up is a 3-foot repair, meaning it looks good from a few steps back but will likely show some texture or a slight color mismatch under direct, close inspection. This isn’t failure. It’s the honest goal. You are preventing rust and making the damage far less noticeable, not performing invisible artistry. That requires a pro with a spray gun.
So, can you touch up car paint yourself? Absolutely, if you follow the rules. How long will it last? For years, if you do it right and protect it. The core principles are simple but strict.
- Cleanliness is king. Any wax, dirt, or oil trapped under your touch-up paint will cause it to fail. I cannot overstate this.
- Patience with drying times is non-negotiable. Rushing between coats is the single biggest mistake. You will create a gummy, textured mess.
- Less paint is more. Your goal is to fill the chip, not create a raised blob on top of the paint. This is the hardest skill to learn.
The Detailer’s Order of Operations: Your Touch-Up Protocol
This is your checklist. Do not skip steps. Do not change the order. I treat my red 911 with the same discipline as my kid-hauling Odyssey for this. Skipping a step, especially curing, guarantees a bad result.
1. Assess & Match
First, find your paint code. It’s on a sticker usually in the driver’s door jamb or under the hood. Then, get your paint. I use two main sources.
- Dealer/Direct Factory Touch-Up: This is your best bet for a color match. It comes in a little pen or vial. The color is usually spot-on, but the applicator brush is often terrible-too big and clumsy.
- Quality Aftermarket Kits: Companies like Dr. ColorChip are excellent. Their paint is matched to factory codes, and they provide superior application methods (like their “ChipFix” smear system) that are more forgiving for beginners.
For my Jet Black BMW, I only use factory paint. For the white Tesla, a quality aftermarket kit works perfectly on the plastic bumper. That decision hinges on the car paint types you can choose. Understanding OEM vs aftermarket finishes helps you pick the right option.
2. Gather Tools
You don’t need much, but you need the right stuff. Get this all together before you start.
- Touch-up paint and clear coat (if separate).
- Isopropyl alcohol (70% or higher) and lint-free wipes (the blue shop towels work).
- Toothpicks or a dedicated fine-tip applicator. I snap a toothpick in half for a super sharp point.
- Micromesh sanding pads (3000 and 5000 grit) or a very fine abrasive block.
- Machine polish and a soft foam polishing pad (by hand can work for one spot).
- Painters tape for isolating the area if needed.
3. Prep & Clean
This step is what separates a lasting repair from one that peels out in a month. Wash and dry the entire panel first. Then, focus on the chip.
- Take your isopropyl alcohol and a fresh, clean wipe. Soak a small corner of the wipe.
- Firmly scrub the inside of the chip and the immediate paint around it. You are degreasing and removing any invisible wax or silicone.
- Use a dry part of the wipe to dry it. Do not touch the area with your fingers afterward.
4. Apply Paint
Shake your paint pen or vial for a solid minute. Then, using the toothpick or a steady hand with the brush, place a tiny drop of paint directly into the center of the chip, ensuring you apply it carefully for chip repair. Do not brush it on like a model kit. Just let the paint flow off your tool to fill the defect. If the chip is deep, you will need to let this dry for 24 hours and come back to add another tiny drop. The paint should be slightly below the surface of your factory clear coat, not above it.
5. Apply Clear Coat
If your kit includes a separate clear coat, repeat step 4. Apply the tiniest amount over the dried base paint. Your goal is to just barely fill the remaining hole level with the factory paint. This step protects the color and gives it depth and gloss.
6. Cure
Walk away. Seriously. Let the repair sit for at least a week. Two weeks is better, especially if it’s cool or humid. The paint needs to fully harden (cure) before you touch it. If you sand it too soon, you will pull the soft paint right out. This is where most people fail.
7. Level & Polish
Once fully cured, you will likely have a slight bump or “blob.” Now we level it. Take your 3000-grit micromesh pad, add a drop of water, and very gently sand the touch-up spot. Use almost no pressure. Sand for just a second, then wipe and check. You are only sanding the high point of the new paint, not the surrounding factory clear coat.
Switch to 5000 grit to refine the sanding marks. Finally, use your polish and a soft pad to restore the gloss over the entire area. On my black BMW, I follow this with a fine finishing polish to erase any haze.
8. Protect
The repair is now part of your paint’s surface. Treat it that way. Apply your preferred wax or sealant over the entire panel. On my daily drivers, I use a spray sealant for this. On the Porsche, I’ll apply a layer of ceramic coating booster. This final step seals your work and helps blend the repair visually.
What You’re Really Fixing: Assessing the Scratch or Chip
Before you touch a bottle of touch-up paint, you need to know what you’re dealing with. A mistake here means wasted time and a repair that looks worse than the original damage. The first tool you need isn’t a brush, it’s your fingertip. From there, the next step is choosing car touch up paint that matches your car’s color and finish. That choice sets the stage for a seamless repair.
Run your fingernail gently across the scratch. If your nail doesn’t catch, the scratch is likely only in the clear coat and can often be polished out. If your nail catches and drops into a groove, the scratch is through the clear and into the color layer or deeper. This simple test tells you 90% of what you need to know to choose your next step.
Modern car paint is a layered system. Understanding which layer is damaged defines your repair:
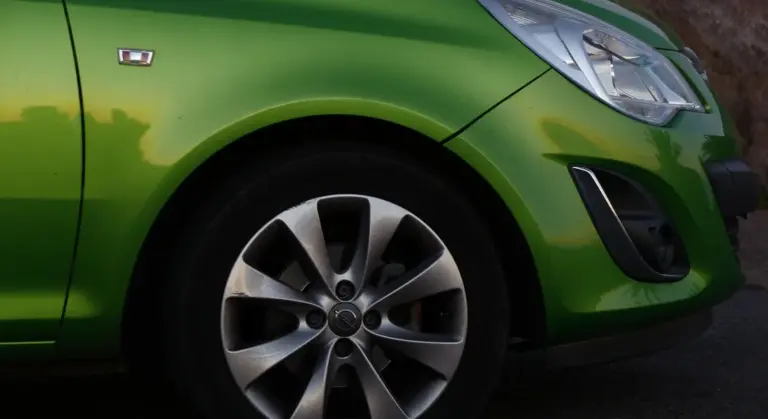
- Clear Coat Scratch: Only the top, glossy protective layer is marred. It looks like a white, hazy line. On my black BMW, these catch the light like a spiderweb. These are DIY-friendly and often fixed with a light polish.
- Color Layer Chip/Scratch: The scratch is through the clear and into the pigmented base coat. You see the true color of the scratch. On a white car, it might look dark. On my blue truck, it shows as a brighter blue streak. This requires touch-up paint to fill.
- Primer Chip: The damage is through both clear and color, revealing a dull gray, tan, or black undercoat. This is common on stone chips. Primer prevents rust but offers zero cosmetic finish.
- Bare Metal Chip: You see silvery, raw metal. This is an emergency. Even on aluminum panels, corrosion starts fast. This needs immediate cleaning and priming before any color is applied.
Use a bright flashlight held at an angle and a magnifying glass. The goal is to see the bottom of the scratch. Its color tells you exactly how deep you need to repair. On my black BMW, a deep scratch isn’t black; it’s a stark, light-colored canyon that screams for attention. A shallow one just dulls the reflection.
Be honest with yourself about what you can handle. Here’s my rule of thumb:
- DIY This: Isolated stone chips smaller than a pencil eraser. Short, fine scratches that only catch a fingernail slightly. Scuffs on plastic bumpers where perfection isn’t critical.
- Call a Pro: Damage larger than a quarter. Deep scratches longer than a few inches, especially on curved panels or sharp body lines. Any damage on a panel edge (like a door edge), as paint struggles to adhere there. If you see rust bubbling, the repair is beyond a simple touch-up.
It’s not about skill, it’s about physics. Filling a large area with a tiny brush leaves a blob. A pro uses spray equipment and blends the repair. Knowing when to walk away saves your car’s finish and your sanity. For everything else, let’s get your hands dirty.
The Tool Pile: What You Need (And What to Avoid)
Gather your supplies before you start. Having everything within arm’s reach keeps you from scrambling with wet paint on your brush.
The Must-Have Kit
You can fix most chips with this basic setup. I keep a box with these items in my garage for quick repairs on my fleet.
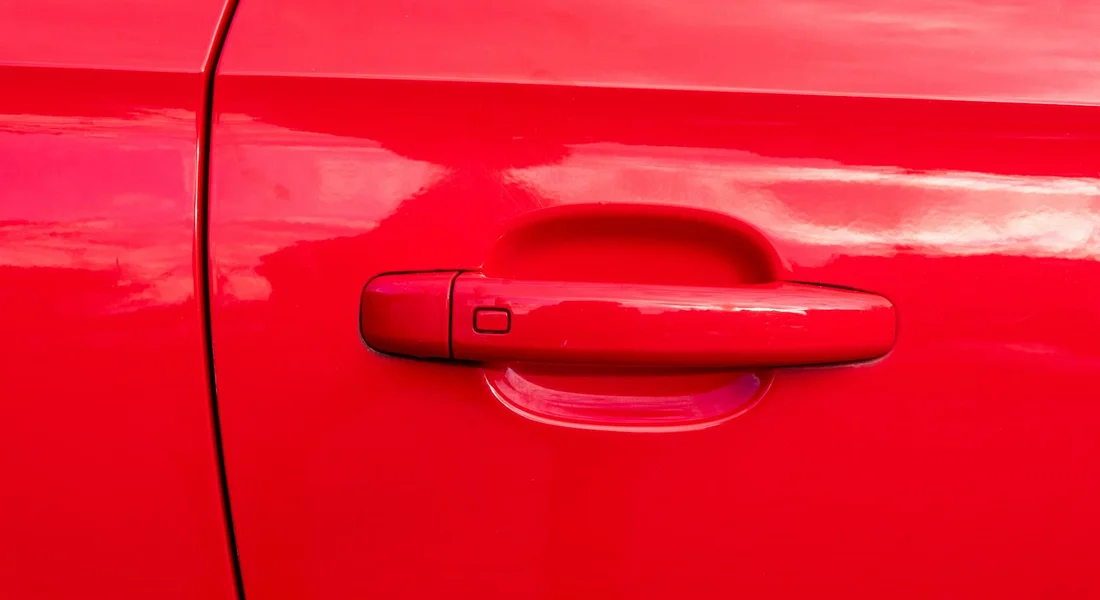
- Touch-Up Paint with Brush: This is your color. Get the correct factory match, which we’ll discuss next.
- OEM Clear Coat: Non-negotiable. Modern car paint is a base color layer topped with clear coat for shine and protection. Skipping this leaves the color dull and vulnerable.
- Prep Solvent (Isopropyl Alcohol): Use 70% or higher. This removes wax, grease, and any lingering cleaner from the chip. It makes the paint stick.
- Fine Sanding Sticks (2000+ Grit): These feel smooth, almost like stiff paper. You use them after the paint dries to gently level the touch-up blob with the surrounding surface.
- Clean, Lint-Free Microfiber Towels: A few dedicated towels for prep and final buffing. I like the soft, plush ones for this job.
- Painters’ Masking Tape: The blue or green kind. Use it to create a tiny barrier around a large chip, protecting good paint from an accidental slip.
Helpful Pro Tools
You do not need these to begin, but they make a noticeable difference. I added these after my first few attempts on my black BMW.
- Needle Applicator: A metal tip that lets you deposit a single, tiny droplet of paint. It is perfect for pin-head stone chips where the brush is too clumsy. Much more precise.
- Magnifying Visor or Lamp: Good light is everything. A bright lamp and a magnifier let you see the true depth of the scratch and place the paint exactly where it needs to go.
- Rotary Sanding Pen (like a Dremel): For a heavily textured or rusty chip, a small abrasive wheel can clean out the damage before painting. Go slow. It is easy to make the chip wider.
A Critical Warning
Do not use a generic can of spray paint from the hardware store. I have seen the results. It never matches, it lays on too thick, and it lacks the proper chemicals to bond with your car’s factory clear coat system. That hack job will look terrible, fail quickly, and be a nightmare for a professional to fix later. Your car’s paint is a specific chemical recipe. Stick with products made for automotive touch-up. If you choose to use spray paint automotive products, pick options specifically made for automotive finishes. They’re designed for color matching and bonding with your factory clear coat, helping the repair blend in.
Finding Your Factory Color
Matching the color is the most important step. Your car’s exact paint formula has a code.
Look for a small metal or plastic plate, usually in the driver’s side door jamb, under the hood, or in the trunk. The code is listed as “C/TR” for color, or just plainly labeled. For my Ford F-150, it’s “PB” for its Dark Blue. Write this code down.
Now you have two main options:
- Dealer Touch-Up Pen: This is a pen with a brush in the cap, and often a separate clear coat pen. The match is usually very good because it comes from the manufacturer’s approved supplier. The downside is the brush. It is often too thick for precise work, forcing you to use a needle instead.
- Aftermarket Bottled Paint: Companies like Dr. ColorChip or automotive paint suppliers sell small bottles. The big advantage is they often offer a more precise applicator (like a syringe). The color match is generally excellent if you provide the correct code. I used this method for my red Miata’s single-stage paint with perfect results.
My advice? For common colors on newer cars, the dealer pen is fine. For a tricky metallic, pearl, or an older car, spend the extra time to get a quality aftermarket bottle with a good applicator. It makes the job easier.
The Crucial Prep: Making a Clean Canvas
Think of paint touch-up like surgery. You clean the area first. You do not want to trap dirt or wax under your new paint. It will fail. It will look terrible. I learned this the hard way on the hood of my black BMW.
Your goal is to create a surface the new paint can grab onto and call home.
The Cleaning Ritual
Start with a proper wash of the entire panel. Use your two-bucket method. Rinse it well. Dry it with a clean microfiber towel. Now, look at the chip or scratch closely. Run your fingernail over it. Does it feel rough or gritty?
If the surface feels rough, you need to clay it. Take a small piece of detailing clay, lubricate it well with a quick detailer spray, and gently glide it over the area. The clay will pull out embedded contaminants your wash missed. This step is non-negotiable for a smooth foundation.
After claying or washing, you must degrease. Paint will not stick to any oils, including from your own fingers. Mix isopropyl alcohol and distilled water in a spray bottle. A 1:1 ratio works perfectly. Spray it on a clean microfiber towel-never directly on the paint-and wipe the repair area. Let it air dry completely. The surface should be squeaky clean.
The “Denting” Technique
Here is a pro trick most kits forget to mention. Look at the edge of the paint chip under good light. You will see a sharp, raised lip where the factory paint ends. If you paint over that lip, the new paint will sit on top of it. It creates a thick, obvious blob.
You need to gently bevel that edge. Use a fine-grit sanding stick, something around 3000 grit. Wet the sanding surface. Now, with very light pressure, sand only the sharp edge of the chip. You are not sanding the bare metal or the surrounding good paint. You are just knocking down that tiny cliff.
You are not trying to make the chip bigger, just turning that hard edge into a soft, shallow slope. This gives the new paint a gradual place to flow into. Wipe the area with your alcohol mix again when you are done. The surface should feel perfectly smooth to the touch with no rough transitions.
When to Use a Tape Guide
Masking tape is not for masking the whole chip. Do not box in the area. That creates a paint ridge you will never level out. Use tape for one thing: creating a straight line.
This works best for long, straight scratches along a body line or panel gap. Tear off a one-inch piece of painter’s tape. Place it just below the scratch, using the body line as a guide. This gives your hand a physical boundary to follow when applying the paint. It keeps your brush or pen from wandering. For a small stone chip, skip the tape. Your steady hand is guide enough.
Peel the tape off immediately after applying the paint, while it is still wet. If you wait for it to dry, you risk peeling off your fresh paint work.
Technique Tweak: The Art of the Tiny Drop
This is where most touch-ups fail. You are not painting a wall. You are performing micro-surgery. The goal is to deposit the absolute minimum amount of paint needed to fill the void. If you use the brush that comes in the bottle like a normal paintbrush, you will fail. It will glob on too much, creating a messy, textured blob that looks worse than the chip.
Think of this not as painting, but as placing a tiny, controlled drop of colored resin into a hole. The paint should look like a tiny dome of nail polish sitting on the surface, not a flat wash.
The “Dab and Fill” Method for Stone Chips
This is for the classic round or star-shaped chips, common on hoods and bumpers. My Ford F-150’s dark blue hood is a map of these. You need a fine, pointed tool. I use a toothpick. Some prefer a syringe or a precision needle applicator. The brush in the bottle cap is your enemy here.
- Shake your touch-up paint well. Dip just the very tip of your toothpick into the paint. You want a tiny bead hanging from the point, not a soaked stick.
- Gently touch the tip of the bead to the very center of the cleaned, prepped chip. Let capillary action pull the paint down into the void. Do not smear.
- As the paint flows in, guide the droplet to fill the chip from the center out. You are placing one microscopic drop at a time.
- Fill the chip so the paint mounds slightly above the level of the surrounding clear coat. It will look like a tiny pimple. This is correct.
You must let this first layer cure completely, usually for 24 hours, before even thinking about a second coat. Patience is your most important tool. For a deep chip, you may need to apply three or four of these micro-layers over several days. Rushing this guarantees a bumpy result.
The “Pull-Through” Method for Fine Scratches
This is for those thin, hairline scratches that catch your fingernail. My black BMW is covered in them. Here, you can sometimes use the brush tip, but only if you modify it. Tear off most of the bristles, leaving just three or four. This creates a fine point.
- Load the very tip of your modified brush with a minimal amount of paint. Wipe excess on the bottle neck.
- Place the tip at one end of the scratch. In one slow, steady motion, pull the tip through the length of the scratch, letting the paint flow into the groove.
- Do not go back over it. Do not try to paint the sides. Your goal is to fill the trench, not color the walls.
- Again, build the paint so it mounds slightly above the surface. The scratch should disappear under a thin, raised line of paint.
The Critical Step: Building a “Meniscus”
This is the non-negotiable rule. Whether filling a chip or a scratch, you must overfill it. The paint must form a convex mound, or meniscus, that stands proud of the surrounding surface.
All paint solvents evaporate as it cures. This causes shrinkage. If you apply the paint level with the surface today, it will be a sunken pit tomorrow. That sunken spot will catch light differently and look dark, making the repair obvious.
Apply your final layer so it looks like a proud, tiny blob. As it fully cures over a week or more, it will shrink down to be nearly flush with the factory clear coat. Only then can you level it perfectly with gentle sanding and polishing.
Blending, Finishing, and the Long Wait
The color layer hides the chip. The clear coat protects it and gives it depth. Think of it like a thick, shiny piece of glass over your new paint. Your job now is to make that new glass sit flush with the old glass around it.
This step is where impatience ruins everything. You must wait for the paint and clear coat to cure, not just dry to the touch.
In warm, dry weather, give it a full 24 hours before you even think about sanding. If it’s cold or humid, wait 48 hours or more. I learned this the hard way on my black BMW. I tried to sand too soon and just peeled the whole repair right out. The wait is non-negotiable.
Leveling the Repair
Once cured, your repair will sit proud of the surface like a tiny blob. We need to shave it down. You’ll need a 3000-grit sanding stick and a spray bottle with water and a drop of car wash soap.
- Spray the area and the sanding stick liberally. The soapy water is your lubricant.
- Use the flattest side of the sanding stick. Apply almost no pressure. Let the grit do the work.
- Use very short, gentle strokes over only the repaired spot. Your goal is to sand down the high spot of clear coat until it is perfectly level with the factory paint around it.
- Stop frequently, wipe the area clean with a microfiber, and feel it with your fingertip. The moment you can no longer feel a ridge, you are done sanding.
If you see color on your sanding stick, you have sanded too deep and gone through the clear coat. Stop immediately. This is why we use a very fine grit and check constantly.
Restoring the Gloss
You’ve just sanded the area flat, but now it looks hazy and dull. This is normal. We bring the gloss back with polish.
For a small spot, you can do this by hand. Put a dime-sized drop of a fine finishing polish on a clean, soft foam applicator. Work it over the sanded area and a bit of the surrounding clear coat using small, overlapping circles. The haze will disappear, revealing a glossy, blended finish.
For a larger repair or a perfectionist finish on dark paint like my BMW, I use a machine polisher with a small foam polishing pad. It’s faster and creates a more flawless blend. When you’re tackling surface defects, you’re basically cutting and polishing car paint scratches to restore optical clarity. Whether by hand or machine, the principle is the same: you are removing the microscopic scratches from the sandpaper to restore optical clarity.
Do I Need to Seal My Touch-Up Paint?
Yes, absolutely. Your new paint and clear coat are fresh and vulnerable. After the final polish, wait another 24 hours for the polished area to settle. Then, apply a coat of your favorite spray wax or paint sealant over the entire panel. This adds a sacrificial layer of protection against UV rays and contaminants. On my daily drivers, I use a simple spray sealant. It’s quick and effective. This final step locks in your hard work and makes the repair last.
Keeping It Clean: How to Make Your Repairs Last
Filling in a paint chip is only half the job. The real skill in detailing is not just fixing damage, but building a shield to stop it from happening again. I treat every touch-up as a reminder. My detailing philosophy is simple. Protection prevents damage. After you spend an hour carefully matching and layering paint, you want that spot to blend in and stay that way.
Think of your car’s clear coat as its skin. A quality paint sealant or ceramic coating adds a sacrificial layer on top. This layer takes the hit from UV rays, bird droppings, and road grime so your paint does not. For a DIYer, a spray-on sealant is a great start. It beads water and buys you months of protection. A true ceramic coating requires more prep. You must decontaminate and polish the entire vehicle first. But it can last for years. Always apply these products to a perfectly clean, dry surface in a shaded spot to avoid streaks and bonding issues. My go-to for the Model 3 is a hybrid ceramic spray. It slicks down the flat panels and makes bug removal a breeze. You can learn more about the correct application techniques for ceramic coatings.
Look at my F-150. The dark blue hood is a chip magnet. Gravel from country roads and salt spray in winter leave their marks. I touch up the big ones each spring. But I also coat the whole truck with a heavy-duty sealant. This does not make the paint bulletproof. Nothing does. Yet it adds a harder, more slippery surface. That extra hardness can mean the difference between a tiny nick and a deep chip. On the F-150’s hood, the sealant helps deflect smaller debris. The repair spots stay protected, and the rest of the paint fights off oxidation longer.
For the ultimate defense, consider paint protection film. PPF is a clear, urethane sheet applied to high-impact areas. It is thick. It can absorb rock strikes that would otherwise gouge the paint. Paint protection film is the closest thing to an invisible shield for your car‘s finish. On my Porsche, the front bumper, hood, and mirrors are wrapped. The red paint underneath stays flawless, and the film itself is self-healing. Minor scratches in the PPF vanish with a little heat from the sun. Beyond PPF, a high-quality car cover can shield the finish when the car is parked. It protects from sun, dust, and debris, complementing the paint protection film. It is a bigger investment than a bottle of sealant. For a daily driver or a cherished car, it is often worth every penny.
Final Thoughts on DIY Paint Touch-Ups
The repair lives or dies by your prep work. I always tell people that cleaning and abrading a chip is the only surface that will hold new paint for years, not months.
Skip the thorough cleaning, and you are simply sealing dirt and moisture against the bare metal, guaranteeing a larger, rust-blistered repair in the very near future.
Deep Dive: Further Reading
- Home – Dr. ColorChip
- Car Paint Scratch and Chip Repair – Autogeek.net
- Car Touch Up Paint | Car Scratch Remover | Halfords UK
- How to Fix Paint Chips and Scratches on Your Car
- Vehicle Touch Up Paint | Chip & Scratch Repair | Chipex
Max is an automotive enthusiast having worked as a car mechanical and in interior detailing service for over 25 years. He is very experienced in giving your old car, a new fresh vibe. He has detailed many cars and removed very tough smells and stains from all kinds of cars and models, always ensuring that his work and advice helps his customers. He brings his first hand experience to his blog AutoDetailPedia, to help readers breath new life into their car interiors.