How Do You Fix and Remove Paint Runs on a Car’s Surface?
Finding a paint run on your car is frustrating. It looks unprofessional and makes your paint feel rough instead of glass-smooth.
I have fixed these flaws on my own cars, like the Jet Black BMW, and I will show you how to tell if a run can be saved, the exact tools you need, the careful sanding process to level it, and the final polishing to blend it perfectly.
Sand or buff incorrectly, and you will create permanent scratches or thin spots in the clear coat that cannot be undone.
Key Takeaways: The Fast Truth About Fixing Paint Runs
The only reliable way to fix a cured paint run is to carefully level it down and then restore the shine. This means wet sanding the high spot of the run, followed by a multi-step polish to bring back the gloss. It is not a quick wipe-and-go fix.
This is an intermediate to advanced paint correction process. If you are comfortable using a dual-action polisher and understand paint depths, you can tackle this. If your detailing experience stops at the two-bucket wash, this repair is beyond that scope.
Your success hinges on three non-negotiable factors:
- Paint Cure Time: You must wait for the paint to fully harden. Sanding soft, uncured paint will create a catastrophic mess.
- Sandpaper Grit Progression: You start with a grit coarse enough to cut the run down but must progress through finer grits to remove the sanding scratches.
- Final Polish Quality: The sanding stage leaves the paint hazy. The compounding and polishing stages must completely remove that haze to match the surrounding finish.
Think of it like smoothing out a thick drip of hardened cake icing on a perfectly frosted cake. You can’t just wipe it off. You have to gently scrape it level, then carefully re-blend the surface so the repair disappears.
For the common drips and runs from a repaint or a sloppy touch-up job, the answer is yes, a bad paint job can often be fixed. Paint runs can usually be removed with some effort. Major issues like massive orange peel or a complete respray are different, but isolated runs are correctable with patience and the right technique.
What Exactly Are Paint Runs? (And What Causes Them)
A paint run, also called a drip or a sag, is exactly what it sounds like. It’s a visible flaw where excess, liquid paint flowed downward before it could dry. When you run your fingers over it, you feel a distinct ridge or a thick, glossy streak that sits higher than the rest of the paint surface. In side light, it looks like a frozen tear.
They are almost always caused by applying too much paint, too quickly, in one spot. The common culprits are:
- Improper Spray Technique: Holding the spray gun too close to the panel or moving it too slowly floods an area with paint.
- Wrong Paint Viscosity: Paint that is thinned too much will be runny and prone to sagging.
- Environmental Factors: Painting in a booth that’s too cold slows drying, giving paint more time to run. A sudden spike in heat can also cause issues.
Your approach depends entirely on the paint’s state. A fresh run that is still tacky can sometimes be gently re-flowed with a delicate touch, but a fully cured, rock-hard run requires mechanical leveling. For a DIYer, waiting for full cure is the only safe path.
Runs can come from a factory job (rare but possible), a professional respray, or most commonly, from an enthusiastic but uneven hand using a touch-up paint pen. To avoid creating runs when painting, one key tip is to always keep the gun moving. Never stop your stroke over the panel. A steady, consistent pace is your best defense.
Spotting the Drip: Common Places for Paint Runs
Paint runs follow gravity. Look for them on the lower edges of any panel. Common hotspots include:
- The bottom edge of doors, fenders, and quarter panels.
- Around door handles and keyholes where paint can pool.
- On the corners and complex curves of bumpers.
- Along sharp body lines, like the crease on a hood or door.
Light is your best tool for finding them. Shine a bright LED light across the paint at a very shallow angle, called “grabbing light.” The run will cast a long, dark shadow. On my black BMW, the “swirl magnet,” this technique shows every flaw. A run on that car looks like a deep scratch until you feel it and realize it’s raised, not recessed.
Runs on plastic bumper covers behave the same as on metal, but you must be extra cautious. Plastic is more flexible and can heat up faster during sanding and polishing. Use less pressure and keep the area cool to avoid damaging the substrate.
Your Paint Run Fixing Arsenal: Tools & Chemicals You’ll Need
Fixing a paint run is a precise operation. You are a surgeon and this is your toolkit. Forget one item, and you risk turning a small blemish into a larger flaw. This list isn’t a suggestion. It is what I lay out on my workbench before I even look at the run on my BMW’s hood. Get these things first.
You cannot start this job without the right abrasives, a proper polisher, and absolutely clean surfaces. A paint run is extra paint that has cured hard. You must cut it down level with the surrounding area without cutting through the clear coat. That takes control, and control comes from the right tools.
The Non-Negotiable Checklist
- Wet/Dry Sandpaper (1500, 2000, 3000 grit): You need all three grits. Start with 3000 to test the run’s height on an inconspicuous spot. If it’s stubborn, step down to 2000, then 1500 as a last resort. I use branded sheets I cut into small, manageable pieces. The 1500 grit feels rough, like coarse sandpaper on wood. The 3000 grit feels almost silky. On my black BMW, I never start below 2000. It’s too easy to leave deep scratches in soft clear coat.
- Dual Action (DA) Polisher (15mm throw recommended): A random orbital polisher is your best friend here. The 15mm throw gives a good balance of cut for correction and smoothness for finishing. My go-to is a 15mm model. It has the power to remove sanding marks without the terrifying grab of a rotary buffer. If you use a rotary, you better have years of experience.
- Cutting Polish & Finishing Polish: These are two different products. The cutting polish has more abrasive to remove the sanding scratches. The finishing polish refines the surface to a glossy, scratch-free shine. I keep a medium-cut and a fine finishing polish on my shelf. The difference in the finish on my Porsche’s red paint is night and day.
- Panel Prep Spray (pH neutral): This is not a quick detailer. It is a dedicated cleaner that strips all oils, polish residues, and waxes from the paint. You must use this after polishing and before applying any protection. If you skip it, your sealant will not bond properly. I learned that the hard way on my F-150.
- Detail Spray: A good lubricant is crucial. You will use this sparingly as a lubricant when sanding. It keeps the paper from clogging and prevents heat buildup. A dry sand is a fast way to burn through your paint.
Cloth, Containment & Light
The wrong towel will put fine scratches right back into the paint you just corrected. Microfiber is not all the same. For removing polishing oils, I use a plush, 500+ GSM towel. It feels thick and soft in your hand, like a premium bath towel. It holds product and glides without dragging. For buffing off wax or sealant later, a lighter 300 GSM towel is perfect. It has less nap and won’t waste your product.
- Grit Guard for Your Rinse Bucket: When you sand, you will need to rinse your sandpaper frequently. The Grit Guard sits in the bottom of your bucket and traps the paint particles you sand off. It keeps your water clean so you aren’t rubbing contaminants back onto the paint. I consider this as essential as the sandpaper itself.
- Masking Tape (1″ Blue Painter’s Tape): Use this to tape off any edges, body lines, or trim near the run. This protects adjacent surfaces from accidental sanding or polishing. On my Model 3, I tape the edge where the bumper meets the fender. The flat panels are forgiving, but edges are thin and easy to burn.
- Dedicated Work Light: Your garage light is not enough. You need a bright, handheld LED light that you can angle across the paint. This reveals the run’s shadow and, later, the subtle haze from sanding. I shine mine from a low angle. The light makes the defect pop out so you can see exactly what you are working on.
Safety & Environment First
This work creates fine dust and uses chemicals. Your health and the paint’s health depend on your setup.
Always wear nitrile gloves and eye protection. Polishing sling and sanding slurry can irritate your skin and eyes. I keep a box of gloves and clear safety glasses right with my polisher. They are cheap insurance.
Work in a clean, shaded space. Direct sun will heat the paint too fast and cause your compounds to dry out. It also hides defects. I work in my garage or under a portable canopy. Sweep the floor first. Dust from your feet can become scratches on your paint. The clean, cool environment is what my 911’s paint deserves, and your car does too. Keeping sun exposure under control is part of how you protect your car paint from sun damage. Detailing in shade keeps products working evenly and the finish looking its best.
Step-by-Step: How to Remove Paint Runs from Your Car
Finding a paint run, also called a sag, can feel like a gut punch. You see that ugly drip frozen in the clear coat and think the job is ruined. I get it. I felt that way when I spotted a small run on the rear quarter panel of my red Porsche, the garage queen. But take a breath. This is a fixable problem. The process is about patience and a gentle hand, not force. We will methodically level the high spot and restore the gloss, just like I did on the 911.
Step 1: The Most Important Step-Wait for the Paint to Cure
You cannot touch a paint run on a fresh repaint. If you sand soft, uncured paint, you will create a gummy, distorted mess that is far worse than the original run. Factory paint is baked at extreme temperatures and is ready. Car paint cure time is what matters here—it marks when the finish truly hardens, not just when it feels dry. Respecting the cure time helps ensure a durable, glossy finish. A fresh repaint from a body shop needs time. Wait a minimum of 30 days. In cooler or humid climates, wait 60 to 90 days. This is non-negotiable.
Test the paint by gently pressing your fingernail into an inconspicuous area, like the edge of a door jamb. If your nail leaves any impression, the paint is still soft. Wait longer.
This rule does not apply to old, fully cured paint. The single-stage paint on my 1995 Miata restoration project was harder than rock. That paint was ready for correction the day I started. Fresh paint is not. Your patience here is the foundation of the entire repair.
Step 2: Leveling the Run with Wet Sanding
This step answers the common question, can you wet sand a car? The answer is yes, but with immense care. You are only removing the microscopic high point of the run, not the entire panel. The goal is to make the run flush with the surrounding paint, not to dig a hole.
You need a soft sanding block, a spray bottle with clean water, and sandpaper. Start with 2000-grit sandpaper. Wrap a small piece tightly around your block. Keep the area and the paper soaking wet the entire time. The water lubricates and carries away debris to prevent deep scratches.
Use the weight of your hand, no extra pressure. Sand in straight, overlapping strokes directly over the run. Check your progress every few seconds by wiping the area dry with a microfiber. Stop sanding the instant the run is level with the paint. You should feel no ridge with your fingertip.
Now, switch to 3000-grit paper. Sand the same area lightly. This step removes the finer scratches from the 2000-grit paper, making the next polishing steps much faster. Your warning is clear coat thickness. You are only sanding the very top. If you see any color come off on your sandpaper, you have gone too deep. Stop immediately.
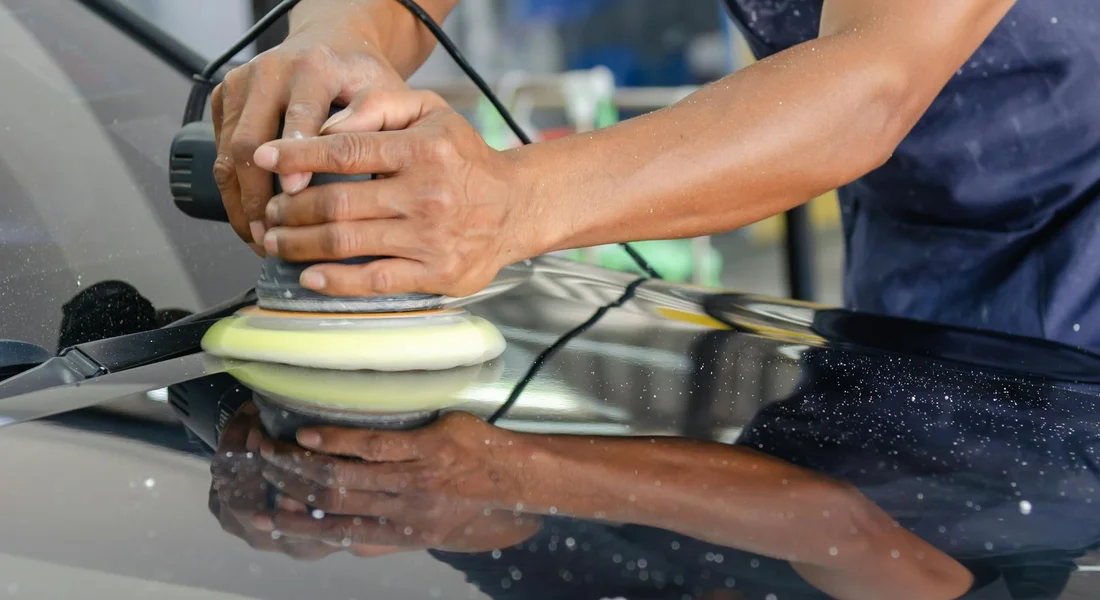
Step 3: Polishing the Sanded Area to Perfection
Wet sanding leaves a flat, matte spot. Now we restore the shine. This is the core of how to correct paint on a car. You will need two stages: a compound to cut, then a polish to refine.
Using a dual-action polisher is best for control. Fit it with a medium-cut foam pad. Apply a few dots of a heavy-cut compound to the pad. Work the sanded area in slow, overlapping passes. Keep the polisher moving. After a few passes, wipe the area clean with a microfiber and inspect under your bright work light. The sanding marks should be gone, replaced by a slight haze.
Now, change to a soft finishing pad and a fine polish. This step removes the hazing left by the compound and brings back the deep gloss. Work the polish until it becomes nearly clear. Check your progress after every single pass with the polisher. This prevents you from removing more clear coat than necessary.
This process is identical to what I do on my black BMW, the swirl magnet. The difference is scale. You are correcting a spot the size of a quarter, not an entire hood. The principle is the same: remove the defect, then restore the clarity.
Step 4: Final Inspection and Protection
Your correction is not done until you inspect it in harsh light. Take your work light and hold it at an angle over the repaired spot. Look for any remaining haze or holograms, which look like fine, circular swirls in the reflection. If you see them, another pass with the fine polish on the finishing pad will usually clear them up.
Once the finish is flawless, you must protect it. The polishing process has removed any existing wax or sealant. Clean the entire panel with a spray like isopropyl alcohol diluted with water. This strips any leftover oils so your protection can bond.
Apply a sealant or a quality spray wax. I use the same spray wax on this spot of the Porsche as I do on my entire F-150 workhorse for efficient protection. A coat of protection locks in your hard work and blends the repaired spot seamlessly with the rest of the panel. Now the run is gone, and only a perfect finish remains.
Machine Polisher vs. By Hand: Which Method is Right for You?
You have that run of paint leveled down. Now you need to bring the gloss back. This is where the real decision point hits. Do you grab a pad and polish with your own two hands, or do you plug in a machine?
Let’s compare them directly. Hand polishing is a pure test of physical endurance. You are the motor. You provide the speed, the pressure, and the consistency. For a spot the size of a quarter, maybe you can muster the effort. For anything larger, your arm will give out long before the paint is perfect. A machine polisher is a force multiplier. Its orbiting or rotating action creates consistent, repeatable friction that human hands simply cannot match for more than a few seconds. For removing the fine scratches left by sanding and restoring deep clarity, a machine is not just better-it’s the only realistic tool for the job.
I am going to be direct: a Dual Action (DA) polisher is the correct choice for nearly everyone fixing a paint run. Why? Safety and finish quality. A rotary polisher can burn through paint in a heartbeat if you’re not skilled. A DA polisher, with its random orbiting motion, is dramatically more forgiving. It greatly reduces the risk of creating holograms or buffer trails-those nasty swirl marks left by improper technique. My black BMW is a hologram magnet; I would never take a rotary to it without years of practice. My trusted Rupes DA polisher, however, lets me polish with confidence. It does the cutting work while leaving a finish that’s ready for wax. That’s the real-world verdict in a da polisher vs rotary polisher comparison: the DA wins on safety and control. A rotary can deliver more aggressive correction, but it requires experience.
I will concede one point. The initial wet sanding step to knock down the high point of the run? That can be done carefully by hand with a small sanding block. Your fingertips give you sensitive feedback. But after you sand, you are left with a flat, dull, scratched patch. Those scratches need to be polished out. Trying to do that final gloss restoration by hand is like trying to sand a rough piece of wood smooth using only your fingernail. You might make progress, but you’ll never get it truly smooth. The machine polishing step is non-negotiable if you want the repair to disappear into the surrounding paint. Without it, you’ll swap a shiny paint run for a dull, hazy spot that screams “repair.” That’s the essence of the scratch repair paint correction workflow: a deliberate sequence of leveling, compounding, and finishing to blend the repair into the surrounding paint. When done right, the result reads as one continuous coat rather than a patch.
Think about cost versus result. A good bottle of compound and a hand pad might cost you $25. A quality DA polisher kit is an investment of $150 to $300. For fixing one single, small run on an older car you care less about, the hand method might be tolerable. You will work harder, longer, and the result will be mediocre, but it’s technically possible. If you value your time, your results, or your car’s finish-like the paint on my Porsche-the machine pays for itself in one use. Your shoulder will thank you, and your paint will glow. The choice, in my shop, is clear. Hand versus machine, it’s no contest.
Special Cases: Fixing Runs on Bumpers, Fresh Paint, and Touch-Ups
Not every paint run is on a flat, metal door panel. You will find them in trickier spots. The core idea stays the same, but your approach needs a slight shift. Here is how to handle the most common special cases.
Removing Paint Runs on Plastic Bumpers
You can absolutely fix a run on a bumper. The sanding and polishing steps are identical. The difference is in the material underneath. Plastic bumpers flex. The paint and primer are formulated to flex with them. This means you must be gentler.
Aggressive sanding or heavy pressure can cut through the color coat and into the primer much faster than on metal. Once you hit that gray or black primer, the repair gets complicated. Use less pressure than you would on a steel panel and check your progress twice as often.
My Tesla Model 3 has a flat plastic bumper perfect for catching runs. I treat it with extra care, often using a softer foam sanding block instead of my firm rubber block to better conform to the bumper’s slight curves.
How to Handle a Fresh Paint Run Before it Cures
This is your golden window. If you see a drip or sag in paint that is still wet to the touch, you can sometimes fix it without sanding. You need the correct solvent for the paint type. For a common urethane clear coat, this is usually a dedicated paint thinner or reducer.
Act fast, but carefully. Dab a small amount of the appropriate thinner onto a clean, soft, lint-free rag and gently wipe across the run. The goal is to re-flow and level the paint, not scrub it off. Use one light pass, then assess. You may need a second pass with a fresh part of the rag.
Wear nitrile gloves and work in a ventilated space. This method works only on fresh, uncured paint. Once the paint has skinned over or begun to harden, you must move to the sanding method.
Correcting Blobs from Touch-Up Paint Pens
This is a very common form of paint run. You go to fill a small chip, and the touch-up paint pools into a thick, raised blob. The repair process is just a miniature version of the full one. You need precision tools, especially when repairing touch-up paint chips.
- Instead of a large sanding block, use a pointed sanding pen or a small piece of 2000-grit sandpaper wrapped tightly around a pencil eraser.
- Sand the high spot of the blob only until it is level with the surrounding factory paint. This takes seconds, not minutes.
- Follow with 3000-grit, then polish. A dual-action polisher is overkill here. I use a microfiber applicator pad by hand or a small cordless polishing pen for control.
Fixing a touch-up paint blob is the most accessible form of paint repair, teaching you the fundamentals of leveling and finishing on a very small, low-risk area. It is excellent practice.
Can a Bad Paint Job Be Fixed? Knowing When to Call a Pro
The short answer is yes. Most drips and runs can be corrected. I have fixed them on my own cars and for clients. It is a precise task, but it is very doable with patience and the right approach.
You need to spot the problems that are beyond a simple fix. These are your red flags.
- Runs that travel down over multiple body panels. This often points to a major application error from the start.
- Deep “solvent popping.” This looks like tiny craters or dimples within the run. It means the paint dried too fast, trapping solvents underneath. Fixing this usually requires stripping the area and repainting.
- Sanding too deep. If you sand through the clear coat and hit the color layer, or worse, the primer, you have created a much bigger problem. You will need a full respray of that panel.
Be honest about your skill. Be honest about your car’s value. My black BMW is a swirl magnet, but its paint is original and valuable to me. If I had a severe run on its hood and had never sanded paint before, I would practice on a junkyard panel first. The risk of burning through the thin factory clear coat is high. My red Porsche? I would not touch a run on it myself. The cost of a professional correction is less than the cost of my mistake on that car.
A professional detailer or painter brings specific tools to this job. They start with a paint thickness gauge. This tool tells them exactly how much clear coat they have to work with, so they know their safety margin. For a large, hardened run, they might use a rotary polisher with a heavy-cut compound. This tool generates more heat and cutting power than a dual-action polisher. It is faster but can instantly burn through paint if you are not experienced. They also control the environment, with dedicated lighting to see every imperfection and proper ventilation for safety.
Learning to fix a paint run is a rewarding skill. It teaches you about paint layers, sanding grits, and the final finish. Start small. Find an old panel or an inconspicuous spot on a daily driver. The satisfaction of turning a glossy blemish into a flawless surface is real. It makes you see your car, and its care, in a whole new way.
Final Steps for a Smooth, Run-Free Finish
From correcting runs on my Jet Black BMW, I can tell you that success hinges on your patience during sanding and your commitment to the polish. Treat the clear coat with respect, and it will reward you with a seamless, glassy surface that hides all evidence of the repair.
Rush or press too hard with the sandpaper, and you will create a permanent low spot or a thin, cloudy patch that screams “amateur fix.”
Further Reading & Sources
- How to Remove Runs, Dirt, and Other Flaws From Paint – The Garage™
- How to get the run out of a fresh paint car – Quora
- How to Fix Runs and Sags in Automotive Paint – Expert Guide
- r/motorcycles on Reddit: How to fix runs in paint?
- This Genius Trick FIXES Paint Runs Instantly! – YouTube
- How to fix paint runs – YouTube
- How to Fix Runs in Single Stage Paint | Homesteady
Max is an automotive enthusiast having worked as a car mechanical and in interior detailing service for over 25 years. He is very experienced in giving your old car, a new fresh vibe. He has detailed many cars and removed very tough smells and stains from all kinds of cars and models, always ensuring that his work and advice helps his customers. He brings his first hand experience to his blog AutoDetailPedia, to help readers breath new life into their car interiors.