How Long Does Car Wax Take to Dry? Your Buffing and Cure Time Guide
You just finished waxing your car and now you’re clock-watching, worried that wiping too soon or too late will ruin your hard work.
We will cover what “dry” versus “cure” really means, how to apply wax for even drying, the exact moment to buff for a deep shine, and how long to wait before driving or washing.
Ignore these timelines, and you’ll be left with a hazy, streaky finish that offers little protection.
Key Takeaways: The 30-Second Version
You are busy. I get it. Here is everything you need to know, fast.
- Drying time (when you can buff it off) is usually 5 to 30 minutes.
- Curing time (when it is fully hard) takes 12 to 48 hours.
- “Dry to the touch” does not mean “cured and safe.” This is the most common mistake.
- The biggest factor is the product type. A thick paste behaves very differently than a quick spray.
- Do not leave wax on your car overnight. In most conditions, this will make it very difficult to remove.
Wax & Sealant Quick Reference Table
This table is based on my years of using these product types in my shop and on my own fleet. Your results can vary with temperature and humidity.
| Product Type | Dry Time (to buff) | Cure Time (full hardness) | Safe to Get Wet After | Expected Durability |
| Paste Wax (Carnauba) | 10-30 minutes | 12-24 hours | 24 hours | 2-4 months |
| Liquid Sealant (Synthetic) | 5-15 minutes | 12-24 hours | 12-24 hours | 4-6 months |
| Spray Wax/Hybrid | 1-5 minutes | 1-2 hours | 2 hours | 1-3 months |
| Ceramic Spray Sealant | 1-3 minutes | 24-48 hours | 24-48 hours | 6-12 months |
See the difference? Spray products are designed for speed, but traditional pastes and liquid sealants often demand more patience for a longer lasting result.
Drying vs. Curing: It’s Not the Same Thing (And Why That Matters)
Think of it like painting a wall in your house. Drying is when the paint no longer feels wet or sticky to your finger. You can walk back into the room. Curing is what happens over the next few weeks. That is when the paint develops its full hardness. You can finally lean a bookcase against it without leaving a permanent dent.
For your car’s paint, the idea is similar but much faster.
Drying is a physical change. It is just the solvents and carriers in the wax or sealant evaporating into the air. What is left behind on the paint is a thin, hazy film of protective ingredients. This is the film you buff away to reveal the shine. The product instructions always give you a “dry time,” which really means “buff-off time.”
Curing is a chemical change. This is where the magic happens for durability. After you buff off the haze, the remaining microscopic layer starts to cross link. The polymers bond together and to your clear coat, forming a hard, continuous shell. This process is not instant.
Your car’s new protection is most vulnerable in the gap between drying and full curing. If it rains, you wash the car, or even if heavy morning dew settles on it during this window, you can ruin the bond. Water can etch into that soft, fresh layer, leaving permanent spots. It is like leaning that bookcase against the wall a day too soon. The mark is there for good.
The “Finger Swipe Test” and Other Dryness Clues
Forget the clock on your phone. The best tool for checking dryness is already on your hand. I use this test on every vehicle, from the Porsche to the Odyssey.
After applying your wax in thin, even sections, wait a few minutes. Then, take a perfectly clean, dry fingertip and lightly swipe it through the hazy film on the panel.
- If it is ready: Your finger will come away clean. The wax will not smear or transfer. The path your finger made will look like a clear streak through a uniform, frosty haze.
- If it is not ready: You will see a dark, wet looking streak where you swiped. The product will feel greasy on your finger. This means the solvents are still evaporating. Walk away for a few more minutes.
That frosty, uniform haze is your visual cue. It should look like a light dusting of powder on the paint. On my white Tesla, it is very obvious. On my black BMW, I have to look at it from an angle under good light.
Here is a critical warning for owners of dark colored cars: be careful using this test in direct, hot sun. The heat from a dark panel (like my Jet Black BMW) can bake the wax too fast. It might haze over in seconds, but the solvents can get trapped underneath. You will buff it off and think you are done, but the curing will be compromised. Always try to work in the shade or in a garage.
The Step-by-Step: From Application to Buffing to Cure
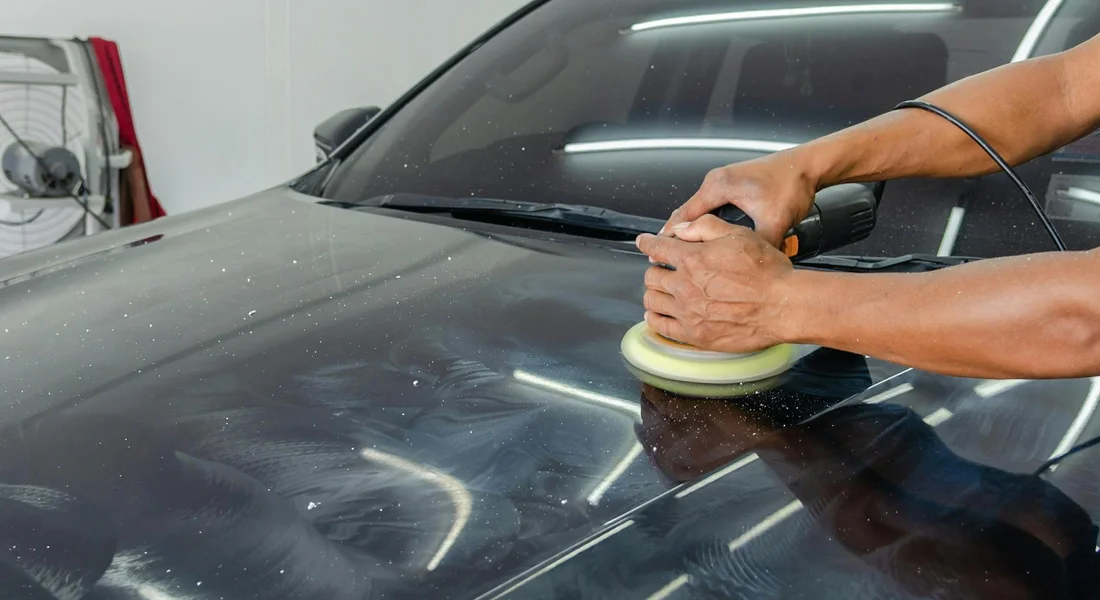
Think of waxing your car like painting a room. The actual painting is quick. The hours of taping, sanding, and cleaning the walls are what make the job last. The timeline below walks you through each phase, so you know exactly what to expect and when.
Step 1: Prep is 90% of the Job (The Real Time Sink)
Wax bonds to the paint, not the dirt on top of it, so putting a perfect coat on a dirty car is a complete waste of a Saturday. This prep stage is where you will spend most of your time. For my black BMW, skipping any of these steps guarantees I will just wax swirls and contaminants into the finish, making it look worse. For a true black finish, I always look for the best wax for black car paint to preserve depth and gloss. The right wax choice can make all the difference on a dark surface.
The process is non-negotiable. Start with a proper two-bucket wash to lift away loose grime. Next, you need to decontaminate. Run your bare hand over a clean, dry panel. If it feels rough like sandpaper, you need to clay it. Use a dedicated clay bar or a synthetic clay mitt with plenty of lubricant to glide over the surface and pull out embedded pollutants. Finally, dry the car completely with a clean microfiber drying towel. Any water droplets left will repel the wax. Once the prep is complete, you’ll move on to waxing techniques application to lock in that clean finish. In the next steps, you’ll learn how to apply wax evenly for a durable, glossy shine.
If you polished the paint first to remove scratches, you have a critical extra step. You must wipe down every panel with a panel prep spray or a diluted isopropyl alcohol solution to remove all traces of polishing oils, or the wax will not bond properly. I learned this the hard way on my Miata’s single-stage paint when my first wax application beaded water poorly.
Step 2: Applying the Wax – Thin is In
This is the most common mistake I see. A thick, sloppy application is the main reason people struggle with long dry times and a buffing arm workout. You are not applying sunscreen.
The goal is a thin, translucent film you can barely see. For a paste wax, use a pea-sized amount on a foam applicator pad. Spread it in straight lines or small circles across one panel, like the hood or a door. The layer should be so thin it looks almost invisible as you work. If you see a thick, white paste that looks like you spread yogurt on your hood, you used way too much. Wipe most of it off immediately and start again with less product.
Work panel by panel. Apply wax to the hood, then move to a fender. Never apply wax to the entire car at once. By the time you finish the roof, the wax on the hood will be too dry to buff correctly. Working in sections lets you manage the clock.
Step 3: The Waiting Game – How Long Before Buffing?
So, how long do you leave wax on a car before you wipe it off? The answer depends entirely on what you are using. This is the “dry to the touch” or “haze” time.
- Traditional Carnauba Paste Wax: 10 to 30 minutes. These need the most time to settle.
- Synthetic Polymer Sealant: 5 to 15 minutes. They usually dry faster.
- Instant Spray Wax (used as a drying aid): 1 to 2 minutes. Spray on, spread, and buff almost immediately.
Heat and humidity change everything. My blue F-150 parked in direct summer sun might be ready to buff in just 5 minutes, while that same wax on my Tesla in a cool, humid garage could take 25 minutes. Do the “swipe test.” Use the tip of your finger on a small, inconspicuous spot. If it swipes clean without smearing, it is ready.
Can you leave wax on a car overnight? Do not do it. Overnight, dew can settle on it, dust from the garage will stick to it, and the wax can harden into a cement-like layer. Removing wax left on overnight is a brutal task that often requires you to re-wash the entire car to start over. It is never worth the risk.
Step 4: Buffing to a Deep Shine
This is the satisfying part. Use a clean, premium microfiber towel. A cheap, scratchy towel will mar your freshly waxed paint. Fold the towel into quarters so you have multiple clean sides to use.
Use light, sweeping passes and let the fluffy towel do the work. There is no need to press down hard. If the towel drags or you feel serious resistance, the wax is not fully dry. Stop buffing that panel, wait a few more minutes, and try again with a fresh towel section.
After you buff the whole car, inspect your work. Take it into good light, like sunlight or a bright garage LED, and look at the paint from different angles. Look for any leftover hazy residue, which means you missed a spot during buffing. A quick pass with a clean microfiber will take care of it.
Step 5: The Silent Cure – The Most Important Wait
You have a gorgeous shine, but the job is not done. While the wax is dry to the touch, the chemical bonds that provide real, lasting protection are still forming. This is the curing phase, and it happens invisibly.
Most synthetic sealants and hybrid waxes need 12 to 24 hours for a basic cure and up to 48 hours to reach full hardness. Some newer ceramic-infused coatings and hybrids even recommend a full 7 days for a complete cure. Check your product’s label.
This leads to the big question. How long after waxing a car can you wash it? The safe rule is to wait at least 24 to 48 hours for a full cure before any contact with soap. If the car gets dirty and you must do something, a gentle rinse with plain, cold water after 12 hours is the absolute minimum. Soap and wash mitts can disrupt the curing film before it is fully set.
If you can, keep the car garaged and dry for that first day or two. This gives your hard work the best chance to form a strong, durable shield. I always plan my detailing so the Porsche or the Odyssey can have a quiet weekend in the garage after a wax. That patience is what makes the protection last for months, not weeks.
What Slows You Down? Factors That Extend Dry & Cure Times
You followed the instructions. It has been thirty minutes. But when you go to buff, the wax is still slick and sticky. It smears instead of clearing away to a shine. This is frustrating. It happens to everyone. Usually, one of three things is the cause.
Thick Application: The Primary Culprit
This is the number one mistake. More wax is not better protection. It is just more work. A thick, visible layer of product cannot dry. The solvents that carry the wax need to evaporate into the air. A thick layer traps them underneath. The result is a gummy, sticky mess that fights your microfiber towel.
Apply wax so thin you can barely see it after you spread it. On my black BMW, if I can still see a white haze after application, I used too much. For a paste wax, use a dime-sized amount for an entire door or fender. For a liquid, a few drops on the applicator are enough. If you think you used too little, you are probably using the right amount. A thin film dries quickly and buffs off with little effort, leaving a perfect finish.
Weather and Environment: The Uncontrollable Variables
You cannot fight the weather. You can only work with it. The air around your car has a huge impact on drying time.
High humidity is your enemy. On a muggy summer day, the air is already full of water vapor. There is no room for the solvents in your wax to evaporate. The process slows to a crawl. In high humidity, a typical 10-minute dry time can easily become 25 minutes. If the air feels thick and damp, be patient. Wait until the wax feels completely dry to a light fingertip touch, especially when waxing in direct sunlight.
Cold temperatures stop the curing process. I never wax my cars outside if it is below 55°F (13°C). The molecules in the wax simply move too slowly to bond and harden properly. You might buff it off, but it will never reach its full hardness or durability. Trying to wax my F-150 in a cold garage once left a streaky, weak layer that washed away in two weeks. If you must work in cooler weather, move the car into direct sunlight first to warm the panels, then move it to shade to apply the product.
A little airflow is a big help. A stagnant, still garage is the worst place for drying wax. A light breeze under a shaded tree is ideal. The gentle movement of air carries the evaporating solvents away, which speeds up drying. Do not use a high speed blower or fan, as it can blow dust onto the tacky surface. Just a natural, subtle airflow makes a noticeable difference.
Product Chemistry: Know Your Wax
Not all waxes are the same. The ingredients dictate the rules. The thick paste wax I use on the Porsche’s red paint is a different beast from the spray sealant I use on the Tesla.
A traditional carnauba paste wax uses strong petroleum based solvents to hold the hard wax. These take longer to evaporate. They demand a longer dry time, often 15 to 30 minutes in good conditions. The result is a deep, warm glow. These properties influence how the wax is applied and performs on different surfaces. Understanding carnauba wax properties and their applications helps explain formulation choices for varying finishes.
A modern synthetic spray wax or sealant, like the one on my Model 3, often uses water or lighter alcohols as carriers. These flash off very fast. Their dry time can be as short as one to five minutes. If you wait too long with these, they can become difficult to buff.
The product’s label is your first and best source of truth. Before you open the bottle, read the instructions. The manufacturer knows their chemistry best. Their recommended dry time is your starting point. Adjust from there based on your thickness of application and the day’s humidity. This simple step saves you from the headache of a tacky, stubborn wax job.
Troubleshooting: What If You Get It Wrong?
Do not worry. Everyone, including me, has messed up a wax application at some point. Timing is a skill you learn by feel. The good news is that most mistakes are simple to fix. Here is how to handle the common problems.
Wax Left On Too Long (Hard to Buff Off)
You finish a panel, get distracted, and come back to find the wax has dried to a hard, chalky film. It feels like you are rubbing cement. I learned this the hard way on a hot afternoon with my black BMW. The sun baked the wax on before I could turn around.
The wax has hardened, but it has not bonded to the paint yet, so you can almost always re activate it.
Do not scrub harder with a dry towel. You risk creating swirls. Instead, you need to put a little moisture back into the product.
- Grab a quick detailer spray or even a spray bottle with plain water.
- Lightly mist the stubborn area. You are not trying to wash it, just dampen the surface.
- Immediately take a clean, dry microfiber towel and buff the area. The moisture will soften the wax, allowing it to wipe away cleanly.
If a quick detailer is not handy, a professional trick is to put a tiny, pea-sized amount of the same fresh wax on your applicator. Gently rub it over the dried wax. This re activates the old product. Buff it all off immediately with a fresh side of your towel.
Car Gets Wet or Rained On Before Curing
This is a real gut punch. You spent hours waxing, and then an unexpected shower rolls through. I have had this happen to my F-150 after a coating job. The risk is not a ruined finish, but compromised protection.
Water droplets will sit on the soft, uncured wax layer. When they evaporate, they leave spots and can disrupt the wax’s ability to form an even, continuous shield. The protection will be patchy where the water landed.
Do not just wipe the water off and hope for the best. The bond is already broken where the water touched.
Here is your recovery plan:
- Let the car dry completely in a garage or shaded spot. Do not touch it.
- Once dry, give the car a gentle wash with a pH-neutral shampoo. This will remove any water-spotted wax residue and prepare the surface.
- Dry the car thoroughly with a clean microfiber drying towel.
- Re apply wax to the entire affected panel. A full redo is the only way to guarantee uniform coverage and protection.
Consider it a lesson learned. Always check the weather radar, not just the sky, before you start.
Streaking or Hazing After Buffing
You wipe off the wax, step back, and see faint, cloudy streaks or a light haze on the paint. On dark cars like my 3 Series, this shows up terribly. It looks worse in certain light.
This is almost always caused by “high spots.” It means a thin layer of wax residue was not fully removed during your initial buff. It is not a disaster, just an incomplete final step.
Streaking is a superficial residue issue, not a curing problem, and it cleans up easily.
You do not need to start over. Fix it with a final finishing step.
- Take a fresh, premium microfiber towel. Fold it into quarters to create a clean, soft surface.
- Lightly spritz one section of the towel with your quick detailer spray. Do not soak it.
- Gently wipe the streaked or hazy area with light pressure. The quick detailer provides just enough lubrication to dissolve the leftover wax without harming the underlying layer that has already bonded.
- Immediately flip to a dry section of the towel and buff the area to a clear, high-gloss finish.
This method works on glass, trim, and paint. It is my go-to for achieving a flawless, streak-free result on any vehicle, especially my show car Porsche.
Detailer’s Pro-Tip: The Panel-By-Panel Method for Perfect Timing
Chasing a drying wax across a hot hood is a miserable way to spend an afternoon. You are not alone. I used to do it too, wrestling with a paste wax that set up like concrete before I could get a towel to it. That frustration led me to a simple, professional workflow that eliminates the guesswork. It turns waxing from a stressful race into a calm, rhythmic process.
The secret is to never let the car get ahead of you. You control the clock, panel by panel. Here is how it works in practice.
First, you must wash and dry the entire vehicle completely. This is non-negotiable. Any water spots or dirt trapped under the wax ruins the finish. Once the car is clean and dry, grab your applicator and wax. Start with a large, flat panel like the hood or the roof.
Apply a thin, even layer of wax to that first panel. Then, move directly to the next panel. Do not stop. While you are carefully applying wax to the second panel, the first one is quietly drying. By the time you finish the second, the first is almost always ready for buffing. You then buff the first panel to a shine, move to the third panel to apply wax, then buff the second, and so on.
You create a continuous, efficient loop: apply, move on, buff the previous. This rhythm keeps you moving at a steady pace. This method prevents any single section from drying too long, which is the main cause of difficult buffing and hazy residue. Your arm gets a break from constant buffing, and your mind stays focused on perfect application.
This technique is vital when conditions change. On a cool, cloudy day, you might apply to two panels before circling back to buff the first. On a hot, sunny day, you might only finish one small panel before you need to buff. Your eyes and a quick finger-touch test guide you, but the loop keeps you in control. It is how you manage a whole car without one side baking in the sun while you are still working on the other.
I live by this method with my Jet Black BMW, the ultimate swirl magnet. Black paint shows every mistake, especially waxy haze from a product dried too long. The hood can be in full sun while the passenger door is in shade. If I waxed the whole car at once, the hood would be a nightmare to buff by the time I got to it. The panel-by-panel method is the only reliable way to give that entire car a uniform, flawless shine without fighting the sun. It turns a daunting job on a high-maintenance paint into a series of small, manageable victories.
Wax Timing for Lasting Protection
The key is to always respect your product’s specific instructions. Letting a wax dry to a haze and buffing it off is just the first step; the full cure time is what gives you lasting durability and protection.
Rush the steps, and you will be left with a streaky, smeared finish that fails to protect your paint.
Expert Resources and Citations
- How long do you let polish and wax haze/dry before buffing? | Corvette Z06 Forum
- r/AutoDetailing on Reddit: How long should I leave wax on my car?
- How long do you leave wax on your car? – Quora
- How to Wax a Car: Your Step-by-Step Guide (Updated 2025)
- Love My Car -HOW TO TELL IF YOUR WAX IS DRY – THE SWIPE TEST
Max is an automotive enthusiast having worked as a car mechanical and in interior detailing service for over 25 years. He is very experienced in giving your old car, a new fresh vibe. He has detailed many cars and removed very tough smells and stains from all kinds of cars and models, always ensuring that his work and advice helps his customers. He brings his first hand experience to his blog AutoDetailPedia, to help readers breath new life into their car interiors.