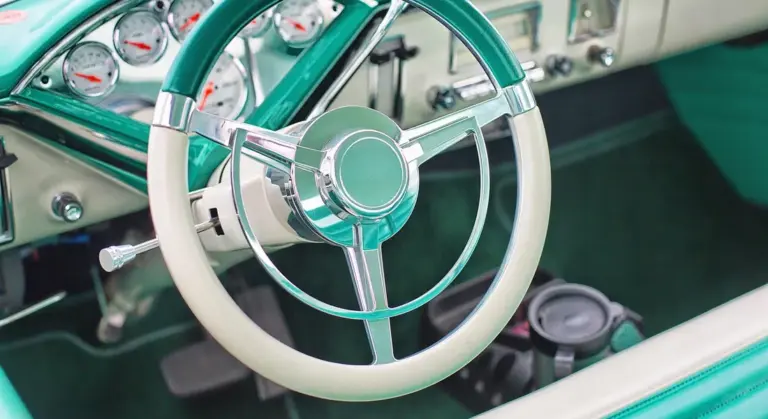
Waxing Your Car: How Often Is Often Enough?
You’ve heard you need to wax your car, but the advice on how often is everywhere, from every month to maybe once a year.
We will cover what really determines how long wax lasts, a realistic maintenance schedule for different vehicles and lifestyles, and the simple signs your car is begging for a fresh coat.
Ignore this, and your car’s clear coat will slowly oxidize into a dull, chalky shadow of its former self.
Key Takeaways: Your Quick-Start Schedule
This table gives you a baseline. Think of it as a preseason game plan. You will adjust it based on the next section.
This schedule is a map to get you started, not a law you must follow. Your car’s specific needs will fine-tune these numbers.
What Determines Your Wax Schedule? The 5 Key Factors
Forget a one-size-fits-all answer. Your schedule comes from diagnosing your car’s life. My Jet Black BMW and my kid’s Odyssey have completely different needs. Let’s break down why.
The Type of Protection You Use (This is #1)
Yes, the frequency absolutely depends on the type of wax or sealant you use. Durability is the main difference. Think of it like sunscreen. Some last an hour at the beach. Some last all day.
Traditional Carnauba Paste Wax gives a warm, deep gloss but sacrifices longevity for that look. On my red Porsche, a pure carnauba feels and looks incredible. It might last 6 to 8 weeks on a garage-kept car. For a daily driver outside, plan on applying it every 4 to 6 weeks, or about 8 times a year. Carnauba wax’s hardness and warm gloss help explain this finish. Applied with thin coats and proper curing, these properties maximize durability and shine.
Synthetic Polymer Sealants are the workhorses, offering longer protection with a bright, clear shine. I use these on my daily drivers. A good sealant on my F-150 can easily last 4 to 6 months. For most people, this means applying it 2, maybe 3 times a year.
SiO2 (Ceramic) Sprays and Waxes bridge the gap between sealants and professional coatings. They are my go-to for easy maintenance. On my Tesla, a ceramic spray gives me 3 to 5 months of strong protection with incredible water behavior. Apply it 2 to 3 times a year as a standalone or to maintain your existing ceramic coatings.
Professional-Grade Ceramic Coatings are in a different league, measured in years, not months. You do not wax over these. You use specific ceramic toppers or detail sprays to refresh the surface hydrophobics. The coating itself is your long-term base. Maintenance is the ongoing part of protecting that base. Regular, ceramic-safe care keeps the hydrophobic properties strong.
Using a quick detailer or spray wax as a “topper” after washes extends the life of your main layer. It’s like a booster shot for your protection.
Your Local Weather & Climate Assault
Climate directly attacks your wax. It decides how fast your protection breaks down.
In the Florida sun, UV radiation is the enemy. It bakes and oxidizes paint. Wax evaporates faster. You need frequent applications to shield the clear coat. A garage is your best friend here.
In the Midwest, road salt is a chemical etching agent. On my F-150, a heavy sealant before winter is mandatory. The salt and brine will degrade protection faster than rain alone. I might apply a fresh layer in late fall and again in early spring.
The Pacific Northwest has constant moisture and acid rain. This slowly contaminates and breaks down the wax layer. Frequent, light decontamination washes and consistent protection are key to preventing etching in the paint.
In harsh conditions, think of more frequent, lighter applications rather than one heavy coat per year. It keeps a fresh barrier on the paint at all times.
Where Your Car Lives: Garage vs. Street Parked
This is simple. UV rays and the elements are what degrade wax. A garage eliminates almost all of that attack when the car is parked.
My garage-kept 911 might get a coat of carnauba in April and still look pristine in July. The same wax on my street-parked Odyssey would look tired and thin by June.
A car that sleeps outside will likely need wax twice as often as its identical twin kept in a garage. The sun’s UV rays, overnight dew, bird droppings, and tree sap never stop. Your protection schedule should not either.
How You Wash (The Secret Killer of Wax)
You can wash the wax right off your car. Harsh methods strip protection fast.
Using a stiff brush, dish soap, or a drive-through with harsh chemicals will cut your wax’s life in half. There is no lubrication. It just scrubs the layer away.
The best way to make your wax last longer is to wash it correctly. The two-bucket method with grit guards and a pH-neutral car shampoo is non-negotiable for me. It cleans the dirt without aggressively stripping the protection you worked so hard to apply. Gentle washing preserves your wax.
Your Personal Standards: Beading vs. Perfection
This is the human factor. Some of us are fussier than others. Both approaches are fine.
For my Jet Black BMW, the “Swirl Magnet,” I wax at the first sign of diminished slickness. When I run my hand over the clean hood and it doesn’t feel like glass anymore, I know it’s time. The water might still bead, but the perfectionist in me wants that flawless feel back.
For the Odyssey, our “Kid Hauler,” we often wait until the water stops beading well and starts sheeting flat on the panels. That’s the clear signal the protection is nearly gone. Then we give it a full cleanup and sealant.
You can maintain a show-car finish or simply maintain a protective barrier. Your schedule lives somewhere between those two points. Choose what makes you happy.
How to Tell, “My Car Needs Wax Right Now”
You asked how you can tell when your car needs a new coat of wax. Forget the calendar for a minute. Your paint will tell you. I listen to my cars, and I teach my clients to do these three simple checks. They take the guesswork out of the equation.
These are hands-on, real-world tests you can do in your driveway. They work on any color or finish.
The Water Bead Test (The Classic)
This is the oldest trick in the book, and it works. A fresh coat of wax or sealant makes water repel. It does not want to sit flat.
Take a spray bottle of clean water and mist your car’s clean hood or roof. Look closely.
- Tight, round beads that look like little pearls mean your protection is strong. The water is being pushed into a ball. On my white Tesla, after a fresh ceramic spray, the beads are so tight you can flick them off with your finger.
- Flat, sheeting water that spreads out into a thin film means the protection is gone. The water is wetting the surface directly, which is what you want to avoid. My Ford F-150 shows this after a brutal winter. The water just lays there like a blanket.
The moment you see water sheeting instead of beading, your paint is bare and vulnerable to the elements. It is your clearest signal to reapply protection.
The Finger-Swipe Test (For Slickness)
Beading is the final stand. Slickness is the first line of defense to fail. This test catches problems earlier.
Make sure the panel is clean and completely dry. Then, with the pads of your fingertips, gently glide them across the paint. Do not press down. Just glide.
- Feels smooth as glass? Your protection layer is intact and doing its job. There is a frictionless barrier between your finger and the paint.
- Feels gritty, sticky, or grabby? That is the paint itself you are feeling. The slick sacrificial layer has worn away, and contaminants are starting to bond to the surface. It is time.
I do this test on my jet black BMW every other wash. Loss of slickness is a warning sign that your paint is losing its shield and contamination is setting in. Address it now, and you prevent deeper cleaning later.
The Visual Clarity Test (For the Perfectionists)
Some of us, especially those with dark-colored cars, judge with our eyes. Paint protection is not just a barrier. It is an optical layer that adds depth. Ceramic coating for car paint protection can lock in that depth with a durable, glossy shield. Many drivers choose it for long-lasting protection and showroom appeal.
Look at your clean, dry car in bright, direct light. What do you see?
- A deep, wet, liquid look with sharp reflections means the protection is filling microscopic pores and reflecting light evenly. My Porsche’s red paint looks like it is a foot deep when the sealant is fresh.
- A hazy, dull, or chalky appearance means that optical layer is gone. The paint looks clean but tired. This is glaringly obvious on my black BMW. It goes from looking like a mirror to looking like a grayish ghost of itself.
When the deep gloss and sharp reflections fade, even if water still beads a little, the paint has lost its visual pop and needs rejuvenation. This test is about pride, not just protection.
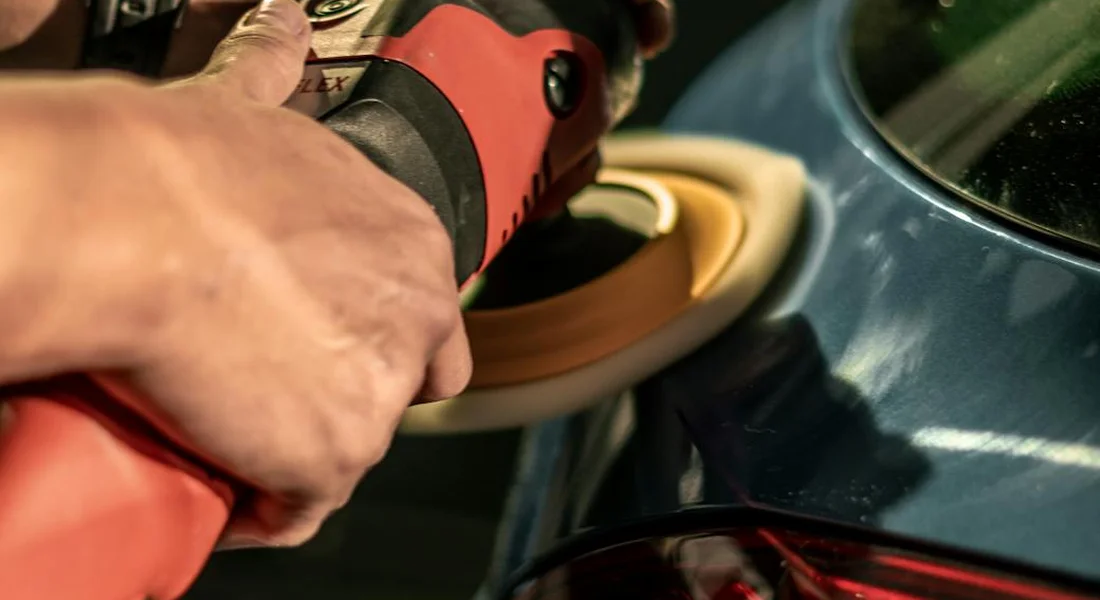
The Right Way to Apply Wax & Make It Last
Getting the most out of your wax means applying it with care. The right technique makes the protection last longer and prevents common mistakes. I treat every wax job the same, whether it’s on my work truck or my show car. Follow these steps to save product and effort.
Prep is Everything: Wash, Decontaminate, Dry
Wax needs a perfectly clean surface to bond. Any dirt left behind creates a weak barrier. I start with my 2016 BMW 3 Series, the black paint shows every speck. A simple wash is not enough.
- Wash the car with a two-bucket method and a gentle shampoo. Rinse it fully to remove all soap.
- Feel the paint with the back of your hand. If it feels gritty, you must decontaminate. For bonded contaminants like rail dust or tar, use a detailing clay bar or a synthetic iron remover spray. On my Ford F-150 after winter, I clay the lower doors and bed sides.
- Dry every panel completely. Use a clean, absorbent drying towel or a leaf blower. Water spots trapped under wax will ruin the finish. For my Tesla’s flat front bumper, I blot it dry to avoid streaks.
Wax applied over contaminants will simply slide off, wasting your time and leaving the paint vulnerable.
Application: Thin, Even, and Cool
This step is about control. Applying too much wax is the most common error I see. A thin layer cures better and is easier to remove.
- Use a soft foam applicator for paste or liquid waxes. For spray waxes, a fresh microfiber towel is best. I keep a dedicated towel in my Honda Odyssey for quick spray wax applications on the go.
- Apply the wax in thin, even circles. Imagine you are applying sunscreen. You want a translucent film, not a white paste. On my Porsche’s hood, I work on one small section at a time.
- Always work in the shade on cool panels. Sunlight heats the paint and causes the wax to dry too fast. This makes it hard to remove and can leave holograms. I learned this lesson waxing my red Miata in direct sun one summer afternoon.
One thin layer is all you need for complete coverage; extra product just creates a sticky mess.
Removal & Final Buff: The Shine Reveal
Buffing off the wax reveals the gloss. Doing it right protects your paint from fine scratches.
- Let the wax haze first. Check your product’s label for timing. Usually, it’s ready when it looks dull and passes the swipe test. On my Model 3, I wait until it loses its wet look.
- Buff it off with a clean, high-quality microfiber towel. Use a plush, soft towel and gentle pressure. I use my edgeless towels for this on the BMW to avoid swirls.
- Flip the towel to a clean side frequently. Once a towel section is full of wax residue, it can act like sandpaper. When I do my full-size truck, I use multiple towels to keep the buffing surface fresh.
A clean towel lifted the haze from my Porsche’s paint to show a deep, liquid shine without any leftover residue.
Paint Damage Prevention: Can You Wax Too Much?
Can you wax your car every week? The short answer is yes, but you absolutely should not. How many times can you wax your car? More than you need to, and that’s the problem. Waxing is not like washing. More is not better.
I learned this the hard way on my black BMW. In my early days, I thought constant waxing was the key to perfect paint. What I got instead was a cloudy, hazy film that muted the deep jet black shine. It looked like a thin layer of plastic wrap was stretched over the paint. This is wax buildup. Applying fresh wax over old, degraded wax creates a cloudy barrier that actually dulls your finish instead of enhancing it.
The bigger danger isn’t just buildup. It’s the act of waxing over a surface that isn’t perfectly clean. If your paint has fine dust, pollen, or industrial fallout on it, rubbing a wax applicator pad across it is like using fine-grit sandpaper. You are grinding those contaminants into your clear coat. This is a guaranteed way to create fine scratches and swirls, the very defects you’re trying to protect against.
Before any new protective layer goes on, the old one must come off. This doesn’t mean a normal wash. You need a proper decontamination wash. For my F-150 before a big wax job, I follow a simple two-step process. First, I spray the entire truck with an iron remover to dissolve metallic brake dust particles. After that rinses off, I use a detailing clay bar or synthetic clay mitt with plenty of lubricant. I glide it over the paint to pull out any embedded tree sap, tar, or pollution that washing missed. The paint will feel smooth as glass. Only when the paint is decontaminated and perfectly clean is it safe to apply a new wax or sealant.
Special Cases: New Cars, Wraps, and Coatings
Standard wax schedules work for standard paint. But modern finishes and protection methods need special rules. Let’s clear up the most common questions.
Waxing a Brand New Car
You just drove it off the lot. The paint feels slick and looks perfect. Should you wax it? The answer is yes, and you should do it right away.
That new car smell does not mean pristine paint. From the factory to the dealer, your car collects invisible junk. It gets rail dust, which are tiny iron particles from train transport. It can get overspray from other cars in the factory. The dealer’s prep wash might leave light swirls.
Protecting it from day one stops those minor defects from becoming permanent stains or etched spots. Think of it as putting a raincoat on before you get caught in a storm, not after.
Do not just slap wax on it. You must prep the surface first. Here is what I did with my BMW when it was new.
- Wash it using the two-bucket method with a high-lubricity shampoo.
- Run your hand inside a plastic sandwich bag over the clean, wet paint. If it feels gritty, you need to decontaminate.
- Use an iron remover spray. Watch it turn purple as it dissolves embedded rail dust. Rinse thoroughly.
- Clay the entire car using plenty of lubricant. This lifts off bonded contaminants the wash missed.
- Now you have a truly clean canvas. Apply your sealant or wax of choice.
Caring for Vinyl Wraps and Paint Protection Film (PPF)
Vinyl wraps and PPF are different from clear coat. They are plastic films. Using the wrong product can ruin their appearance or even damage the material. When deciding between vinyl wrap and paint protection film, weigh durability and finish. This understanding helps you choose the right option for your car’s protection and appearance.
Never use a traditional carnauba paste or liquid wax on a vinyl wrap or a matte/satin PPF finish. Most traditional waxes contain oils or additives that can create ugly, uneven shiny spots on matte vinyl. They can also leave a hazy white residue in the seams of the film.
For my Porsche, which has a glossy PPF, and any wrapped section on my Tesla, I follow one simple rule.
- Use products labeled specifically for “wraps,” “PPF,” or “matte finishes.” These are formulated to be safe and non-staining.
- A high-quality ceramic spray detailer is often a universal safe bet. It adds slickness and hydrophobic behavior without risking damage to the film.
- Wash gently. Avoid harsh alkaline soaps and stiff brushes that can lift the film’s edges.
Stick to the manufacturer’s recommended care products if you can. It keeps the warranty valid and the color consistent.
Maintaining a Ceramic Coating
A true professional-grade ceramic coating is not wax. It is a hardened layer of silicon dioxide (glass) bonded to your paint. You do not wax over it. Unlike wax, ceramic coatings provide superior scratch protection and durability.
Waxing a ceramic coating is like spreading butter on top of a non-stick frying pan. It might work for a minute, but it gunks up the surface and defeats the purpose. The wax cannot bond properly and will just sit on top, creating a dull, smeary mess. Even putting wax over ceramic coating doesn’t help.
Instead, you maintain a coating with ceramic-boost sprays or SiO2-infused detailers every few months. These “topper” products are designed to rejuvenate the top layer of the coating. They restore that incredible water-beading effect and add extra chemical resistance.
On my daily drivers with coatings, my maintenance is simple. After a regular wash, I mist a ceramic detail spray onto each panel and wipe it off with a clean microfiber towel. It takes ten minutes. This routine keeps the coating performing like new for years, extending its effective life far beyond the base warranty period. Think of it as a periodic refresh, not a re-application.
Product Tier List: Choosing Your Wax
Forget searching for a single “best” wax. The right choice depends entirely on your car, your time, and what you want the finish to do. Think of it like choosing shoes. You need different ones for a quick errand, a long hike, or a formal event. Your paint protection needs the same thoughtful approach, especially when it comes to understanding car wax properties and application.
This list is built from my own garage. I have used every type of product here, on the specific vehicles mentioned, under real-world conditions.
Tier 1: Quick & Efficient (Spray Waxes & Sealants)
This is your maintenance MVP. If you wash your car monthly, this tier is your answer. These are not weak products. A good spray sealant applied to a damp car after every wash builds up consistent protection with almost zero extra effort.
I use these religiously on the Honda Odyssey. After extracting juice stains and wiping down crackers, the last thing I want is a four-hour wax session. A spray wax takes five minutes. It keeps the paint slick and protected from grocery store carts and sun exposure.
- How to use it: Wash and rinse your car. While the paint is still wet, mist the product onto a panel. Use a clean, damp microfiber towel to spread it evenly. Then, flip the towel to a dry side and buff to a clear shine. Move panel by panel.
- What to expect: 4 to 8 weeks of solid protection. It will sheet water beautifully and make the next wash easier. The gloss is very good, not deep.
- My garage note: Keep a bottle in your detailing caddy. It is perfect for wiping off light dust or fingerprints between washes on any car, even the Porsche.
This tier answers the “how often” question for real life: every single time you wash, if you want constant, effortless protection.
Tier 2: Dedicated Weekend Project (Liquid & Paste Sealants)
When you block off a Saturday morning for your car, this is your project. Synthetic polymer sealants are the workhorses. They outlast carnauba wax by months and provide a harder, more durable shell against contaminants, UV rays, and light acids from rain.
My Jet Black BMW 3 Series lives in this tier. The paint is soft and a swirl magnet. A strong synthetic sealant gives me the durability I need to survive weekly washes without marring the paint. The protection is my primary goal, with a bright, clear gloss as a bonus.
- How to use it: This requires a perfectly clean, dry, and cool surface in the shade. Apply a thin, even layer with an applicator pad. Let it haze fully (check the label for time). Then, remove it with a clean, soft microfiber towel. Two thin coats are better than one thick one.
- What to expect: 3 to 6 months of robust protection. The finish will feel like glass. Water will bead up tightly and roll off.
- My garage note: Always read the product label. Some modern sealants are “wipe on, walk away” and do not require a haze time. Do not assume. Applying it wrong wastes the product and your time.
For the daily driver that faces sun, salt, and sap, a synthetic sealant is the most practical long-term shield you can apply yourself.
Tier 3: Ultimate Depth & Show Car Shine (Premium Carnauba & Hybrids)
This is for the love of the craft. A premium carnauba wax, often blended with other oils and polymers, delivers a warmth and depth that synthetics cannot match. The paint looks wet, rich, and alive. It is a treat for the eyes, not just a barrier for the paint.
This is reserved for my Porsche 911, the garage queen. Before a cars and coffee event, I will layer a rich carnauba paste wax over its existing sealant. The red paint gains a liquid, three-dimensional glow. The protection is secondary. I am paying for the art.
- How to use it: The process is the same as a paste sealant: clean, cool, shade, thin application, haze, buff. It can be more physical work. The warmth from your hand can help soften the wax in the jar for easier application.
- What to expect: A breathtaking, deep gloss that turns heads. Expect a shorter lifespan, typically 6 to 8 weeks at most, especially if the car is parked outside. It is less resistant to high heat and harsh chemicals.
- My garage note: Many enthusiasts use a “base and topper” system. They apply a durable Tier 2 sealant as a base layer for protection. Then, they top it with a Tier 3 carnauba for the ultimate look. The best of both worlds.
Choose this tier when the visual reward is worth the more frequent reapplication. It is paint jewelry.
Tier 4: The New Standard (Ceramic Sprays & Hybrid Waxes)
This technology changed my routine. These products contain silicon dioxide (SiO2), the building block of professional ceramic coatings. They offer a remarkable bridge between a traditional wax and a permanent coating. The water behavior is insane, beading into tight, rolling pearls that shed dirt.
This is my go-to for the Tesla and the F-150. The Tesla’s flat front end and soft clear coat benefit from the extreme slickness, making bug removal easier. The truck’s large surfaces get protected for half a year or more, fighting off road grime and UV fade with less work from me.
- How to use it: Application is similar to a spray wax or liquid sealant. The key is meticulous surface prep. The paint must be decontaminated (clayed) and perfectly clean for the SiO2 to bond properly. Apply to one panel at a time and level carefully to avoid high spots.
- What to expect: 6+ months of extreme hydrophobics, strong UV resistance, and a slick, hard feel. Dirt has a harder time sticking, and washes become faster.
- My garage note: These are not foolproof. If you apply them to a dirty surface, you will lock in that dirt. They also can stain black plastic trim if you are not careful. Always do a test spot first and use dedicated applicators.
For the modern car owner who wants near-coating performance without the permanent commitment, ceramic sprays are the most significant advancement in consumer-grade protection.
Maintaining Your Car’s Protection is a Habit, Not a Chore
Your best plan is to pick products that fit how you use your car and your local weather, then set a simple reminder to keep that layer of protection fresh. This habit preserves your paint’s depth and that slick, glossy shine for years.
If the schedule slips, your wax will degrade, your protection will fade, and your paint is left exposed to everything the road can throw at it.
Research and Related Sources
- How Often Should You Wax Your Car?
- How Often Should I Wax My Car? – Stoner Car Care
- How Often to Wax Car – Chemical Guys
- r/AutoDetailing on Reddit: How often do you wax your daily driver?
- How Often Should You Wax Your Car
Max is an automotive enthusiast having worked as a car mechanical and in interior detailing service for over 25 years. He is very experienced in giving your old car, a new fresh vibe. He has detailed many cars and removed very tough smells and stains from all kinds of cars and models, always ensuring that his work and advice helps his customers. He brings his first hand experience to his blog AutoDetailPedia, to help readers breath new life into their car interiors.