How Do You Strip Clear Coat from Car Paint Without Ruining It?
That chalky, peeling haze on your roof or hood isn’t just an eyesore, it’s a cry for help. You need to remove the failing clear coat, but the wrong approach will destroy the paint underneath.
Drawing from my own battles with my jet black BMW’s delicate finish, this guide walks you through spotting true clear coat failure, choosing between chemical and mechanical removal, executing a safe strip-down process, and prepping the bare surface for its next protective layer.
Rush this job with harsh methods, and you will sand or etch straight through the color layer to the primer.
When You Absolutely Need to Strip the Clear Coat
Most paint flaws are just in the clear coat’s top layer. You fix them by leveling that layer, not removing it all. My black BMW, the “Swirl Magnet,” is covered in fine scratches. They catch the light and look terrible. I remove them with a polisher and a cutting compound. That is paint correction. It shaves off microns to create a flat, reflective surface. This approach targets removing scratches and correcting paint defects, restoring the finish. Deeper scratches may require additional correction steps to reclaim uniform color and gloss.
Stripping the entire clear coat is a different, drastic step reserved for when the clear coat itself has failed. If the current coating isn’t completely compromised, you may consider applying a clear coat protective coating to restore gloss and add protection. Look for signs that mean the clear coat is dead, not just dirty or scratched.
The first sign is a permanent, chalky white haze. It will not wipe off with a cleaner. The paint feels dry and rough, like sandpaper. Next is alligator skin cracking. These are tiny, interconnected cracks that look like a dried-up riverbed. The final sign is peeling or flaking. You will see clear coat lifting up in sheets or chips, revealing the softer color coat underneath.
This process is a last-resort prep step. You only do it if you are planning a full respray or restoring single-stage paint. My 1995 Mazda Miata project had clear coat that was oxidized pink and peeling in patches. I stripped it back to the color coat so I could repaint it properly.
Will a car wreck if the clear coat peels off? Yes, it will. The clear coat is a shield. Without it, the base coat is exposed to UV rays, which cause rapid fading. Moisture and pollutants attack the color directly, leading to etching and corrosion. The paint loses its gloss and structural integrity for good. Fortunately, there are car paint peeling prevention strategies you can follow. A simple routine of regular washing, waxing, and protective coatings helps keep the clear coat intact.
Your Clear Coat Stripping Arsenal: Tools & Chemicals
You cannot use your regular detailing supplies for this job. You need a specific set of tools and chemicals designed for aggressive material removal.
- Heavy-Duty Chemical Paint Stripper: A high-pH gel or liquid that dissolves clear coat. Read labels for caution.
- Plastic Scraper: For gently lifting the bubbled, softened clear coat without gouging the paint below.
- 500-800 Grit Sandpaper: For hand-sanding edges or spots the chemical misses.
- DA Polisher with a 5/8″ Throw: You will need this powerful tool after stripping to aggressively compound the surface smooth.
- Grit Guard for Your Bucket: Essential to keep sanding residue from contaminating your rinse water.
- 70% Isopropyl Alcohol: For wiping the panel after stripping to neutralize residues and check your work.
- 350 GSM Microfiber Towels: Dense, durable towels for chemical wipe-off that will not disintegrate.
- Respirator with Organic Vapor Cartridges: Fumes are toxic and overwhelming. A dust mask is useless here.
- Heavy Nitrile Gloves: Standard latex or thin gloves will not protect you from these chemicals.
Your safety gear is as important as your stripping chemical. Always work in a space with massive airflow, like a garage with the door wide open. Contain your work area with plastic sheeting. Never let chemical runoff go into a storm drain or onto soil. I use a large, shallow drip pan to catch everything.
You have a choice in strippers. Aggressive, fast-acting chemical strippers work in minutes but are caustic and require extreme care. Slower-acting “aircraft” removers are often safer for DIY. They take longer to work, giving you more control and reducing fume exposure.
The Non-Negotiable Safety Setup
Do not skip a single item here. This is the most hazardous chemical process you will encounter in detailing.
Wear full skin coverage. That means a long-sleeve shirt, long pants, and closed-toe shoes. Wear chemical-resistant goggles that seal around your eyes. Put on your respirator with the correct cartridges before you even open the chemical container. Work in that ventilated space, and make sure it is contained and away from any floor drains.
Respect the process. One splash or inhaled fume can cause real injury. I treat this with the same caution as handling battery acid. Set up your safety zone first, then bring in the chemicals.
The Stripping Protocol: Order of Operations
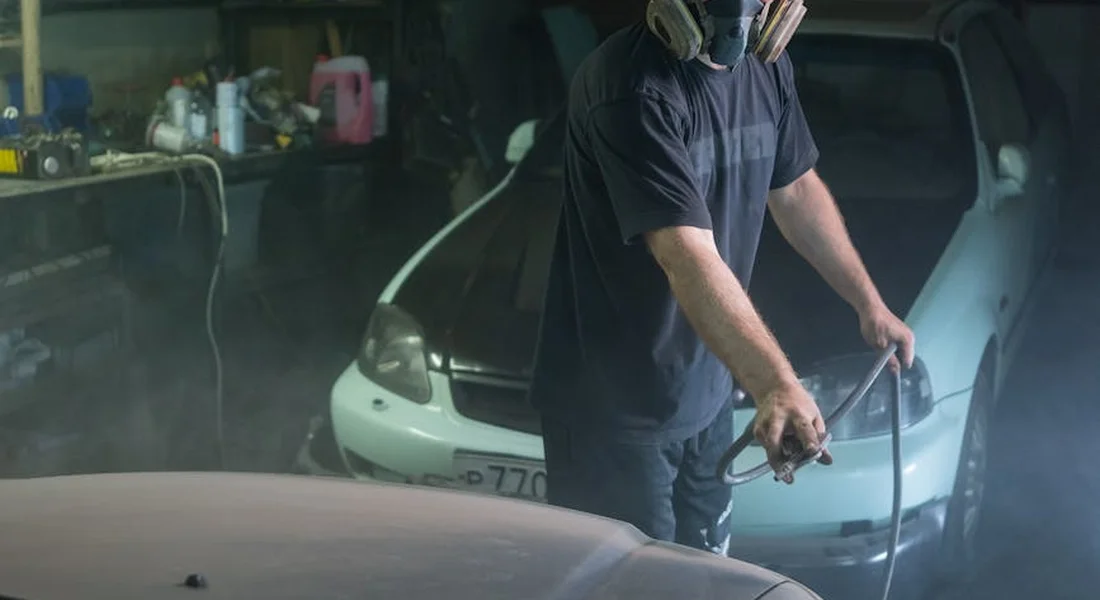
This is not a suggestion. It is the sequence you follow. Skip a step and you risk damaging the base coat, creating more work, or ruining adjacent parts of your car. I follow this exact order on every project, from my 1995 Miata’s single-stage to my BMW’s delicate clear.
1. Wash & Decontaminate
You must start with a perfectly clean surface. Any dirt, road film, or embedded grit will get ground into the paint during later steps. This creates deep scratches you cannot fix later.
I use a standard two-bucket wash on the entire vehicle. Then, I clay bar the panels I plan to strip. The clay grabs contaminants that washing misses. Your finger should glide over the paint without a hint of roughness. Removing stains and contaminants from the car paint becomes the next essential step. A clean surface then enables effective treatment. A contaminant-free surface is the only safe starting point for stripping.
2. Tape & Isolate
Paint stripper does not discriminate. It will eat plastic trim, rubber seals, and cloud glass. You protect these areas before you even open the chemical can.
Use a high-quality automotive masking tape. I run it along the edges of window rubber, plastic trim, headlights, and badges. Cover larger areas like wheel wells with plastic sheeting. On my Miata, I taped off the canvas top frame meticulously. This step feels tedious, but fixing melted trim is far worse.
3. Chemical Stripping Pass
This is your first major attack on the clear coat. The goal is to remove 90-95% of it. Apply a heavy-bodied chemical stripper with a cheap, disposable brush in a thick, even layer. Let it dwell according to the product’s instructions. You will see the clear coat wrinkle and bubble. After this stage, you can move on to repairing clear coat damage to restore gloss and protection. The next steps cover the repair process for a seamless, durable finish.
Use a plastic scraper to gently lift the gooey residue. Scrape it into a disposable tray. Never use a metal scraper, as it will instantly score the soft base coat underneath. After scraping, you must neutralize the chemical. Most strippers are neutralized with plenty of water. Flood the panel, rinse thoroughly, and dry it completely.
4. Mechanical Sanding Pass
After the chemical pass, you will have patches of stubborn clear coat and an uneven surface. This is where sanding levels everything. You are not sanding the base coat. You are sanding the last bits of clear until the surface is uniformly dull.
I start with a grit block around 800 or 1000, using plenty of water as a lubricant. Sand in straight, consistent motions. Stop frequently, wipe the area dry, and inspect. Your endpoint is a completely flat, matte finish with zero shiny spots. Those shiny spots are leftover clear.
5. Final Chemical Wipe
Sanding leaves behind a slurry of clear coat dust and water. This residue can interfere with the next step. You need a perfectly clean, bare surface.
Mix isopropyl alcohol and distilled water at a 1:1 ratio. Douse a clean microfiber towel in the solution and wipe the entire sanded area. This removes all sanding residue and any final, invisible traces of stripper. The panel should look uniformly dull and feel perfectly clean to the touch.
6. Immediate Protection
The base coat is now exposed and completely vulnerable. It has no UV protection and will begin to oxidize quickly. You have a very short window, often just hours.
You must apply a sealant, primer, or your new clear coat immediately after the alcohol wipe and before any dust can settle. Do not drive the car, do not leave it in the sun. On my projects, I treat this step with the urgency of applying a bandage to a cut. The protection you apply next is all that stands between your base coat and the elements.
Step-by-Step: Using a Chemical Stripper on Car Paint
For most of a car’s panels, a chemical stripper is the best first step. It is more controlled than aggressive sanding from the start. But it demands respect.
First, test in an inconspicuous spot. I use the inside of a door jamb or under the trunk lid. Apply the stripper to a small area. This test tells you two critical things: how long it takes for your specific clear coat to bubble, and how the base coat color holds up. Some base coats can stain or soften. You need to know before you cover a whole hood.
Work in small sections, no larger than a 2×2 foot area. Apply the stripper thickly. A thin coat dries out and stops working. Watch it closely. When the clear coat wrinkles and looks cracked, it is ready. This is usually 5-15 minutes.
How do you remove clear coat without damaging base coat? The answer is constant vigilance. The moment you see the base coat color consistently appearing under the sludge, you stop. The stripper has done its job. If you let it dwell on the base coat, it can stain it or cause etching. Use your plastic scraper gently, lifting the mess away. Do not scrub or dig.
Neutralizing is not optional. Check the product’s Material Safety Data Sheet (MSDS). For most water-rinsable strippers, you need to flood the panel with low-pressure water. I use a garden hose without a nozzle. You want to rinse all the chemical and residue away, not drive it into panel gaps. Dry the area thoroughly with microfiber towels. Any leftover moisture will dilute your next step.
Wear gloves, goggles, and work in a ventilated space. The fumes are strong. Have a dedicated disposal can for the used scrapings and towels. This is not a gentle car soap. It is a powerful chemical that demands a safety-first mindset from start to finish.
Step-by-Step: Sanding Off Stubborn or Spot Clear Coat
Sometimes, a chemical stripper meets its match. You use it, you scrub, and a few glossy, stubborn patches of clear coat refuse to let go. This happens on edges, in deep scratches that started the failure, or on older, rock-hard factory clear. That is your signal. When chemicals stall out on localized spots, wet sanding becomes your surgical tool for final cleanup.
Yes, you can sand clear coat off. It is a physical removal process. You are literally abrading the coating away, particle by particle. This demands a gentle, systematic approach.
You never start aggressive. I keep a sanding block and a range of wet/dry sandpaper nearby for this exact moment. Here is the progression I use on my black BMW’s spot repairs:
- Start with 800-grit sandpaper, soaked in water with a drop of car wash soap as lubricant. This grit is for leveling the remaining clear coat edges down to the base coat.
- Sand in straight, overlapping passes. Never in circles. Use the block on every single stroke. Your fingers will create divots and gouges the block prevents.
- Once the area is level and the high spots are gone, move to 1000-grit. This refines the surface, removing the scratches from the 800-grit. Your goal is a uniform, matte finish.
- Rinse the panel constantly. Feel the surface with your bare hand. You are done sanding when the entire area feels perfectly smooth and evenly dull.
This hands-on sanding method is for panels, not complex curves or tight body lines. A door, a fender, a quarter panel-these are manageable. For a large, flat area like a hood or roof, a Dual Action (DA) sander can be used with extreme caution. I mean it. Use a 6-inch DA with a soft interface pad, 1000-grit discs, and let the tool’s weight do the work. Push down, and you will burn through the base coat in a heartbeat.
This leads to a common question about wheels. Can you strip clear coat off aluminum wheels with sanding? Technically, yes. Practically, it is a terrible idea. The intricate spokes, tight corners, and complex curves of a wheel are a nightmare to sand evenly. You will leave deep scratches and thin spots. For wheels, a chemical stripper formulated for metals is the only sane path. Save the sandpaper for flat panels.
Detailer’s Pro-Tip: The Light Angle Inspection
Your hand will tell you the surface is smooth. Your eyes must confirm the clear coat is completely gone. After sanding and rinsing, do not dry the panel.
Grab your brightest work light. Shine it across the wet paint at a very shallow angle, about 5 to 10 degrees. Get close. Look for any streaky reflections or slightly glossy patches. Any remaining clear coat will show as a slick, shinier streak against the fully stripped, matte base coat. This light angle reveals texture differences your fingers cannot feel. Mark those spots with a bit of painter’s tape and hit them with one more pass of your finest grit.
What to Do Immediately After the Clear Coat is Gone
The job is not over. In fact, the most critical phase begins the moment you see that uniform, matte base coat. It is completely naked. Exposed. Think of it like fresh skin after a sunburn peels. It is incredibly vulnerable.
First, you must decontaminate. Any sanding residue, oils from your hands, or leftover chemical film will ruin the next step. Dry the panel thoroughly. Then, do a final wipe down with a clean microfiber towel and isopropyl alcohol (mixed 1:1 with water) or a dedicated automotive prep solvent. This removes every trace of impurity and leaves a perfectly clean surface for paint or protection.
Now, you face a decision. Are you applying new paint or clear coat within the next few hours? If not, you cannot leave the base coat bare. Oxygen and moisture in the air will begin attacking it immediately. You must apply a temporary barrier to lock out the environment. A spray-on epoxy primer or a dedicated wipe-on primer sealer works. I keep a can of spray primer for this exact purpose. Apply a light, even coat over the stripped area.
This brings us to the big question. What happens if you do not put clear coat on a car? The answer is rapid, ugly degradation. The color will fade quickly under UV light. It will lose its depth and vibrance. Water, dirt, and pollutants will stain and etch directly into the soft base coat. On my old Miata’s single-stage paint, which has no clear, I have to wax it constantly for protection. A modern base coat without clear will chalk and fail faster than you can imagine. The clear coat is the shield. Without it, the paint has no chance.
Alternatives to Stripping: When a Cut & Polish is Enough
Let’s be honest. Most folks typing “how to strip clear coat” into a search bar aren’t looking at bare primer spots. They’re looking at a hood that’s lost its shine, a roof that looks chalky in the sun, or a car that’s turned a faded, milky version of its original color.
That’s severe oxidation, not clear coat failure. The clear coat is still there, but it’s so dead and contaminated on the surface that light can’t pass through it properly. I see this all the time on my own 2018 F-150, the “Workhorse.” After a few harsh winters and sun-baked summers, the dark blue paint on the hood looked flat and pinkish. The clear coat was exhausted, but it was intact.
Bringing Dead Clear Coat Back to Life
Restoration is a process of removal, not addition. You are mechanically leveling the damaged, oxidized top layer of clear to reveal the fresh, clear material underneath. This is a job for a machine polisher, the right compound, and patience.
Here is how I brought my truck’s hood back from the dead.
- Wash and Decontaminate: I started with a thorough wash and iron remover spray. You must remove all loose grit first.
- Test Spot is Law: I taped off a 12×12 inch square on the worst part of the hood. This is your proving ground.
- The Heavy Cut: Using a random orbital polisher, I chose a heavy-cut foam pad and a dedicated cutting compound. I worked the product in slow, overlapping passes, applying firm pressure. The compound turns from its original color to a clear, dry film as it breaks down.
- The Reveal: I wiped the residue away with a clean microfiber. The difference was night and day. The restored spot was deep, dark, and reflective. The surrounding area was still chalky and dull.
- Follow with a Polish: A cutting compound leaves micro-marring. I followed with a finer polishing pad and a light polish to refine the finish to a high gloss.
- Protect Immediately: Freshly corrected paint is naked. I sealed the entire panel with a synthetic sealant right away.
The goal is to remove the absolute minimum amount of clear coat necessary to restore clarity, preserving every micron of protective thickness you have left. It’s essential to be cautious and not overdo it, especially when there are no actual scratches to buff on the clear coat.
The Truth About “Clear Coat Restorer” Sprays
You will see products on shelves that promise to restore clarity with just a spray and wipe. Be very careful with these. They are almost always temporary fillers loaded with oils and silicones.
They work by flooding the microscopic pores and scratches in the dead clear coat, allowing light to pass through evenly for a few weeks. It looks great until the first rain or wash strips those oils away. These products do not fix the problem; they mask it, and repeated use can prevent proper compounds from bonding later. For a real fix, you must remove the damaged layer, not fill it.
Debunking the Home Remedies: Vinegar and WD-40
In the search for a cheap fix, people ask: does vinegar remove clear coat? Does WD-40 remove clear coat? Let’s clear this up.
Vinegar (acetic acid) is a mild acid. It is excellent for dissolving water spots and mineral deposits on top of your clear coat. It will not strip or remove a healthy clear coat. On severely oxidized and compromised paint, its acidity might accelerate damage, but it is not a stripping agent. Do not use it for that purpose.
WD-40 is a penetrant and water displacer made of petroleum distillates and oils. It will leave a greasy, contaminated film on your paint that is a nightmare to remove. It will not remove clear coat, but it will attract dust and create a barrier that prevents proper polishing or protection from adhering. Using it on paint is a shortcut to creating more work for yourself.
These home solutions stem from a real desire to fix a problem. The real solution is understanding the problem. Chalky, faded paint needs mechanical correction, not a kitchen-cabinet chemical. Reach for the polisher, not the pantry.
Safely Stripping to the Base Coat
I always tell people that stripping clear coat demands more patience than power. Test every abrasive step on a hidden panel first, like inside a door jamb, and let the paint guide your pace.
Rush this, and you will burn through the color layer, turning a refresh into a costly repaint.
Expert Resources and Citations
- r/Autobody on Reddit: How can I remove this without damaging the clear coat? I think it might be paint from the road or something. Already tried soap and water.
- How To Remove Clear Coat From Car Without Damaging The Paint?
- How can I strip just the clear coat? | Infiniti Q50 Forum
- How to Remove Clear Coat from Car Step By Step Guide | Rx Mechanic
- How to Remove Clear Coat – At Home with Simple Equipment
Max Gunther
Max is an automotive enthusiast having worked as a car mechanical and in interior detailing service for over 25 years. He is very experienced in giving your old car, a new fresh vibe. He has detailed many cars and removed very tough smells and stains from all kinds of cars and models, always ensuring that his work and advice helps his customers. He brings his first hand experience to his blog AutoDetailPedia, to help readers breath new life into their car interiors.