How Soon Can You Wash a Car After a Paint Job? Your Post-Paint Washing and Care Guide
You just got your car back from the paint shop, and that first speck of dirt has you worried. Washing it too early can ruin the fresh finish before it even hardens.
I will walk you through exactly what to do. We will cover the real-world curing times for modern paints, the safest hand-wash method, which products protect instead of harm, and how to spot early warning signs of damage.
Wash it before the paint cures, and you risk embedding dirt into the soft surface or creating permanent water spot stains.
The Short Answer: Your Post-Paint Care Cheat Sheet
Everyone wants a simple number. I get it. You just got your car back and it looks incredible. You want to keep it that way. Here is the timeline I follow, and what I tell every customer who asks.
| Type of Paint Work | Wait Before First Wash | The “Why” Behind the Wait |
| Full Respray (Entire Car) | 30 to 90 Days | This is a massive amount of new material. The solvents underneath need the most time to fully evaporate and harden. The paint is soft all the way through. |
| Panel Repair or Blend | 2 to 4 Weeks | A smaller area, but it’s still fresh paint blended into old. It needs to harden to match the durability of the surrounding factory finish. |
| Paint Touch-Up or Chip Repair | 48 to 72 Hours | These are tiny spots. They skin over fast, but the material underneath is still curing. Gentle care is needed so you don’t dislodge the repair. |
| Factory New Car Paint | Can Wash Immediately (Gently) | Your new car’s paint was baked at extreme heat in the factory. It is fully cured when you drive it off the lot. You just need to wash it safely to avoid swirls. |
This leads to the big question: can i drive my car after paint job? You can, but you must be smart about it.
Driving is okay for short, essential trips after 24-48 hours when the paint is dry. But you must avoid three things: rain, long highway trips, and dusty or gravel roads. Rainwater and road film will chemically bond to the soft surface. Highway speeds drive bugs and debris into the paint like tiny bullets. Gravel and dust are just sandpaper waiting to happen.
Humidity and cold are your enemies. They trap solvents in the paint film. A shop might say “30 days,” but if it’s a cold, damp winter, you should realistically wait 60 or 90. Listen to the weather, not just the calendar.
Why Rushing the First Wash Ruins Everything
Paint feels dry in hours. It is not cured for weeks. This is the most important thing to understand.
Think of it like a cake. The outside forms a crust quickly, but the inside is still wet batter. If you touch it too soon, your finger leaves a permanent dent. Paint works the same way. The surface may be dry to the touch, but underneath, it is still releasing solvents-a process called off-gassing. This slow hardening is what gives the finish its final hardness and gloss.
Washing during this period doesn’t clean the car. It attacks it. what happens if you wash the car before the paint cures is not a minor oops. It is permanent damage. That is why avoiding car washes during this stage matters. This helps prevent paint damage from car washes before the finish fully cures.
- Watermark Etching: Water droplets sit on the soft surface. As they evaporate, they leave behind minerals that etch into the clear coat. These are not water spots. They are tiny, permanent craters.
- Micro-Scratches That Won’t Polish Out: Even the softest wash mitt will drag microscopic dirt across the surface. On cured paint, you can polish these swirls out. On fresh paint, you are scratching deep into a soft gel. You cannot fix it without repainting.
- A Dull, Hazy Finish: Soap chemicals can interact with the uncured solvents. Harsh drying towels can drag and smudge the surface. The result is a finish that looks hazy and lifeless, lacking the deep reflective shine you paid for.
I learned this lesson on my 2016 BMW, the Swirl Magnet. Its factory black paint is notoriously soft. Fresh paint is exponentially softer. If I have to be this careful with the BMW, treating new paint like it’s made of wet tissue paper is the only way.
Paint Stripper After a Wash? How That Happens
Sometimes people search for ‘paint stripper after wash‘ or ‘after wash paint remover‘. They see damage and think a product stripped their paint. On fresh paint, that’s exactly what can happen.
A proper, pH-neutral car wash soap will not strip cured paint. But your fresh paint is not cured. It is chemically vulnerable.
Harsh products you might use in a normal wash routine become paint strippers on new paint. An acidic wheel cleaner can etch and stain it. A strong alkaline degreaser or tar remover can cause the film to wrinkle and lift. Even a concentrated bug remover can be too much. A product that is perfectly safe on your three-year-old hood can act like a chemical weapon on paint that is three weeks old.
The rule is simple: for the first 90 days, the only thing that touches the new paint is clean water or a dedicated, gentle car wash shampoo. Nothing else. No all-purpose cleaners, no spray waxes, no quick detailers. Just wash, and let it be.
Your Post-Paint Protocol: The Order of Operations
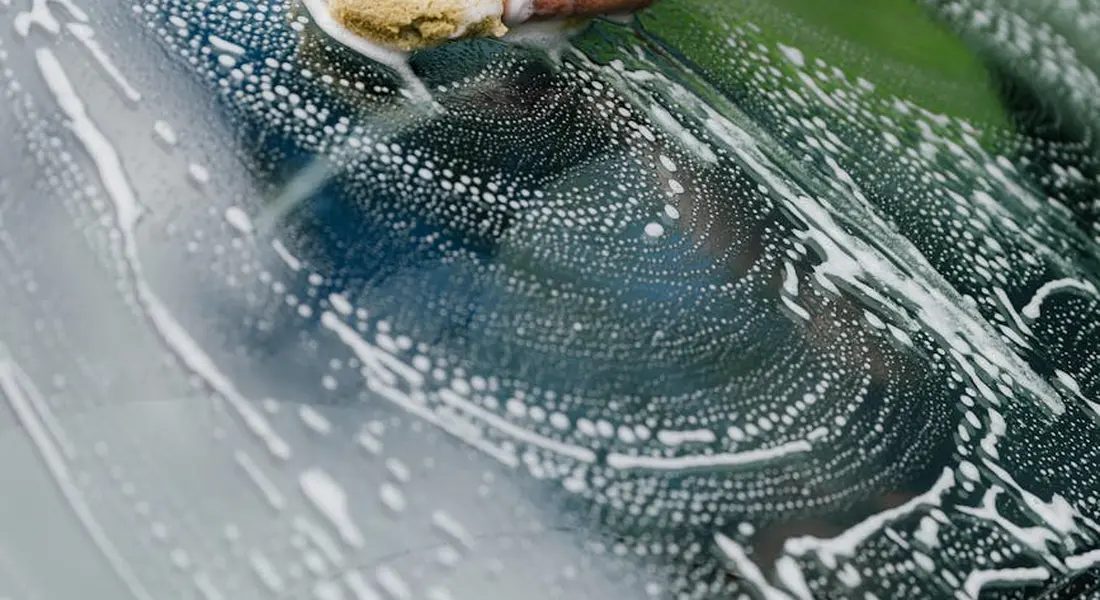
This is your checklist. Do not skip steps. The goal is to clean the surface without sealing in solvents, scratching the soft paint, or trapping moisture.
Step 1: The Long Wait (What to Do and Not Do)
A shop will tell you 30 days. I tell you 90 days for a full cure. For a basic wash, 30 days is the absolute minimum. The paint is hardening from the outside in. The surface may feel dry, but underneath, solvents are still slowly escaping.
The biggest risk is applying a wax or sealant too soon, which traps those solvents and can cause cloudiness, poor adhesion, or bubbling in your new finish.
What if it rains? Park indoors. If you must park outside, accept that it’s a risk. Rainwater can etch soft paint. After the rain, do not wipe the car. Let it air dry in the shade.
To keep it dust-free, park in a clean garage. If you use a car cover, make sure it’s breathable and put it on loosely. A tight cover rubbing on soft paint will scratch it. On forums, I see people panic about bird droppings. If you get one, follow the proper steps to remove it without damaging the paint. Spray it with a detailer and gently flush it off with a soaked towel, without rubbing. Do not touch the dry paint.
Step 2: The First Wash – Tools and Mindset
You need the right tools. This is not the time for an old sponge and a bucket of soapy water.
- Two buckets, each with a grit guard at the bottom.
- A brand-new, high-pile microfiber wash mitt. I keep one sealed in plastic just for jobs like this.
- Brand-new, premium drying towels. A waffle weave or a plush microfiber drying towel.
- A dedicated, pH-neutral car shampoo. Never dish soap. It strips any oils and is too harsh.
Wash in a cool, shaded spot. Direct sun on fresh paint during a wash is a recipe for instant water spots and accelerated drying, which leads to streaks.
Step 3: The Gentle Wash Technique, Step-by-Step
When washing a car after a paint job, your touch is everything. Pretend the paint is wet plaster.
- Pre-rinse the car thoroughly with a gentle stream from your hose. You want to loosen and rinse away loose grit.
- Fill your wash bucket with shampoo and water. Fill your rinse bucket with clean water.
- Soak your mitt in the soapy water. Start at the roof. Use almost no pressure. Let the weight of the mitt and the slickness of the soap do the cleaning.
- After each panel, rinse the mitt completely in the rinse bucket. Scrub it against the grit guard to release dirt.
- Re-soap the mitt and move to the next panel, working top to bottom.
For the final rinse, use the “flood rinse” method: remove the nozzle from your hose and let a sheet of water flow over the paint, which minimizes spotting by reducing droplets.
Step 4: Dry It Like It’s Glass
Water spots are your enemy. You must dry the car completely. The safest method is a forced-air dryer, like a Master Blaster. It’s touchless and helps prevent water spots on car paint.
If you’re using a towel, lay it flat on the paint and gently pat or glide. Do not scrub back and forth. Pick the towel up, reposition, and lay it down again. Check all door jambs, trunk seams, and mirror housings where water hides. Gently blot these areas dry.
Step 5: The First Layer of Protection
Can you wax your car after it’s painted? Not yet. Not on fresh paint. Can you ceramic coat a recently painted car? Absolutely not. Both will seal the surface before it’s done curing.
For this first wash, your only “protection” should be a pure, lubricating spray detailer. It adds a light gloss and helps if you need to gently remove any light dust before the 90-day cure is up.
Mark your calendar. True protection with a synthetic sealant, wax, or ceramic coating happens only after the full 90-day cure. That’s your final step.
Special Cases: Spot Repairs, Headlights, and Paint Correction
Washing After a Paint Chip or Spot Repair
A small paint chip repair or a blended panel cures much faster than a full respray. For a simple touch-up paint chip repair, wait 48 hours before getting it wet. For a blended spot repair, give it a week.
When you do wash, be gentle over that specific area. The goal for washing a car after paint correction on a spot is to clean without disturbing it. Do not use a clay bar or any abrasive polish on or around the repair for at least 30 days. The paint there is still hardening. This is part of the car paint cure time, when the finish is still setting. Plan your washes and maintenance accordingly to protect the repair.
Can I Wash My Car After Headlight Restoration?
This is a different process. When you sand and polish a headlight, you remove the factory UV coating. The plastic is now bare and will turn yellow again very fast.
You must apply a dedicated UV-blocking sealant or coating immediately after polishing, before any washing with soap. Soap will contaminate the clean plastic and the coating won’t bond. Once your headlight protectant has cured (usually 12-24 hours), then washing is perfectly safe.
Washing After Paint Correction (Not a Repaint)
This confuses people. Paint correction does not add new paint. It removes a tiny amount of clear coat to level out scratches. My 1995 Miata was a perfect example. After I cut the oxidation, the clear coat was exposed and clean.
You should wash the car after paint correction to remove any leftover polishing oils. The corrected paint is ready for protection immediately, making the post-wash phase the perfect time to apply your favorite sealant or coating. There’s no long cure time to wait for because you didn’t apply new paint, unlike when you restore dull car paint through traditional methods.
Long-Term Care: Keeping That Fresh Paint Perfect
You did the hard part. You waited. You performed that first gentle wash. Now, you move from that single, careful event to a lifetime of care. Think of it as shifting from a post-surgery checkup to a daily health habit. Your new paint needs this consistent, gentle attention to stay flawless.
The goal now is simple: keep every wash from being the one that puts the first swirl or scratch into that perfect surface. This is where most people get it wrong. They go back to old habits, using a single bucket and a rough sponge. I see it all the time. Don’t be that person.
Your Forever Wash Routine
This routine is non-negotiable for any car, but for fresh paint, it’s your bible. My Jet Black BMW taught me this the hard way. Every mistake shows up like a scratch in glass, especially when you’re not familiar with the car paint correction process.
Follow these steps every single time you wash.
- Pre-Rinse is Everything: Always blast loose dirt off first with a hose or pressure washer. Use a fan tip, not a pinpoint jet. You want to float the grit away, not grind it in.
- Foam It Up: Use a foam cannon or sprayer to apply a thick layer of pH-neutral car shampoo. Let it soak and slide the dirt off. This lubrication is your first defense against dragging particles across the paint.
- The Two-Bucket Method with Grit Guards: One bucket for your soapy wash solution. The other, filled with clean water, is for rinsing your wash mitt before you reload it with soap. The grit guards at the bottom trap dirt. This method saved my black BMW’s finish.
- Touch with Care: Use a clean, high-quality microfiber wash mitt. Start from the top (roof, windows) and work down to the dirtiest parts (lower doors, bumpers). Use light, straight-line motions. Never scrub in circles.
- Dry with Precision: Pat the surface dry with a clean, plush microfiber drying towel. Do not drag it. I use a dedicated drying towel for my Porsche and a different one for my muddy truck. Cross-contamination causes scratches.
If you remember one thing, let it be this: fresh paint is softer and more vulnerable than cured paint, so your technique must be flawless from day one. Beyond wash technique, keep your tools clean. Wash your microfiber towels with a dedicated detergent, no fabric softener. It feels like a lot of work. It is. But it works.
The Ultimate Shield: Sealants and Coatings
After about 90 days, when your paint is fully cured and hard, you can apply the ultimate protection. This is where you lock in that perfection for years. Make sure you follow the recommended wait time between coats to ensure a smooth, durable finish. Proper coat timing helps the final layer perform at its best.
A high-quality synthetic paint sealant will give you 6 to 12 months of strong protection. It beads water beautifully and makes washing easier. A ceramic coating is the next step up. It forms a harder, semi-permanent layer that can last several years. It resists chemicals, UV rays, and makes dirt release almost on its own.
My red Porsche 911, the Garage Queen, is the perfect example. After its paint fully cured, I applied a professional-grade ceramic coating. Now, brake dust from the alloys wipes off with less effort. Bug splatter on the front bumper doesn’t bake on. The deep red metallic paint pops with a wet look that lasts between washes. For a car you love, this investment is worth every penny and every minute of the application process.
You can apply a good sealant yourself in an afternoon. A ceramic coating often requires more precise preparation, like a full paint decontamination and correction. If you are not comfortable, have a professional do it. The result is a surface that fights swirls for you.
The Ethos of Patience
The wait for that first wash is painful. The discipline of a perfect forever wash routine is demanding. Applying a coating is a detailed job. I get it.
But when you run your hand over a finish that is still deep, glossy, and swirl-free years later, you will know it was all worth it. The reward is not just a car that looks new. It is a car that stays that way, reflecting your care every time the sun hits it. That is the real prize.
Final Thoughts on Protecting Fresh Paint
Your most important job is to wait for the paint to fully cure-often 30 to 90 days-before that first wash. I treat my cars, like the black BMW, with this same patience because a hardened finish resists scratches and stains far better. When the time comes to wash, I focus on removing stains and contaminants from the paint to protect that cured surface. Clean, deliberate care makes future stain removal easier and safer for the finish.
Ignore this timeline, and you risk washing soft, vulnerable paint, leading to permanent water spots, swirl marks, or a dull, cloudy finish.
Research and Related Sources
- Do Car Washes Damage New Paint Jobs? | Maaco
- How Long Should You Wait Before Washing Your Car After a New Paint Job? | Soapy Joe’s Car Wash
- How soon can I wash and wax my car after a new paint job?
- r/AutoDetailing on Reddit: is it really necessary to wait 90 days before i can take my car through a car wash after body work?
- Washing A Car After A Paint Job | Customer Advice | JTAPE
Max Gunther
Max is an automotive enthusiast having worked as a car mechanical and in interior detailing service for over 25 years. He is very experienced in giving your old car, a new fresh vibe. He has detailed many cars and removed very tough smells and stains from all kinds of cars and models, always ensuring that his work and advice helps his customers. He brings his first hand experience to his blog AutoDetailPedia, to help readers breath new life into their car interiors.
