How Can I Restore Shine to Dull Car Paint and Make It Look New Again?
You see that hazy, lifeless layer on your paint every time you walk to the driveway. I remember staring at the same dull film on my jet black BMW, the swirl magnet, before bringing back its deep gloss.
This article walks you through the process, covering identifying the root cause of the dullness, performing a safe decontamination wash, correcting the paint with polish, and protecting the new shine with a sealant or wax.
Without proper correction, you risk locking scratches and oxidation under a layer of wax, permanently dulling the clear coat.
What Steals Your Paint’s Shine? The Usual Suspects
Your paint doesn’t just wake up one day looking tired. Specific, tangible things happen to it. Knowing the enemies is half the battle.
Oxidation: The Chalky Killer
Think of a red plastic kids’ toy left in the sun for years. It fades to a dull pink. That’s oxidation. Your car’s clear coat does the same thing. UV rays and oxygen break down the protective layer, turning it chalky and hazy. Light can’t reflect cleanly off a fuzzy surface. My 1995 Mazda Miata was a perfect example. When I got it, the classic red single-stage paint wasn’t red. It was a flat, pinkish grey. It felt like sandpaper. Oxidation is your paint’s clear coat literally dying, and it steals deep, reflective shine first.
Swirl Marks & Fine Scratches
Your paint should be a smooth mirror. Now imagine millions of tiny ditches, all swirling in circles, scratched into that mirror. That’s what improper washing creates. Each scratch acts like a prism, scattering light in every direction instead of reflecting it back to your eye. This is why my black BMW looks stunning in the shade but under the sun looks like a holographic spider web. These microscopic defects don’t change the paint’s color, they just ruin its ability to reflect light clearly, creating a dull, lackluster finish.
Bonded Contamination: The Invisible Grit
Run your hand over a clean-looking car roof. Does it feel like smooth glass, or does it have a gritty, sandpaper texture? That grit is bonded contamination. It’s microscopic particles of brake dust (which is metallic), industrial fallout, and tree sap that have welded themselves to your paint. You can’t wash it off. This layer creates a rough surface that blocks shine and will destroy your polish pad if you try to correct over it. The wheels on my Porsche are a constant lesson in bonded brake dust.
Poor Maintenance Habits
Using dish soap strips every bit of wax and dries out paint. Wiping a dusty car with a dry towel is like using sandpaper. Never applying a protective sealant leaves the clear coat naked against the elements. I see it all the time. Someone uses an old bath towel and some harsh cleaner, wondering why their paint looks faded. Good paint starts with gentle products and clean, soft tools, every single time.
UV Damage & Clear Coat Failure
Sunlight is the ultimate fade agent. It bleaches color and weakens the clear coat’s molecular structure. Over years, this leads to clear coat failure. You’ll see it as milky, peeling patches, often on horizontal surfaces like the roof and hood. This is advanced oxidation. Once it fails, you can’t polish it back. It needs a repaint. Protecting your paint with a quality sealant or wax is like putting sunscreen on it. If fading has progressed, repair sun-damaged paint with options like color restoration or a full repaint. Understanding the extent of the damage helps you choose the right repair path.
The Golden Rule: Your Paint Restoration Order of Operations
You cannot cheat this process. Skipping a step will ruin your results, or worse, ruin your paint. Follow this sequence like a recipe.
- Wheels, Tires, and Wheel Wells First
Always start here. Wheel cleaners and brake dust are the dirtiest part of the job. You don’t want to splash that grime onto a clean body later. I use a dedicated iron remover spray on my wheels, let it dwell, and agitate with soft brushes. Rinse thoroughly. Doing this first lets the wheel cleaner run off without touching the painted surfaces.
- Thorough Pre-Wash & Contact Wash
You must remove loose dirt before you touch the paint. I foam the entire car, from top to bottom, using a foam cannon. Let the soap soak and slide the dirt off. Rinse. Then, using the two-bucket method (one with soap, one with clean rinse water) and a plush microfiber mitt, I wash the car panel by panel. Start high, finish low. This step is about safely removing surface dirt without scratching, setting the stage for the real work.
- Chemical Decontamination (Iron Remover)
After washing, spray an iron remover product over the entire painted surface, glass, and wheels. It will turn purple as it reacts with embedded metallic particles. This dissolves the invisible brake dust and rail dust that washing can’t touch. Let it work for 3-5 minutes, then rinse the whole car again. This is a non-contact, critical step. You’ll see and feel the difference.
- Mechanical Decontamination (Clay Bar or Mitt)
Now for the “bag test.” Feel the paint. If it’s not smooth as glass, you need to clay. Using a dedicated lubricant spray and a fine-grade clay bar or synthetic clay mitt, gently glide it over the paint. You’ll hear and feel it grabbing the bonded contaminants. Claying makes the paint perfectly smooth, ensuring your polisher works on the paint, not on a layer of grit. Wipe each panel dry with a clean microfiber as you go.
- Paint Correction (Compound and/or Polish)
This is where you restore the shine. Correction removes the defects we talked about: oxidation, swirls, light scratches. You’ll need a dual-action polisher, pads, and the right products. For heavy oxidation (like the Miata) or deep scratches, you start with a cutting compound and a firmer pad. To remove swirls (like on the BMW), you use a finer polish and a soft pad. Work in small sections. This step requires patience. Test on a small area first to find the least aggressive method that works.
- Final Wipe Down with Isopropyl Alcohol
After polishing, your paint is perfectly clean and smooth, but it’s covered in polishing oils. These oils will hide defects and prevent your protectant from bonding. Mix isopropyl alcohol with distilled water (a 10-20% solution is safe). Wipe down the entire car with this mix using a clean microfiber. This sterile wipe guarantees your sealant bonds directly to the naked, perfect paint for maximum durability.
- Apply Your Protective Layer
Now you protect your hard work. On a completely clean, cool surface in the shade, apply your chosen product. For long-term protection (6-12 months), use a synthetic sealant or a consumer-grade ceramic coating. For a deep, warm glow (1-3 months), a natural carnauba wax is beautiful. I often use a sealant on my daily drivers for durability and top it with a spray wax for extra depth. Apply thinly and evenly. This layer is what keeps the shine and fights off the elements—especially if you know how to layer them properly.
Phase 1: The Deep Clean – Stripping the Dullness Away
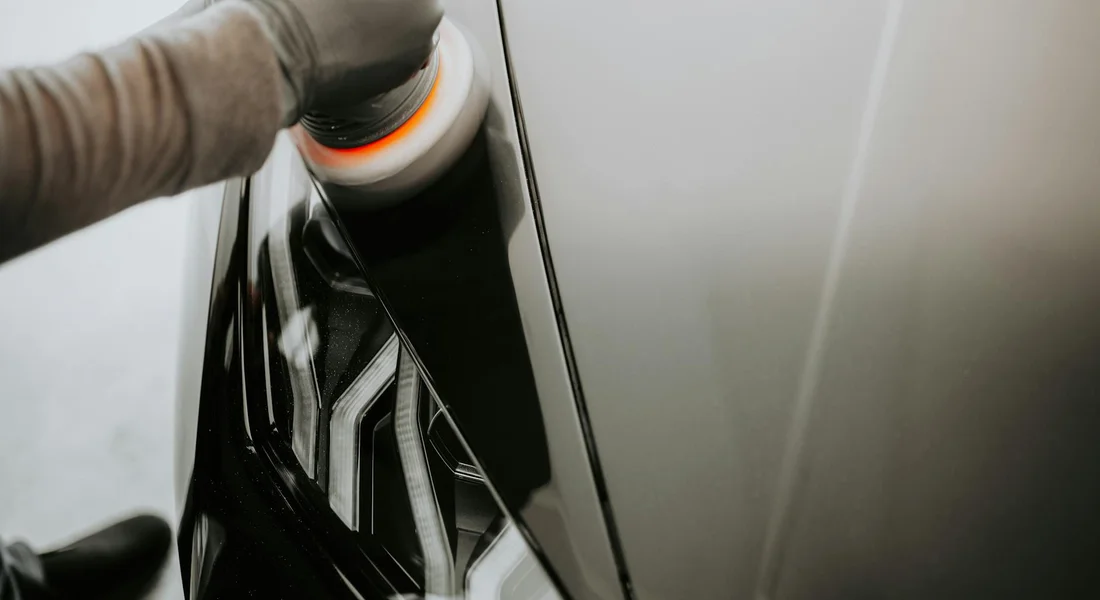
You cannot put a brilliant shine on top of a dirty canvas. Every speck of grit on your paint is a tiny piece of sandpaper waiting to be rubbed in by your wash mitt. My black BMW taught me this the hard way. The deep clean is about removing the dirt you see and the contaminants you don’t, without adding new scratches.
The Foundation: Two-Bucket Wash
This is not a suggestion. It is the rule for anyone who cares about their paint. You need two five-gallon buckets. Fill one with clean water and your chosen shampoo. Fill the other with just clean water.
- Wash a section of the car with your mitt from the soap bucket.
- Before reloading the mitt with soap, rinse it thoroughly in the rinse bucket. Swirl it against the bottom.
- This drags the dirt you just picked up off the mitt and into the rinse water.
The grit guard is a plastic grid that sits at the bottom of your bucket, and its job is to trap the dirt you rinse off so your mitt can’t pick it back up. Without it, you’re just making dirty soup and putting your mitt right back in. Use it in both buckets for the best defense.
Choosing Your Shampoo
Do not use dish soap or all-purpose cleaner. These are too harsh. They strip every bit of protection from your paint, leaving it dry and vulnerable. You want a dedicated car shampoo. Look for the words “pH-balanced” or “wash and wax.” These clean effectively but leave behind a light lubricating layer that helps your drying towel glide without scratching.
Drying Without Disaster
Water left to dry on hot paint leaves spots. Hard water spots. I remove them for a living, and you don’t want to start. First, use the “sheeting method.” Remove the nozzle from your hose. Starting at the roof, pour a steady stream of water. It will pull most of the water off the panel in sheets, leaving only tiny beads.
Now, take a large, clean, plush microfiber drying towel-I keep a dedicated one just for this-and gently lay it on the wet surface. Pull it across, don’t scrub. Flip to a dry section often. A good towel will absorb the beads without you having to apply pressure, which is the safest way to dry.
The Decontamination Double Play: Chemical & Mechanical
After washing, your paint might feel smooth to your bare hand. It is lying. Invisible pollutants are bonded to the clear coat. You need two steps to get them off.
Step 1: Chemical (Iron Remover)
Brake dust is mostly ferrous metal. It embeds itself in your paint and slowly rusts, creating tiny orange specks you can’t wash off. An iron remover is a chemical spray that dissolves these particles. Spray it on cool, dry panels after your wash. It will start to turn purple or red as it reacts with the iron. After a few minutes, rinse it thoroughly with a strong stream of water. You will see a purple waterfall-that’s all the contamination leaving your paint. Always wear gloves and do this in a shaded, well-ventilated area.
Step 2: Mechanical (Claying)
Now for bonded contaminants like industrial fallout, tree sap, and overspray. A clay bar is a malleable putty that shears these particles off as you glide it over the surface. You must use a dedicated clay lubricant or a very soapy water mixture. Never clay a dry surface, especially when you’re unsure about the technique. Understanding the proper science and use of clay bars is crucial to avoid any damage to your paint.
- Spray a 2×2 foot area generously with lubricant.
- Flatten your clay bar in your palm and glide it back and forth with light pressure.
- You will feel it grab and smooth out. Keep the surface wet.
- Frequently knead the clay to expose a fresh, clean surface. If you drop it, throw it away.
The goal is a “glass smooth” feel. If you hear squeaking, you need more lubricant.
Clay Bar vs. Mitt vs. Towel
You have options beyond the traditional bar.
- Clay Bar (Traditional): Best for severe contamination. You can knead it clean. It is messy, can be dropped, and is single-use if contaminated.
- Clay Mitt/Towel (Synthetic): These are rubberized mesh covers you use with lubricant. They are faster and easier for large vehicles like my F-150. Rinse them clean during use. They last for many cars but can eventually wear out and are less precise on tough spots.
For a first-timer on a moderately dirty car, a synthetic clay towel is the most forgiving and efficient tool you can choose.
Detailer’s Pro-Tip: The Bag Test
Your fingertips are not sensitive enough. After you clay and dry a panel, put your hand inside a thin, disposable plastic sandwich bag. Gently feel the paint with the backs of your fingers. The plastic film eliminates your skin’s texture and amplifies every single tiny bump on the paint. If it feels like smooth glass, you’re done. If it still feels like fine sandpaper, you need to clay that area again with more lubricant. This test never fails.
Phase 2: The Correction – Erasing Scratches to Bring Back the Mirror
You have a clean canvas now. The deep grime is gone. But that faded, scratched look remains. This is where paint correction begins. Think of your car’s clear coat as a bumpy, scratched ice rink. Light hits the bumps and scatters, making the paint look dull. Correction is the process of carefully leveling that surface until it is flat and smooth.
You are not removing the entire scratch, just shaving down the high edges around it until the surface is even enough to reflect light like a mirror again. This is delicate work. You use specialized abrasives, suspended in liquids called compounds and polishes, to do the shaving.
- Cutting Compound: This is your aggressive tool. It contains larger abrasives designed to remove deeper defects like heavy oxidation, clear coat scratches, and some swirl marks. It will leave a hazy finish because its job is to cut, not to shine.
- Finishing Polish: This is your refining tool. It uses much finer abrasives to remove the hazing left by the compound and to refine the surface to a high gloss. It brings out the final clarity and depth of the paint.
For my black BMW, I always start with a test spot using a mild polish. If that doesn’t work, I move to a compound. Starting too aggressive is a common mistake.
By Hand vs. Machine: Choosing Your Weapon
Can you do this by hand? For a tiny spot of very mild oxidation, maybe. For the spider-webbing of swirls covering your hood or door, no. Your arm will give out long before you make meaningful progress. Hand polishing lacks the consistent speed and pressure needed to properly break down abrasives.
For real correction, a machine is non-negotiable, and for a DIYer, a Dual Action (DA) polisher is the only safe choice. Unlike a rotary polisher that spins in one direction (and can burn through paint in a heartbeat), a DA polisher both spins and oscillates in a random orbit. This motion removes material safely and dramatically reduces the risk of causing heat damage. It’s forgiving, and that’s what you need. In the da polisher vs rotary polisher comparison, the DA’s random orbit keeps heat buildup under control. For most DIYers, that safety margin is the deciding factor.
Gathering the right supplies for machine polishing is key:
- A 5 or 6-inch DA polisher.
- A flexible backing plate that matches your polisher’s thread.
- Foam Pads: Start with two types-a cutting pad (usually orange or yellow) for use with compound, and a polishing pad (usually white or blue) for use with polish. A soft finishing pad (usually black) is for applying sealants later.
- Plenty of clean, soft microfiber towels for wiping off residue. Use a dedicated towel for compound removal and a different, cleaner one for polish removal.
- Eye protection and a dust mask are smart when dry buffing compound dust.
Detailer’s Pro-Tip: The Cross-Hatch Pattern
The technique matters as much as the tool. The goal is even, complete coverage over every square inch. I work on one 2ft by 2ft section at a time.
Apply a few small dots of product to your pad, smear it onto the paint to start, and then turn the machine on. Use a slow, steady speed setting. I use a method called the cross-hatch pattern.
Make three or four slow, overlapping passes moving the polisher up and down, then three or four more passes moving it left to right. This ensures you don’t miss any spots. Let the weight of the machine and the action of the pad do the work. Pushing down hard just creates more heat and risks pad failure. You should hear a slight, smooth buffing sound, not a loud straining whine.
How Do I Bring Dull Car Paint Back to Life Without a Machine?
If you are not ready for a machine polisher, your best option is a product called a “cleaner wax” or an “all-in-one polish.” These are hybrid products that contain very mild abrasives for cleaning and oils or polymers for protection in one step. They are designed for hand application.
They work well on paint that is simply faded or mildly oxidized, like an old single-stage red Miata that’s turned pink. They will not remove scratches or swirl marks. The result will be a brighter, richer looking paint with some protection, but it won’t have the deep, wet gloss of a corrected surface.
Apply it with a soft foam applicator in small, circular motions, one panel at a time. Buff it off immediately with a clean microfiber towel before it fully dries. It’s a great maintenance step, but it’s a band-aid, not a cure.
Phase 3: The Protection – Locking In That New Car Shine
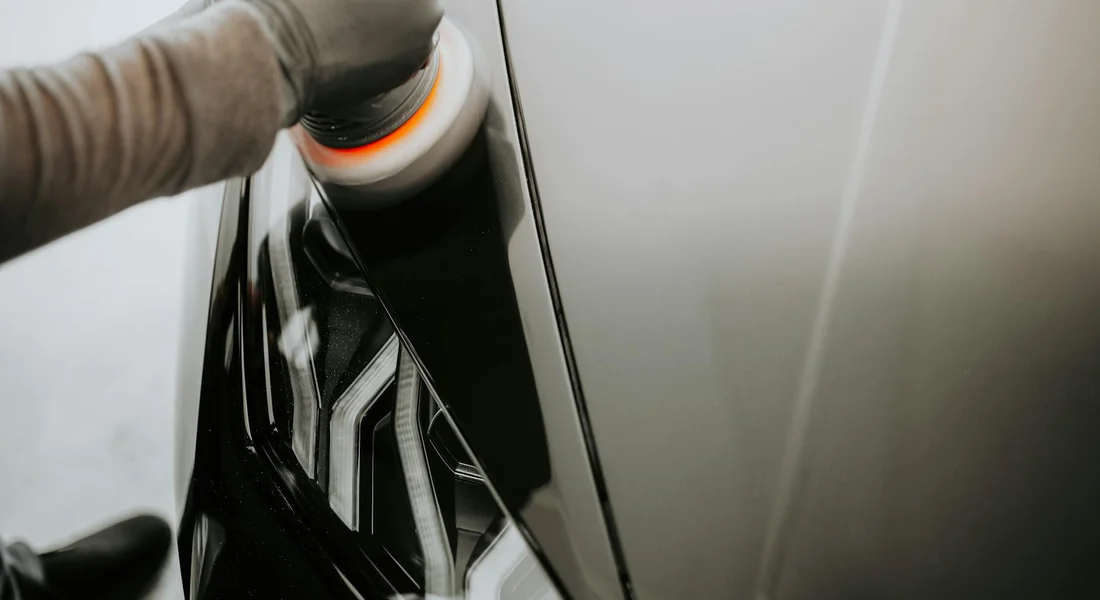
You just spent hours leveling your paint and bringing back that deep, liquid gloss. It looks fantastic. But that fresh, smooth surface is now naked and vulnerable. All that work is pointless if you do not seal it.
Leaving corrected paint unprotected is like washing a dish and then setting it directly in the dirt. Environmental contaminants, UV rays, and even light dust can begin etching and marring the surface almost immediately. Protection is not an optional last step. It is the final, mandatory act that makes your effort last.
Before any protectant touches the paint, you must ensure it bonds to the clear coat, not to the oils left behind by your polish. Those oils make the paint look wet and deep, but they prevent your wax or sealant from sticking properly.
You fix this with a surface prep, or panel wipe.
- Mix a solution of 10-15% isopropyl alcohol (the 70% or 91% kind from the pharmacy) with distilled water in a spray bottle.
- Mist it onto one panel at a time.
- Wipe it off immediately with a clean, soft microfiber towel, using straight-line strokes.
- The surface will lose its wet look and feel perfectly clean and squeaky to the touch. That is what you want.
I do this on every car, including my black BMW. It is the difference between a protectant that lasts one month and one that lasts six.
Choosing Your Shield: Wax, Sealant, or Coating?
This choice is about balancing look, durability, and effort. Think of it as choosing an outfit for your car. You need the right one for the occasion.
Carnauba wax gives a warm, deep, soulful gloss that is hard to replicate, especially on dark colors, but it typically only lasts 1-3 months. It is the classic choice. The warmth comes from its natural origins. On my 1995 Miata with its single-stage red paint, a good carnauba paste wax makes the color look rich and alive, like ripe fruit. It feels like a ritual. But it melts in the summer sun and washes away faster. You reapply it often. It is a labor of love, especially when you understand the properties and application of carnauba wax.
Synthetic sealants (polymer-based) offer a brighter, sharper, and sometimes more reflective gloss, with durability lasting 4-6 months or more. They are tougher against chemicals and bird droppings. On my Tesla Model 3, with its stark white paint, a synthetic sealant makes the finish look brilliantly crisp and clinical, like new porcelain. It is less about warmth and more about a flawless, high-tech shine. This is what I use on my family Honda Odyssey, too. I need durability more than poetry when dealing with juice box spills and parking lot doors.
For most people detailing at home, spray ceramic sealants are the perfect middle ground. They are hybrids. These products use silicon dioxide (SiO2) to create a slick, hydrophobic layer that is far more durable than a traditional wax and almost as easy to apply. They come in spray bottles. You apply them to a clean, dry car, wipe them on, and buff them off. They bead water fiercely for 6-12 months. I use them on my Ford F-150 for quick touch-ups after a wash. They are incredibly user-friendly.
True ceramic coatings are a different league. They are professional-grade, multi-year commitments that require perfect application. For a DIY paint restoration guide, I recommend mastering spray ceramics first, especially when understanding the differences between professional and DIY options.
No matter what you choose, application rules are universal.
- Apply thin, even layers. If you can see a thick, hazy film, you used too much. A little goes a very long way.
- Work on one panel at a time (the hood, a door, the roof). Do not try to do the whole car at once.
- Follow the product’s cure time. Some need to haze fully; others are “wipe on, walk away” for a few minutes before buffing.
- Use a clean, premium microfiber towel to buff off the residue. Fold it frequently to a fresh side. The goal is a clear, high-goss finish with no streaking.
- Let the car sit for 12-24 hours if possible before getting it wet. This lets the protection fully cross-link and harden.
On my Porsche, after a full correction, I use a dedicated synthetic sealant. I apply it in my garage under good light, inch by inch. The result is a mirror that repels water and brake dust for months. That is the reward.
Color & Clear Coat: Does Your Paint Color Change the Game?
The steps to restore shine are the same for every car. Wash. Decontaminate. Polish. Protect. But the visibility of your results, and the flaws you start with, change dramatically with color. A black car and a white car need the same work, but they tell very different stories.
Dark Colors (Black, Deep Blue): The Swirl Magnets
My 2016 BMW, the Jet Black “Swirl Magnet,” is the perfect teacher. On black paint, every imperfection is a headline. A minor scratch looks like a canyon. A hazy finish from an aggressive polish looks like a fog has settled on the hood.
For these colors, your prep must be flawless. A single grain of sand left on your wash mitt will etch a new swirl. A dirty clay bar will mar the surface. Perfect decontamination is not a suggestion for dark paint; it is the absolute foundation for everything that follows.
The final polishing step is where you win or lose. You must use an ultra-fine finishing polish with a soft foam pad to erase any micromarring from earlier steps. Your goal is a finish so clear it looks like you can reach into it. Any leftover haze from an abrasive compound will scream under the sun. On my BMW, I spend 80% of my correction time on this final refining pass.
Light Colors (White, Silver): The Contamination Hiders
My white Tesla Model 3 tells the opposite story. Swirls and light scratches are incredibly difficult to see on bright white or metallic silver paint. You might think the paint is perfect. Then you run your hand over it.
It feels like sandpaper. That is bonded contamination-industrial fallout, rail dust, hardened sap. On light paint, this grime is the star villain. It creates a rough, dull texture and blocks light reflection. For white and silver cars, decontamination is the single most transformative step you can take.
You will see a massive jump in gloss simply from a thorough iron remover spray and a meticulous clay bar treatment. Polishing might not even be necessary if the clear coat is otherwise sound. Your victory on a white car is a surface that feels like slick glass, free of those tiny, gritty specks that steal its brightness. For white car paint, a wax polish helps lock in that glossy finish and adds a protective layer. This final step keeps the shine resilient through future washes and sun.
Single-Stage vs. Clear Coat: The Old-Timer’s Challenge
Modern cars have a base color layer topped with a clear, protective coat. You polish the clear coat. My 1995 Miata, the Classic Red restoration project, has single-stage paint. There is no clear coat. The colored pigment goes all the way to the surface.
When it oxidizes, it turns pink and chalky. Restoring it is a different game. As you start to polish, you will see red paint transfer onto your buffing pad. This is normal and a sure sign you’re working on single-stage. Don’t panic. Your goal with single-stage paint is to gently remove the dead, oxidized layer to reveal the fresh, vibrant color pigment underneath.
You use less aggressive products and work slowly, checking the pad often. It is about restoring the pigment itself, not just enhancing clarity. The reward is watching faded, pinkish paint become a deep, glossy red again, a transformation that feels like true revival.
Should You Do It Yourself or Hire a Pro?
This is the first and most important question. The right choice depends on your car’s condition, your budget, and your honest willingness to spend a weekend learning.
I own both the 2016 BMW 3 Series, the “Swirl Magnet,” and the 1995 Mazda Miata restoration project. I corrected the BMW myself. It was a brutal two-day lesson. For the Miata’s single-stage paint, I hired a friend who specializes in classics. Knowing when to tackle a job and when to call for backup is a skill in itself.
The DIY Path: Rewards and Realities
There is a deep, quiet satisfaction in transforming your own car. You learn its curves and flaws. You save money on labor. This path is best for cars with moderate dullness, light swirls, and overall haze.
The real reward is looking at a gleaming hood and knowing your own hands put that shine there.
The Benefits
- Cost Savings: You pay for supplies, not for many hours of skilled labor.
- Personal Satisfaction: The pride of accomplishment is tangible.
- A Learned Skill: Once you learn to polish correctly, you can maintain that perfection for years.
The Challenges
You must be honest with yourself here. This is not a quick wash.
- Time Investment: A proper wash, decontamination, polish, and sealant application is a full weekend project for a first-timer. My BMW took 16 hours.
- Learning Curve: Using a polisher feels awkward at first. You must learn pad selection, polish abrasiveness, and machine speed.
- Upfront Cost: A good dual-action polisher, pads, polishes, and quality microfiber towels will cost several hundred dollars to start.
- The Hologram Risk: This is the big one. Poor technique with a rotary polisher, or using the wrong pad/polish combo with a DA, can leave swirling, haze-like marks called holograms. They are only visible in direct sun and are a telltale sign of amateur work. My black BMW was covered in them from a previous owner’s attempt, and fixing them was harder than fixing the original scratches.
If your paint feels rough but looks uniformly dull, not deeply scratched, DIY is a great adventure. If you see deep scratches that catch your fingernail, or areas where the color is gone and it looks milky (clear coat failure), read the next section.
The Pro Detailer Path: When to Write the Check
Hiring a professional is not a failure. It is often the smartest choice. Think of them as a surgeon for your paint.
A professional brings industrial tools, curated chemicals, and the muscle memory from correcting thousands of cars. They see defects you will miss.
The Benefits
- Superior, Guaranteed Results: They can achieve a level of clarity and depth that is difficult for a novice. The work should be guaranteed.
- Your Time is Saved: They handle the intense labor while you live your life.
- Diagnosis and Expertise: A pro can instantly tell you if a scratch can be removed or if it needs touch-up paint. They know how to handle soft Tesla clear coat, hard German paint, and brittle single-stage paint on classics.
When You Need a Pro
- Heavy defect correction: deep swirls, significant oxidation (that chalky, faded look).
- Deep scratches that catch your fingernail.
- Any sign of clear coat failure: peeling, milky white sections, severe fading where the color is gone.
- Simply wanting the absolute best result without the personal labor.
Understanding the Cost: How much does it cost to restore dull car paint?
Detailing is labor. The price reflects hours of focused, skilled work. It is not cheap, and cheap work often costs more to fix later. When considering those prices, it’s essential to understand what you’ll be paying for in car detailing.
The main cost factors are:
- Car Size: A pickup truck or large SUV has far more surface area than a coupe.
- Paint Condition: A moderately dull car costs less than one with severe defects.
- Level of Correction: This is the biggest driver of price.
Here is a realistic breakdown of what to expect:
- 1-Step Enhancement Polish: This is for overall dullness and light swirls. It cleans up about 70-80% of defects and restores strong gloss. It typically does not remove deeper scratches. For a midsize sedan, expect $400 to $700. This is a great maintenance service for a well-kept car that’s lost its pop.
- Multi-Step Paint Correction: This is the full restoration. It involves multiple polishing steps with different compounds and pads to remove the deepest defects and achieve a near-flawless finish. For a midsize sedan with heavy swirls and scratches, expect $800 to $1,500+. For a large SUV or truck in poor condition, prices can exceed $2,000.
Always get an in-person evaluation. A trustworthy detailer will walk the car with you under good light, point out the defects, and explain what their process can achieve. You are not just paying for shine. You are paying for their trained eye, their steady hand, and the years it took to develop both.
Keeping the Shine: Your New Wash Ritual
You just put in the work. The paint is deep, reflective, and feels like glass. Now what? I learned this the hard way with my black BMW. I spent a full weekend correcting the swirls. A month later, after a few hasty washes with a single bucket and an old towel, the fine scratches were right back. Your restoration work is an investment, and proper maintenance is the only insurance policy that keeps it looking new.
The Safe Wash Method: This Isn’t Optional
Forget everything you think you know about washing a car. Your goal is to clean the paint without grinding dirt into it. This is my non-negotiable process for every vehicle, from the dusty F-150 to the garage-kept Porsche. To do that safely, I wash the exterior with gentle, proper technique to protect the paint. This approach helps keep the finish pristine while avoiding swirls and scratches.
- Pre-Rinse First, Always. Blast the entire car with a strong stream of water. This removes loose grit and sand so you’re not rubbing it around later. Focus on wheel wells and lower panels where debris collects.
- The Two-Bucket System with Grit Guards. You need two identical buckets. Fill one with clean rinse water. Fill the other with your chosen car shampoo mixed with water. Drop a grit guard into the bottom of each bucket. This plastic grid traps dirt at the bottom so your wash mitt can’t pick it back up.
- Use a Clean, High-Quality Wash Mitt. I prefer a soft microfiber or lambswool mitt. Start washing from the top (roof, windows, hood) and work your way down to the dirtiest lower panels. After you wash a section, rinse the mitt thoroughly in the rinse bucket before dipping it back into the soap bucket. This keeps your soap water clean.
- Dry It Properly. Letting water air-dry is a guarantee of water spots. Use a large, clean, plush drying towel. Gently glide it over the surface. Don’t scrub. For my Tesla or the Porsche, I use a filtered air blower to push water out of cracks and off flat surfaces first, minimizing towel contact.
Your Secret Weapon: The Drying Aid
This simple step changes everything. As you do your final drying pass with the towel, spritz a light mist of a dedicated detail spray or diluted rinseless wash solution onto the panel. This adds a layer of lubricant between the towel and paint for ultimate scratch safety, and it leaves behind a thin layer of protection that boosts gloss and fights water spots. I use CarPro Elixir on my cars for this. It’s a tiny habit with a massive payoff in shine and safety.
The Biannual Decontamination Wash
Over months, invisible contaminants bond to your paint: industrial fallout (iron particles), tree sap mist, and embedded grime. You’ll feel it as a rough, sandy texture. This requires a targeted removal every 6 to 12 months.
- After your normal wash, spray an iron remover (like CarPro IronX) over the paint. It will turn purple as it reacts with the metals. Rinse it off completely.
- Then, use a detailing clay bar or synthetic clay mitt. Lubricate the surface generously with a quick detailer spray. Gently glide the clay back and forth. You will feel it grab and then glide smoothly as it pulls the contaminants out. This process restores that perfectly smooth, glassy feel that new paint has, and it is critical for your sealants and waxes to bond properly.
Fight the Elements Between Washes
The sun and weather are your shine’s biggest enemies. Ultraviolet rays break down coatings and fade paint. Bird droppings and tree sap are acidic and will etch into your clear coat if left alone.
If you have a garage, use it. It is the single best thing you can do. If you must park outside, consider a high-quality, soft-lined car cover. A word of warning: never cover a dirty car. The cover will grind the dirt into the paint. A clean car in a garage or under a good cover will look showroom-new years longer than one left to bake in the sun. I keep a bottle of quick detailer and a microfiber towel in my garage for the Honda Odyssey; when I see a fresh bird dropping, I spray and wipe it off immediately. It takes ten seconds and saves the paint.
Your Path to a Permanent Shine
The single most important step is understanding your paint’s true condition before you touch it. Spend time in good light diagnosing the swirls, oxidation, and contamination; this diagnosis dictates every product and tool you choose, saving you time and preventing damage. I learned this the hard way on my own black BMW, and it changed my entire approach.
If you skip this assessment and just start polishing, you might add holograms or buffer trails that are worse than the dull finish you started with.
Industry References
- How to Restore Your Car’s Paint to a Perfect Shine?
- Restore Shine to Single-Stage Car Paint – Malco Automotive
- 8 Causes of Fading Car Paint & How to Fix Them the Right Way
- Restoring Car Paint, The Way Professional Detailers Do | Turtle Wax
- How To Fix Faded Car Paint: Guide to Auto Paint Restoring | UTI
Max Gunther
Max is an automotive enthusiast having worked as a car mechanical and in interior detailing service for over 25 years. He is very experienced in giving your old car, a new fresh vibe. He has detailed many cars and removed very tough smells and stains from all kinds of cars and models, always ensuring that his work and advice helps his customers. He brings his first hand experience to his blog AutoDetailPedia, to help readers breath new life into their car interiors.