Can You Fix Sun-Faded Car Paint? A Real Detailer’s Guide
Watching your car’s color turn pale and chalky under the sun feels like a slow defeat. I know that sinking feeling, whether I’m looking at my daily driver or a prized classic.
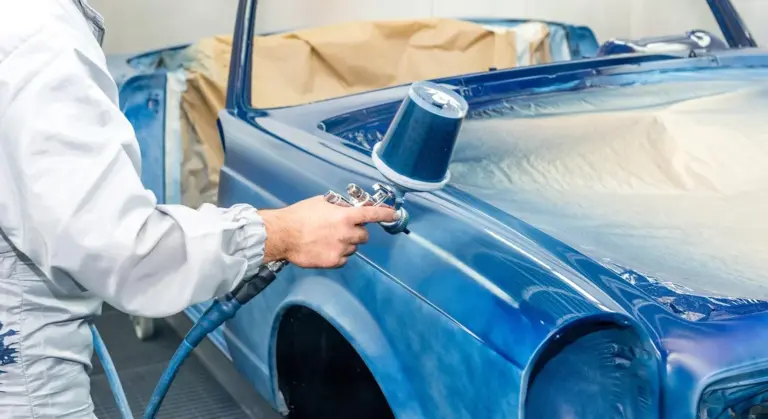
This article will show you the precise causes of UV damage, how to prevent fading before it starts, and the hands-on techniques to restore your paint’s color and gloss.
Leave it unchecked, and the clear coat will fail, leaving your paint porous, dull, and unprotected from the elements.
What Exactly Does the Sun Do to Car Paint?
Think of your car’s paint like your own skin. The sun has two weapons: light and heat. The light part, ultraviolet radiation, is the real enemy. It hits the paint thousands of times a minute, breaking down the chemical binders that hold everything together.
This breakdown is called oxidation. The surface turns dull and chalky, like faded plastic lawn furniture. You can feel it with your hand. It’s rough, not smooth. On a white car, it looks flat and grey. On my red Miata, it looked pink. Oxidation is the paint’s structure failing, and UV light is the primary cause.
The heat is the accomplice. A hot surface cooks everything on it. Bird droppings, tree sap, and even air pollution bake into the paint faster. What might wipe off a cool car can stain or etch a hot panel in an hour. Heat speeds up every bad chemical reaction happening on your hood and roof.
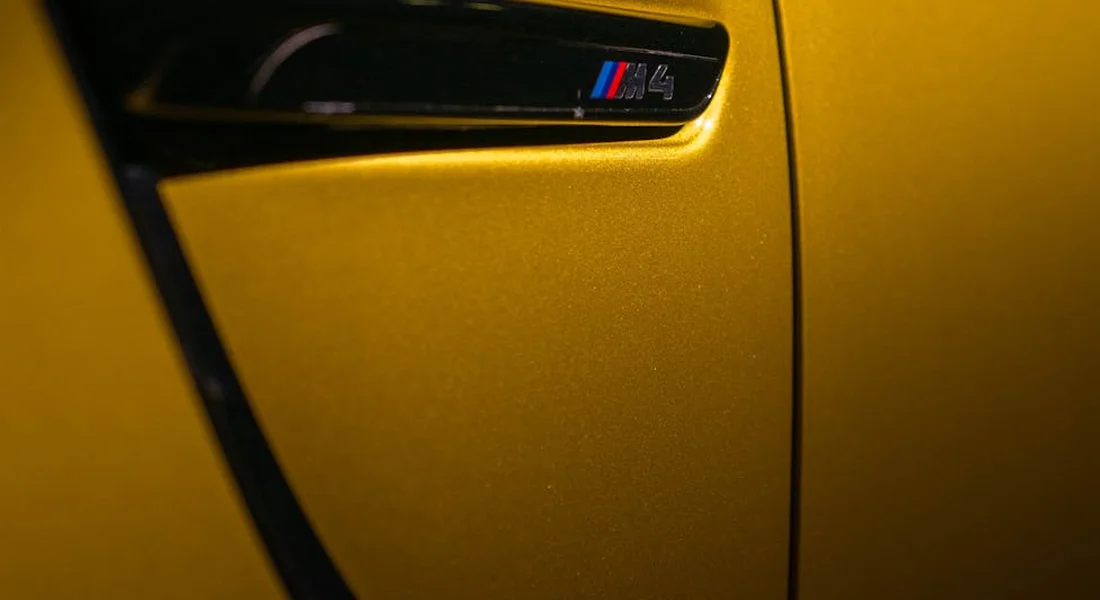
Fading is often confused with oxidation, but they’re different. True fading is the actual pigment losing its color. You see it on older reds that turn orange, or deep blues that look pale. It’s the dye being destroyed by UV light. A clear coat can look shiny but the color underneath can still be faded.
Can the sun damage car paint? Absolutely. It’s the single biggest environmental threat to your car’s finish. The science is simple: UV radiation breaks chemical bonds, and heat accelerates decay. Without protection, paint is just slowly burning.
Damage looks different on modern cars versus classics. My BMW and Tesla have a clear coat system. The color is buried under a clear, protective layer. Sun damage usually attacks that top layer first, making it hazy and dull. The repair involves polishing that clear coat. My 1995 Miata has single-stage paint. There’s no clear coat. The color pigment is in the entire paint layer. When it oxidizes, you’re seeing the actual color pigment fail. You restore it by carefully polishing and nourishing that single layer of paint back to life.
Common Mistakes That Make Sun Damage Worse
When you see your car looking faded, the urge is to fix it immediately. That haste can cause permanent harm. I’ve made some of these errors myself early on.
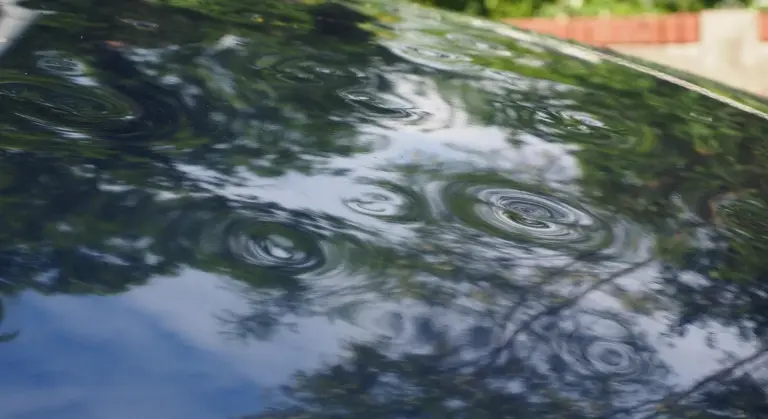
Washing a hot car in direct sunlight is a top mistake. Water droplets act like tiny magnifying glasses on the compromised paint. They focus the sun’s heat and evaporate in seconds, leaving mineral deposits etched right into the surface. These aren’t simple water spots you can wipe away; they are literal etchings in your clear coat that require polishing to remove. Always wash in the shade on a cool surface. If you’re dealing with stubborn mineral deposits, you can learn how to remove water spots from car paint.
Reaching for dish soap or a harsh cleaner seems logical. You want to strip the grime. But these products also strip the last traces of protective wax or sealant. You are left with bare, oxidized paint that has zero defense against the next day’s sun. It’s like washing sunburned skin with rubbing alcohol.
Frustration leads to bad tools. I’ve seen people use stiff brushes, Scotch-Brite pads, or abrasive powder cleaners to scrub the chalkiness away. This doesn’t restore the paint. It scratches it deeply. You are trading a dull, oxidized finish for a dull, swirled, and scratched finish. The damage goes from surface level to deep in the paint.
Seeking shade under a tree feels smart. You avoid direct UV rays. But you trade that threat for others. Tree sap is acidic and sticky. It bonds to paint and is a nightmare to remove. Bird droppings from perching birds are concentrated acid bombs. Both will etch into your paint much faster on a hot day, often causing damage more severe than the fading you were trying to prevent. A car cover or a dedicated shade structure is a much safer bet.
Your First Defense: How to Prevent Paint Fading
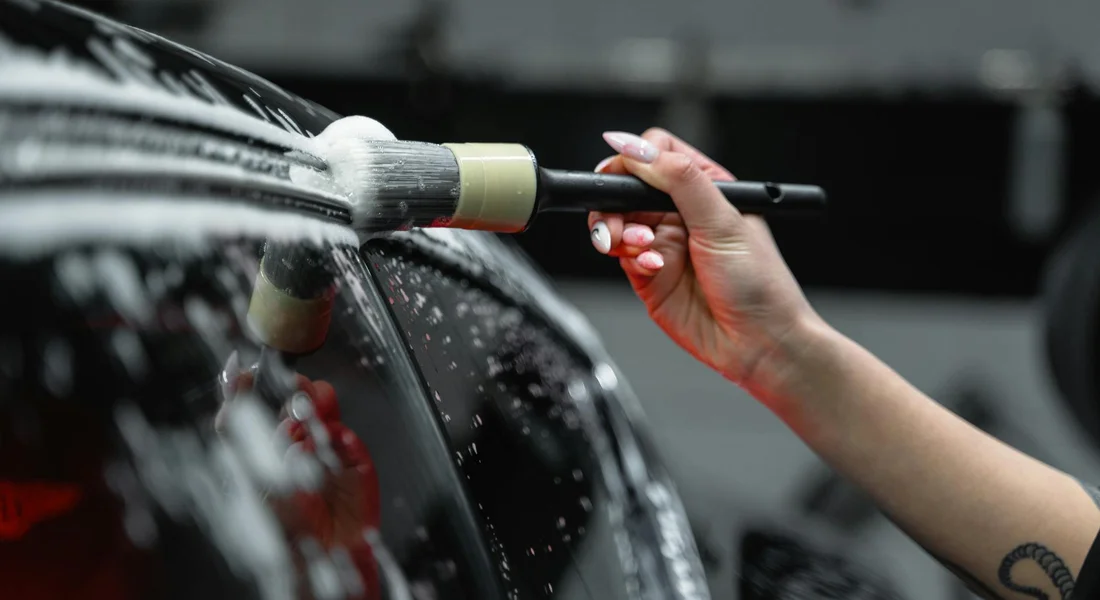
Think of your car’s paint like your own skin. You wouldn’t go to the beach, get covered in sand and salt, and then just sit in the sun all day. You’d rinse off and apply sunscreen. Your car needs the same logic. The single most effective thing you can do is maintain a clean layer and a protected layer. Contaminants like dirt, pollen, and bird droppings bake into the clear coat under UV rays, accelerating the breakdown of the paint’s binders and pigments. A clean surface allows your protective product to bond properly and do its job for months, not weeks, helping to shield your paint from environmental damage.
Parking Strategy: Your Car’s Real Estate Matters
Where you park is a choice you make every day. Each option has a trade-off in the fight against the sun.
- A Garage: This is the undisputed champion. It provides complete shade and shields the car from environmental fallout. If you have one, use it. My Miata lives in one, and it’s the main reason its single-stage paint is still vibrant at its age.
- A Quality Car Cover: A great solution for a stored vehicle or one parked for long periods. Only use a clean, soft, breathable cover on a perfectly clean car, or you’ll grind dirt into the paint. I use one on the Miata when it’s parked outside for a weekend show.
- A Shaded Spot: Any shade is better than direct sun. Tree shade helps, but beware of sap, birds, and pollen. A building’s consistent shadow is ideal. Moving your car a few spots over at work can add years to your paint’s life.
- Out in the Open: This is the hard mode for your paint. The sun, rain, and everything in the air is working on it 24/7. If this is your only option, the “clean layer, protected layer” rule is not a suggestion-it’s a requirement.
The Shield: Understanding Sacrificial Protection
Protectants don’t stop UV rays like a sunblock stops them from reaching your skin. They sacrifice themselves. UV radiation, along with chemical contaminants, slowly breaks down the protective layer instead of your clear coat. Once it’s gone, your paint is bare again.
- Carnauba Wax: The classic choice. It gives a warm, deep gloss but typically lasts 4-8 weeks. It’s a great starting point. I keep a bottle of spray wax in my garage for a quick boost on the F-150 after a wash.
- Synthetic Sealant: These are more durable than wax, often lasting 3-6 months. They create a slick, highly reflective surface. I used a sealant on my black BMW for years because I needed longevity between corrections.
- Ceramic Coatings: These are semi-permanent, chemically bonded layers. A professionally applied coating can last years, offering superior chemical resistance and incredible slickness. They are an investment. The hydrophobic properties make washing the Tesla a breeze, pushing water and dirt right off.
All of these products have one job: to degrade so your paint doesn’t have to. Reapplication is not a failure; it’s the system working.
A Surprising Threat: Can Sunscreen Damage Car Paint?
Yes, it absolutely can. This is a hidden danger at the beach or pool. The oils and chemical absorbers in sunscreen are designed to bind to your skin. On your car, they bind to your paint and exterior plastics.
On hot paint or trim, these oils can stain and become difficult to remove. Over time, they can slightly degrade the surface. The interior is even more vulnerable. Getting sunscreen on leather, vinyl, or “vegan leather” seats can lead to premature drying, discoloration, and sticky spots.
If you’ve been applying sunscreen, wash your hands before touching door handles, the steering wheel, or any interior surface. For the exterior, a quick detailer and a clean microfiber towel can usually lift fresh sunscreen splatter. On the Odyssey’s interior, I keep a dedicated interior cleaner for exactly these kinds of kid-related chemical spills.
The Ultimate Barrier: Paint Protection Film (PPF)
For physical protection, nothing beats a high-quality paint protection film. It’s a clear, durable urethane layer applied to the paint. Think of it as a flexible, self-healing screen protector for your entire car. Paint protection film is different from vinyl wrap, which is primarily for aesthetic changes…
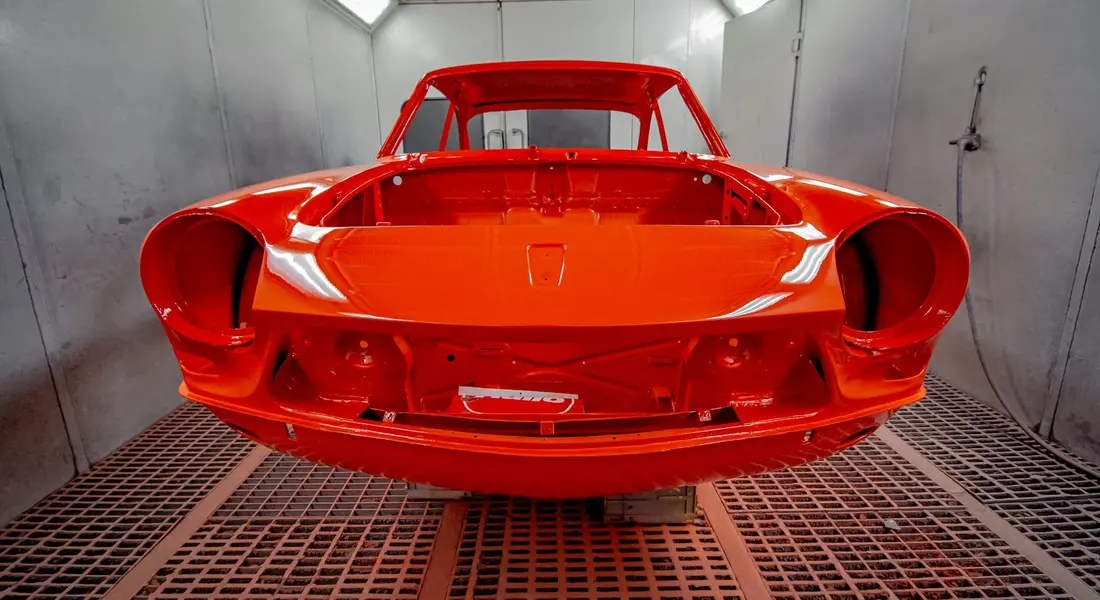
It stops UV degradation, minor scratches, and rock chips dead in their tracks. My red Porsche has PPF on its full front end. The flat bumper and hood are prime targets for bugs and road debris. The film takes the hit, and the paint underneath remains perfect. While it’s a significant upfront cost, for a cherished vehicle, it is the most effective preservation tool available.
Diagnosing Your Paint: How Bad Is It?
Before you grab a polisher, you need to know what you are working with. A good diagnosis saves hours of wasted effort. The first rule is to start with a clean car. Wash it thoroughly. You cannot feel or see the true damage through a layer of dirt and road film.
Find a shaded spot to inspect. Sunlight hides defects. You need even, indirect light. A garage or a cloudy day works best. Run your clean, dry hand over the paint. Does it feel smooth like glass? Or does it feel rough, like very fine sandpaper?
That roughness is bonded surface contamination. It is not sun damage itself, but it is a barrier to fixing it. Here is a pro trick I use on every car, especially my dark blue F-150 after a muddy week.
The Two-Minute Touch Tests
The baggie test is the fastest way to feel contamination your bare hand will miss. Put your hand inside a thin, clean plastic sandwich bag. Now gently glide your fingertips over the paint surface. The plastic film amplifies every tiny bump. You will feel embedded rail dust, industrial fallout, and hardened tree sap as a gritty texture. This grittiness must be removed with a clay bar or synthetic clay towel before any polishing happens.
The fingernail test tells you if the damage is on the surface or deep in the color. Find a visible scratch or a spot where the color looks faded. Lightly drag your fingernail across it. Does your nail catch in the groove? If it does, that scratch has cut through the clear coat into the base color layer. That is often too deep to remove completely. If your nail glides right over it, the defect is likely only in the clear coat and can be polished out.
Clear Coat Failure vs. Simple Oxidation
All sun damage is not the same. Knowing the difference decides your next move.
Simple oxidation looks like a dull, chalky film over the color. The paint loses its depth and reflection. On my old red Miata when I bought it, the single-stage paint had turned a flat, pinkish hue. This milky haze is the clear coat breaking down at a molecular level, but it is still mostly intact as a layer. You can often restore this with aggressive polishing to cut away the dead, oxidized layer and reveal fresh paint underneath.
True clear coat failure is more severe. Look closely. Do you see a pattern of tiny cracks, like a dried-up riverbed or a spiderweb? This is called “crazing” or “checking.” The surface might feel brittle and look chalky white or gray. On a badly neglected panel, the clear coat can actually start to flake off in patches. Once the clear coat is cracked or peeling, it has structurally failed. You cannot polish this back to health. The only lasting fix is a repaint.
Setting Realistic Expectations
Be honest with what you can fix. My jet black BMW taught me this lesson. Severe scratches, deep etching from bird droppings that sat for weeks, and clear coat cracks are permanent without professional repainting. Polishing can make them less visible, but it will not erase them.
If your diagnosis shows heavy contamination with overall dullness but no cracking, you are in luck. That is a perfect candidate for restoration. If you find large areas of cracking or peeling clear coat, manage your goals. You can clean and protect what is left to prevent further damage, but the visual flaw will remain.
Start with the roof and hood. These horizontal surfaces get the most UV exposure and show the worst damage. If they are salvageable, the rest of the car will be easier. If they are too far gone, you know the car’s limits right away.
The Product Tier List: Choosing Your Restoration Arsenal
Budget/Quick Fix Tier
You see a chalky haze on the hood. The red isn’t as deep as it used to be. For mild, surface-level fading, you do not need to break out the heavy machinery. I keep a bottle of cleaner wax in my kit for the Ford F-150. When that dark blue looks tired and hazy after months in the sun, this is my first move.
A cleaner wax is a hybrid product that lightly scours the paint while laying down a protective layer of wax in one step. It removes oxidized, dead paint. Think of it like a gentle scrub for your car’s skin. You apply it by hand with a foam applicator, let it haze, and buff it off with a clean microfiber towel. The change is immediate. The color wakes up. You can also use pre-wax cleansers or paint cleaners for a more thorough cleaning before waxing.
All-in-one sprays and liquids fall here too. Many car paint restoration spray products work on this principle. They are perfect for a single panel or quick refresh. You spray on, wipe off, and the paint looks better. It is a band-aid, not surgery. But for a car you use daily, it is a smart, fast fix. Always work in the shade on a cool, clean surface. Your arms will get a workout, but the results are worth it.
Enthusiast/DIY Correction Tier
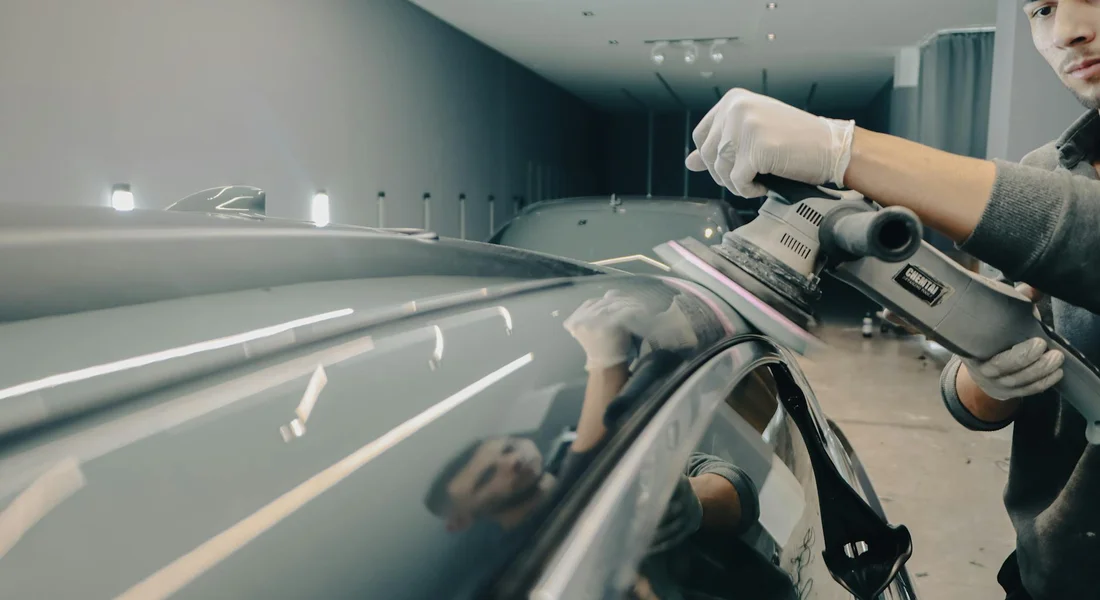
When the sun damage is deeper, you need to remove a thin layer of clear coat. This is paint correction. For my black BMW, the swirl magnet, this tier is a weekend savior. You move from masking defects to removing them.
Your toolkit expands. You need a dual-action (DA) polisher. It oscillates and spins, making it safe for beginners to use without burning the paint. You pair it with separate compounds and polishes. Compound is aggressive. It cuts into the clear coat to level scratches and heavy oxidation. Polish is finer. It smooths the haze left by the compound to restore clarity.
A typical car paint restoration kit bundles these essentials. You often get a DA polisher, a set of foam or microfiber pads, a bottle of compound, a bottle of polish, and sometimes a sealant. The key is to start with the least aggressive product and pad combination, testing in a small area first. Use the compound on a cutting pad for bad spots. Follow with the polish on a finishing pad for the whole car. Keep the polisher moving. Let the abrasives do the work, do not press down. Sometimes you’ll need to address scratches directly with a controlled cutting and polishing pass to level the surface. This approach helps blend scratches with the surrounding paint before finishing with polish and sealant. Wear a mask when dust is in the air, and always work in a clean, shaded space.
Show Car/Professional Tier
This is for perfection. It is the process I use on the Porsche 911 or for a full restoration on the Miata. The goal is a flawless, deep gloss that looks wet. It is a multi-stage dance of machine and skill.
The work is sequential: compound, polish, and often a final jeweling stage. Jeweling uses a very fine polish with a soft pad to perfect the gloss, removing any tiny holograms. After correction, a professional-grade ceramic coating is applied. This is not a wax. It is a liquid glass that chemically bonds to the paint, offering years of protection against UV rays and contaminants.
The tools here are serious. A rotary polisher is common. It spins fast and can generate heat, so it demands experience. A paint thickness gauge is non-negotiable. You use it to measure the clear coat across every panel before you start. Knowing exactly how much paint you have tells you how much you can safely remove without striking through to the color layer. This tier is about control, measurement, and an obsessive eye for detail. It transforms a faded finish into a mirror.
Step-by-Step: How to Restore Sun-Damaged Paint Yourself
Pick your path based on what you saw during your inspection. I always start with the gentlest method and move up only if needed. This saves your paint from unnecessary work.
Path 1: For Mild Dullness (The Cleaner Wax Method)
Your paint looks a bit hazy or lacks depth, but it still feels smooth to the touch. Think of my Ford F-150’s dark blue paint after a season in the sun, just needing a wake-up call. A proper restoration can bring back that rich depth and gloss. You’ll see how to restore dull car paint in the upcoming steps.
- Wash the car with a gentle, pH-neutral shampoo. Rinse it completely.
- Dry every panel with a clean, plush microfiber towel. Water spots will ruin your finish.
- Apply a quality cleaner wax by hand with a foam applicator pad, or use a dual-action polisher on its slowest setting. Work on one panel at a time.
- Buff off the product with a fresh microfiber cloth before it dries completely. A light, quick motion works best.
This is a one-step improvement that cleans off light oxidation and leaves behind a protective layer of wax, perfect for regular maintenance.
Path 2: For Heavy Oxidation & Staining (The Polish Method)
This is for paint that looks chalky, feels rough, or has etched-in water spots. I used this on my 1995 Mazda Miata when its single-stage red paint had turned a dull pink.
- Wash and dry the car thoroughly. Any dirt will act like sandpaper.
- Clay the entire painted surface. Spray lubricant, glide the clay bar, and feel for smoothness. This step removes bonded contaminants.
- Using a dual-action polisher, apply a mild polishing compound with a soft foam pad. Keep the machine moving in straight, overlapping lines.
- Wipe away the polish residue with a microfiber towel. You will see the color transform.
- Immediately apply a synthetic paint sealant to lock in the new finish and protect it.
The goal is to remove the dead, oxidized layer of paint to reveal the fresh, vibrant color hiding underneath. On the Miata, this process brought the red back to life.
Path 3: For Severe Fading & Scratch Removal (The Compound & Polish Method)
Reserve this for severe cases where the color is bleached, or deep scratches and swirls are visible. My black BMW 3 Series, the ultimate swirl magnet, required this approach.
- Complete the wash and clay steps from Path 2. A perfectly clean surface is non-negotiable here.
- With a dual-action polisher, use a cutting compound and a medium-cut foam pad. Work in small, two-foot by two-foot sections.
- Follow that step with a finer polishing compound and a soft finishing pad to restore gloss and clarity.
- Finish by applying a durable protectant, such as a ceramic coating or a long-lasting sealant.
You must check your paint thickness with a gauge before starting. Burning through the thin clear coat on edges and body lines is a real and permanent danger. On the BMW, I took measurements across every panel to ensure I had enough material to work with safely.
So, can you fix sun damaged car paint? Yes, you can. The fix is mechanical: you wash, clay, and polish away the damaged layer to uncover the healthy paint below. Success comes from choosing the right path for your car’s condition, especially when dealing with surface damage on the paint.
When to Call a Pro: Understanding Professional Car Paint Restoration
Sometimes, your paint needs more than you can give it in your driveway. I learned this the hard way with my black BMW. I made the holograms worse before I made them better. A professional detailer has tools, space, and experience that are tough to match at home.
What a pro service does is remove the guesswork through science and specialized skill. The first tool they’ll use is a paint thickness gauge. This little device tells them exactly how much clear coat is left on every panel. On a car like my old Miata with single-stage paint, or a modern car that’s been polished a few times, knowing this number is the difference between a stunning restoration and burning straight through to primer.
They also master tools that most DIYers should avoid. A rotary polisher, for instance, removes severe oxidation and deep scratches incredibly fast. It also generates a lot of heat and can hologram or burn paint in untrained hands. Pros use them with a level of control that comes from thousands of hours of practice.
Finally, they offer access to professional-grade coatings. These ceramic or graphene coatings are far more durable than anything you buy off the shelf. Applying them requires absolute perfection in paint decontamination and correction. A pro ensures the surface is surgically clean before locking in that protection for years.
What Influences Car Paint Restoration Cost
The price isn’t arbitrary. It’s a calculation of labor, materials, and risk. Here’s what a shop considers:
- Car Size and Condition: A compact coupe takes less time and product than a full-size truck. A car covered in light swirls is a simpler job than one with deep oxidation, etched water spots, and failing clear coat.
- Paint Hardness: German paint (like on my BMW) is notoriously hard. It takes more time, more aggressive compounds, and more skill to correct. Japanese paint is often softer and corrects more easily, but is also easier to mar.
- Desired Outcome: A basic “clean-up” polish costs less than a full multi-stage correction that removes every defect. Applying a top-tier ceramic coating adds significant cost for the product and the extra prep time.
- Products and Warranties: Professional coatings come with multi-year warranties that require certified application. That certification and the product itself are factored into the price.
How to Find Car Paint Restoration Near Me (And Vet Them)
Do not just search and pick the first ad. Your car’s paint is too important. Look for detailers who specialize in correction, not just wash and wax packages.
Your first question should always be: “Do you use a paint thickness gauge before starting work?” If they say no, walk away. This is non-negotiable. Ask to see their portfolio, specifically “before and after” shots of sun-damaged or swirled cars. Look for reflections, not just clean cars.
When you visit, look at their shop. Is it clean and organized? Are the lights bright? A serious pro will have dedicated polishing bays with intense LED or halogen lighting to reveal every defect. Ask them to explain their process. They should easily describe steps like decontamination, level of correction, and how they’ll protect the finished work.
DIY vs. Pro: Evaluating Your Situation
This choice comes down to the condition of your paint, your budget, and your own confidence. For light fading and mild swirling on a car with plenty of clear coat, a DIY approach with a dual-action polisher is a great, rewarding project. My Honda Odyssey fits this category. The paint is decent and the stakes feel lower.
For severe cases, a pro is the wise investment. Think about my faded Miata. The single-stage paint was turning pink. Restoring that required a specific product knowledge and aggressive cutting that I wasn’t comfortable with initially. A professional did it right the first time.
Consider the value of your time and the cost of mistakes. Buying a polisher, pads, compounds, and sealants can easily cost $300-$500. If your car has delicate paint or you’re anxious, that money might be better put toward a professional who guarantees a result. For a cherished car like a 911 or a classic, the cost of a pro is almost always worth the peace of mind.
Locking In the Shine: Protecting Your Newly Restored Paint
You just spent hours bringing that color back to life. The faded pink is red again. The chalky grey is a deep blue. It feels incredible. If you walk away now without protection, all that work will be gone in a matter of months. Sunlight and contaminants attack bare, polished paint faster. The clear coat is thin and vulnerable. Protection is not an optional last step. It is the most important one.
Think of it like sunblock for your car. You would not spend a day polishing your skin and then go sit in direct UV light. Your car’s paint needs that same shield. The good news is you have great options. The choice depends on how long you want it to last and how much effort you want to put in.
Sealant vs. Wax vs. Ceramic: Choosing Your Shield
I have used every type of protectant on my fleet. Each has a place. My black BMW shows the differences better than any chart could.
- Synthetic Sealant: This is my default recommendation for a newly corrected daily driver. It is engineered in a lab for durability and slickness. A good sealant will easily last 6 to 12 months. It applies clear and does not yellow. The surface feels like glass. It excels at shedding water and dirt. On my F-150, I use a spray sealant. It takes ten minutes and provides months of serious protection against road grime and sun.
- Natural Carnauba Wax: This is for the soul, not just the paint. Nothing matches the warm, deep, liquid glow of a premium carnauba on a dark color. I use it on my red Miata for car shows. The trade-off is serious: durability is often measured in weeks, not months. Heat melts it. Strong washes strip it. It needs frequent reapplication. But for that perfect, rich look on a garage-kept car, it is still the king of depth.
- Ceramic Coating: This is a semi-permanent, rock-hard layer of silicon dioxide (glass) that bonds to your paint. It is the ultimate defender. On my Tesla and Porsche, ceramic coatings are a lifesaver. They can last 2 to 5 years, offer incredible chemical resistance, and make washing a breeze. Applying a true ceramic coating is a major commitment. The paint must be perfectly decontaminated and corrected. The application is precise. It is also the most expensive option. For a DIYer who just did a big correction, a high-quality “ceramic spray sealant” offers similar behavior with much easier application.
My Go-To Recommendation: The Simple Sealant
For most people who just fought sun damage, you want a win. You want to lock in that shine and not think about it for a long time. A synthetic sealant is that win. Grab a bottle of a well-reviewed spray sealant. They are foolproof.
Here is how I apply it to my BMW after a correction:
- Make sure the paint is completely cool, clean, and dry. Work in the shade.
- Spray a small amount onto a fresh, clean microfiber applicator pad. Do not spray directly onto the paint in full sun-it can streak.
- Apply a thin, even layer to one panel (like the hood or a door). You should barely see it.
- Immediately buff it off with a separate, clean, dry microfiber towel. Use a flipping motion to keep a clean towel surface.
- Move panel by panel around the car. The whole car should take 20 minutes.
You now have a robust, transparent barrier. Your paint is safe.
The Maintenance Wash: Keeping Your Restoration Perfect
Protection is not a force field. It is a sacrificial layer. How you wash determines how long it lasts. One trip through a scratchy automatic car wash can ruin your fresh finish. This simple routine will preserve everything.
Your new rule: two buckets, clean towels, and no abrasive contact.
- Pressure Rinse: Blast off loose dirt and sand with plain water. This prevents grinding grit into the paint during the wash.
- Two-Bucket Wash: Fill one bucket with shampoo and water. Fill a second with clean rinse water. Dunk your wash mitt in soap, wash a section of the car, then rinse the mitt in the clean water bucket before getting more soap. This traps dirt in the rinse bucket, not in your soap.
- Pat Dry: Use a large, soft, clean drying towel. Gently pat and pull the water off. Do not scrub or wipe aggressively on dry paint.
- The Topper (Optional but Great): Every third or fourth wash, use a “detail spray” or “ceramic quick wax” as you dry. This adds a fresh layer of protection and boosts the gloss. It takes two extra minutes.
That is it. That is the secret. Consistent, gentle washing keeps your protection strong and your paint flawless. The sun does not have to win. With the right shield and simple care, your restoration will stay brilliant for years.
Your Sun Damage Restoration Questions, Answered
I hear these questions all the time in my garage. People see their car’s paint looking tired and chalky, and they want straight talk on fixing it. Let’s go through the common ones, using plain language and lessons from my own fleet.
Can you paint a car in the sun? For a professional in a pinch with the right additives? Sometimes, but it’s a risk. For you, at home? Absolutely not. I tried a touch-up on my ’95 Miata’s rear bumper in direct sunlight once. The paint dried almost the second it left the gun. It couldn’t flow out, so it set with a rough, bumpy texture we call orange peel. Every speck of dust in the air landed in it. Painting in the sun guarantees a finish that’s flawed from the start, often worse than the damage you’re covering, especially when using unconventional touch-up techniques.
Are car paint restoration products worth it? You mean those all-in-one kits? They can be. A decent kit gives you a matched polish, pad, and sealant so you don’t have to guess. For my kid’s Odyssey, a basic kit worked fine for the roof. But for my black BMW, the ‘Swirl Magnet,’ I buy everything separate. I need a specific cutting polish and a super-soft finishing pad from different brands. A kit is a good, simple start for a first timer, but building your own set of products gives you more control for tough jobs.
How long does a restoration last? This is everything. If you polish the paint to a deep gloss and then leave it bare, the sun will attack it again in months. My blue F-150’s hood was oxidized last year. I corrected it and then sprayed on a hybrid ceramic sealant. Even parked outside, it still sheds water. The clock on your restoration starts ticking the moment you finish; a strong sealant or wax is what pauses it. Your parking habits, like using a cover or a garage, add more time.
Look, I’ve seen paint so faded it felt like sandpaper. On that old Miata, the red was a pale pink on every horizontal surface. We brought it back. With the right steps and a commitment to protection, you can absolutely bring life back to sun-bleached paint. It’s not magic. It’s just good technique followed by consistent care.
Your Paint’s Long-Term Fight Against the Sun
I have learned this through every faded hood and chalky bumper: consistent protection with a UV-resistant sealant is the single most effective step you can take. If damage is already there, as it was on my ’95 Miata, methodical paint correction followed by that relentless protection is the only true fix.
Without it, ultraviolet rays will steadily break down your clear coat, leaving it dull, brittle, and headed for a costly repaint.
Expert Resources and Citations
- r/Autobody on Reddit: Fading Paint from Sun – Fixable?
- What can you do about sun-faded car paint? Can it be fixed? – Quora
- How to Fix Sun-Faded Car Paint: A Brief Restoration Guide
Max is an automotive enthusiast having worked as a car mechanical and in interior detailing service for over 25 years. He is very experienced in giving your old car, a new fresh vibe. He has detailed many cars and removed very tough smells and stains from all kinds of cars and models, always ensuring that his work and advice helps his customers. He brings his first hand experience to his blog AutoDetailPedia, to help readers breath new life into their car interiors.