How Do You Fix Scratches on a Car Bumper at Home?
You just heard that sickening scrape in the parking lot, and now a fresh scratch mars your bumper. I get it-that sting of frustration is real.
This guide walks you through the cosmetic fixes a detailer would use, from a simple wipe to a full repaint. We will cover assessing the scratch depth, cleaning and prepping the plastic, using touch-up paint and clear coat, wet sanding for deeper damage, and final polishing to restore the gloss.
Jump in with the wrong product or technique, and you can make that thin scratch look like a permanent, cloudy scar.
How to Tell What Kind of Scratch You’re Dealing With
Before you touch a product, you need to know your enemy. I learned this the hard way on my Jet Black BMW. I once spent an hour polishing a scratch that needed touch-up paint. A simple test saves that frustration.
Start with the fingernail test. Gently run your fingernail across the scratch, perpendicular to it. Do you feel a catch or a groove? Your nail is a perfect depth gauge.
If your nail catches, the scratch is through the clear coat and into the color or plastic. If your nail glides over smoothly, you’re likely only dealing with the clear coat.
Next, look at the color. A shallow clear coat scratch looks hazy or translucent. It’s like a smudge on a pair of eyeglasses-it distorts light but you can still see through it. A deeper paint layer scratch will show the color of your car’s base coat. This is like a cut into a piece of colored construction paper; you see the raw color underneath. If the scratch goes into the base coat, a repair to restore the finish may be necessary. The next steps will walk you through how to repair deep scratches on car paint.
The most severe scratches on plastic bumpers expose the raw material. These look white or grey. They aren’t a flaw in the paint; they are a gouge in the bumper itself. It’s different from simply repairing cracked paint on car bumpers.
Identifying the scratch depth tells you exactly which repair method will work, preventing wasted effort and money. A clear coat scratch buffs out. A paint scratch needs filling and color. A plastic gouge needs primer and filler.
Gathering Your Scratch Repair Arsenal: Tools & Chemicals
Fixing scratches is part art, part science. Having the right tools makes the science easy so the art can shine. This is the kit I’ve built from years of fixing everything from my F-150’s scrapes to the 911’s delicate clear coat.
Your essential tool list is non-negotiable for a clean, safe repair.
- Microfiber Towels: Use 300-500 GSM towels for applying polish and compound. Use 700+ GSM plush towels for drying and final buffing. Cheap towels scratch.
- Dual-Action Polisher: A machine with an 8mm to 15mm throw gives you control. It’s safer for beginners than a rotary polisher and effective for bumper curves.
- Compounds & Polishes: Always choose pH-neutral products. They are safe for all paints and won’t cause chemical damage. You’ll need both a cutting compound and a fine finishing polish.
- Grit Guard & Wash Bucket: You must wash the area perfectly before any repair. A Grit Guard in your bucket traps dirt at the bottom, keeping your wash mitt clean.
Match your products to the scratch depth for the best results.
- For light clear coat marks: A fine polish is all you need.
- For moderate scratches your nail barely catches: A rubbing or cutting compound.
- For deep scratches showing color: A touch-up paint pen matched to your car’s factory code.
- For deep gouges into the plastic: A plastic primer and filler to build up the surface before painting.
Never skip safety. Wear nitrile gloves to protect your skin from chemicals. Use eye protection. If you sand, wear a basic dust mask. This isn’t optional.
You might see “bumper scratch repair kits” at the store. Look closely. A good kit has separate compounds and polishes, not a one-bottle mystery solution. It should include applicator pads and clean microfiber cloths. I prefer buying professional-grade items separately for better control when carrying out bumper scratch repairs.
The Core Chemicals and Their Jobs
Think of these products as a team. Each one has a specific job. Using them in the right order is everything.
Compound is your coarse sandpaper. It contains abrasives that cut down the edges of a scratch, leveling the surface. It leaves a hazy finish that needs refinement.
Polish is your fine sandpaper. It uses finer abrasives to remove the haze left by the compound and restore gloss. It makes the paint look new again.
Isopropyl alcohol (70% mix) is your final cleaner. After polishing, you wipe the area with it. This removes any leftover oils so that sealants, waxes, or touch-up paint stick perfectly.
Store-bought “scratch removers” are often a middle-ground blend of compound and polish. They can work for very light defects. For real control and results on deeper scratches, professional-grade separate compounds and polishes are far superior. You decide how much to cut and how much to refine. Rubbing compound is a common choice to repair scratches. It can be a practical next step when deeper marks are involved.
The Detailer’s Protocol: Order of Operations for Bumper Scratch Repair
You can have the best products in the world. If you skip steps or do them out of order, you will make the scratch look worse. I learned this the hard way on the black BMW. I tried to polish a light scuff before claying. I just rubbed invisible grit in a perfect circle, creating a hazy mess that took me an hour to fix. This checklist is not a suggestion. It is the law in my shop.
1. Deep Clean: Wash the Entire Bumper
You cannot assess or fix a scratch on a dirty surface. Dirt hides depth. Mud can fill a gouge and make it look shallow. You must start with a perfectly clean slate.
Use a pH-neutral car shampoo in a bucket with a grit guard. Wash the entire bumper panel, not just the scratched area. Use a clean microfiber wash mitt with plenty of sudsy lubrication. Start from the top of the bumper and work down. Rinse thoroughly with clean water.
Dry the bumper completely with a clean, plush drying towel. Any water droplets left behind will interfere with your inspection and the next steps. I use an electric leaf blower on my Model 3 to push water out of the crevices around sensors and trim.
2. Decontaminate: Remove Bonded Contaminants
After washing, run your clean hand inside a plastic sandwich bag over the paint. It will feel smooth like glass over clean sections, but gritty and sandy over others. That grit is bonded industrial fallout, tree sap, and brake dust. If you polish over it, you will sand your paint.
You have two good choices here. A traditional clay bar with a dedicated lubricant spray works beautifully. Knead it frequently to expose a clean surface. For larger areas like bumpers, I often use a synthetic clay towel or mitt. They are faster and you can rinse them clean. Whichever you choose, keep the surface wet with lubricant, use light pressure, and stop once the baggie test glides smoothly.
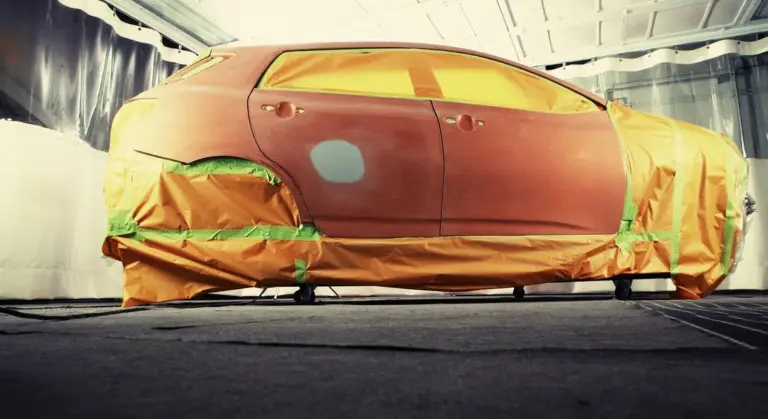
3. Isolate & Tape: Protect the Surrounding Area
This is where you become a surgeon. Get a roll of low-tack, automotive painter’s tape. The blue or green kind. Mask off any trim, lights, grilles, or adjacent body panels right next to your scratch. You are creating a safe zone for repair, ensuring your polish or compound only touches the damaged paint and nothing else.
On my F-150’s plastic bumper, I also tape off the edge where it meets the metal fender. This protects the factory edge of the fender paint. Be precise. Cheap tape can leave adhesive residue if left on for days, but for a few hours of work, it’s perfect.
4. Repair: Execute Your Chosen Method
Now, and only now, do you address the scratch itself. Refer back to your depth test. Your path is set by what you found.
- Clear Coat Scratches: Use a dual-action polisher with a light polishing pad and a fine polish. Work a small 2×2 foot section at a time. Use slow, overlapping passes. The goal is to gently abrade the clear coat around the scratch until its walls are leveled and it disappears.
- Base Coat Scratches: This is paint touch-up work. Use the factory touch-up paint, a quality brush pen, or a fine-tip applicator. Apply the color in thin layers, filling the scratch from the bottom up. Let each layer dry for at least an hour. Do not glop it on. It will dry lumpy and look terrible.
- Primer/Plastic Scratches: This is a full repaint for a perfect finish. For a DIY fix, the goal is to prevent rust on metal bumpers or to seal plastic. Clean thoroughly, apply primer to the bare material, then follow with base coat and clear coat touch-up paint, sanding lightly between layers with very fine grit sandpaper (2000+).
5. Refine & Blend: Polish to Match
If you used touch-up paint, it will dry with a raised texture and a dull, matte finish. You must blend this new material into the surrounding factory clear coat.
Once the paint is fully cured (24-48 hours), use a very fine abrasive like a finishing polish or even a mild compound on a soft pad. Gently polish the repaired spot and the clear coat around it. This will level the touch-up paint’s surface and restore gloss, making the repair virtually invisible from a few feet away. On dark paint like the BMW, I will often polish the entire bumper panel to ensure a perfectly even gloss with no haze.
6. Protect: Seal Your Work
The repair zone, especially if you polished, has no protection left. It is bare, clean clear coat. You must shield it immediately.
Apply a synthetic sealant or a ceramic spray coating. These last longer than traditional wax. I use a spray ceramic on my daily drivers. Apply it to the entire bumper in a thin, even coat. Let it haze and buff it off with a clean microfiber. This protective layer will shed water, repel dirt, and give you a buffer against the next shopping cart or branch. It is the final, non-negotiable step. Without it, your hard work will degrade quickly.
How to Buff Out Scratches on a Plastic Car Bumper
Buffing out a scratch on a plastic bumper is about leveling the clear coat. You are not adding paint. You are removing a tiny bit of the clear layer around the scratch so the surface becomes flat and smooth again. This works for clear coat scratches and light paint scratches that haven’t gone deep into the color or plastic. This approach also applies to repairing scratches on plastic car bumpers, where the goal is to restore a uniform surface without repainting.
You have two good paths: machine polishing for larger areas or stubborn marks, and hand correction for small, isolated scratches.
The Machine Polishing Method
This is my go-to for my black BMW, the “Swirl Magnet.” A dual-action polisher is your best friend here. It’s forgiving and effective. Rotary polishers can work but require serious skill to avoid burning the plastic.
- Start with a clean, dry bumper. Clay bar it first if you feel any grittiness.
- Attach a medium-cut foam polishing pad to your polisher.
- Apply four small dots of a light to medium cutting compound to the pad. Spread it on the paint at low speed first.
- Work on a section about two feet by two feet. Use a slow, overlapping arm speed. Imagine you are moving the machine about one inch per second across the surface.
- Keep the polisher flat. Let the pad and compound do the work. After a few passes, wipe the area clean with a microfiber towel to check your progress.
You must follow the compound with a fine polish on a separate, soft finishing pad to restore perfect gloss and remove any hazing or holograms the compound might leave.
The Hand Method for Tiny Scratches
For a single scratch from a shopping cart or a key tip, you can fix it by hand. I did this on my Odyssey’s bumper after a scrape against a recycling bin.
- Use a dedicated scratch removal compound, not a all-in-one wax.
- Put a dime-sized amount on a firm, foam applicator pad or a folded microfiber towel.
- Apply firm, focused pressure right on the scratch using small, tight circular motions. You need friction and abrasion.
- Work for 30-60 seconds, then wipe clean to check. Repeat if needed.
- Finish the spot with a dab of pure polish by hand to bring back the shine.
Hand correction takes real elbow grease for anything beyond the most superficial mark, but it avoids setting up a machine for one small flaw.
Detailer’s Pro-Tip: The Lighting and Pressure Technique Tweak
Your eyes are your most important tool. A bright LED work light is non-negotiable. Shine it across the paint at a very low, glancing angle. Scratches will look like white lines. As you polish, watch them fade away under that light. You see the truth in real-time.
Pressure is everything. When using the cutting compound, use firm, consistent pressure to help the abrasives work. When you switch to the fine polish, lighten up your pressure by about 80%. You are just glossing the surface now.
Plastic bumpers are sensitive to heat. Never hold a spinning polisher in one spot on a bumper. Keep it moving. Excess heat can soften the plastic and warp it, creating a permanent divot that is far worse than any scratch.
Fixing Deeper Scratches with Touch-Up Paint and Filler
When a scratch digs past the clear coat and into your car’s color layer, or worse, down to the bare grey plastic, you need a different plan. A simple polish won’t fill that canyon. This is where touch-up paint and filler come in. The goal isn’t always a perfect, invisible repair from two inches away, especially on a daily driver. The goal is to protect the exposed material from the elements and make the damage far less noticeable from a few feet away.
My F-150’s bumper has seen its share of these deeper scrapes. The process always starts the same way. You must have a surgically clean surface. After washing the area, I wipe it down with isopropyl alcohol (70% or higher) on a clean microfiber cloth. This removes any lingering wax, grease, or detailer spray that will prevent the paint from sticking.
Using a Touch-Up Paint Pen
A factory-matched touch-up pen is your best friend for color-layer scratches. Here is how to use it without creating a messy blob.
- Shake the pen vigorously for a full minute. You need to mix that settled pigment.
- Test the flow on a piece of cardboard or paper. You want a steady, small droplet to form.
- Apply the paint to the scratch only. Do not paint the surrounding clear coat. Think of it like coloring inside the lines of the defect itself.
- The golden rule: thin layers win every time. Apply one thin coat to fill the scratch about halfway. Let it dry completely. This can take 10-20 minutes. Apply a second thin coat, letting it dry again. You may need three or four micro-layers to build the paint up level with the surrounding surface.
Rushing this step is the most common mistake. A thick, goopy application will dry slower, shrink unevenly, and look terrible. Patience here makes the next steps possible.
Filling Deep Plastic Scratches
If you can see raw, colored plastic or the bare grey substrate, you often need a filler primer first. The plastic itself can be porous, and paint alone will sink in and look uneven.
- First, smooth the scratch edges. I use a small piece of 1000-grit sandpaper, wet, and lightly sand just the scratch channel to remove any frayed plastic or paint lips. Be gentle.
- Clean the area again with isopropyl alcohol.
- Apply a dedicated plastic primer or a liquid filler designed for scratches. These products are thicker and fill the void. Use the applicator brush lightly, filling the scratch only. Let it dry fully as per the product instructions-often an hour or more.
- Once rock hard, lightly sand the dried filler with 1500-grit wet sandpaper until it is perfectly level and smooth with the surrounding factory paint. Wipe clean and dry.
- Now, follow the touch-up paint pen steps above to apply your color coat over the primed and leveled scratch.
Blending the Repair
Even with perfect application, the new paint will have a slightly raised edge. This is where you make it disappear. You need to flatten and blend this “paint island” back into the surrounding clear coat.
I start with a very fine sanding pad, like a 3000-grit finishing film. I use plenty of water and lubricant (a detail spray works) and lightly sand only the new paint spot and a millimeter of the clear coat around it. The goal is to remove the top of the paint blob and feather its edges. Go slow. Check your progress often by wiping the area dry.
After sanding, you must restore the gloss by machine polishing the area. I use a small foam polishing pad on my dual-action polisher with a fine finishing compound. This removes the fine sanding marks and brings back a deep shine. On my black BMW, I follow this with an even finer polish to ensure no holograms are left behind. If you are working by hand, use a dedicated hand-applied polishing compound and a lot of elbow grease in tight, overlapping circles.
Making Touch-Up Paint Look Invisible
Getting the paint in the scratch is one thing. Making it look like it was never there is the art. The standard brush on a paint pen is often too big and clumsy.
I use the “dot and dab” method. Instead of brushing, I use the tip of a toothpick, a fine sewing needle, or a specialized touch-up applicator tool. I dab a tiny amount of paint from the pen’s brush onto the tip of my tool. Then, I carefully dot the paint directly into the bottom of the scratch. This gives me incredible control. I can build the paint up slowly, dot by dot, without flooding the surrounding area. It is tedious but effective for thin, deep scratches.
For the final, professional touch, you must seal it with clear coat. Factory paint has a clear coat layer, and your repair should too. Once your final color coat is completely dry (I wait 24 hours to be safe), apply a clear coat pen using the same thin-layer technique. This clear coat will protect the new paint, give it the correct gloss level, and allow you to safely sand and polish the repair without cutting into your fresh color. Apply two or three thin layers of clear, letting each dry, before performing the final sanding and polishing blend step.
When to Call a Pro: Bumper Scratch Repair Cost and Considerations
I fix scratches on my own cars all the time. But I also know when to wave the white towel and call for backup. Trying to fix the wrong kind of damage can make a small problem look much, much worse. It’s important to know your limits, especially when DIY car scratch repair is involved.
Knowing your limits is the mark of a true detailer, not a failure.
Scenarios That Demand a Professional Touch
Grab a flashlight and take a close look at that scratch. If you see any of the following, put the DIY kit down and pick up the phone.
- Deep Structural Damage: If the scratch has cracked, gouged, or deeply dented the bumper plastic itself, it’s a body shop job. My F-150’s bumper has a gouge from a rogue trailer hitch that I won’t touch. It needs plastic welding and reinforcement.
- Large Affected Areas: A scratch longer than your forearm, or a cluster of deep scuffs covering a big panel, is often more efficient for a pro to handle. Their setup allows for seamless blending.
- Complex Paint Matches: This is the big one. Modern paints like pearl white, tri-coat reds, or any metallic/color-shift finish are layered. Matching them requires a spray booth and an expert eye. The jet black on my BMW is hard enough. A modern Mazda Soul Red Crystal? Forget it.
- You Lack the Tools or Confidence: If the thought of wet-sanding makes your hands sweat, or you don’t have a proper polisher and pads, stop. A botched repair means paying a pro more later to fix your mistakes.
Understanding Bumper Scratch Repair Costs
Costs vary wildly by location, shop reputation, and your car’s make. These are rough estimates based on what I’ve seen and been quoted for my own fleet.
A professional spot repair for a single, isolated scratch might run between $150 and $400. They sand, fill, blend, and clear coat just that section. It’s a great option for a door ding or a shopping cart wound.
A full bumper respray is the most comprehensive fix, typically ranging from $500 to $1,200+. This includes removing the bumper, sanding it completely, applying primer, base coat, and clear coat. This is what you need for major scrapes or perfect results on a classic or luxury car.
Why the huge range? A standard white Honda Odyssey bumper is on the lower end. The bumper for my Porsche, with its complex curves and need for absolute perfection, is at the very top. Materials and labor hours shoot up.
How to Find a Reputable Professional
Not all shops are created equal. You want a craftsman, not just a technician. Here’s how to find one.
- Seek Reviews and Portfolios: Look beyond star ratings. Read details. A good shop will have before-and-after photos, specifically of bumper repairs and color matches. Ask to see examples of work on your car’s color.
- Ask Specific Questions: Walk in and talk to them. Your questions tell them you’re informed.
- “Do you remove the bumper to paint it?” (The answer should be ‘yes’ for a full respray).
- “How do you handle paint matching for my car’s specific code?”
- “What is your process for prepping the plastic surface?”
- Look for Specialization: Some shops excel at insurance work. Others, often called “detail and paint correction” shops, specialize in the kind of spot repair and perfection you’re likely after. Find the latter.
The Modern Complication: Bumpers with Brains
This is non-negotiable for newer vehicles. If your car has parking sensors, a front camera, or radar cruise control, the bumper is not just plastic.
Disassembly, painting, and reassembly around these Advanced Driver-Assistance Systems (ADAS) requires calibration. A shop needs the proper equipment to reset these sensors after the bumper comes off. A poor reinstall can block a sensor or misalign your safety systems.
For any scratch on a modern bumper, getting a professional assessment first is the wisest move. They can tell you if the repair might affect a sensor behind that specific panel. It’s a cost now that can prevent a massive, unsafe headache later.
Keeping Your Bumper Scratch-Free: Maintenance and Protection
Fixing a scratch is satisfying. Preventing the next one is smarter. Your bumper takes the most abuse, so a little regular care goes a very long way. This is about building simple habits that keep your paint safe. For those inevitable scrapes, paint touch up bumper scratches can be a quick fix. It’s a simple step to keep your bumper looking true.
Wash It Right, Every Time
A clean car is a protected car. Dirt is just tiny rocks grinding into your paint. The front and rear bumpers collect the worst of it, bugs, tar, and road film. I wash my jet black BMW using the two-bucket method, and it’s the only reason the paint isn’t a web of fine scratches.
Use two buckets: one for soapy wash water, and one with clear water and a grit guard at the bottom for rinsing your mitt. This traps the dirt you rinse off so you don’t drag it back onto the paint. Always wash the bumper last. It’s the dirtiest panel. I use a dedicated mitt just for the lower sections and bumpers on my F-150 to avoid contaminating the cleaner mitt I use for the hood and roof.
- Rinse the entire car thoroughly with a gentle stream to loosen surface grit.
- Wash from the top (cleanest) down to the bottom (dirtiest).
- After each pass with the wash mitt, rinse it in the clear water bucket, letting the grit settle to the guard.
- Dry with a clean, soft drying towel, not a chamois or old t-shirt.
Add a Layer of Defense
A naked clear coat is soft. A protected one is more resilient. Think of a sealant or coating as a sacrificial shield. It takes the minor abuse so your paint doesn’t have to. On my Tesla’s flat front bumper, a good sealant makes bug splatter wipe off with far less pressure, which means less chance of scratching during cleanup.
A quality synthetic sealant lasts months and provides excellent scratch resistance. A ceramic coating lasts years and offers even greater hardness and chemical resistance. Neither is a force field against keys or shopping carts, but they make your paint slicker and harder for environmental contaminants to bond and cause damage. Apply these to a perfectly clean and decontaminated surface for best results.
Park and Protect with Purpose
Where you park matters more than you think. I look for end spots or pull through spaces whenever possible. It keeps other car doors away from my Odyssey’s sliding doors and bumpers. When parallel parking, use your mirrors to get close to the curb without touching it. If your bumper frequently kisses parking blocks, consider a simple rubber bumper guard.
For the ultimate in scratch prevention, nothing beats clear paint protection film (PPF). This is a physical barrier, a thick, clear vinyl that absorbs impacts and self-heals light scratches from heat. I have the full front end of my Porsche covered in PPF. It’s stopped countless stone chips and saved the paint from scuffs. For most cars, a partial front bumper cover is a very worthwhile investment. Old-school fabric front-end bras work but can trap moisture and grit underneath, leading to paint damage over time.
A Simple Habit for the Trunk
The rear bumper gets scratched constantly during loading. Grocery bags, toolboxes, dog cages, and furniture all leave their mark. My solution is simple. I keep a soft moving blanket or a dedicated bumper protector in my trunk. Before I slide anything heavy in or out, I drape it over the bumper. It takes two seconds. You can buy a fitted bumper guard from brands like Griot’s Garage, or just use an old bath towel. Making this a routine is the easiest way to prevent those frustrating load-in scuffs that ruin an otherwise clean rear end.
Final Insights on Bumper Scratch Repair
The most important advice I can give is to always assess the scratch depth first. Start with a mild polish on a test spot; if the scratch vanishes, you have saved your clear coat and your Saturday.
Using a cutting compound on a simple scuff will haze the surrounding paint and create more work than you started with.
Deep Dive: Further Reading
- r/fixit on Reddit: Scratched bumper – any way to DIY fix it?
- Amazon.com: Bumper Scratch Repair Kit
- How to Repair Plastic Bumper Scratches : 9 Steps – Instructables
- How to fix scratches on a car bumper affordably?
Max is an automotive enthusiast having worked as a car mechanical and in interior detailing service for over 25 years. He is very experienced in giving your old car, a new fresh vibe. He has detailed many cars and removed very tough smells and stains from all kinds of cars and models, always ensuring that his work and advice helps his customers. He brings his first hand experience to his blog AutoDetailPedia, to help readers breath new life into their car interiors.