How Do You Spot and Remove Mold and Musty Smells from Car Interiors After Rain?
Open your door after a wet week and that dank, earthy smell hits you-it’s more than an odor, it’s a warning that mold or mildew is growing in your car.
I’ll use my experience from battling spills in the Kid Hauler to show you the way, covering identifying mold growth, diagnosing the moisture source, and safely removing all traces and odors.
Neglect it, and you risk breathing harmful spores and watching your seats stain or degrade for good.
Key Takeaways: The Battle Plan for a Fresh Cabin
Before you touch a single spore, put on nitrile gloves and a tight-fitting N95 mask. Breathing in mold dust can make you sick, and you do not want that on your hands.
You win this fight by doing three things in order. Kill the living spores. Physically remove all the dead mold. Make sure the car stays completely dry afterwards. Forget one, and you will be back here in a month.
This job is moderate to high difficulty. It will take a full afternoon, maybe a whole weekend if it is bad. I spent a long Sunday on my grey Honda Odyssey after a forgotten sippy cup of milk rolled under the seat.
This is a systematic scrub-down, not a quick spray of air freshener. You need patience and the right steps.
The Mold Removal Protocol: Your Non-Negotiable Order of Operations
Follow this list like a recipe. Do not skip ahead. Do not improvise.
-
Safety Gear & Diagnosis
Gear up first. Good gloves, an N95 mask, and old clothes. Now, hunt for the mold. Look for speckles-black, grey, green, or white-on seat fabric, carpet fibers, and hidden spots under floor mats. Feel for damp patches. Sniff the air. That sour, earthy smell is the clue. In my Odyssey, the smell led me to a wet patch under the third-row seat where a leak had started.
-
Dry Out the Car
You cannot clean a wet sponge. Park the car in direct sun, if possible. Open all doors and the trunk. Use a powerful fan to blow air through the cabin for several hours. A small dehumidifier inside the car works wonders. The interior must feel bone-dry to the touch before you move on. Any leftover moisture is an invitation for the mold to return.
-
Vacuum & Dry Vacuum Loose Spores
Use a vacuum with a HEPA filter. A shop-vac with a fresh bag is perfect. Do not use a brush attachment. The bristles can flick spores into the air. Gently vacuum every surface-seats, headliner, carpets, dash. This sucks up the dry, loose mold so you do not smear it around when you add cleaner.
-
Apply Antimicrobial Cleaner
You need a solution that kills mold, not just cleans dirt. A simple mix is distilled white vinegar and water, half and half. For tougher jobs, I use a commercial-grade, pH-neutral antimicrobial spray. Test any cleaner on a hidden spot of fabric first. Spray it generously over all affected areas until the fabric is damp, not soaking. Let it sit for 10-15 minutes to work.
-
Agitate & Extract
Take a soft-bristled detailing brush or a clean toothbrush. Gently scrub the cleaner into the fabric. You are lifting the dead mold from the fibers. Next, extract all that liquid. A wet-dry vacuum or a carpet extractor is the right tool. Pull the dirty water out. You may need to do this two or three times until the water you pull up runs clear. If you leave cleaner and dead mold in the seat, the smell will stay.
-
Final Dry & Deodorize
Dry the car again, completely. Use your fans and open doors. For a fast dry on seats, I use a blow dryer on the cool setting. Once dry, hit the whole interior with an odor neutralizer. Do not use a perfumed spray. It only masks the smell. I use an ozone generator for an hour on my project cars. It breaks down the odor molecules at the source, effectively eliminating bad odors.
-
Prevent Recurrence
Find and fix the water leak. Check sunroof drains, door seals, and window edges. Keep moisture absorbers, like rechargeable silica gel pods, under the seats. Make a habit of checking under floor mats after rain or a car wash. Keep the interior clean. A quick vacuum once a week makes a big difference.
Skipping steps, especially the drying parts, guarantees the mold will return. I have seen it happen. I have made the mistake myself on a rush job. Do it right the first time.
What You’re Really Smelling: Mold vs. Mildew and Why It Matters

Let’s break this down simply. Mildew is that powdery or fuzzy patch you see, usually white, grey, or light green. It sits on the surface. Think of it like dust on your dashboard. You can often wipe it off with a good microfiber cloth and a cleaner. Mold is different. It looks slimy or fuzzy too, but it’s often black, green, or red. More importantly, it sends out roots into the material. Mildew is surface-level fuzz, while mold digs deeper and is far more stubborn to remove. For your car’s fabric or foam, that means mildew might be on the top fibers, but mold could be growing inside the seat cushion itself, which is why it’s important to correctly identify and treat it.
Why does this difference matter for your health? Both can cause problems, but mold is typically worse. Inhaling mold spores can trigger allergies, cause sneezing, or irritate your throat and lungs. For someone with asthma, it can be a real issue. Mildew might just give you a musty smell or minor irritation. Ignoring a musty smell lets spores circulate in your cabin air, which is why addressing it quickly is a smart move for everyone in the car. Always wear nitrile gloves and an N95 mask when you start poking around suspected growth. It’s a basic safety step I never skip.
I learned this the hard way with my grey Honda Odyssey, the “Kid Hauler.” After a rainy soccer practice, a soaked towel got tossed in the back and forgotten under a seat for a week. When I found it, the towel had that classic grey, fuzzy mildew all over it. The smell was damp and earthy, like a basement. It hadn’t turned into deep mold yet, but it showed me how fast moisture leads to growth. That experience taught me to treat any damp smell in the cabin with immediate suspicion, because what starts as mildew can quickly become a much bigger problem.
How to Find the Source: A Detective’s Guide to Car Mold
Start with your nose. Get in the car, close the doors, and take a slow breath. Move around, sniffing near the seats, the floor, and the dash. Your nose is the best tool you have; the spot where the musty smell is strongest is almost always ground zero for the problem. I learned this the hard way in my grey Honda Odyssey after a juice box spill went unnoticed for a week.
Next, get your eyes involved. Turn on a good flashlight. On fabric seats, headliners, and carpets, look for clusters of tiny black or green speckles. On vinyl, leather, or plastic trim, mold often looks like a white or gray powdery film. That powdery substance might wipe off easily, but it leaves a stained, etched surface behind, which is a clear sign of active growth.
Now, investigate the usual hiding spots. These areas trap moisture and organic debris, creating a perfect home for mold.
- Under floor mats: Pull them all out. The carpet underneath can stay wet for days after rain gets past the seals.
- Seat rails: Crumbs and dirt pack in here, holding dampness against the metal. Run your finger along the track.
- The spare tire well: A common pool for water from clogged drain plugs or rear light seals. Lift the cover and look.
- Door panel fabrics: Moisture runs down windows and soaks into the lower door cards. Feel the material.
Your hands are tools, too. Press firmly on the carpet, especially along the sill plates and under the seats. If the carpet feels cool, damp, or spongy under pressure, you have found hidden moisture that must be addressed before any cleaning. This tactile test has saved me from missing major issues in cars that looked clean on the surface.
Finally, consider the air conditioning system. A common question is how to know if the smell is coming from the A/C. Here is a simple test. Turn the ignition to accessory mode and blast the fan on high without the A/C compressor engaged. If you get a wave of that damp, dirty socks smell from the vents, you have mold growing on the evaporator core inside your dashboard. This happens when the system doesn’t dry out properly after use, a frequent issue in humid climates or after heavy rain.
The Mold-Fighting Product Tier List: From DIY to Pro-Grade

Fighting mold is not a one size fits all job. Your tools should match the problem. I keep three tiers of products in my shop, ready for anything from a faint damp smell in my Miata to a full blown biohazard in the Odyssey after a juice box disaster. Here is how I break it down.
Budget & DIY: Vinegar, Baking Soda, and Sunlight
This is where most people start. I have, too. For a small, fresh problem, these kitchen staples can work. Your goal here is to neutralize odors and dry the area completely without spending a dime on specialty chemicals.
- Distilled White Vinegar: Mix it 50/50 with water in a spray bottle. It kills surface mold due to its acidity. Spray it on, let it sit for ten minutes, then wipe. The con? That sharp, pickled smell hangs around. It fades after a day or two, but in a closed car, it can be overwhelming. I used this on the Honda’s carpet mats once. It killed the mildew smell from wet sneakers, but my kids asked if I was making salad in the van.
- Baking Soda: This is for absorption, not killing. Sprinkle it on a musty seat or carpet, let it sit for hours to pull moisture and odors, then vacuum it up. It is great for mild smells. The problem is it gets everywhere. If you do not vacuum thoroughly, you will find white dust in crevices for weeks. It is a temporary fix, not a cure.
- Sunlight: Nature’s ultimate disinfectant and dryer. Park the car with the windows down on a hot, sunny day. UV light helps kill spores, and heat drives out moisture. This works wonders on my Miata’s canvas top after a surprise rain. But it is a slow process, and you risk sun damage or fading to your dash and seats if done too often.
These methods are cheap and accessible. They work for surface level issues, but they often just mask a deeper problem if moisture remains trapped in the padding.
Enthusiast & Reliable: Dedicated Cleaners and Steam
When DIY mixes do not cut it, you step up to products made for the job. This is my most used tier for customer cars and my own daily drivers. Investing in a few key tools here saves you endless frustration and actually solves the problem.
- Automotive Interior Disinfectants: These are sprays specifically formulated for car interiors. They kill mold, bacteria, and odors without damaging fabrics or plastics. A good car mold removal spray should be EPA-registered. That means it is proven to kill specific pathogens. I use one on the BMW’s leather and the Tesla’s vegan seats. They work fast, smell neutral, and do not leave a residue. The cost is higher than vinegar, but the results are reliable.
- Enzyme Cleaners: These are alive, in a way. They use natural enzymes to “eat” organic matter like mold spores and biological stains. They are fantastic for pet odors or old milk spills in family vehicles. You spray, let it dwell, and the enzymes work for hours. The downside is they need time and a specific temperature range to be effective. Rushing the process makes them useless.
- Portable Steam Cleaners: This is a game changer. Steam over 200°F kills mold and bacteria on contact and flushes it from fabrics. I use my handheld steamer on seat seams, headliners, and floor mats. The heat also helps evaporate deep moisture. It is safe for most interiors if you keep the nozzle moving. The con? You have to buy the machine. It is an investment, but for anyone serious about detailing, it pays for itself.
This tier offers a balanced approach of effectiveness, safety, and cost for the person who cares for their car regularly. It is how I maintain the F-150’s cloth seats after muddy boot season.
Show Car & Severe Cases: Professional-Grade Assault
Sometimes, you need the big guns. For a flooded car, a chronic leak, or a mold colony you can see growing, DIY and enthusiast methods are just a bandage. This tier is for eradication, and it requires respect for the tools and the chemicals involved.
- Professional-Grade Antimicrobial Sprays: These are concentrated, industrial strength formulas. They create a long lasting barrier that prevents mold regrowth for months. You typically dilute them and apply with a pump sprayer, wearing gloves and a mask. They are incredibly effective, but they are expensive and can be harsh if misused. I used one in a customer’s convertible that had been stored damp. It worked, but the smell of the chemical itself was strong for a day.
- Ozone Generators: An ozone machine is my secret weapon for stubborn, pervasive smells. It produces ozone gas (O3) that oxidizes and destroys odor molecules and mold spores at a chemical level. You run it in the closed car for 30-60 minutes. No other method penetrates every crack and vent like ozone does. I have used it in the Odyssey after a truly horrific spoiled food incident. The warning is serious: you and all pets must stay away from the area during treatment. Ozone is a lung irritant.
- Commercial Extractors: This is a wet-vac on steroids. It injects hot water and cleaner deep into upholstery, then powerfully suctions it all back out, removing the moisture that mold needs to live. My shop extractor can pull gallons of water from a seat. It is the definitive way to dry and clean a soaked interior. The cost is prohibitive for most individuals, which is why it is a pro tool. Renting one is an option for a severe case.
These are not everyday solutions. They are for when the health risk or value of the vehicle demands a complete, guaranteed solution, like saving a classic car’s interior or making a family car safe again after a major leak.
The Removal Process: Tactics for Every Surface in Your Car
How to Get Mildew Smell Out of Fabric Seats (Like in the Honda Odyssey)
My grey Odyssey has seen every kind of spill. When a damp smell sets into the fabric, you need to act like a surgeon. You are not just cleaning the surface thread, you are treating the deeper layers without drowning the cushion foam underneath.
First, get a good look. Use the crevice tool on your vacuum to pull any loose spores and grit from the seat’s seams and perforations. This keeps you from grinding dirt in later.
Next, pick your weapon. I prefer an enzyme-based cleaner for organic smells; it eats the mold and mildew at a molecular level. Spray it lightly onto the fabric. Do not soak it. You want it damp, not dripping.
Take a soft-bristled detailing brush and gently agitate the area. This works the cleaner down into the fibers. Let it dwell for five to ten minutes, as the bottle instructs.
Now, extraction is everything. You have two main tools here:
- A wet/dry vacuum with an upholstery extraction tool is the gold standard. It pulls the dirty moisture and contaminants back out.
- A steam cleaner is a fantastic alternative. The high heat sanitizes and helps lift the stain, but you must follow with a dry microfiber to soak up the released moisture immediately.
Finally, dry it like your sanity depends on it. Park in the sun with the windows down. Point a fan directly at the seat. Use a climate control setting with the heat on if you have it. A seat that feels dry on top can be wet underneath for days. That hidden dampness is what brings the smell right back.
Cleaning Mold from Car Carpets and Floor Mats
Floor mats and carpets are ground zero. The best thing you can do is get them out of the car. This lets you attack the problem directly and, more importantly, clean what’s underneath.
Pull the mats and peel back the carpet if your vehicle allows. Take them to a driveway or garage floor. Hose them down to remove loose dirt. Then, apply your antimicrobial cleaner or a diluted all-purpose cleaner. Scrub thoroughly with a stiff brush. The goal is to flex the carpet backing and loosen everything trapped deep in the pile. All of this sets you up for clean car carpet floor mats. Finish with a thorough rinse and air-dry to keep them fresh.
Rinse until the water runs clear. Then, hang the mats over a fence and prop the carpet up against a wall. Airflow is your best friend here; it might take a full sunny day or two for them to dry completely.
With the carpet out, you have a rare chance to clean the painted metal floorpan. This is often where moisture pools unnoticed. Wipe it down with a disinfectant spray and a microfiber towel. Inspect for any rust spots that may need attention. Let it air out before you put your fresh, dry carpet back in.
Caring for Leather and “Vegan Leather” Surfaces (Like in the BMW or Tesla)
Leather and synthetic materials like Tesla’s “Vegan Leather” need a gentler approach. Harsh chemicals will dry out real leather, causing it to crack. On synthetics, they can degrade the protective coating.
For my black BMW’s leather or the Tesla’s white seats, I use a pH-balanced leather cleaner specifically designed for automotive interiors. Avoid household cleaners, vinegar, or strong bleach solutions. They do more harm than good. This routine helps you clean and maintain leather car seats effectively, keeping them looking and feeling new. It’s a simple step toward long-lasting interiors.
Spray the cleaner onto a soft microfiber towel, not directly onto the seat. Wipe the surface with gentle pressure. Mold on these non-porous surfaces is usually just on top if you catch it early. It should wipe away easily. Follow up with a separate, dry towel to buff off any residue.
If the smell persists in the pores of real leather, a light conditioning after cleaning can help. For synthetics, just ensure the surface is completely dry. The key is to treat the material with respect, preserving its finish while removing the contaminant. You can find additional tips on how to clean and condition leather car seats.
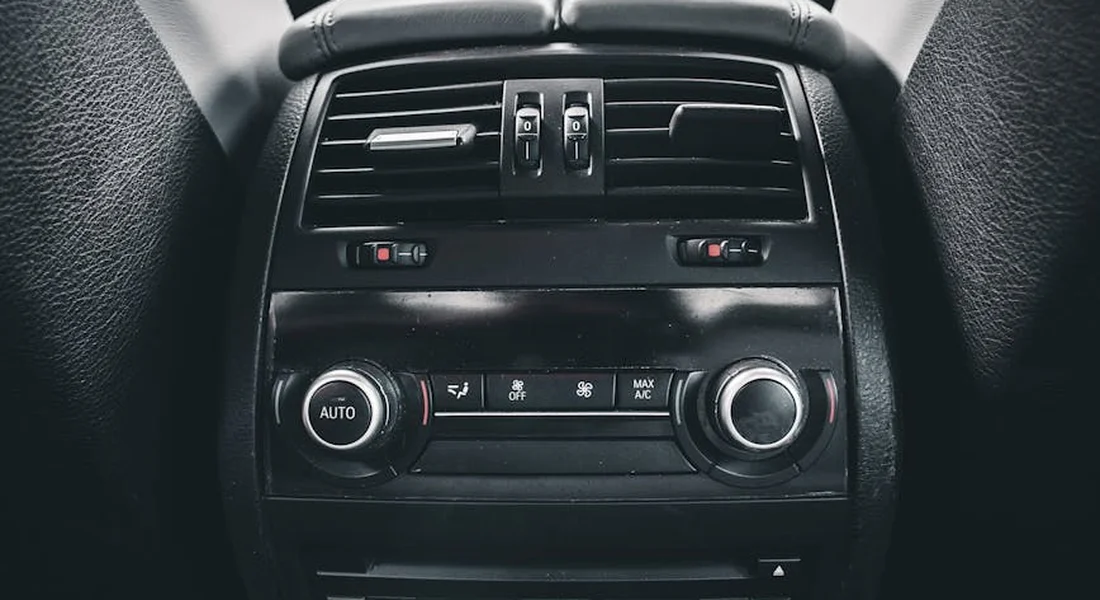
How to Get a Moldy Smell Out of a Car’s Air Conditioning System
You clean every surface, but a musty blast still hits you when you turn on the AC. That’s the evaporator core. It gets cold and wet, and mold loves it. Here is the simple fix.
Start by replacing the cabin air filter. It’s cheap, often located behind the glovebox, and is a primary odor filter. A new one gives your system a clean start.
Next, use a foaming HVAC cleaner. With the vehicle running and the AC on recirculate, spray the long hose that comes with the can into the exterior air intake (usually at the base of the windshield). The foam will be sucked through the system, coating and cleaning the evaporator core.
Let the foam work as directed, then turn the system off. This last step is critical: turn the fan to high and set the heat to maximum for about ten minutes. This bakes any remaining moisture out of the evaporator core. Do this with the windows down so the hot, dry air can carry the last of the smell away.
Erasing the Musty Smell for Good: The Deodorizing Finale
You have killed the mold and scrubbed every surface. The car looks clean. But you open the door the next morning and that damp, musty smell hits you again. It feels like a betrayal. I have been there with my grey Honda Odyssey, the kid hauler, after a forgotten sippy cup incident. The cleaning step removes the source, but the odor molecules themselves are volatile organic compounds (VOCs) that get embedded deep in fabrics and foams. To win, you must evict these invisible tenants.
Think of it like this. Killing the mold is putting out a fire. Deodorizing is clearing the smoke out of the house. You need a final, targeted step. You have three main weapons, from gentle to aggressive.
The Passive Absorber: Baking Soda
This is your first line of defense for a mild, lingering smell or as a maintenance step after a deeper clean. Baking soda is a base that neutralizes acidic odor molecules. It works, but slowly.
- Do not just sprinkle powder everywhere. That makes a new mess.
- Use an open container, like a shallow box or bowl, and place it on a floor mat overnight.
- For a more targeted approach, I will sometimes vacuum the carpets and seats, then lightly dust them with baking soda, let it sit for an hour, and vacuum it all back up.
This method is passive, cheap, and safe, but it only treats the air and surface-level odors. It will not pull smells from deep within a seat cushion.
The Active Hunter: Enzyme & Odor-Eliminator Sprays
When baking soda is not enough, you need an active agent. These are my go-to for most post-cleanup smells. They do not mask with perfume. They break odor molecules apart on a chemical level.
Look for sprays labeled as “enzyme-based” or “odor eliminator.” They are different from air fresheners. You need to saturate the area where the smell originated.
- After cleaning, ensure the fabric or carpet is slightly damp, not soaked.
- Spray the product liberally over the entire affected zone. Do not just mist it. You want it to penetrate.
- Let it air dry completely with the windows cracked if possible. The drying process is when the enzymes work.
- You may need a second application for stubborn cases.
I keep a quality enzyme spray in my detailing kit for any organic odors, from milk spills in the Odyssey to fast-food smells in the F-150. A proper enzyme treatment will destroy the odor compounds, not cover them up with a stronger scent.
The Nuclear Option: Ozone Generators
For a severe, pervasive musty smell that has been present for months, or if you bought a car that smells like a wet basement, this is your solution. An ozone generator creates ozone (O3), a highly reactive gas that oxidizes and destroys odor molecules, bacteria, and viruses. It is incredibly effective but requires caution.
Ozone is a lung irritant and unsafe to breathe. You must follow strict safety protocols. I used this on the Odyssey after a milk spill festered for a week during a vacation.
- Run the generator only in a completely empty car. Remove people, pets, and plants.
- Place the unit on a front seat, set the timer (start with 30-45 minutes for a car), and turn it on.
- Seal the car doors and windows. Let the ozone fill the cabin and work.
- When the timer stops, wait at least one hour before opening the doors. Then, air the car out thoroughly for another hour before getting inside.
- The smell will be gone. It leaves a faint, clean “after-thunderstorm” scent that fades in a day.
This is the permanent fix for the toughest cases. You can rent these units or hire a detailer who has one.
Choosing Your Path to a Fresh Cabin
Start with a complete clean. Always. Then, match the deodorizer to the smell’s severity.
For a faint reminder, try the baking soda box overnight. For a persistent odor after cleaning, an enzyme spray is your best friend. For a smell that makes you want to sell the car, the ozone generator is the definitive answer. This progression — clean, then target the odor with the right tool — is how you eliminate a musty smell in a car interior permanently. You are not just cleaning the car. You are reclaiming it.
Keeping It Dry: Prevention is Always Easier Than the Cure
I learned this lesson the hard way with my grey Honda Odyssey. A forgotten sippy cup of milk rolled under a seat. A week later, the smell told me exactly where it was. Stopping moisture is the single most effective thing you can do to stop mold and mildew before they start. Here is what I do now to keep all my cars dry. If a forgotten snack leaves a stubborn odor, I apply the same approach to remove rotten food mold odors from the car. It’s all about quick moisture control and targeted odor neutralization that lasts.
Actionable Daily Habits
Make these simple actions part of your routine. They cost almost nothing but save you a huge headache.
- Use Silicone Gel Desiccant Bags: I buy reusable ones online and keep two in the car, one under each front seat. They silently pull moisture from the air. Every few months, when they turn from blue to pink, I plug them in to recharge overnight.
- Crack Windows After a Car Wash: Even a professional interior detail leaves the air damp. When you get home, roll each window down about half an inch for an hour. This lets the humid air out and stops it from settling into your fabric.
- Never Store Wet Items Inside: This seems obvious, but we all do it. Wet gym clothes, a soaked umbrella, a swimsuit. Take them out immediately. Your car is not a drying rack. My rule is if it is wet, it does not stay in the car past the drive home.
Check Your Drains (The Hidden Culprit)
Modern cars have built in drains for sunroofs and doors. They are designed to let water out. When they clog, water has nowhere to go but inside your car’s frame and carpets.
My black BMW taught me this. A musty smell appeared every fall. I finally found the sunroof drain tubes, tucked near the A-pillars, clogged with old leaves and pine needles. Clogged drains are a leading cause of hidden, persistent moisture that you cannot see.
- When to Check: Do this every fall after the leaves drop and again in spring. If you park under trees, check more often.
- How to Clear Them: Open your sunroof. Look in the corners for the small drain holes. Use a long, flexible trim tool or a piece of weed whacker line. Gently feed it down the hole a few feet to push any blockage through. For door drains, open the door and look along the bottom edge for a small rubber flap. Make sure it is open and clear of dirt.
Create a Moisture Barrier
Once your seats are perfectly clean and dry, you can add an invisible shield. A fabric protector does not make your seats waterproof, but it causes liquids to bead up on the surface so you can wipe them away before they soak in.
I treat the cloth seats in my Odyssey and my Miata’s canvas top every year. Applying a protector to a clean, dry surface gives you critical extra minutes to react to a spill before it becomes a stain or a source of moisture.
- Prep is Everything: The seats must be shampooed, extracted, and completely dry. Applying a protector over dirt or moisture traps it in.
- Application Tip: Spray the product lightly onto a microfiber applicator pad first, not directly onto the fabric. This gives you more control and prevents overspray and soaking. Apply in a well ventilated area, wearing gloves and a mask.
When to Call for Backup: Understanding Professional Car Mold Removal

Sometimes, the mold wins. I learned this the hard way with a customer’s car that had a sunroof drain leak they ignored for months. The carpet felt like a wet sponge, and a musty smell hit you like a wall. That’s when you hand it off.
You should call a professional detailer or mold remediation specialist if you see extensive fuzzy growth patterns, discover soaked padding under the carpets, or have any underlying health concerns like allergies or asthma. My 2019 Honda Odyssey, the “Kid Hauler,” taught me about hidden moisture. A spilled juice box can be extracted, but a persistent leak from a door seal soaks into places you cannot see or properly dry.
What does a pro do that you can’t? They have the tools and the process to attack the problem at its root.
- Full Interior Tear-Down: This is the big one. They remove seats, center consoles, and door panels to get to the cabin floor. They peel back the carpet to expose the foam padding underneath, which acts like a giant, filthy sponge. This is often the true source of the smell.
- Advanced Drying & Sanitizing: Professionals use powerful forced-air dryers and dehumidifiers designed for water damage. They don’t just wipe surfaces dry; they remove moisture from the air itself to prevent regrowth. Their industrial-grade cleaners and disinfectants are formulated for biocide action, going beyond simple soap.
- Ozone or Hydroxyl Treatment: I keep a small ozone generator for odor jobs. A pro will use a much larger one or a hydroxyl machine. These devices flood the cleaned cabin with oxidizing gas that breaks down odor molecules at the source. It’s the final step to ensure the smell is gone, not just covered up.
This level of service has a cost, but it reflects the labor and expertise involved. For a localized area on a seat or in the trunk, you might spend $200 to $400. For a full interior tear-down due to a major leak, the price can easily reach $800 to $1,000 or more. The final number depends entirely on the hours of labor and the square footage of affected material.
If you open the door and the sight or smell makes you take a step back, that’s your sign. Searching for “professional auto mold removal near me” or “auto detailer water damage restoration” is the right move when the project feels bigger than your garage, your time, or your comfort level with chemicals. A good pro will give you a clear assessment and a plan, not just a scary bill. There is no shame in calling for the right tools for the job.
Keeping Your Car’s Interior Fresh and Safe
Your most powerful tool against mold is acting fast-dry any moisture immediately and clean thoroughly with the right, safe cleaners. This stops spores from taking hold and ensures that musty smell doesn’t become a permanent passenger.
Neglect this process, and you’re inviting damage to your seats and health risks that are much harder to reverse.
Industry References
- r/cars on Reddit: Advice on cleaning mold from car interior?
- Car Interior – Mold Removers – The Home Depot
- Looking for recommendations for services to remove mold …
Max is an automotive enthusiast having worked as a car mechanical and in interior detailing service for over 25 years. He is very experienced in giving your old car, a new fresh vibe. He has detailed many cars and removed very tough smells and stains from all kinds of cars and models, always ensuring that his work and advice helps his customers. He brings his first hand experience to his blog AutoDetailPedia, to help readers breath new life into their car interiors.