How Do You Remove Scratches from Car Paint Without Making Things Worse?
You just noticed a scratch on your door, bumper, or hood, and now it’s all you can see. I get it-that mark feels personal, like a dent in your pride as much as your paint.
Based on years of correcting everything from light swirls to deep gouges on my own cars, this article will teach you how to diagnose a scratch’s severity, the right hands-on methods to safely remove it, which products and tools actually work, and how to protect the area after correction.
Use the wrong technique, and you will permanently dull your clear coat or etch the scratch deeper into the paint.
How Do You Know What Kind of Scratch You’re Dealing With?
You need to diagnose the scratch before you try to fix it. It saves time and prevents making things worse. The best tool for this is already at your fingertips.
Run your fingernail lightly across the scratch. Does it catch? The answer tells you everything.
Modern car paint is a sandwich. The top layer is clear coat, a hard, transparent plastic shield. Under that is the base coat, which gives the car its color. Beneath the color is primer, a greyish layer that helps paint stick. At the bottom is the metal of your door or hood, or the plastic of your bumper.
A clear coat scratch will catch your fingernail just slightly, and the scratch itself looks like a hazy, whitish line. This is damage only in the top clear layer. The color underneath is perfectly intact. These are the most common and the most rewarding to fix yourself.
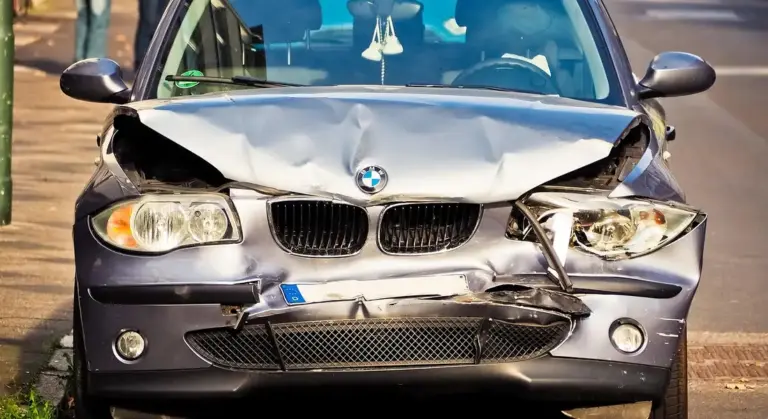
A deep paint scratch will catch your fingernail firmly, and you’ll see the color of your car or a light grey primer at the bottom of the groove. This means the scratch has cut through the clear coat and into the color layer or even down to the primer. This is a more serious wound. Repairing this type of scratch often requires more than just a simple touch-up.
The repair process is the same whether the scratch is on metal or plastic. On my F-150’s plastic bumper, a deep scratch feels the same as one on the metal hood. The only difference is you must be more careful not to generate too much heat with a polisher on plastic.
So, can you really fix car scratches? Yes, absolutely. Clear coat scratches are 100% DIY-friendly with the right process. Deep scratches that show primer or metal often need professional touch-up paint work, but you can still make them far less noticeable with careful effort. For those facing repair deep scratches car paint, practical DIY steps can improve the look. They’ll also help you decide whether to DIY or hire a pro.
Gathering Your Scratch-Fighting Arsenal: Tools & Chemicals
You cannot fight scratches with dirty rags and hope. You need the right gear. This is my non-negotiable list, the stuff I grab from my shelf every single time.
Tools You Must Have
- Microfiber Towels (Two Types): Get a stack of 300-400 GSM towels for wiping off compound and polish. They have more texture for grabbing product. Then, get a few 500+ GSM ultra-plush towels for your final buff. The deep pile leaves a flawless, streak-free finish.
- Grit Guards: These plastic grids sit at the bottom of your wash buckets. They trap dirt so you’re not scrashing your mitt in a soup of grit. Use two buckets: one for soapy wash water, one with clean water and a Grit Guard for rinsing.
- Dual Action (DA) Polisher: For beginners, a machine with an 8mm throw is perfect. It’s forgiving and powerful enough for most work. Trying to remove scratches by hand will leave your arms dead and the job half-done.
- Polishing Pads: You need different pads for different jobs. A firm, orange cutting pad removes defects. A softer, white polishing pad refines the finish after cutting. A very soft, black finishing pad is for applying the final sealant or wax.
Chemicals & Solutions
- Panel Prep / IPA Solution: This is a mix of isopropyl alcohol and distilled water. It’s pH-neutral. You use it to wipe the panel down after polishing to remove any oily residues before you apply protection. This ensures everything sticks.
- Compound: This is your heavy hitter. It’s abrasive and usually has a higher, alkaline pH. It’s designed to quickly level the clear coat and erase scratches. It will leave a hazy finish, which is why you follow with polish.
- Polish: This is your finisher. It has finer abrasives and is often slightly acidic. Its job is to refine the surface after compounding, removing the haze to bring back a deep, clear shine.
- Touch-Up Paint: For deep scratches, you’ll need your exact color code. Get the official factory touch-up paint if you can. It comes with a brush applicator. This is for filling the groove after you’ve cleaned it out.
Safety is Not Optional
I never work without these three items. Nitrile gloves protect your skin from harsh chemicals that can cause dryness or irritation over time. Safety glasses keep compound splatter out of your eyes. When you’re machine polishing, a simple disposable respirator stops you from breathing in fine clear coat dust. It’s not dramatic, it’s just smart.
You might see “car scratch repair kits” at the store. A good one should contain a small bottle of compound, a bottle of polish, a few applicator pads, and maybe a sealant. They are fine for a single, small clear coat scratch. For fixing multiple scratches or doing a whole panel, you’ll run out quickly. Building your own arsenal from the list above gives you better control and more value. That’s the essence of DIY car scratch repair—small, targeted fixes you can tailor to your car’s finish.
The First Line of Defense: Removing Light Scratches and Swirls
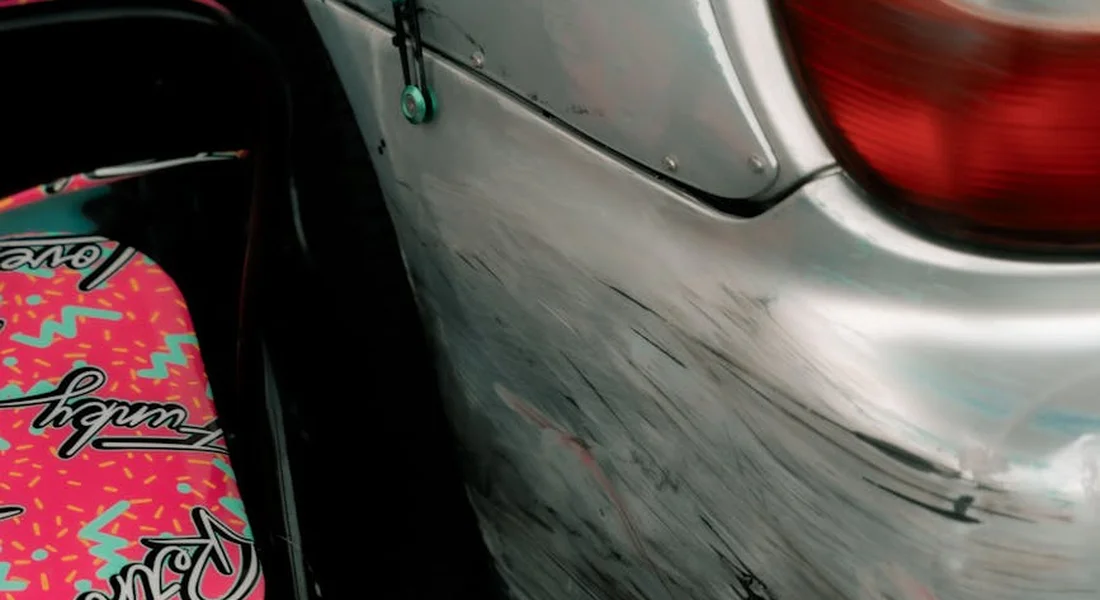
You see those fine lines in the sun. They look like a spiderweb on your hood or door. Those are swirl marks. They are scratches, but only in the clear coat. You can remove them. I do it all the time on my black BMW, the one I call the Swirl Magnet. The process is straightforward if you prepare right.
Everything starts with a perfectly clean surface. Buffing over dirt is like sanding with mud. You will grind contaminants deep into the paint. First, give the panel a proper two-bucket wash. Dry it with a plush microfiber towel. No water spots.
Now, decontaminate. This step is non-negotiable. Spray an iron remover over the whole area. On my Ford F-150’s bumper, it turns purple as it dissolves brake dust and rail dust. Rinse it thoroughly. Next, clay bar the paint. Use plenty of lubricant. Glide the clay bar over the surface. You will feel it pulling out tiny bits of tree sap and pollution. Your paint should feel slick and smooth when finished. If it feels gritty, clay it again.
Now you face a choice: fix it by hand or with a machine.
Using your hand with a foam applicator pad is acceptable for a single, isolated scratch. I did this on my Honda Odyssey’s door after a shopping cart incident. It works for a three-inch line you can cover with your thumb. For anything more, it is inefficient.
A dual-action polisher is the correct tool for a full panel or a sea of swirl marks. It corrects evenly and saves your arm. Trying to hand-polish the hood of my Tesla Model 3, with its soft clear coat, would be a frustrating exercise in inconsistency. The machine does the work you cannot replicate by hand.
If you choose the machine, follow a methodical process. Rushing leads to mistakes.
- Protect edges with painter’s tape. Tape along trim, badges, and panel gaps. On my Porsche’s bumper, I tape the PPF edges and the plastic grilles. This keeps polish from drying in cracks.
- Start with the least aggressive combination. Mount a soft, clean foam polishing pad to your polisher. Use a light cutting or finishing polish. The goal is to remove the defect, not the clear coat. You can test a small spot first.
- Apply a few dots of product to the pad. Spread it on the paint at the slowest speed. Then, increase to a medium speed. Work in a small area, about two feet by two feet. Use a crosshatch pattern: move the polisher up and down, then side to side. Overlap your passes slightly. Keep the pad flat.
- Polish until the product looks nearly clear. This usually takes a few passes. Do not press down hard. Let the machine and the abrasives do the cutting.
After you finish a section, you must inspect your work. Do not just look at the haze.
Wipe off the polishing residue with a clean, soft microfiber towel using a gentle, one-directional swipe. Fold the towel into quarters. Use a fresh fold for each wipe. This prevents you from dragging any leftover abrasives across the fresh surface. Check the paint under a bright LED light. Tilt the panel. The swirls should be gone. If they remain, you may need one more pass or a slightly more aggressive pad.
People often ask me about scratch repair kits from the auto parts store. For this level of light correction, they can be a good fit. These kits are basically all-in-one solutions with a mild abrasive and an applicator, tailored for shallow scratches and swirls. They are a practical first attempt for a scratch on your car door or a scuff on the bumper. They will not help with a deep gouge, but for the fine stuff, they are a reasonable place to start.
When the Scratch Goes Deeper: Filling and Blending Paint
You ran your fingernail across it. It caught. That smooth feeling is gone. This scratch has cut through the clear coat and into the color layer, maybe even down to the gray or black primer. On my black BMW, a scratch like this looks like a tiny white canyon. You can’t polish this out. The color is missing. You need to put it back.
This is not about making the scratch disappear forever that is a job for a professional body shop. Our goal is to fill the gap with matching paint and blend the repair so it becomes a minor flaw you only see up close, not a glaring eyesore from ten feet away. Manage your expectations. A perfect, invisible repair is incredibly difficult. A great, blended repair that protects the metal and restores 90% of the look is absolutely achievable.
Choosing Your Weapon: Pens, Brushes, and Sprays
You have three main tools, each for a different job. Getting the right one matters.
- Car Scratch Repair Pen: Think of this as a fine-line marker filled with paint. It’s for very thin, hairline scratches and chips. The tip lets you draw color directly into the groove.
- Pro: Pinpoint control. Great for door edge dings and narrow key scratches.
- Con: Can leave a raised, globby line of paint if you’re not careful. The paint finish is often less than perfect.
- Touch-Up Paint with a Brush: This is your standard bottle of factory-matched paint with a small built-in brush. This is what I use most often.
- Pro: Versatile. You can use the brush for wider scrapes or just the tip for smaller spots. You can build up layers easily.
- Con: The brush can leave streaks. It requires a very steady hand and patience.
- Car Scratch Repair Spray: This is for larger areas, like a bumper scuff several inches long. You spray a little paint into a cap and use a fine detailing brush to apply it.
- Pro: Allows for the smoothest, most professional application on bigger repairs. You can blend more easily.
- Con: Overkill for a tiny scratch. Requires more masking and prep to avoid overspray.
For most door dings and bumper scrapes, the classic touch-up bottle with a brush is the best starting point.
The Step-by-Step: Patience in a Bottle
Rushing this ruins it. I learned this the hard way on my Porsche’s front bumper. Here is the slow, right way.
- Clean the Scratch Impeccably. Wash the area, then use isopropyl alcohol (diluted 1:1 with water) on a microfiber to remove every trace of wax, oil, and dirt. The paint must stick to bare, clean surface.
- Apply the First Layer. Don’t use the brush from the bottle. Dab the tip on a piece of cardboard first to get rid of the big blob. Then, using just the very tip of the brush, gently dab paint into the scratch. Do not paint back and forth like a wall. You are filling a hole. Let this first layer dry for at least one hour.
- Build it Up Slowly. Apply a second thin layer, again just dabbing. Your goal is to overfill the scratch slightly, because the new paint will shrink as it cures. Let it dry another hour. You may need three or four of these micro-layers.
- The Hardest Part: Let it Cure. The paint is dry to the touch in hours, but it needs to harden fully. For the next step to work, you must let the repair sit for at least 48 hours, and a full week is better if you can. Park the car in a garage. This patience separates a good repair from a gummy, messed-up one.
The Mandatory Follow-Up: Sanding and Polishing
After curing, your repair will be a bump. You must level it with the surrounding clear coat. This step is where bravery meets caution.
You will need a very fine grit sandpaper, like 2000 or 3000 grit, made for wet sanding. You must keep the paper and the area soaked with water mixed with a drop of car wash soap. This lubrication prevents deep scratches.
- Tear a small piece of sandpaper, fold it, and use your fingertip to gently sand only the raised paint blob. Use light pressure. Sand for 2-3 seconds, then rinse and look. Your goal is to sand the new paint down until it is perfectly level with the factory clear coat around it.
- Stop the second it becomes level. You will now see a dull, sanded spot where the repair is.
- Now, polish that spot. Use a hand applicator pad or a very small polishing pad on a drill. Start with a light polishing compound, then a finer finishing polish. You are restoring the clarity and gloss to the area you just sanded, blending it into the rest of the panel.
- Apply wax or sealant over the entire panel to protect your work.
This takes practice. If you are nervous, practice wet sanding and polishing on an old junkyard panel or an inconspicuous spot first. On my black car, I do this in direct sunlight so I can see the reflections and spot the high point of the repair easily.
Quick Questions Answered
What about “car scratch repair paste”? Most of these are temporary fillers. They contain colored waxes or polymers that fill the scratch and hide it. They wash away after a few rains or car washes. They are a band-aid, not a repair. They are useful for hiding a scratch on a car you are selling quickly, but not for a fix you want to last.
How long does a proper scratch repair last? If you do it correctly letting the paint cure fully and then sealing it with wax a touch-up repair can last for years. It becomes part of the car’s finish. It will not pop out or fade if the preparation was good. The surrounding clear coat will degrade at the same rate. I have touch-up spots on my Ford truck from five years ago that still look exactly the same as the day I fixed them.
Battle-Tested Techniques for Doors, Bumpers, and Hoods
Every scratch location on your car presents its own set of problems. The technique for fixing the mark might be similar, but the surface you’re working on changes everything. Let’s break down the common spots.
Repairing Scratches on Car Doors
Doors are a magnet for trouble. They’re vertical, at the perfect height for shopping carts, other car doors, and yes, dog nails. The biggest challenge on a door is working against gravity, as polish and compound want to drip and run down the panel. You also have to navigate sharp body lines and curves, like the character line that runs along many modern doors.
If you’re asking “how to protect my car door from dog scratches,” my answer is always prevention. For my Honda Odyssey, I applied a clear paint protection film (PPF) to the lower section of the rear doors. It’s a sacrificial layer. The dog’s claws dig into the film, not the paint. It wipes clean. When the film gets too marred, you replace a small section, not the entire door’s paint. Prevention is always better than trying to remove dog scratches later.
When polishing a door, work in smaller, manageable sections. I often start with the polisher off, just resting on the paint, to get a feel for the curve. Your passes need to follow that curve. A common mistake is flattening the polishing pad against a rounded surface, which concentrates all the force on a small area and can create a low spot or burn-through.
Also, look for door dings near the scratch. If there’s a dent, you often need a Paintless Dent Removal (PDR) specialist to pop it out before you touch the paint. Polishing a scratch right next to a dent will look odd and won’t fix the real eyesore.
Repairing Scratches on Bumpers
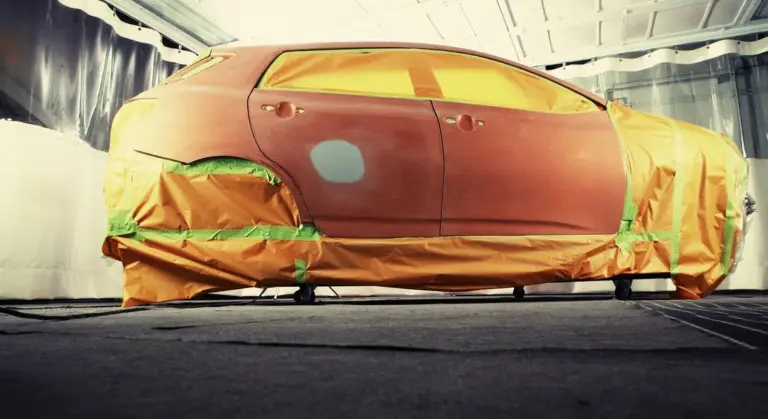
Bumpers are almost always made of flexible plastic (urethane) with a textured, unpainted underside. This flexibility is the key thing to remember. Polishing a bumper is no different than polishing a fender, as you’re only working on the clear coat, but the game changes completely if you need touch-up paint. Standard touch-up paint can dry brittle and will crack the first time the bumper flexes, say, in a parking lot.
You must use a flexible primer and paint designed for plastic bumpers. Many OEM touch-up kits now specify if they are flexible.
For the question “how to buff out a scratch on a car bumper,” the process is standard. However, be extra cautious around the edges where the painted top meets the textured black plastic trim. It’s very easy to sling polish onto that textured plastic. It becomes a nightmare to remove. I mask it off with painter’s tape. If the damage looks deeper than a surface buff, you might explore repair scratches car bumper options. The right choice depends on the depth and location of the blemish. Also, the front bumper collects every bug and rock chip, so inspect closely. What looks like a scratch might just be a deep stain in the clear coat that a dedicated bug remover can dissolve.
Repairing Scratches on Hoods
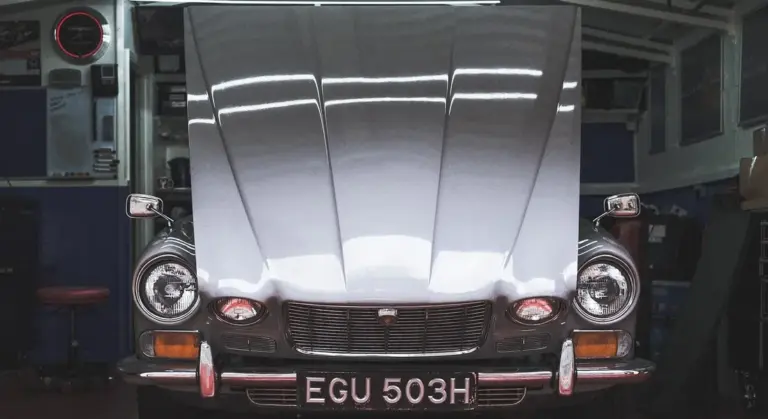
The hood is the centerpiece of your car. It’s large, horizontal, and directly in your sightline. Any mistake here is glaringly obvious. On a hood, the enemy is an inconsistent finish, which creates holograms or buffer trails that look like faint, swirling clouds in direct sunlight. My black BMW is the perfect example. On it, every polishing imperfection shouts at you.
The technique here is about even, systematic coverage. You must use overlapping passes, like mowing a lawn, and keep the polisher moving. Letting it sit in one spot on this large, flat surface generates intense heat fast. Heat is the enemy of your clear coat. I work in two-foot by two-foot sections, completing each one fully before moving to the adjacent area. On horizontal panels, dust from the polish can settle back onto the surface. A quick spritz of a detail spray and a wipe with a clean microfiber between compounding and polishing steps fixes this.
Detailer’s Pro-Tip: The Light is Your Guide
You cannot fix what you cannot see. Overhead garage lights lie to you. The single most important tool for paint correction, beyond the polisher itself, is a low-angle side light. I use a simple LED work light placed on the floor, shining across the panel. From this raking angle, every scratch, swirl, and defect casts a deep shadow.
Here’s how to use it. After you make a few polishing passes in a section, stop. Grab your light. Shine it across the area you just worked. Watch the scratches disappear in real-time as you smooth the clear coat. If they’re still there, you need more passes, a more aggressive compound, or slower arm speed. This instant feedback is what separates a guess from a guaranteed result.
Speaking of arm speed, slow down. Let the machine and the abrasives do the cutting. Use firm, steady pressure to keep the pad flat, but don’t lean your body weight into it. You’re guiding the tool, not forcing it. If you hear the polisher motor straining, you’re pressing too hard. Good correction feels smooth, almost effortless, when you have the right technique.
The Cost Question: When to DIY and When to Call a Pro
Everyone wants to know what this will hit their wallet for. Searches for car scratch repair cost or just cost estimate are constant. The answer is never one number. It depends entirely on the scratch and who fixes it.
What You’ll Spend to Do It Yourself
If you’re handling a clear coat scratch or light scuff, your costs are in tools and materials, not labor.
- A basic hand-applied scratch removal kit with compound and a applicator: $15 to $30.
- A good bottle of polishing compound and a separate bottle of finishing polish: $20 to $40 total.
- Renting a dual-action polisher from a parts store for a day: $40 to $60.
- A quality pack of microfiber towels you won’t ruin: $20.
For under $100, you can correct a world of light defects across your entire car, not just one scratch. My BMW’s trunk lid was covered in fine spiderwebs from automated car washes. A bottle of polish, a rented polisher, and an afternoon brought it back to black. The investment pays off again and again.
What a Professional Will Charge
Pros charge for their skill, guaranteed results, and insurance. Here is what you can expect in most markets.
- A single, isolated scratch repair (polish and blend): $50 to $150.
- Full correction and polishing of one panel (like a door or hood): $150 to $300.
- Spot repair and repaint of a bumper cover or fender: $300 to $800, depending on paint complexity.
These prices shift if you search for car scratch repair near me in a big city versus a rural town. A high-end detailer fixing a Porsche 911 will charge more than a shop working on a minivan. Always get a written estimate.
Is It Worth Getting Scratches Fixed on a Car?
Sometimes yes, sometimes no. It comes down to your goal.
Fix it for resale value if the scratch is prominent on a metal panel or the hood. A buyer sees a deep scratch and imagines a neglected car. Scratches can affect resale value. Addressing them now can help maintain a better price when you sell. A few hundred dollars in professional polishing can add thousands to perceived value.
Fix it for personal pride. I get it. Every time I walked up to my black BMW and saw that scratch from a shopping cart, it annoyed me. Fixing it felt good. Your car should make you happy.
Fix it for preventing rust. This is non-negotiable. If a scratch on a steel door, fender, or hood has gone through the color coat and exposed bare metal, you must seal it. Even a small tube of touch-up paint is a critical barrier. Leaving raw metal exposed is an invitation for corrosion, especially with road salt.
Call a Pro If…
Be honest with yourself. After reading this guide, if your gut says “maybe not,” listen. Specifically, call a professional for car scratch repair near me when: you notice deeper gouges, chips that have broken through the clear coat, or scratches that won’t buff out. A car paint scratch repair service can restore the finish and protect your investment.
- The scratch spans multiple panels or is very long.
- You can see distinct, shiny bare metal at the bottom of the scratch.
- The scratch is on a complex curve or edge, which is easy to burn through with a polisher.
- You’ve tried a conservative hand polish and made no visible improvement.
- You simply lack the time, space, or confidence for the job.
There’s no shame in it. I called a pro for a deep scrape on my F-150’s bedside. It was through the paint, on a sharp body line, and I knew a perfect blend was beyond my driveway setup.
Is It OK to Leave Scratches on My Car?
It depends on the type. Clear coat scratches are not okay to leave alone. Those fine web-like swirls act like a sponge, holding dirt and grime, making your paint look dull faster. They also weaken the clear coat’s UV protection over time. Polishing them out restores clarity and health.
A small, deep scratch on a plastic bumper is often a cosmetic issue only. On my Odyssey’s bumper, there’s a nick from a rogue bike handle. It’s down to the plastic, but plastic doesn’t rust. I touched it up with a dab of paint to make it less obvious, but I didn’t repaint the whole bumper. For a daily driver, that’s a practical compromise. I didn’t bother to repair it professionally.
Keeping Scratches at Bay: Protection After the Repair
Fixing a scratch is only half the job. You have exposed fresh, clean paint. It is naked and soft. Leaving it unprotected is like putting a new bandage on a cut and then immediately rubbing dirt on it. A proper repair always ends with a shield.
This is where I stop thinking about correction and start thinking about preservation. For long term defense, you have two main allies: paint sealants and ceramic coatings. A high quality synthetic sealant is my go-to for most cars. It bonds to the paint, creating a slick, hard shell that can last six months or more. It makes future cleaning effortless and adds a noticeable layer of scratch resistance. For the ultimate shield, a true ceramic coating is the answer. On my Porsche, the coating makes brake dust hose off and gives the red paint an unreal depth. Think of a sealant as a tough winter coat and a ceramic coating as a suit of armor; both protect, but one is a more permanent, investment-grade solution. Remember, coatings demand perfect paint preparation. Any flaw you leave behind will be locked in for years.
Your new protective layer is only as good as your wash technique. This is the most important habit you can build. I wash my jet black BMW with a religious two bucket method. One bucket holds your clean soapy water. The other is just for rinsing your mitt. You drag a mitt through clean suds, wash a section, then rinse it in the second bucket before getting more soap. A grit guard in the bottom of each bucket traps the dirt. This single practice prevents 90% of the fine swirls that ruin a finish. Use a plush, high pile microfiber wash mitt. Old sponges and rags are sandpaper.
To keep that shield strong between washes, I keep a bottle of spray wax or a hybrid ceramic spray in my garage. After every maintenance wash, when the car is still wet, I mist a product like this on one panel at a time and dry it off. It takes two extra minutes. This constantly replenishes the top layer of protection, boosting water beading and adding gloss. For my F-150, I use a simple spray wax for efficiency. For the Tesla, I prefer a ceramic spray for its longer life and slickness. This quick touch up is the secret to making your hard work last through seasons of weather and driving.
This is the cycle of real car care. Proper washing prevents scratches. Preventing scratches means you rarely need repairs. When you do repair, you immediately protect the work. That protection makes the next wash safer and easier. You break the cycle of damage and correction. Your car stays looking right with less effort over time. That is the goal.
Keeping Your Paint Protected After a Repair
The most critical step is identifying the depth of the scratch before you touch it. I’ve saved myself hours of work on my black BMW by first running a fingernail over a mark to see if it catches, which tells me instantly if it’s a clear coat fix or something deeper.
Skip this simple test and you risk turning a minor flaw you could polish out into a permanent eyesore that requires a full repaint.
Citations and Authoritative Sources
- Not All Scratch Removers Work-These Are the Ones That Smoothed Out the Scrapes on Our Car
- r/cars on Reddit: Best way to remove scratches from paint?
- Different Types Of Scratches On Cars And How To Fix Them | Synchrony
- 6 Ways To Repair Car Scratches At Home: DIY Tips And Tricks
- How to Remove Scratches from Car Paint | DIY Guide for Scratch Repair
- Easy Ways to Remove Car Paint Scuffs and Scratches
- How To Remove Scratches On Car | Detailing Tips From Experts
Max is an automotive enthusiast having worked as a car mechanical and in interior detailing service for over 25 years. He is very experienced in giving your old car, a new fresh vibe. He has detailed many cars and removed very tough smells and stains from all kinds of cars and models, always ensuring that his work and advice helps his customers. He brings his first hand experience to his blog AutoDetailPedia, to help readers breath new life into their car interiors.