How Do You Safely Remove Glue from Car Paint?
That patch of sticky residue on your car’s paint is more than an eyesore. You’re right to worry about scratching the clear coat while trying to get it off.
This guide gives you the detailer’s method. We will cover the only safe solvents to use, the right tools for the job, and the step-by-step process I use on my own cars.
Guess wrong on the method, and you can leave behind scratches or a permanent, hazy spot in your clear coat.
Key Takeaways: The Safe Adhesive Removal Cheat Sheet
Your clear coat is a thin, fragile skin that you must protect through every step. The core method is always the same: start with the gentlest physical method, introduce heat or a dedicated solvent only if needed, and finish by cleaning and protecting the paint you just saved. Watch for signs of clear coat wear, as early detection guides the repair process. This approach sets the stage for repairing any clear coat damage and restoring gloss.
- Difficulty: Easy to Moderate. A fresh sticker is easy. Ten-year-old vinyl adhesive baked in the sun is a moderate afternoon project.
- Time: 30 minutes for simple residue. Two to four hours for large areas of stubborn, aged film adhesive.
- The Non-Negotiable Rule: Never use a razor blade, metal scraper, Scotch-Brite pad, or harsh abrasive on your clear coat. You will scratch it deeply. Plastic razor blades and your fingernail are your only scraping tools.
- Method Comparison: Sticker glue often yields to a rubber eraser or citrus cleaner. Old wrap adhesive needs heat and a dedicated adhesive remover. Super glue requires a very specific, cautious solvent approach.
What Kind of Glue Are You Dealing With? Identifying Your Adhesive
Look at it. Feel it. This tells you everything. Run your finger (in a latex glove for cleanliness) over the spot. Is it a thin, slippery film? A thick, gummy layer? Or is it a hard, crusty lump? Identifying the enemy is 80% of the battle. Using the wrong method on the wrong adhesive wastes time and risks the paint.
I learned this removing the dealer’s obnoxious sticker from my F-150’s tailgate. It was simple gummy residue. The adhesive left on my Miata’s fender from a 90s-era pinstripe vinyl was a different beast entirely, brittle and discolored.
Sticker and Decal Residue: The Common Nuisance
This is the classic “adhesive ghost.” You peel off the decal, and a translucent, tacky film remains. It might be clear or have a whitish, cloudy look. It feels uniformly gummy and sticky to the touch. This is the easiest type to tackle, often removable with just friction or a mild citrus-based cleaner.
How do you remove sticker residue from car paint? Start with your thumb. Rub firmly. The heat and friction can ball up fresh residue. If that fails, a dedicated adhesive remover or even a white vinyl eraser disk works wonders. Be cautious when dealing with stickers or decals on car paint to avoid any damage.
Tougher Customers: Vinyl Wrap and Paint Protection Film (PPF) Adhesive
This adhesive is designed to hold for years. When the film comes off, it often leaves a thicker, more tenacious layer. It can look like a patch of dried, clear glue. Old adhesive feels different. It might be hard and brittle, cracking when you push on it. Or, if it’s breaking down, it can be a gooey, tar-like mess. Sun exposure turns it into a hardened shell.
This job requires patience, heat to soften the bond, and a solvent designed for automotive adhesives. You work in small sections, softening and lifting, never forcing.
Super Glue (Cyanoacrylate) and Other Hard Adhesives
This is a spill, not a sticker. It forms a hard, plastic-like bond that is rough and opaque. You can’t rub it off. It sits on top of the clear coat in a distinct bead or smear. This is a high-risk removal.
How do you remove super glue from car paint? You need a solvent that breaks cyanoacrylate bonds, like acetone or nitromethane-based removers. This is a last-resort, spot-treatment process because these solvents can instantly dull clear coat if misused. You apply a drop to a towel, never directly to the paint, and dab cautiously for mere seconds. For more on removing super glue from car paint, see our quick guide. It covers safer options and best practice.
Your Detailing Toolkit: Everything You Need to Get Glue Off Car Paint
You do not need a garage full of specialty gear. You need the right few tools used correctly. Gathering everything before you start is the difference between a clean removal and a frantic search with glue drying on your paint. Here is what you need, broken down by job.
- Softening Agents: A heat gun (on low) or a standard hair dryer. A handheld steamer is excellent for delicate areas or if you are nervous about heat.
- Removal Tools: A pack of plastic razor blades. My go-to are Autocraze blades. A dedicated adhesive removal wheel, like a 3M Eraser Wheel, for very large, stubborn areas. Your own fingers, protected by nitrile gloves.
- Cleaning Agents: A dedicated adhesive remover or citrus-based cleaner (Goo Gone Automotive is a safe bet). High-purity isopropyl alcohol (70% or higher, often called IPA) for the final wipe. Car wash soap and water in a bucket for rinsing.
- Wiping & Buffing: A stack of clean, high-quality microfiber towels. You will need several. I use a soft, plush towel for applying cleaners and a separate, edgeless towel for the final buff with IPA.
Set up a dedicated rinse bucket with soapy water to immediately dunk any towels or tools with adhesive on them; this stops the glue from transferring somewhere else.
The Softening Squad: Heat and Steam
Think of old glue like hard candy. It is brittle and will shatter if you try to pry it. Apply a little warmth, and it becomes soft and pliable. That is your goal.
I use a basic heat gun set to its lowest setting, usually around 150°F. A hair dryer on high works, it just takes longer. Hold the tool at least six inches from the paint. Keep it moving in a slow, side-to-side motion. Do not point it at one spot. You are warming the adhesive, not cooking the clear coat.
Test the adhesive every 15-20 seconds by gently nudging it with a gloved fingernail; when it starts to feel gummy and lifts slightly, it is ready.
For badges on my Tesla’s bumper or residue near plastic trim on the Odyssey, I prefer a steamer. The concentrated steam softens glue quickly without any risk of heat damage. It is my top pick for beginners.
The Scraping Tools: Plastic is Your Friend
Once the glue is warm and soft, you need to lift it off. Metal tools like credit cards or actual razor blades are a hard no. They will scratch. Plastic is the only material that should touch your paint.
Hold the plastic razor blade at a very shallow angle, almost flat against the surface. Use gentle, scraping motions in one direction. You are not chiseling. You are skimming the softened glue off the surface. Wipe the blade clean on a damp towel frequently.
A common question is, is it safe to use a plastic razor blade on car paint? The answer is yes, if you follow two rules. First, the surface and the glue must be lubricated with your chosen cleaner or warmed properly. Never scrape dry. Second, if you feel increased resistance, stop. Reapply heat or cleaner. Forcing it creates scratches.
For a big job, like removing all the factory pinstriping from my F-150’s doors, a rubber eraser wheel attached to a drill is a lifesaver. It works like a giant pencil eraser, rolling the adhesive off in bits. Use light pressure and let the wheel do the work. It is faster but requires more care around edges and curves.
Cleaning and Wiping Materials
Your towels are as important as your scraper. Using an old, crusty towel will grind leftover adhesive bits into your clear coat. You need fresh, clean towels.
I keep two piles. The first pile is for the messy work: applying adhesive remover, wiping off big globs of glue, and general cleanup. These are my soft, 500 GSM plush towels. They have the nap to absorb product and lift residue.
The second pile is for the final, critical step. After all the glue is gone, you must remove the oily film from the adhesive remover. This is where isopropyl alcohol (IPA) comes in. Dampen a clean, edgeless microfiber towel with IPA and wipe the entire area; this eliminates any leftover residue and preps the paint for wax or sealant.
That final wipe with IPA is non negotiable. If you skip it and just apply wax over the residue, you will seal in a contaminant that can cloud your finish or cause bonding issues later.
The Golden Rule: Test Your Removal Method in a Hidden Spot First
This is not a suggestion. It is the single most important step in the entire process. I have learned this through expensive mistakes, like the time I assumed a general-purpose adhesive remover was safe for my BMW’s clear coat and ended up with a permanent, dull patch on the rear bumper. Always test your chosen product and technique in an inconspicuous area to see how your specific paint reacts. Factory paint, repaints, and ceramic coatings can all behave differently—especially when used with adhesive removers for paint overspray.
Think of it like testing a new shampoo on a small patch of your skin before lathering up your whole head. You are checking for a bad reaction before it becomes a big problem.
Where to Perform Your Test
You need a spot with the same paint as the affected area, but where any potential damage won’t be seen. Do not test on the obvious problem spot.
- Inside a door jamb or hood ledge: This is my go-to. The paint here is usually the same as the exterior but completely hidden when the door is shut.
- Under the trunk lid: Another perfect, out-of-sight location.
- On a lower rocker panel: Behind a wheel or near the rear bumper. These areas are often already slightly hidden and less noticeable.
- Behind a door handle: A small, sheltered spot that’s easy to check.
What You’re Looking For (The Warning Signs)
Apply a small amount of your removal product to a clean microfiber towel. Gently rub the test area for 10-15 seconds, using medium pressure. Then, immediately wipe it clean with a separate, damp towel and dry it.
Inspect the spot under good light. Run your fingernail over it lightly. You are checking for three things:
- Discoloration or Clouding: Does the paint look hazy, lighter, or duller than the surrounding area? This means the chemical is attacking the clear coat.
- Texture Change: Does the surface feel gummy, rough, or etched compared to the untouched paint? This is a sign of dissolution or scarring.
- Staining: This is rare, but some dyes in adhesives or removers can leave a slight tint.
If you see or feel any of these changes, stop. That method is not safe for your car’s paint. You must try a milder option. The soft clear coat on my Tesla Model 3, for example, is much more sensitive than the harder paint on my old Porsche.
This testing step is the direct answer to the common question, “What is the safest way to remove adhesive residue from a car’s finish?” Safety isn’t about a magic product. It is about this deliberate, cautious process of verification. Skipping this to save two minutes risks hundreds of dollars in paint correction. I do this test on every single car, even my beat-up F-150. It takes moments and saves you from heartache.
The Step-by-Step Method: How to Remove Adhesive from Car Paint
This is the part where we get our hands dirty, the right way. I have done this on every car I own, from pulling old dealership badges off the F-150 to cleaning tape residue after wrapping the Miata’s headlights. The goal is simple: get the glue off without getting the clear coat off. Follow these steps in order.
Working in sequence prevents you from grinding dirt into the paint or stripping away your protection permanently.
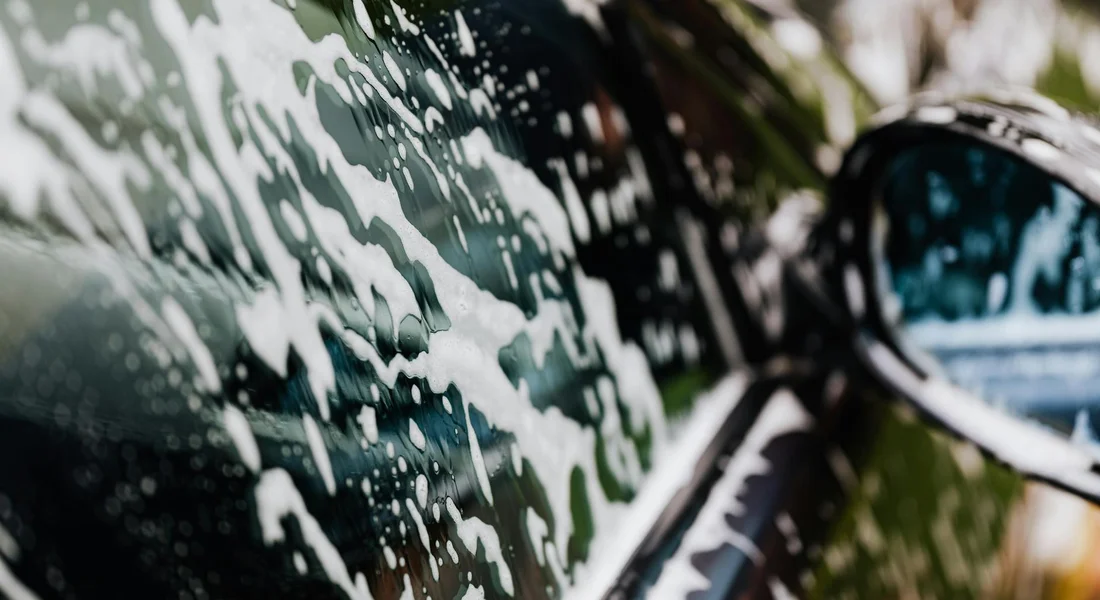
Step 1: Wash and Dry the Target Area Thoroughly
Never start on a dirty panel. That grit is like sandpaper. You need to remove all loose dirt first.
Take your car wash shampoo and mix it in a bucket. Use the two-bucket method if you can, one for soapy water and one for rinsing your wash mitt. If the glue spot is small, just wash that entire panel or section. Get it completely clean.
Dry the area with a clean, plush microfiber towel. Work in the shade on cool paint. Hot sun bakes solvents into the finish and makes everything harder. I learned this the hard way on my black BMW’s roof, and it took me an hour to fix the haze I created.
Step 2: Soften the Adhesive Glue
You cannot just scrape hardened glue. You must soften it first. Think of it like old chewing gum. Cold, it’s brittle and sticky. Warm, it becomes pliable. You have two good choices here: heat or a dedicated remover.
Let the chosen method work for a short time. For heat, move the tool constantly for about 30 seconds. For a solvent, let it sit for 1 to 2 minutes to break the bond.
Method A: Using Controlled Heat
A heat gun on a low setting or a standard hair dryer on high works. Keep the nozzle moving back and forth over the adhesive from about 3 to 4 inches away.
Your goal is to warm the glue until it’s slightly glossy and soft to the touch, not to cook the paint underneath. Test it by gently pressing the edge with your fingernail. If it gives, it’s ready. This is my go-to for large, thick adhesives like old bumper stickers.
Method B: Using a Solvent or Remover
Use a product made for automotive surfaces, like a citrus-based adhesive remover or a dedicated “tar and glue” solvent. Do not use harsh chemicals like acetone or gasoline.
Put a few drops on a small, clean microfiber applicator pad. Dab it onto the glue spot, just enough to wet it. Do not pour it on or let it run. Let it dwell. The remover will slowly break down the adhesive’s hold. This is the safest method for delicate areas or fresh paint.
Step 3: Gently Remove the Softened Glue
Now the glue is soft. Take a plastic razor blade. Hold it at a very shallow angle to the paint, less than 45 degrees. Gently push the edge under a corner of the softened glue.
Use light, steady pressure to lift and slide the blade across. Wipe the gunk off the blade onto a paper towel after every pass. If you feel serious resistance, stop. Do not force it. Forcing a blade is how you put a permanent scratch in your clear coat.
For stubborn bits, re apply a tiny bit of heat or solvent to that specific spot, wait another minute, and try again. Patience here saves you from paint correction later.
Step 4: Clean the Area to Remove Any Residue or Solvent
The glue is gone, but a film or solvent residue is always left behind. This film will stop any new wax from sticking.
You have two good options. First, wash the area again with a bit of car shampoo and water. Second, use an isopropyl alcohol (IPA) wipe. This leads to a common question.
Can you use rubbing alcohol to remove glue from car paint? Not as the main remover. But as a final cleaner, yes. Mix 10 to 15% isopropyl alcohol with distilled water in a spray bottle. Mist it on a clean microfiber and wipe the area. This strips the leftover solvent and any oils, leaving a perfectly clean, bare surface. This step is non-negotiable. Just be sure to use it carefully to avoid any damage.
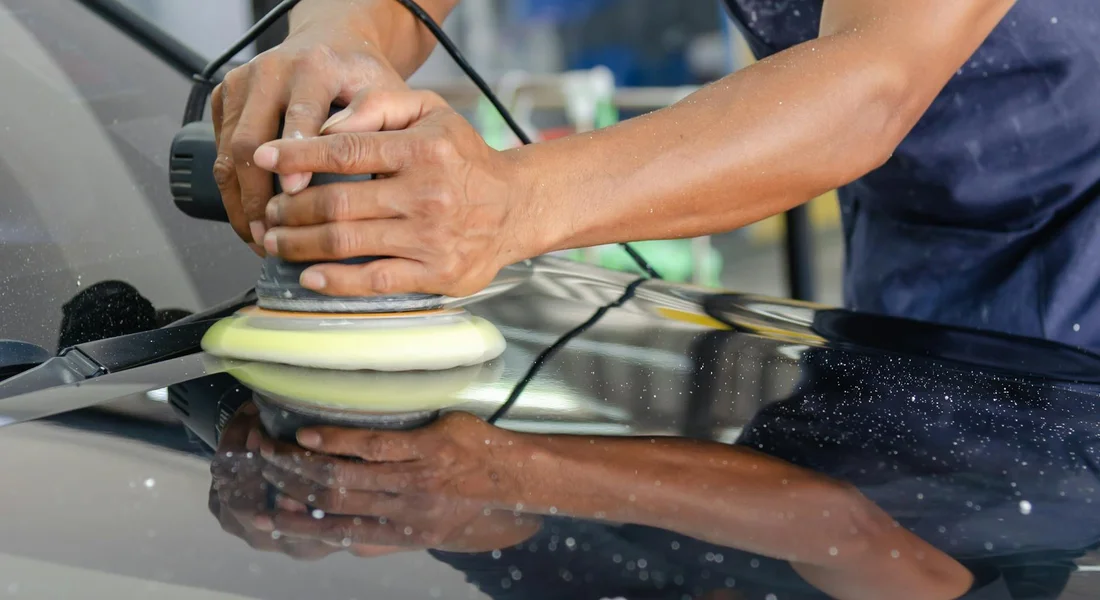
Step 5: Protect and Restore the Paint’s Shine
That spot you just cleaned has zero protection. It is vulnerable to water spots and UV damage immediately. You must seal it.
Grab a quality spray wax or spray sealant. Apply it to the entire panel following the product’s instructions. This restores the shine and adds a protective layer. I keep a bottle of spray wax in my garage for exactly this. After I clean adhesive off the Tesla’s bumper or the Porsche’s fender, I hit it with sealant right away. It takes two minutes and keeps the paint safe.
Leaving bare paint unprotected after all that careful work is the biggest mistake you can make.
Product Tier List: How to Clean Adhesive Off Car Paint, From Budget to Pro
Not all sticky situations are created equal. The best tool depends on the glue, the car, and your budget. I keep products from all three tiers in my shop because a bumper sticker on the family Odyssey needs a different approach than ten-year-old vinyl residue on a show car.
This list organizes your options from the kitchen cabinet to the professional shelf, so you can match the solution to your specific problem.
Tier 1: Budget/Drive-Through Solutions (Household Products)
We have all been there. A sticker needs to come off now, and the store is closed. This tier answers the common question: what household products can remove adhesive? These items are already in your home. They work on fresh, light adhesives like price tags, light tape residue, or recent bumper stickers.
They are a great first attempt. Just know their limits.
- Isopropyl Alcohol (70% or higher): My first grab for light glue. It evaporates quickly, so it is less likely to harm paint if you wipe it off fast. It works well on the sticky film left behind by tape.
- Cooking Oil, Peanut Butter, or Mayonnaise: The oil in these foods can break down adhesive bonds. Smear it on, let it sit for ten minutes, then wipe. It is messy. You must wash the area thoroughly with car shampoo afterward to remove all oily residue.
- WD-40: It is a light penetrant and lubricant. I have used it on my F-150’s tailgate for adhesive from a removed decal. Spray it on a cloth, rub the residue, and wipe clean. You must wash and wax the spot afterward, as it will strip any protection.
These methods are cheap but messy. They often require more elbow grease. Results can be unpredictable on old or strong glue. Which brings us to a specific household product people always ask about.
Can Goo Gone be used on car paint? The original, citrus-based Goo Gone can work. I am cautious with it. The citrus oils are strong and can linger. If you use it, apply a tiny amount to a cloth, not directly on the paint. Rub gently and wash the area immediately with soap and water. I do not let it sit. For car paint, I strongly prefer the “Automotive” version of Goo Gone, which is formulated to be safer. It’s always best to ensure that any adhesive remover is safe for use on car paint.
Tier 2: Enthusiast-Grade Automotive Adhesive Removers
This is the sweet spot for most car owners and detailers. These are dedicated products made by detailing brands like CarPro, Stoner, or 3M. They answer the question: what is the best commercial adhesive remover for regular use?
These removers are engineered to target adhesive without aggressively attacking your clear coat or the polymers in your sealant or wax. They are more effective and predictable than household hacks. I always have a bottle in my detailing caddy for the Odyssey’s bumper sticker changes or cleaning residue off the Tesla’s glass.
You spray them on, let them dwell for a minute to dissolve the glue, and wipe it away with a soft microfiber. Most are water-based and biodegradable, which I appreciate. They rinse off easily with no oily film. For removing dealer badges, old pin stripes, or adhesive from trim, this tier is your best friend. It is safe for all paints when used as directed, including the delicate clear coat on my black BMW.
Having one of these on hand turns a frustrating chore into a simple, one-step process.
Tier 3: Show Car/Professional Solvent Systems
This is for the tough jobs. Think old, hardened vinyl wrap adhesive, the gunk under removed paint protection film (PPF), or industrial bonding tape. These are powerful, targeted solvent systems.
I used a professional-grade remover on my 911 when I had to replace a section of PPF. I also keep it for the Miata restoration project for taking off decades-old pinstripes or badges. Brands like Rapid Remover or 3M Specialty Adhesive Remover are common here.
These products are not for casual use and demand respect. They work fast and can damage plastics, trim, and even paint if left on too long. You use them in a well-ventilated area with gloves. The technique is critical: apply to a cloth, gently agitate the residue, and wipe clean immediately. You often follow with an isopropyl alcohol wipe to neutralize the surface.
For 99% of people, Tier 2 is perfect. Reserve Tier 3 for when you are dealing with a hardened, crusty mess that lighter products cannot touch. It is the final tool in the box.
Paint Damage Prevention: What to Avoid When Removing Glue from Car Paint
You want the sticky stuff gone, but not at the cost of your paint’s health. I’ve learned these lessons the hard way, so you don’t have to. This is about what to avoid at all costs.
Never Use Metal Blades, Knives, or Abrasive Pads
Your first instinct might be to grab a razor blade or a putty knife. Fight that instinct. My black BMW taught me this lesson permanently. The clear coat on your car is softer than you think. Even the lightest touch from a metal edge will leave a deep, permanent scratch that requires a professional polish to remove. I once saw a faint glue line on my trunk and used the tip of a plastic trim tool, which had a tiny, almost invisible metal burr. It left a three-inch scar in the clear coat that I stare at every time I wash it. Use a dedicated plastic razor blade or a flexible plastic trim removal tool instead. They provide the scraping action you need without the guaranteed damage.
Avoid Harsh, Un-Tested Solvents Like Acetone or Lacquer Thinner
Your garage might have a bottle of acetone for projects, but your car’s paint is not one of them. These are industrial-strength solvents. Products like acetone, lacquer thinner, or even some nail polish removers can chemically burn or permanently cloud your clear coat, leaving a dull, hazy finish that no amount of polishing can fix. They don’t just clean the surface, they can attack and degrade the paint’s chemistry. A proper automotive adhesive remover is formulated to break down glue bonds without breaking down your car paint. Think of it as the difference between using bleach and a gentle soap on your skin.
Don’t Scrub Aggressively with Dry Towels
Impatience creates swirls. When a solvent is working, you might be tempted to start scrubbing with a dry towel to speed it up. This is how you inflict a web of fine micro-scratches. Let the chemical do the work of breaking the adhesive bond, then use gentle, lubricated wiping to lift it away. I keep a spray bottle of detailer spray or quick wax nearby. Once the glue is softened, I lightly mist the area and use a clean, soft microfiber towel with light pressure. The lubricant allows the glue to slide off without your towel dragging abrasive particles across the paint.
Avoid Working in Direct Sunlight or on Hot Paint
Heat is your enemy here. Working on a hot panel in the sun causes two big problems. First, it makes any solvent evaporate almost instantly, so it can’t dwell and break down the glue. You end up using more product and scrubbing harder. Second, and worse, it can “cook” the solvent into the paint or cause rapid flashing that leads to hazing or etching. Always move the car into full shade and let the surface cool to the touch before you begin any adhesive removal process. Early morning or late afternoon in a garage is the ideal time. Your product will work correctly, and you maintain total control.
Aftercare and Final Checks: Sealing the Deal
Getting the sticker goo off is only half the job. The real success comes from what you do next to restore the paint’s defense system. That spot is now naked. You’ve stripped away any old wax or sealant along with the adhesive, leaving the clear coat vulnerable to water spots, UV rays, and new contaminants. On my grey Honda Odyssey, I never skip this step. A family hauler needs all the protection it can get.
Feeling for Roughness: The Clay Bar Check
Run your fingertips lightly over the area you worked on. Does it feel like smooth glass, or does it have a gritty, sandy texture? If it’s not perfectly smooth, you’re feeling bonded contaminants-tiny bits of industrial fallout, brake dust, and tree sap that washing alone won’t remove. A quick clay bar treatment is your next move.
Think of a clay bar as a gentle, surface-level vacuum for your paint. You lubricate the area with a detailing spray, then glide the clay bar back and forth. You’ll feel it grabbing that embedded grit. It’s a satisfying, crucial step for perfect paint. We have a full guide on how to clay bar a car the right way, but the rule is simple: lots of lubricant, gentle pressure, and knead the clay frequently to a fresh side.
Locking in the Protection: Sealant or Wax
Now, with a perfectly clean and smooth surface, you apply protection. For a daily driver exposed to the elements, I lean towards a synthetic sealant. They typically last longer than traditional waxes-think 3 to 6 months instead of 4 to 8 weeks. A spray sealant is my go-to for efficiency on the Odyssey or my F-150. You just mist it on a panel and wipe it off. It’s foolproof.
For a garage-kept show car like my 911 or the restored Miata, I might use a boutique ceramic-infused spray or a premium paste wax for that deep, warm glow. The goal is the same: to create a sacrificial barrier. This new layer is what will make future clean-ups easier and shield your clear coat from the next sticker, bug splatter, or bird dropping.
A Quick Word on New Adhesives
This leads right into a common question I get: “Can you put a new sticker or decal over a clear coat?” Absolutely, but only if you follow a rule. The paint must be impeccably clean, decontaminated, and protected first. Applying a new adhesive directly onto bare, possibly rough paint is asking for trouble. It won’t stick well, and removing it later will be harder. Do the full prep-wash, clay, protect-then apply your new decal to a robust, slick surface.
Keeping an Eye on Your Work
Don’t just forget about it. The next few times you wash your car, pay a little extra attention to that spot. Does the water still bead up nicely? Does it feel as slick as the surrounding paint? This quick check tells you your protection is still working. If the beading stops, it’s just a five-minute job to reapply your spray sealant. Maintenance is always easier than repair.
You’ve done the careful work of removing the adhesive for car paint without damage. Spending these final twenty minutes on aftercare ensures your fix lasts and your paint stays healthy for the long haul.
Final Thoughts on Safe Adhesive Removal
The most important step is always to start gentle and let a proper solvent, like a dedicated automotive adhesive remover, do the dissolving work for you. Testing that solvent in an inconspicuous area first is your absolute best defense against a costly mistake, as it confirms the clear coat’s compatibility.
Skip that test or get impatient with a scraper, and you will likely inflict scratches or chemical etching that requires a full paint correction to repair.
Deep Dive: Further Reading
- How to remove super glue from car paint
- r/cars on Reddit: How to get adhesive off car paint?
- How to remove glue from car paint fast and easy
- I Got SuperGlue On My Car Paint! How Do I Take It All Off? | Auto Geek Online Auto Detailing Forum
- A Guide to Removing Glue and Tar from Your Car’s Paintwork | Simoniz
- How to remove glue from car paint: A simple guide
- Remove Stickers & Glue from Car Safely & Easily
Max is an automotive enthusiast having worked as a car mechanical and in interior detailing service for over 25 years. He is very experienced in giving your old car, a new fresh vibe. He has detailed many cars and removed very tough smells and stains from all kinds of cars and models, always ensuring that his work and advice helps his customers. He brings his first hand experience to his blog AutoDetailPedia, to help readers breath new life into their car interiors.