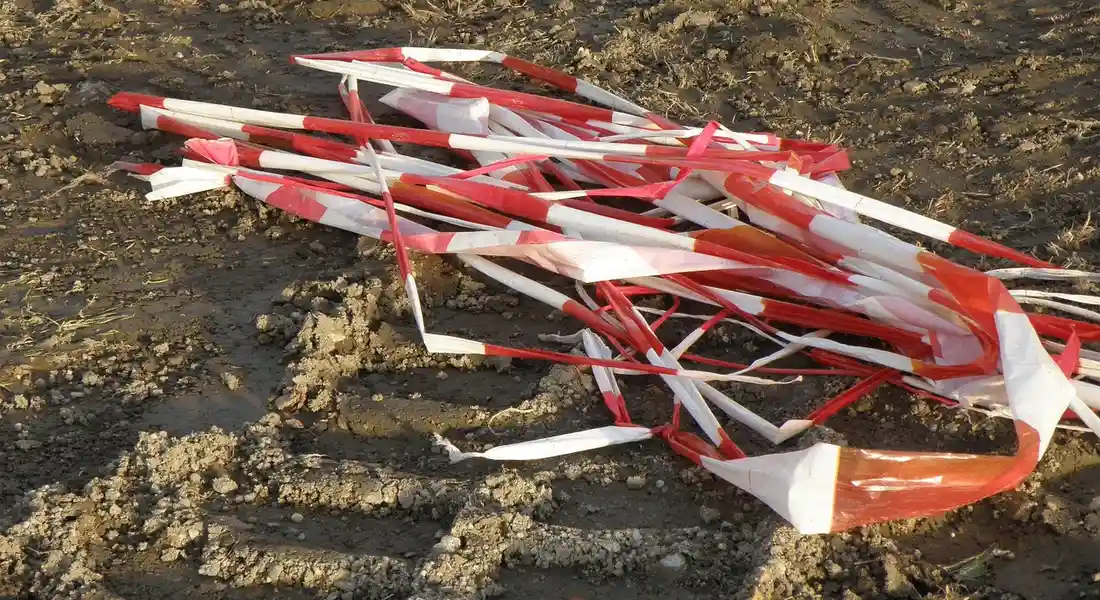
Which Tape Is Truly Safe for Your Car’s Paint During Detailing?
You’re about to mask a trim piece or protect paint for a correction job, and a nagging voice asks if this tape will come off clean. I’ve ruined a section of clear coat on my black BMW by assuming all blue tape was the same.
This article will walk you through the three tape types that won’t damage paint, how to test adhesion on delicate surfaces, and the correct removal technique to avoid residue.
Pick the wrong roll, and you will be left with gummy adhesive stains that only a clay bar or polish can fix.
Key Takeaways: Tape Smart, Protect Your Paint
You need the right tape. Let me be clear. Using the wrong tape on your car’s paint is a fast way to ruin your whole weekend. The core message is simple. You must only use low-tack, paint-safe tape specifically designed for automotive surfaces to prevent adhesive residue, paint lifting, or clear coat damage.
This is not a place to improvise. The blue painter’s tape from your hardware store shelf and the duct tape in your junk drawer are for walls and ducts. They are not safe for car paint. Their adhesive is too aggressive. It can leave a sticky mess that requires solvents to remove, or worse, it can actually pull the paint right off a repainted panel or a fragile edge.
The right tape has a few critical jobs in detailing:
- Protecting trim, rubber, and plastics during machine polishing or applying compounds.
- Creating sharp, clean lines when applying ceramic coatings, waxes, or sealants to specific panels.
- Preventing splatter from liquids or compounds from getting into gaps, badges, and crevices.
- Masking off areas when applying trim dressings or tire coatings to avoid overspray on paint.
Before any tape touches your car, the surface must be clean and dry. I cannot say this enough. Applying tape over dust, wax, or sealant guarantees it will not stick properly and could trap contaminants against the paint, leading to scratches. Wipe the area down with a dedicated surface prep or isopropyl alcohol spray to ensure perfect adhesion. Rubbing alcohol can damage paint if used too aggressively or left on the surface too long. Use a light wipe and follow product directions.
Why Your Detail Job Needs the Right Tape
Tape is not an optional step. It is a critical tool that prevents costly and time-consuming mistakes. Think of it as your insurance policy against a sloppy finish.
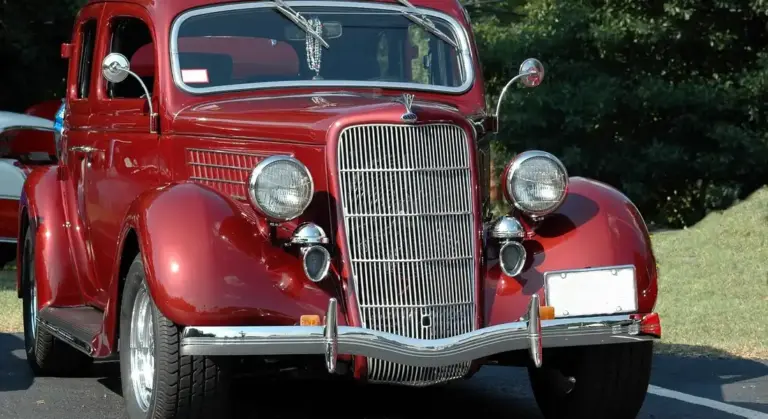
I learned this the hard way on my black BMW. That paint shows every flaw. I was in a hurry to polish a scratch out of the hood. I figured I could just be careful around the rubber trim at the base of the windshield. I was wrong. The fine compound dust sprayed everywhere. It embedded itself deep into the textured black plastic and the rubber seal. What should have been a one-hour polish job turned into a three-hour nightmare of picking dust out of trim with a soft brush and detailing swabs.
Now, I never polish without taping. For that BMW, I run a line of 1/4-inch fine-line tape along the edge where the paint meets the rubber. Then I use wider 3/4-inch general purpose automotive tape to cover the rest of the trim. When I peel it off after polishing, the result is perfect. You get a clean, crisp line where the brilliant, corrected paint stops and the protected, untouched trim begins. You can feel the difference with your finger. There is no gritty residue, no stained plastic. It feels as clean as it looks.
Contrast that with the horror of trying to remove dried compound from textured plastic. It gets stuck in every little pore. You scrub and scrub. Often, you need a dedicated trim cleaner or even a mild all-purpose cleaner to finally get it out. You risk damaging the trim. All of that frustration is avoided with 60 seconds of careful taping.
The same principle applies for other jobs. On my Tesla, I use tape to mask the edges of the bumper before I install a new piece of paint protection film. On the Odyssey, I tape over woodgrain vinyl trim before I clean the leather seats with a steamer, so moisture does not seep underneath. It is a simple habit that separates a good detail from a great, professional-looking one.
What Makes Tape “Paint-Safe”? The Detailing Checklist
Not all tape is created equal. The wrong kind can turn a simple polish job into a permanent regret. Paint-safe tape is engineered for one job: to protect, then disappear without a trace. Forget the hardware store roll. Here’s what you’re looking for.
Low-Tack, High-Peel Adhesive
This is the single most important feature. The adhesive needs to hold firm against dust and overspray, but let go the moment you pull it. Think of the gentle, reliable stick of a Post-It note. Now think of the aggressive, fibrous grip of duct tape. You want the Post-It.
A low-tack adhesive secures your work without bonding to your clear coat, which is the difference between protection and peeling paint. When you peel it back, it should release smoothly. It shouldn’t stretch like taffy or fight you. If it does, that adhesive is too strong for your paint.
This directly answers the common questions. Can duct tape damage car paint? Absolutely. Its high-tack adhesive can literally pull paint off, especially on edges, older finishes, or repainted panels. Can masking tape damage car paint? Standard tan painter’s tape often has a stronger adhesive than you’d think and can leave residue, especially if left on for more than a day or exposed to heat. I learned this the hard way on a trim piece of my old BMW. It left a gummy mess that took solvent and a lot of elbow grease to remove. No matter the tape, it is one of those substances and methods that can damage car paint.
Residue-Free Removal, Even in Heat
A tape can seem perfect when you apply it in a cool garage. The real test comes hours later in the sun. A quality detailing tape is formulated to withstand temperature swings without breaking down and depositing its adhesive on your paint.
True paint-safe tape leaves behind nothing but a clean, tape-free line, even after baking on a hot hood. I test every new tape roll on the hood of my Ford F-150. I apply a strip, let the truck sit in direct afternoon sun for a few hours, and then peel it. If there’s any hint of sticky transfer, that tape gets relegated to shop use only, never touching paint. Engine bay detailing ups the ante even further with radiant heat from the block.
Chemical Resistance
Detailing isn’t a dry process. Tape is your barrier when you’re polishing, applying compound, or prepping for a ceramic coating. These products often contain oils, solvents, and abrasives.
The tape’s paper or plastic backing must be inert. It cannot absorb liquids, break down, or disintegrate when it gets hit with isopropyl alcohol, polish splatter, or coating prep sprays. If it does, you’ll get a soggy, failing barrier that leaks contaminants onto the area you’re trying to protect. For jobs like aligning Paint Protection Film on the Porsche or masking before coating, this resistance is non-negotiable.
Controlled Stretch and Tear
Cars have curves. A good tape needs just enough flexibility to lay flat over a gentle fender curve or around a headlight without buckling or forming wrinkles. This “conformability” gives you a crisp seal. But it also needs to tear cleanly and predictably by hand. You shouldn’t need scissors for every little piece.
This balance of stretch and clean tear allows for fast, precise work on complex body lines, from the sharp creases of a Tesla bumper to the rounded hips of the Miata. A tape that stretches too much is frustrating. A tape that doesn’t stretch at all creates gaps. The right one feels like a precision tool in your hand.
The Detailing Tape Tier List: Budget, Enthusiast, and Pro Picks
Let’s get real. Not every job needs a fifty-dollar roll of specialty tape. I sort my tape drawer by use-case, not just by brand. The right tape for a quick wax job on the Odyssey is very different from the tape I use to mask the Porsche before a polish. This tier list is built on that practical mindset.
A common search is for “paint protection tape home depot” or “Bunnings” options. Good news. You can start at any hardware store. The trick is knowing what to grab and, more importantly, what to avoid.
Budget/All-Purpose Tier
This is your household painter’s tape. The classic blue or green rolls from trusted brands. I keep a roll of this in my detailing cart for one reason. Speed.
This tape is perfect for short-term protection during waxing, sealing, or protecting trim during a quick spray-down. I use it on my F-150’s plastic bed rails to keep sealant off them. It works on glass, chrome, and most hard plastics.
Do not use it for machine polishing. The friction heat can bake the adhesive onto your paint. I learned this the hard way years ago on an old sedan, leaving a gummy mess to clean up.
When you’re at the store, run your finger over the label. Look for the phrases “multi-surface” and “clean removal.” These are your guides. They typically mean a gentler adhesive. Even within this tier, some are better than others. A tape that promises 14-day clean removal is safer than one that doesn’t mention it.
Remember, this is a short-term partner. Put it on, do your work, and peel it off within an hour or two. On a hot hood, even less.
Enthusiast/Detailing-Specific Tier
You’ve graduated from waxing to polishing. This is where standard painter’s tape quits. The job now involves a spinning foam pad generating real heat. You need tape that can take it.
These are the tapes marketed directly to us. They often come in yellow or a tan color. The adhesive is formulated to resist the heat from machine polishing. It holds firm under vibration but still releases cleanly.
For any machine correction work, like chasing swirls out of my black BMW, detailing-specific tape is the only safe choice. The peace of mind is worth the extra few dollars per roll. The tape creates a sharp line between the panel I’m correcting and the trim, edges, or adjacent panels I need to protect.
Sometimes you need to shield a larger area. This is where a system comes in. Look for “paint protection tape 3m brown paper.” You use a roll of the gentle, automotive-grade tape as a “border.” Then you tape sheets of brown masking paper to that border to cover doors, windows, or hoods. It’s how I keep compound overspray off everything when I’m focused on one panel.
You’ll find these tapes at better auto parts stores or online detailing retailers. They are a fundamental tool for anyone serious about paint correction.
Pro/Show Car & PPF Tier
This is the realm of ultra-soft paints and high-stakes film installations. The adhesive on this tape is so low-tack it can feel almost limp. That is the entire point.
These tapes are used for applying Paint Protection Film (PPF) and for masking extremely delicate surfaces. When installing PPF, installers use this tape to hold the film in place for trimming and to “roll” the edges without marking the paint or the film itself. Any higher tack would risk stretching or distorting the expensive film.
Think about the paint on my Porsche 911. The clear coat is soft. A regular tape, even a detailing tape, could leave a slight impression or “tape line” if left on under sun or heat. For show car preparation, where absolute perfection is needed, this pro-grade tape is the insurance policy.
You won’t find this tape at a hardware store. It’s sourced from specialty automotive paint or PPF supply shops. For a DIYer, this tape is overkill unless you are attempting a PPF installation or working on a concours-level show car. For a professional, it’s a non-negotiable part of the toolkit for protecting a client’s six-figure investment.
Each tier has its place on my shelf. The blue tape gets used the most. The yellow detailing tape is critical for my correction work. The pro-grade tape sits waiting for the next time the Porsche needs a film adjustment. Matching the tape to the job protects your paint and saves you from a frustrating clean-up.
Step-by-Step: How to Apply and Remove Tape Without a Trace
Using tape wrong can ruin your work. It can leave sticky goo or worse, scratch the paint. This method keeps your finish safe.
Step 1: The Perfectly Clean Surface
Any dirt or wax under the tape becomes sandpaper. When you press the tape down, you grind those particles against your clear coat. My black BMW shows every single mark made this way.
Wash and dry the car first. Then, you must decontaminate the specific tape line. Take a clean microfiber cloth and spray it with isopropyl alcohol diluted with water (a 1:1 mix works) or a dedicated paint prep spray. Wipe the area firmly. You should hear a squeak. That squeak tells you the surface is bare and perfectly clean for tape to stick. This same clean surface will help when you remove tape adhesive from the car paint later.
Step 2: Cutting and Applying with Confidence
Trying to handle a four-foot piece of tape alone leads to folds and frustration. Tear it into manageable lengths, about 12 to 18 inches. For curves, use even shorter pieces.
Start at one end. Do not just drop it onto the paint. Hold one end down with a finger. Use your other thumb to smooth the tape down as you slowly unroll it along the line. Apply light, forward pressure. On a curve, like around a wheel arch, you need to stretch the tape slightly. Not a hard pull, just enough tension to keep it from buckling.
For a sharp edge, like where a window meets paint, run the tape right onto the rubber or trim. Smoothing the tape onto the trim first gives you a clean, straight line on the paint side you can follow. Later, you can slice along that edge with a plastic razor blade to separate them.
Step 3: The Right Way to Remove It
Do not just yank it straight up. Pinch the end of the tape and peel it back on itself, keeping a sharp, low angle almost flat against the paint. Peeling back on itself releases the adhesive cleanly and helps prevent any damage or residue that might require you to remove paint overspray adhesive.
Remove the tape soon after your polish or compound has dried, or right after you finish waxing. Leaving blue painter’s tape on for days, especially in the sun, can bake the adhesive onto the clear coat. I learned this the hard way on my Miata’s fender.
If you find a gummy residue, do not use gasoline or harsh solvents. They can stain or damage the paint. Use a dedicated automotive adhesive remover. Spray a little on a clean microfiber, gently rub the residue, and it will melt away without a fight. Always follow an adhesive remover with a quick wipe of isopropyl alcohol to restore a perfectly clean surface.
When to Reach for the Tape Roll: Common Detailing Scenarios

You do not need tape for every wash. But for a few key jobs, it is the difference between a good detail and a great one. I keep a roll in my apron for these moments.
- Machine polishing or compounding paint.
- Applying a ceramic coating or long-lasting sealant.
- Protecting freshly dressed trim during final wipe-downs.
Machine Polishing and Compounding
This is where tape earns its keep. A polisher spins fast. It can grab the edge of a badge or a trim piece and fling compound everywhere. That residue bakes onto black plastic and stains it white. It gets ground into rubber seals. Worse, the pad can catch that edge and leave behind a hologram or a burn mark that takes more work to fix.
I tape off every single edge that is not paint: window trim, rubber seals, plastic bumpers, and every badge. The goal is to create a safe zone for your polisher to work without any risk.
On my 1995 Mazda Miata, the seals around the canvas top are old and delicate. If compound gets on them, it turns them a chalky grey and dries them out. Before I touch the paint with a machine, I run a line of blue painter’s tape along the base of the seal. It takes two minutes. It saves me an hour of scrubbing and conditioning later. The same rule applies to the black trim on my BMW or the plastic cladding on my F-150.
Your steps are simple:
- Wash and dry the panel completely. Tape does not stick to dust or wax.
- Press the tape down firmly along the edge. You want a tight seal.
- Run your fingernail along the tape edge to bond it to the surface. This keeps polish from bleeding underneath.
- Polish your paint. Your trim stays clean, and your lines stay sharp.
Applying Ceramic Coatings or Sealants
These products are not like spray wax. They bond to surfaces and can leave a visible, crusty buildup on trim if you are not careful. Tape gives you control.
Applying tape before a coating creates a hard, clean line that makes excess product removal simple and foolproof. Imagine applying sunscreen to your face but getting it on your eyebrows. It is a hassle to clean out. Tape is like putting vaseline on your eyebrows first.
When I coated my Tesla, I taped along the edges of all the black plastic trim on the doors and bumpers. I applied the coating to the paint right up to the tape line. After the coating flashed, I wiped off the residue. The tape came off, and the trim was perfectly clean. No sticky high-build on the trim, and no risk of staining the plastic with silicone or other coating ingredients.
The method is key for a professional finish. Tape the perimeter of any panel where paint meets another material. This includes around windows, lights, and emblems. It turns a nervous application into a clean, confident process.
Protecting Sensitive Trim During Clean-Up
This is a pro tip that saves frustration. You have just spent time applying a perfect trim restorer. It looks deep black and satin. Now you need to wipe the last bits of polish off the paint right next to it. One slip of the microfiber, and you smear white polish all over that fresh dressing.
After applying your trim dressing, lay a strip of tape over it before you do your final paint wipe-down. The tape acts as a shield. Your microfiber glides over the tape. The dressing underneath stays untouched.
I do this on my Honda Odyssey’s interior plastic sills and on exterior trim. It is especially useful for liquid dressings that need time to cure. The tape keeps them safe while you finish the job. Peel the tape off slowly when you are done, and your trim looks exactly as you intended it to.
Paint Damage Prevention: The Tape Mistakes You Must Avoid
Choosing the right tape is only half the battle. How you use it matters just as much. I have seen good projects ruined by simple oversights with tape. The goal is to protect your paint, not give yourself a new problem to fix.
Using the Wrong Tape Altogether
This is the quickest way to ruin your weekend. Not all tapes are created equal. The adhesive on common household tapes is far too aggressive for your car’s clear coat.
- Duct Tape: The answer to “can you use duct tape on car paint?” is a hard no. Its cloth backing and powerful adhesive can bond to the clear coat. When you peel it off, you risk pulling the clear coat right off with it, leaving a sticky, gummy mess that requires solvent and polish to remove.
- Electrical Tape: This tape is designed to stretch and conform, which means its adhesive stays soft and can ooze. It will leave behind a thick, tar-like residue that bakes into the paint in sunlight.
- Packing Tape & Generic Masking Tape: These use cheap, aggressive adhesives that cure hard. That generic brown masking tape from the hardware store will become brittle and fuse to the surface. Removing it often leaves behind adhesive fractures or pulls at delicate edges.
Using the wrong tape guarantees you will spend more time and money on paint correction than you ever saved on the tape. I learned this lesson early on a door edge, and the memory of that cleanup job keeps me reaching for the right roll every time.
Applying Tape to a Dirty or Wet Surface
Adhesive needs a clean, intimate bond with the paint. Any barrier prevents that. If you tape over dust, wax, or water, you are setting a trap.
The tape will stick to the contaminant, not the paint. This creates micro-gaps along the tape edge. When you spray polish, compound, or dye, that liquid will seep underneath. You will peel the tape back to find a perfectly straight line of product where it was not supposed to be. Fixing this means carefully cleaning and re-polishing that entire section.
Always wipe the area down with a quick detailer or isopropyl alcohol mix and a clean microfiber until the towel comes back spotless, then let it fully dry to the touch. This one prep step is non-negotiable.
Leaving Tape on for Days or in Direct Sun
Even the safest detailing tape has an adhesive. Adhesive cures, or sets, over time and with heat. Think of it like a Post-It note versus a sticker left on a sun-baked window.
If you tape off a section for a multi-day paint correction on your black BMW and leave the car in a warm garage, the adhesive begins to cross-link. Direct summer sun dramatically speeds this up. What peels off cleanly after two hours might leave a faint, stubborn residue after two days.
Plan your work so you can remove tape the same day you apply it, and never leave a taped car in direct sunlight or a hot garage. If life interrupts, peel a small test section first to check the adhesive’s condition.
Peeling Tape Too Fast or at the Wrong Angle
Your removal technique matters. Jerking the tape off backwards or pulling it straight up is asking for trouble.
Peeling too fast can stretch the adhesive while it’s still bonded, creating a “stringing” effect that can transfer residue. More critically, on older single-stage paint or fragile edges, a fast, upward pull can actually grab and lift a microscopic lip of paint. My 1995 Miata has thin, delicate paint on some edges. I always peel tape off slowly and with great care on that car. That’s why careful removal is a cornerstone of car paint peeling prevention. Using slow, deliberate tape removal protects paint edges and helps prevent new chips.
Pull the tape back on itself at a tight, 180-degree angle, keeping it low and parallel to the paint surface as you go. Slow and steady wins the race. This method breaks the adhesive bond cleanly and minimizes any stress on the paint film, which is especially important when painting over vinyl car wraps.
Answering Your Top Tape Questions and Myths
I get a lot of questions about tape. It seems simple, but using the wrong kind is a fast way to ruin a weekend project. Let’s clear up the confusion with some straight talk from the garage.
Can You Use Masking Tape on Car Paint? What About Duct Tape?
This is where words matter. When most people say “masking tape,” they mean the tan-colored paper tape from a hardware store. That tape is a problem. Its adhesive is too aggressive for your car’s clear coat. Leave standard masking tape for your baseboards, not your bumper.
What you want is “painter’s tape,” specifically the blue or green crepe paper tapes. These are designed with a milder, pressure-sensitive adhesive that bonds enough to hold but releases cleanly. I use the green variety on my Jet Black BMW all the time when polishing around trim.
Duct tape? Never. Not once. Not for a minute. The adhesive in duct tape is a permanent, rubber-based glue. It bonds on contact and leaves a thick, gummy residue that is a nightmare to remove. Heat from the sun bakes it on. Duct tape will absolutely ruin your paint’s finish and require a full solvent cleanup. I learned this lesson years ago on a beater truck. Trust me, it’s not worth it.
Does 3M Adhesive Damage Car Paint?
3M is a giant company that makes a thousand kinds of adhesive. Asking if “3M adhesive” damages paint is like asking if “metal” is sharp. It depends entirely on the specific product.
The brand itself isn’t the issue. The product line is. 3M makes incredibly safe, detailer-grade tapes that are industry standards. They also make super-strength industrial tapes that will destroy your clear coat.
You must look for the tape’s intended use on the label. For example, 3M Performance Masking Tape (blue or green) is formulated for automotive painting and is perfectly safe for short-term paint protection. I used it just last week on the Tesla’s front bumper while cleaning off heavy bug splatter. Conversely, a roll of 3M packaging tape or electrical tape from the same company will cause immediate damage. Always read the package.
What is Paint Protection Tape, and Where Do I Get It?
“Paint protection tape” is a broad term in our world. Sometimes it refers to the tape itself-usually a soft, stretchy vinyl tape. Other times, it means a whole system: the tape attached to a wide roll of glossy paper or plastic sheeting. You use this system to mask off large sections of a car, like the windshield trim or roof, to protect from overspray during waxing or compounding.
You can find it in several places. Specialty auto detailing suppliers online will have the best selection of professional-grade tapes. Big-box stores like Home Depot or Bunnings often carry a basic automotive masking tape in the paint aisle.
Here’s the critical warning. At those hardware stores, you’ll also see tapes labeled “surface protection” for flooring or “delicate surface” for wood. Those tapes are not formulated for automotive clear coat and may leave adhesive behind. Stick to tapes that specifically mention automotive, painting, or detailing use. For my Porsche’s PPF edges, I only use tape from my detailing supplier to be absolutely sure.
How Long Can Safe Tape Stay on the Car?
Even the safest tape is a temporary guest. My rule is simple: put it on, do your work, and take it off the same day. Never plan to leave it on overnight.
The maximum you should ever leave automotive painter’s tape on is 24 to 48 hours, and that’s pushing it. Sunlight, heat, and weather changes cause the adhesive to cross-link and bond more aggressively to the surface. The longer it’s on, the harder it is to remove cleanly, especially when dealing with glue or adhesive on car paint.
I made this mistake on my old Miata’s headlight during a multi-day restoration. After two days in the sun, what should have been a simple peel left behind a faint, sticky shadow that needed a dedicated adhesive remover. Remove the tape while the car is cool, like in a garage, and pull it back on itself at a sharp angle for the cleanest release.
Final Word: Matching the Tape to Your Car and Task
Let me be direct. There is no single “best” tape for every job on your car. Choosing the right tape is about matching its specific strength to the specific task you are performing. Using the wrong one can mean residue, torn edges, or even a scratched panel. I see it like tools in a drawer. You would not use a sledgehammer to hang a picture frame.
Here is a simple guide I follow in my own garage.
- Use basic blue painter’s tape for quick, clean masking on dry paint. I reach for the 1-inch wide roll when I am applying a spray wax to my Ford F-150’s bumper and want to keep it off the black plastic trim. It is perfect for that. It is not strong enough to hold against liquids for long, so do not use it for polishing.
- Use professional-grade detailing tape for any wet work or precision lines. When I am correcting the paint on my black BMW, this is the only tape that touches the car. The stronger adhesive holds back compounds and polishes without bleeding through. The thin, conformable edge gives me that sharp line between panels. The bright yellow color is easy to see under garage lights.
- Use application tape or PPF tape only for installing vinyl or paint protection film. This tape has a very aggressive, permanent bond. It is designed to grip the backing paper of a wrap sheet so you can position it. It will absolutely damage your car’s clear coat if you try to use it like regular masking tape. Keep this roll with your wrap supplies, not your general detailing cart.
Before you unroll any tape on a visible part of your car, do a quick test. Always tear off a two-inch piece and stick it to an inconspicuous area first, like inside a door jamb or on the edge of a window trim. Press it down firmly. Wait ten minutes. Then peel it back slowly. You are looking for two things. Does it stick well enough for your job? And more importantly, does it leave any sticky residue behind when removed? This two-minute test can save you from a massive headache later. Heat and direct sunlight can change how tape behaves, so test in similar conditions if you can.
In my shop, the roll that gets replaced most often is the yellow detailing tape. It lives in the cart I roll over to my BMW 3 Series, the “Swirl Magnet.” That car needs constant attention to keep its finish perfect, and that tape is my first line of defense against holograms and buffer burns. Find your most common task, and keep that tape within arm’s reach.
Choosing Tape That Protects, Not Damages
The single most important rule is to never let convenience lead you to use household tape on your car’s paint. Invest in a quality, low-tack automotive tape designed for paint protection; the peace of mind and guaranteed safe removal are worth every penny. My roll of 3M blue painter’s tape is as crucial to my process as my microfiber towels.
Ignore this advice, and you’ll likely be spending your next detail session carefully removing stubborn adhesive residue or, worse, addressing clear coat that was lifted right off the surface.
Deep Dive: Further Reading
- r/AutoDetailing on Reddit: Tape for car that wont damage paint
- Automotive Tape Guide: Masking Tape, Specialty Tape & More
- 3M Scotch Safe Release Painters Masking Tape | Car Paint Tape
Max is an automotive enthusiast having worked as a car mechanical and in interior detailing service for over 25 years. He is very experienced in giving your old car, a new fresh vibe. He has detailed many cars and removed very tough smells and stains from all kinds of cars and models, always ensuring that his work and advice helps his customers. He brings his first hand experience to his blog AutoDetailPedia, to help readers breath new life into their car interiors.