What’s the Best Way to Clean Your Car’s Interior Windshield?
That hazy film on the inside of your glass isn’t just ugly-it scatters light into your eyes and makes driving unsafe.
I will walk you through the exact process I use on every car in my garage. We will cover the correct glass cleaner, the microfiber towels that actually work, a streak-free wiping method, and how to protect tint or anti-fog coatings.
Use the wrong technique, and you will bake streaks and smears into the glass that haunt every sunrise and sunset drive.
Key Takeaways: Your Roadmap to Streak-Free Glass
Let’s start with the basics. A perfect interior windshield clean comes down to three things you cannot skip. You need the right product, the right cloth, and the right motion. Get one wrong, and you’ll see streaks every time the sun hits the glass.
The film on the inside of your windshield is not dust, it is a greasy layer of plasticizer vapor from your dashboard and oils from your own breath. Exterior glass gets road film and bug guts. Interior glass gets this stubborn, oily coating. That is why a basic glass cleaner and a paper towel will fail you here. You need a cleaner that cuts grease and a cloth that absorbs it.
This is not a two-minute job. Anyone who says it is has streaky glass. To do it right, from gathering your tools to the final buff, plan for a solid fifteen to twenty minutes. Rushing leads to frustration and a safety hazard when driving into the sunset.
You are working in a small, enclosed space. Always roll down the windows or open the doors for fresh air before you start spraying any product. Your lungs are more important than a clean windshield. Good ventilation is the first and most important step.
The Protocol: Your Interior Glass Cleaning Checklist
Follow these steps in order. Do not jump around. This system works on my kid-hauling Honda Odyssey with its fingerprint-covered glass and on my Tesla with its massive, flat windshield.
- Ventilate the Cabin: Open all doors or roll down all windows. Let the air move through for a few minutes. This is non-negotiable for safety.
- Gather Your Tools: Have everything within reach before you start.
- Your glass cleaner (ammonia-free for tint, a dedicated automotive formula is best).
- Two or three clean, premium microfiber glass towels. I like the ones with a woven texture.
- A soft-bristled detail brush (for cleaning around edges and the dash gap).
- Perform an Initial Dry Wipe: Take a dry microfiber and gently wipe the entire interior glass surface. This lifts any loose dust and sand so you don’t grind it into the glass later. Pay special attention to the bottom of the windshield where debris collects.
- Apply Cleaner to the Cloth, Not the Glass:
This is the secret. Do not spray the cleaner directly onto the windshield. You will get overspray on the dash, the vents, and the steering column. That residue attracts more dust. Instead, give two or three sprays directly onto your folded microfiber cloth.
- Wipe in a Consistent Pattern:
Start at the top corner of the windshield. Use a front-to-back, straight-line wiping motion, overlapping each pass. Do not use circles. Circles make circular streaks that are impossible to see until you drive. Work your way across the glass in sections, flipping to a clean part of the towel often. The oily film will load up your cloth quickly.
- Inspect with a Light:
Before you think you’re done, stop. Take your phone’s flashlight or a small inspection light and shine it across the glass at a shallow angle. This reveals every hidden streak and smudge. Mark any spots with a bit of tape or just remember them.
- Final Buff with a Dry, Clean Cloth:
Grab your second, perfectly dry microfiber glass towel. Using the same straight-line motion, buff the entire surface again with light pressure. This is the step that removes the final micro-residue and ensures a truly dry, crystal-clear finish.
You must clean your glass before you apply any dressing or protectant to your dashboard. Those products create vapors that will coat your clean glass in a fresh film within days. Do the glass first, then the dash.
Work from the top down. The windshield is your largest, most critical surface. Clean it first. Then move to the side windows, and finish with the rear glass. This way, if any cleaner drips, it does not land on a surface you have already cleaned.
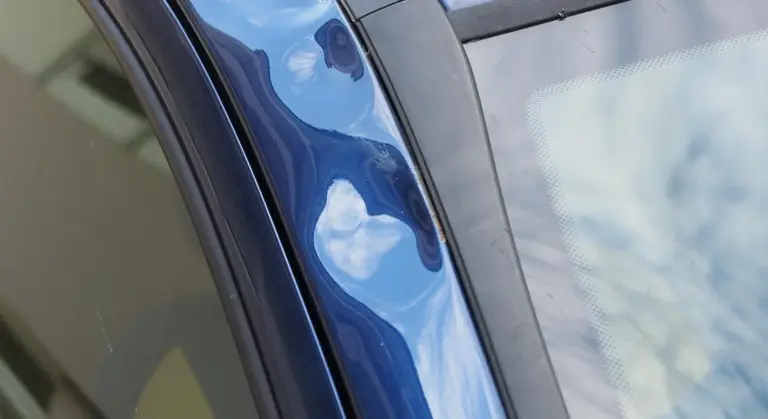
Why Is It So Hard? The Science of Interior Windshield Gunk
You wipe the glass. It smears. You spray more cleaner. It gets worse. That frustrating haze isn’t just dirt. It’s chemistry.
The primary culprit is a process called off-gassing. Your dashboard, door panels, steering wheel, and seats are not inert. They are made of plastics, vinyl, and synthetic materials that slowly release plasticizers and other chemicals over time. This is most intense in a new car, but it never fully stops, especially when the interior heats up in the sun.
These vapors have nowhere to go. They rise, hit the coolest surface in the cabin-your windshield-and condense into a thin, oily film. This invisible coating acts like a sticky landing strip for every other contaminant in your car’s air.
Now, consider what lands on that film. Cigarette or cigar smoke leaves a thick, brownish tar. Vape residue is a sticky glycol blend. If you eat in the car, microscopic oils from french fries or pizza hang in the air. Even daily commuting pulls in exhaust particulates and road film through your vents.
Each layer bonds to the oily base layer. It’s not one substance you’re cleaning. It’s a sandwich of grime. My kid-hauler Honda Odyssey taught me this. After a year of road trips, its windshield had a film of sunscreen off-gassing, cracker dust, and who-knows-what else layered over the standard plasticizer film.
Think of it this way. Cleaning a dusty house window is simple. A dry cloth works. An interior car windshield is like cleaning the greasy window over your kitchen stove after frying bacon. Water alone beads up and fails. You need a strategy that cuts the grease first.
This is why glass cleaner alone often disappoints. It’s designed for glass, not for dissolving this specific polymer and oil-based cocktail. You’re just redistributing the grease.
What Causes That Stubborn Haze and Cloudiness?
People often ask what that blurry film actually is. The cloudiness you see, especially when driving into sunrise or sunset, is light scattering through that multi-layer film.
- The core layer is always the plasticizer film from your interior trim. This is the foundation.
- Improper cleaning makes it worse. Using a dirty rag, a dry paper towel, or a household cleaner with ammonia (which can damage tint and some head-up displays) will streak and smear the film, making it more visible.
- Armor All and similar dressings contribute heavily. If you spray a shiny protectant on your dashboard, a significant amount aerosolizes and lands on the glass. This creates a greasy, rainbow-hazed film that is notoriously difficult to remove.
- Your own efforts can add to it. Cheap glass cleaners with lots of fragrance or additives can leave a residue. So can the fabric from your towel if it isn’t perfectly clean and lint-free.
The haze is a sign that your current method isn’t dissolving the film, just moving it around. You need to break the bond between the grease and the glass. That requires the right cleaner, the right tool, and a shift in technique. Treat it like degreasing a pan, not like dusting a mirror.
Tool Up: What You Need to Clean the Inside of Your Car Windshield
You can’t detail a windshield with an old t-shirt and window cleaner from under the kitchen sink. That path leads to smears, lint, and a sore back. The right gear makes the job fast and the results flawless.
Your core kit is simple: two types of microfiber cloths, one dedicated glass cleaner, and a tool to reach the bottom edge.
The Essential Three
First, gather these items. I keep this exact setup in a bin in my garage.
- Glass-Specific Microfiber Cloths (Low-Pile): You need at least two. These have a tight, almost suede-like weave. They grab grease and film without leaving fuzz behind. A standard plush towel is your enemy here.
- A Quality Interior Glass Cleaner: Not all glass cleaners are the same. The interior faces different grime than the exterior. You need a formula that cuts interior haze without damaging other materials.
- A Flexible Reach Tool: Modern windshields are deeply set. The base, where the glass meets the dash, is a mile away. A long, flexible tool lets you press the cloth into that corner without dislocating your shoulder.
With just these three items, you are already ahead of 90% of people trying to clean their windshield.
Microfiber Face-Off: Scrubbing vs. Drying
Think of your two cloths as a team with different jobs. Using one for both will just redistribute the dirt.
My first cloth is for application and scrubbing. I use a classic, short-nap “glass” towel. It has a blue border so I never confuse it. This towel gets soaked with cleaner and does the hard work of dissolving the film. The flat, tight fibers provide light abrasion to scrub without scratching.
My second cloth is for final buffing. This is a clean, dry, plush microfiber towel. I use a premium 500gsm towel for this. Its deep pile absorbs every last trace of cleaner and moisture, leaving a perfectly clear, streak-free surface. The plush towel is only for drying. If it touches the dirty glass first, it’s ruined.
One towel wets and scrubs, the other dries and polishes. Never cross the streams. I learned this the hard way on my black BMW, where every streak shows up like a neon sign at dusk.
Choosing Your Glass Cleaner
The spray bottle is your chemical key. Your choice depends on your car’s specific challenges.
- For Most Cars, Especially with Tint: Always use an ammonia-free formula. Ammonia can destroy window tint film, turning it purple and brittle. It’s also harsh on vinyl dashboards and plastics if overspray occurs. This is non-negotiable for my Tesla and its factory tint.
- For Heavy Smoke or Grease Film: You may need a dedicated “glass cleaner” that’s stronger. Some are labeled for smoke removal. They have more potent surfactants. Test any stronger cleaner in a lower corner first to ensure it doesn’t harm tint.
- The DIY Route (Vinegar/Water): A 50/50 mix of distilled white vinegar and distilled water in a spray bottle works. It’s acidic, so it cuts alkaline films like water spots and some greasy residues. It’s cheap and safe for tint. The smell fades quickly. It’s not always the most powerful for synthetic smoke films, but for general cleaning, it’s a reliable, healthy option.
A good cleaner should dissolve the film, not just push it around, and should dry quickly without residue. If you’re wiping and wiping, your cleaner isn’t strong enough for the job.
Finding Tools and Forum Hacks
You won’t find a perfect reach tool at every store. Auto parts stores sometimes carry extendable window tools with a clip for a towel. Your best, most reliable bet is online. Search for “automotive windshield cleaning tool” or “glass cleaning wand.” Look for one with a flexible head and a soft, non-marring clamp to hold your microfiber securely.
People get creative. On forums like Reddit, you’ll see popular hacks. Some swear by wrapping a microfiber around a squeegee. Others use a ruler or a paint stick. I’ve even seen recommendations for a bit of PVC pipe. The goal is to get leverage and reach.
The most common hack I see is using newspaper instead of a towel for the final dry. It does work, as the newsprint acts as a mild abrasive. I don’t do it. Newspaper can leave ink traces on your dash or seats, and modern microfiber is simply better and reusable. Another hack is using a steamer to loosen tough grime before wiping. This is advanced. You must be careful not to overheat the glass or trim. I use this method on the kid-hauler Odyssey for stubborn sticker residue near the top, but it’s not a first step.
The right tool isn’t a gimmick; it’s the difference between a clean windshield and a clean windshield with a dirty, frustrating strip along the bottom. For my F-150 with its massive glass, I wouldn’t even attempt the job without my long-reach holder.
The Step-by-Step: How to Clean Inside Car Windshield Without a Single Streak
I see so many people fighting their windshield, wiping in circles and breathing on the glass. They end up with a cloudy, streaky mess. The process is not hard. You just need a system.
Follow these steps in order. Do not skip any.
Step 1: Park in shade, open all doors for airflow. Direct sun will cook your cleaner onto the glass before you can buff it off, creating instant haze. Open all the doors. You need the air moving. This pulls out humidity and fumes, letting the glass dry clear and fast.
Step 2: Use a dry microfiber to knock down any loose dust or crumbs. Never start with liquid. You will just make mud. Take a clean, dry microfiber towel and gently drag it across the entire interior glass. You are not cleaning yet. You are just collecting the sand, dust, and french fry confetti so it does not scratch the surface later.
Step 3: Spray cleaner liberally onto your microfiber cloth, not directly onto the glass. This is the rule. For tinted windows, spraying directly can force liquid behind the film seal, ruining it. For any window, it runs down and soaks your dash. I hold my cloth in one hand, give it 4-5 good sprays with my preferred glass cleaner, and fold it into a pad.
Step 4: Wipe in straight, overlapping front-to-back strokes across the entire surface. Start at the top corner. Wipe from the front of the car toward the back in one long, straight line. Overlap your next stroke by half. Work your way down the glass like you are mowing a lawn. This directional wiping is what makes the difference between clean glass and a hologram mess. Side-to-side wiping leaves streaks that catch the horizontal sunlight. Front-to-back strokes align with most light sources, making imperfections nearly invisible.
Step 5: Flip to a dry side of the cloth and immediately buff the same area with light pressure. Do not wait. Do one section, then immediately flip your cloth to a perfectly dry, clean quadrant. Buff that same section with light, quick strokes. This is the “dry” pass. It lifts any remaining cleaner and moisture, leaving nothing behind to streak.
Step 6: Use a flashlight or sunlight at an angle to inspect for missed streaks or film. Get out of the car. Shine a flashlight across the glass from the outside, or let the sun hit it at a low angle. Any leftover film or streak will glow like a neon sign. Mark it with your finger from the inside, then hit just that spot with a fresh corner of your dry towel.
Technique Tweak: The Detailer’s Pro-Tip for Arm Angle and Pressure
Your tools are only half the job. Your body is the other half. Most streaks come from uneven pressure.
Do not clean glass with just your wrist. You will press harder in the middle of the arc. Instead, lock your wiping arm straight from the shoulder. Move your whole torso back and forth. This gives you even, consistent pressure across the entire wipe. It feels awkward at first. It works.
Set up your cross-light before you make the first wipe. In my Tesla, I park so the low morning sun rakes across the windshield. I see my work in real time. If you are in a garage, prop a flashlight on a chair outside the car. Seeing the streaks as you make them is the secret to not making them at all. You correct your pressure or cloth fold immediately.
Cloth management is critical. One towel for the initial dry dusting. One damp towel for the cleaning pass. One dedicated, pristine dry towel for the final buff. Fold each into quarters. Use one clean quarter per section of glass. When all four quarters are used, get a new towel. A dirty cloth just smears old grime around. This “quarter system” is why my cars have flawless glass and yours can too.
Solving the Tough Cases: Tobacco Stains, Permanent Haze, and Tinted Windows
Sometimes, a basic glass cleaner isn’t enough. You wipe and wipe, but the haze stays put. This is common with stubborn residues. I’ve dealt with this on a few cars I’ve bought used, where the previous owner was a smoker. The film they leave behind is tenacious, and regular cleaners just can’t remove it. That’s why I always use specialized products to get rid of the film before doing a final wipe down.
Cutting Through Nicotine and Tar Film
That yellow-brown film from cigarette smoke is a mix of nicotine and tar. It acts like glue. Your standard cleaner will just smear it. You need a solvent to break the bond first.
Here is the protocol I use on cars like my old Odyssey when I first got it.
- Ventilate the car. Open all doors.
- Put on nitrile gloves. This stuff is unpleasant.
- Spray a dedicated automotive tar and adhesive remover onto a clean, low-pile microfiber towel. Do not spray it directly onto the glass, as overspray can damage plastics or upholstery.
- Wipe the interior glass firmly with the solvent-dampened towel. You will see the yellow residue transferring onto the cloth. Use a folding method to keep presenting a clean section of towel.
- After treating the entire surface, take a second dry towel and buff away any leftover solvent.
- Now, follow up with your normal ammonia-based glass cleaner and a pristine glass towel. This final step removes any final streaks and restores perfect clarity.
If you don’t have a dedicated tar remover, a 70% isopropyl alcohol (IPA) solution on a towel can work as a first step, though it may require more effort.
When the Cloudiness Won’t Wipe Away
You’ve used every cleaner, but the glass still looks foggy or scratched. This is usually one of two problems.
Etched Interior Glass: This is often from constant exposure to acidic vapors, like from spilled soda, frequent vaping, or heavy smoking over years. The haze is actually microscopic damage to the glass surface. You can test this by feeling the glass. If it feels rough or sandy under your fingernail even after cleaning, it’s likely etched.
Exterior Pitting: This feels smooth from the inside. The cloudiness you see is thousands of tiny sand-blasted pits on the outside of the windshield from road debris. You confirm this by looking at the glass from different angles in sunlight.
Polishing glass, especially on the interior, is a last-resort job for a professional. The curvature and tight spaces make it easy to create distortion. For severe interior etching, a pro with a small polisher and specialized cerium oxide glass polish might attempt it. For exterior pitting, polishing is rarely effective and can compromise glass strength. Usually, you learn to live with it or replace the glass.
The Tinted Window Rulebook
Cleaning tinted film, whether on side windows or the rear windshield, requires a gentle touch. Harsh chemicals and methods can cause the tint to turn purple, peel, or bubble. To keep your tinted car windows clean and well-maintained, use mild cleaners and a soft microfiber cloth. Proper care helps preserve clarity and extends the life of the tint.
- Only Use Ammonia-Free Cleaners: Ammonia degrades the dyes in window tint over time. Most modern automotive-specific glass cleaners are ammonia-free, but always check the label.
- Spray the Cloth, Not the Glass: This is non-negotiable. Spray your cleaner generously onto your microfiber towel. This prevents excess liquid from seeping under the edges of the tint film.
- Wipe Gently with Light Pressure: Use soft, linear strokes. Do not scrub. The goal is to clean the surface without stressing the adhesive layer.
- Dry immediately with a second clean, dry glass towel.
I follow this exact method on my Tesla and BMW. It keeps the tint looking new for years.
FAQ: Vinegar, Alcohol, or Just Buy Something?
Many people ask about homemade solutions. They can work, but know the trade-offs.
White Vinegar & Water Mix (1:1): This is a great degreaser and cuts light films well. It’s cheap and non-toxic. The downside is the smell, which can linger in the car for a short while. It also offers no tint-safe guarantee unless you know your tint film’s composition.
Isopropyl Alcohol & Water Mix (1:3 or 1:4): Excellent for removing invisible oils, handprints, and silicone residues. It evaporates quickly with no smell. Alcohol is a stronger solvent than vinegar, so always test it on a small, hidden area of tint first. It can sometimes dry out rubber seals if used excessively.
A Quality Commercial Glass Cleaner: My daily choice, like the one I use on my Porsche’s windshield. It’s formulated to be streak-free, often has anti-static properties, and is consistently safe for tints and interior materials. You pay for the convenience and reliability.
My advice? For a simple, monthly clean, a commercial product is foolproof. For a stubborn, greasy film you can’t identify, try an IPA mix on a test spot. Keep vinegar in the garage for exterior glass and wheels.
What Not to Do: Common Mistakes That Leave Streaks or Cause Damage
We have all been there. You want a clear view, so you grab whatever is nearby and start wiping. The result is a mess of streaks and smears that’s worse than the foggy film you began with. I have made these mistakes on my own cars, especially the kid-hauler Odyssey. Avoiding these common errors is your first step toward perfection.
Using the Wrong Wiping Tools
Paper towels and old T-shirts are the enemies of clean glass. Their rough fibers leave behind tiny bits of lint and are not absorbent enough to lift grime properly. Using a dirty microfiber cloth is just as bad, as you are essentially painting dirt and old product back onto the surface. I keep a dedicated set of glass-specific microfiber towels, washed separately from my other towels, to prevent this (wash and storing them properly).
Spraying Cleaner Directly on the Glass
This might be the biggest mistake. When you spray the cleaner onto the vertical glass, most of it runs straight down onto your dashboard, door panels, or steering column. This can damage vinyl, leather, and sensitive electronics over time. On my Tesla Model 3, with its massive glass roof, spraying directly would send cleaner dripping into places I could never properly dry.
Wiping in Circles or Haphazard Motions
Our instinct is to wipe in circles. On glass, this creates obvious circular streaks that catch the light from every angle. It looks hazy and unprofessional. A consistent, linear wiping pattern is far easier to inspect and perfect than a chaotic swirl.
Using the Wrong Cleaner
Household glass cleaners often contain ammonia. Ammonia is fantastic for breaking down greasy fingerprints on your windows at home. On a car, it is a hazard. It can cause permanent discoloration and bubbling on window tint film. It can also damage the vinyl and plastic anti-fog elements in some defroster lines. I never use ammonia-based products on any vehicle, especially not on my BMW with its tinted windows. To safely use car cleaning chemicals, opt for automotive-safe cleaners and avoid ammonia. Always follow product directions and test in a small, inconspicuous area before full use.
Reaching for Abrasives or Harsh Chemicals
Scrub pads, steel wool, or melamine foam (Magic Eraser) have no place on automotive glass. They will microscopically scratch the surface, creating a permanent haze that glares in the sun. Similarly, aggressive solvents or degreasers not meant for glass can etch the surface or destroy interior trim. The glass is softer than you think.
Cleaning in Direct Sunlight or a Hot Car
Heat is your enemy. If the glass is hot, any cleaner you apply will evaporate almost instantly. This leaves behind the dissolved dirt and chemicals as a streaky, sticky film before you can even wipe it away. I always clean my interiors in the shade or in my garage, letting the cabin cool first.
Can I Use Disinfectant Wipes?
No. Clorox or other disinfecting wipes are designed to leave a residue on surfaces to keep killing germs. On glass, that residue is a greasy, streak-inducing nightmare. They are also often too harsh for the delicate plastics surrounding your windshield. I tried this once in a pinch on the Odyssey and spent twenty minutes fixing the cloudy mess it created.
Keeping It Clear: How to Maintain Your Interior Windshield Between Deep Cleans
You do not need to perform a full interior glass detail every week. A quick, focused maintenance routine stops that sticky film from getting a foothold. This is about prevention, not correction.
The Weekly One-Minute Wipe
Make this a habit, like checking your tire pressure. Every time you fill up for gas, give your interior glass a once-over. I keep a dedicated glass microfiber towel and a small spray bottle of cleaner in every car’s door pocket, even my kid-hauling Honda Odyssey.
Use a dedicated glass towel-its tight, flat weave grabs residues without leaving behind the lint or oils that a plush interior towel would. Spray your cleaner lightly onto the towel, not directly onto the glass, to avoid overspray on the dashboard and electronics. Wipe in straight, overlapping strokes from the top down. Flip the towel to a dry section for a final buff. This removes the week’s worth of film before it can bake on and become a problem.
Block the Heat, Slow the Film
The main enemy of a clear windshield is your own dashboard cooking in the sun. The plastic and vinyl release vapors, a process called off-gassing. These vapors land on the cooler glass surface and stick. Heat accelerates this entire cycle.
Using a reflective sunshade every time you park is the single best thing you can do to slow this down. It is not just about keeping the cabin cooler. By significantly reducing the dashboard temperature, you dramatically slow the rate of off-gassing, which means less film forms on your windshield. In my white Tesla Model 3, with its massive glass roof, a sunshade is non-negotiable if I want to avoid constant cleaning.
Breathe Cleaner Air, See a Cleaner Windshield
Your cabin air filter is your interior’s lungs. When it’s clogged with dust, pollen, and pollution, your car’s HVAC system just recirculates those particles. Many of them end up settling on your interior glass, mixing with the off-gassing vapors to create a gritty, stubborn film.
Changing your cabin air filter every 12-15 months, or per your vehicle’s manual, is a cheap and impactful form of glass care. A fresh cabin air filter improves the air you breathe and reduces the amount of particulate matter that can settle and stick to your windshield. In my Honda Odyssey, after a filter change, I always notice the interior stays dust-free and the glass stays clearer for longer.
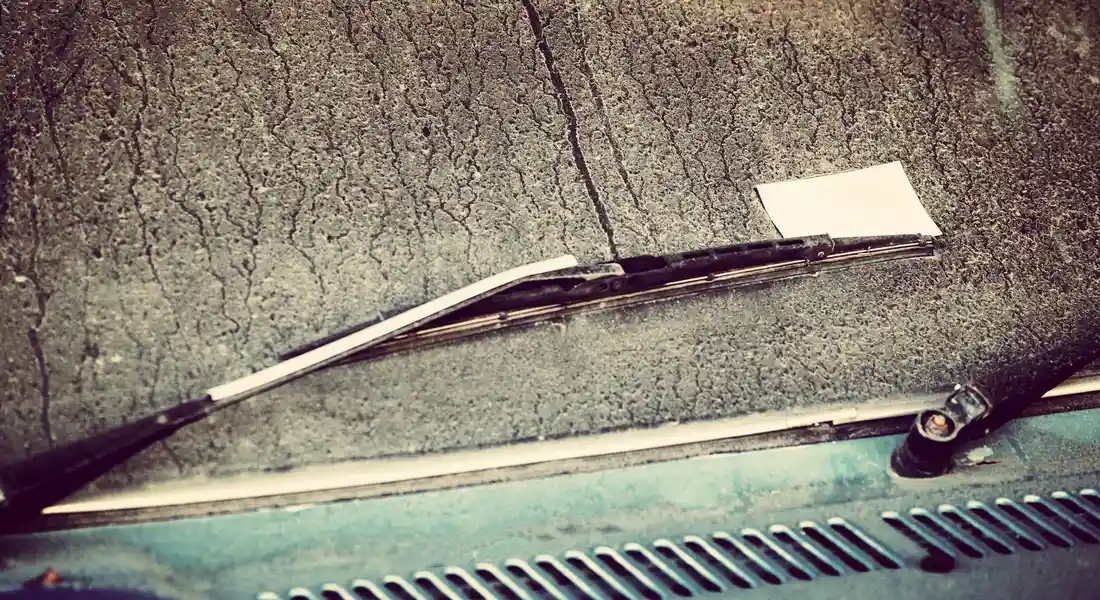
Don’t Forget the Blades
Exterior wiper maintenance is part of interior clarity. Dirty, worn-out blades will smear road grime, sap, and bug juice across your exterior glass. Those smears catch the light at night and create massive glare, which can look like a problem originating from your interior surface.
Every few months, lift your wiper arms and wipe the rubber blades down with an isopropyl alcohol-dampened towel. This removes built-up grease and debris. Clean wiper blades make clean, streak-free passes, which removes a major source of visual distortion and glare that competes with your view. On my Ford F-150, which sees all kinds of weather, I clean the blades whenever I wash the truck to ensure they’re ready to perform.
Safety and Smells: Protecting Yourself While You Clean
You want to see clearly. You do not want to breathe in a chemical fog. Working smart keeps you safe and makes the job easier.
Always clean with the car doors open or in a space with moving air. Your garage with the door up is perfect. A driveway on a breezy day works too. Fumes from glass cleaners, especially aerosol ones or those with ammonia, build up fast in the closed cabin. They give you a headache and make the whole process miserable. I learned this the hard way years ago, sealing myself in my old sedan on a calm day. I felt dizzy after just one window. Now, fresh air is my first tool.
Your skin absorbs what you touch. I keep a box of disposable nitrile gloves in my detailing cart. They are cheap insurance. Some cleaners can dry out your hands. If you have any cuts or sensitive skin, the alcohol in many sprays will sting. Gloves keep your hands clean and safe. I skip them only for a quick wipe-down with plain water on a microfiber. For any dedicated cleaner, the gloves go on.
After you finish, do not just hop in and drive. Those cleaning vapors need to leave. With the doors still open, start the car and turn the climate system to full cool, fresh air mode (not recirculate) for a few minutes. Let the blower push the lingering smell out. If you used a product with a strong scent, give it ten or fifteen minutes. You do not want that perfumed or chemical smell stuck in your nose for your entire drive.
This basic airing-out works for standard cleaning smells. For severe, baked-in odors from smoke or spills, a simple glass clean will not fix it. My Odyssey, the kid hauler, once had a milk spill ghost that lingered. That required a separate ozone generator treatment to actually destroy the odor molecules in the cabin air and fabrics. For day-to-day glass, just let the fresh air do its job.
Keeping Your View Crystal Clear
The simplest truth is that a perfect interior glass clean starts with the right, dedicated tools and ends with a disciplined drying technique. Keep your glass towels separate in their own bag and use a high-quality, low-residue cleaner. That two-bag system and a final buff with a dry, plush towel will defeat streaks for good.
Ignore this, and you’ll be driving into a low sun surrounded by a distracting, hazy film you created yourself, which is a needless safety risk.
Further Reading & Sources
- r/CleaningTips on Reddit: Best way to clean the inside of a car windshield?
- How to Clean Car Windshield Inside | Mercedes-Benz of Newton
- Best Way To Clean Inside Windshield | Chemical Guys
Max is an automotive enthusiast having worked as a car mechanical and in interior detailing service for over 25 years. He is very experienced in giving your old car, a new fresh vibe. He has detailed many cars and removed very tough smells and stains from all kinds of cars and models, always ensuring that his work and advice helps his customers. He brings his first hand experience to his blog AutoDetailPedia, to help readers breath new life into their car interiors.