What’s the Real Way to Prevent and Repair Paint Chips on Your Car?
You see that fresh, white speck on your hood or fender and feel that sinking worry about rust and value loss. I get it-my black BMW shows every single one like a spotlight.
This article shares my proven methods, covering the daily barriers that stop chips before they happen, the correct way to clean and fill chips for a near-invisible fix, and how modern films and coatings offer a permanent shield.
Leave a chip untreated, and road salt and water will blister the metal underneath, forcing a full panel repaint.
Key Takeaways: Your Paint Chip Cheat Sheet
My core philosophy after fixing chips on everything from my old Miata to the new 911 is simple. Preventing a paint chip is always easier, cheaper, and looks better than trying to repair one later.
When you do decide to fix a chip, understand what you’re aiming for. There are three main outcomes for a DIY repair.
- “Good Enough” for Daily Drivers: This is for my F-150 or your commuter car. The goal is to fill the chip to block rust and make it less obvious from five feet away.
- “Nearly Invisible” for Enthusiasts: This is for my black BMW or your weekend car. It requires more time, specialty tools, and patience to level the paint so it blends with the surrounding area.
- “Leave it to a Pro” for Complex Damage: If the chip is deep into the metal, very large, or part of a cluster, a professional painter with a spray gun is your best bet.
Using a touch-up brush is a moderate difficulty task. The real skill is in the prep and the finishing. The paint itself needs a full 24 to 48 hours to cure hard before you can safely wash or wax over it.
Your choice of protection or repair method depends entirely on how you use the car. I use a thick spray sealant on my F-150 for fast application, but I hand-apply a ceramic coating to the Porsche 911 for maximum durability.
What Really Causes Paint Chips? The Usual Suspects
Think of your car’s paint as the skin on your hands. A good lotion (like wax) keeps it healthy, but it won’t stop a sharp knife. The front end of my white Tesla Model 3 tells the whole story. You hear the sharp “ping” of gravel one day and see the sticky, etched splatter of bug guts the next.
A layer of wax or sealant adds slickness and can help a glancing piece of debris slide off. But no liquid coating can absorb the direct hit from a rock traveling at highway speed. That energy goes right through to the brittle layers of paint and clear coat underneath.
Road Debris: Gravel, Sand, and Salt
Speed turns everything into a bullet. A tiny piece of gravel is harmless on the ground. At 65 miles per hour, it hits your paint with real force. Following too closely behind a truck guarantees a sandblasting effect.
This is why the lower third of your car looks the worst after a few years. The damage concentrates on the front bumper, hood leading edge, and the lower parts of the doors and rocker panels. My F-150’s dark blue flanks are proof, constantly peppered from country roads and winter brine.
Flying Objects from Construction and Landscaping
This is the next level of hazard. We’re not talking about sand now, but chunks of loose asphalt, stray stones kicked up by mowers, or debris falling from a dump truck. These objects are bigger and carry more mass.
They create deeper, more jagged chips that often expose bare metal immediately. My best advice is simple defensive driving give any vehicle in a work zone a very wide berth, and slow down. A moment of patience can save you a complex repair.
Environmental Assault: Sap, Bugs, and Hard Water
This cause is a slow burn. Tree sap is acidic. So are bug innards and bird droppings. When baked on by the sun, they etch into and soften your clear coat. Hard water spots are mineral deposits that act like tiny bits of grit stuck to the paint.
A weakened, etched clear coat is far more likely to chip from a minor impact. It becomes brittle. This is why regular washing is non-negotiable, even for my kid-hauling Odyssey. Removing those contaminants weekly keeps the paint’s top layer strong and resilient.
How to Keep Your Car’s Paint Safe: Prevention Tactics That Work
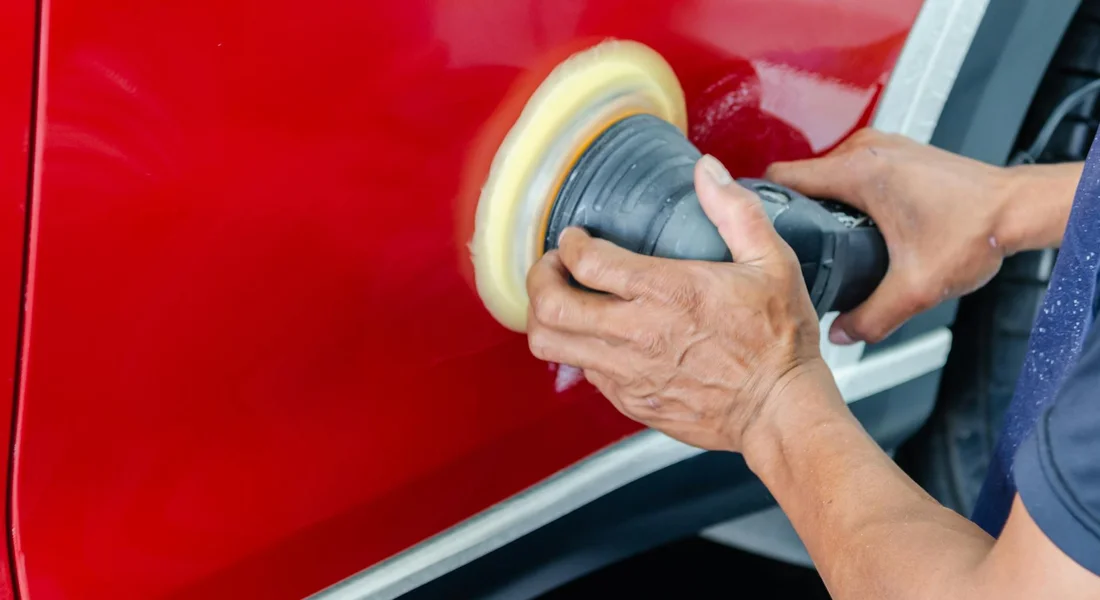
Think of your car’s paint like skin. You want to build a shield for it. The best strategy starts with free habits and moves up to smart investments. This is the core of how to keep car paint looking new for years.
Driving Habits: Your First Line of Defense
This costs nothing. It just takes a little awareness. Increase your following distance, especially behind trucks or on highways. That extra space gives debris more time to fall or be deflected away from your hood and windshield.
If you can, avoid freshly graveled roads or construction zones. Listen to the sound. In my low-slung Miata, I hear every tiny stone pinging the undercarriage. It’s a cringe-worthy sound. In the taller F-150, the chips hit the lower doors and rocker panels instead. The feel is different, but the risk is the same.
Giving yourself space is the easiest, most effective shield you can build right now.
The Protection Pyramid: Wax, Sealant, and Ceramic Coatings
These are your applied layers of defense: wax, sealant, and ceramic coating. Imagine carnauba wax as a light raincoat. It beads water beautifully for a few months. A synthetic sealant is like a tougher nylon shell, lasting longer. A ceramic coating is the suit of armor. It chemically bonds to your clear coat, offering years of chemical resistance and slickness.
I need to be clear. These layers fight environmental damage. They prevent water spots, bird dropping etching, and UV fading. A direct hit from a rock at 70 mph will still chip your paint. But a supremely slick surface can help some smaller debris deflect or slide off with less force.
For my daily drivers like the Honda Odyssey and the Ford F-150, I use a spray sealant. It goes on after every wash in five minutes. It keeps the surface slick and makes the next clean-up easier. It’s the best balance of effort and protection for a car that gets used hard.
The Ultimate Shield: Paint Protection Film (PPF)
This is the professional-grade solution. PPF is a clear, urethane film applied to the paint. It’s thick, often 8 to 10 mils. Modern films have self-healing properties. Light scratches and swirls in the film itself vanish with heat from the sun or warm water.
PPF acts like a second skin, absorbing the impact so your factory paint doesn’t have to.
It’s an investment. A full front-end wrap on my Porsche 911 was not cheap. But for that car’s value and its low, stone-catching front end, it was the only logical choice. For many, a partial hood and fender wrap is a great compromise.
A full-color vehicle wrap also protects the paint underneath. It’s a thicker vinyl layer you can change later. It’s more about style, but the protection is a fantastic bonus.
Assessing the Damage: Is This a DIY Job or a Pro Fix?
You’ve found a chip. Don’t panic. First, figure out what you’re dealing with. The repair path for a scratch in just the clear coat on my Tesla is different from a deep chip on the classic single-stage paint of my Miata.
People search for “paint chip repair cost” and “paint chip repair near me” all the time. The answer always starts with a good diagnosis.
The “Fingernail Test” and Chip Depth
Wash and dry the area first. Run your fingernail lightly across the chip. Listen and feel.
- If your nail glides over it, the damage is likely only in the clear coat. It might look white or hazy.
- If your nail catches slightly and you see the color of your car, the chip is into the base color layer.
- If your nail drops into a pit and you see a dark grey, black, or light tan surface, you’re down to primer or bare metal.
A chip exposing bare metal is a rust emergency, especially if you live where roads are salted. That spot needs to be sealed immediately, even with a simple touch-up dab, to stop corrosion.
When to Use a Touch-Up Pen vs. a Professional Blending
A factory touch-up pen is perfect for small, isolated stone chips. It’s about filling the hole and preventing rust. Manage your expectations. On my jet black BMW, even a perfect color match will look like a dark blob. From five feet away, it’s invisible. Up close, you’ll see it. That’s okay. Its job is protection, not perfection.
Call a professional for:
- Clusters of chips (like a sandblasted front bumper).
- Any chip larger than the diameter of a pencil eraser.
- Damage on complex curves or body lines that are hard to level.
- When the paint has metallic or pearl, which is very hard to blend by hand.
Understanding Repair Costs: DIY Kits vs. Body Shop Rates
A quality OEM touch-up pen costs between $20 and $50. A more advanced kit with primer, color, and clear coat brushes might be $40 to $80. Your labor is free.
Professional spot repair cost varies wildly. A simple chip fix at a detail shop might start around $75 per chip. A body shop repairing a larger area will charge more, often $200 to $500 per panel. This is why “paint chip repair cost body shop near me” has no single answer. Urban shops and high-end dealers charge premium rates.
A professional doesn’t just fill the chip; they sand, paint, and blend the new paint into the surrounding clear coat to hide the repair. This is the art that makes damage disappear. For a prized car or a large, visible area, this is the only path to a flawless finish. It’s a far more meticulous process than simply repairing rock chips on car paint.
The Step-by-Step Guide to Covering Up Paint Chips Yourself
This is where you take control. Fixing a paint chip is a test of patience more than skill. Work in bright, direct light. A cloudy day or a dim garage will make you miss details. Rushing guarantees a messy result.
Gathering Your Tools: More Than Just a Paint Pen
You need the right gear. A basic paint chip repair pen is just a bottle of color with a brush in the cap. It’s fine for a quick cover up on a door edge. A full paint chip repair kit is better. It includes touch-up paint, a separate clear coat, and often a leveling solution to smooth the repair. For a near invisible fix, get the kit.
- Touch-up paint (pen or bottle with brush)
- Isopropyl alcohol or a dedicated automotive paint prep degreaser
- Lint-free microfiber towels
- Fine-grit sanding sticks (2000-3000 grit)
- Toothpicks or a fine-tip artist’s brush
- A magnifying visor or bright LED flashlight (trust me on this)
Step 1: The Critical Clean and Prep
Every failure I’ve seen starts here. You must strip all wax, grease, and road film from the chip and the surrounding paint. If you don’t, the new paint will not stick. It will peel out in a week.
Wash the entire panel normally. Then, soak a corner of a microfiber towel in isopropyl alcohol. Wipe the chip area firmly. Let it evaporate. Never use aggressive household cleaners like bleach or degreasers not meant for cars, as they can stain or haze the clear coat around your repair. The area must be surgically clean and completely dry.
Step 2: Applying the Touch-Up Paint (The Art of the Dot)
This answers exactly how to cover up chipped paint on your car. Do not use the brush straight from the bottle. It holds too much paint. You will overfill the chip. To apply evenly, use the right tool—either car brushes or a spray setup. This naturally leads you to explore paint car brushes spray options in the next steps.
Instead, shake the paint well. Dab a tiny amount onto a toothpick or the tip of a fine brush. Gently touch the tip to the center of the bare metal or plastic in the chip. Let the paint flow in and fill it from the bottom up. Think of it as placing a microscopic dot of paint, not painting a stroke.
Wait for it to dry to the touch. This can take 10-30 minutes. Apply another thin dot. You may need three or four layers to build the paint level just to the surface. Impatience here creates a raised, bumpy blob that is harder to fix than the original chip. For small chips, you can use paint pens to touch up with pinpoint precision. These pens help blend the repair neatly and prepare for a seamless finish.
Step 3: Leveling and Blending the Repair
After the final layer of color dries for at least 24 hours, you can level it. If you used a kit with leveling solution, apply a drop directly to the repaired spot. It will slowly dissolve the excess paint, leaving it flat with the surrounding clear coat. Wipe it away after the time stated on the bottle.
The advanced method is to use a 3000-grit sanding stick. You must keep it wet. Gently sand the tiny paint blob until it is flush with the factory paint. This is nerve-wracking work. It is only for those chasing perfection. For 90% of chips on daily drivers, stopping at Step 2 gives you a solid, protective cover-up that you’ll see only up close.
Step 4: Sealing and Protecting the Repaired Spot
Raw touch-up paint has little protection. If your kit includes clear coat, apply a single, careful dot over the leveled repair. If you didn’t use a kit, this is non-negotiable. Once the clear is cured, protect the entire area with a quality paint sealant or wax. This final step hides the repair by restoring a uniform, glossy shine and shields your work from the elements. On my BMW, I always follow a chip repair with a layer of my favorite spray sealant.
Common Paint Chip Repair Mistakes (And How to Avoid Them)
I have made every one of these. You probably will too. The trick is to learn from them before you make a small chip look like a large mistake.
Using the Wrong Paint Code or a Generic “White”
Your car’s paint code is on a sticker in the driver’s door jamb or in the spare tire well. Order your touch-up paint using this code. I once tried to fix a chip on a customer’s silver Honda with a generic “silver” pen. In the sun, it looked like a gray thumbprint. Sun exposure fades paint over years, so a perfect match on an older fender can be tricky, but the correct code is your only starting point.
Overfilling the Chip: Creating a Paint Blob
This is the most common error. You get impatient and flood the chip. It dries as a lumpy, glossy blob that catches the light and draws more attention than the chip did. The fix is the mantra from earlier: thin layers. It is always better to come back the next day to add more paint than to try and fix a bulge you created in one go.
Skipping the Clear Coat or Final Sealant
Touch-up paint alone is not durable. Without clear coat, it will oxidize and fade faster than the factory finish. Within months, that repaired chip will reappear as a dull spot. I treat touch-up paint like bare metal. It always gets a top coat. This mirrors the fundamental rule of detailing: color gets protection, always. A dab of wax takes seconds and makes your repair last.
Product Tier List: From Quick Fixes to Lasting Protection
Think of fixing paint chips like having a tool chest. You have a hammer for rough jobs and a precision screwdriver for delicate ones. Each product tier here is a different tool for a different job and budget. This list will answer your questions about simple paint pens and more complex repair kits. I keep products from each tier ready for different vehicles in my own fleet.
Tier 1: Budget/Quick Cover-Up
This is the basic, get-it-done-now tier. You are dealing with the kind of chips my blue Ford F-150 gets from gravel roads. The goal is not a perfect, invisible repair. The goal is to plug the hole in your paint’s armor to stop rust and make the chip less obvious from ten feet away. Especially since you want to prevent any rust from developing on those chips.
The products here are simple paint pens or small bottles with a brush in the cap. You can get your exact color code from the dealership, an auto parts store, or online. They usually cost between $15 and $25.
Apply it directly over the clean chip, let it dry, and you have a functional seal that protects the bare metal underneath. The finish will be noticeable up close. It will likely sit higher than the surrounding paint and have a different texture. For a truck that sees real work, that is a fair trade. I keep a pen for my F-150’s paint code in the glove box for touch-ups right after a wash.
A common question is about the “paint chip repair pen.” Most pens are just a reservoir of touch-up paint with a foam applicator tip. They are fast but messy. The brush-in-cap bottles give you more control. Whichever you choose, clean the chip with isopropyl alcohol first. Do not just paint over dirt and wax. Choosing between a paint touch up pen and a spray brings factors like precision versus overspray into play. A pen offers tight control for small chips, while a spray can cover larger areas more quickly with less effort.
Tier 2: Enthusiast/Quality Repair
This tier is for when a simple blob of paint is not good enough. You want the repair to blend. This is the tier I use on my jet black BMW and my classic red Miata. Dark colors and bright reds show every flaw, so you need a better method.
These are typically two-part kits. They include the base color paint and a separate clear coat. The magic is in the process. Kits like Dr. ColorChip use a “smear and level” method. You dab paint over the chip, smear it across the area, and use their special leveling solution to wipe away the excess, leaving paint only in the chip.
Other kits use ultra-fine applicator needles or brushes to lay in tiny drops of paint and clear coat in layers. The result is a much flatter, better-color-matched fill that is hard to spot unless you know where to look. These kits range from $40 to $80. They require more patience and a steady hand.
Here is my comparison. The smear method is faster and more forgiving on chips scattered across a panel. The fine-applicator method is slower and requires more precision, but it can yield a slightly cleaner finish on a single, large chip. For most enthusiasts, a quality smear-style kit is the best balance of results and effort.
Tier 3: Show Car/Professional-Grade Protection
This tier has two parts: flawless repair and ultimate prevention. For a car like my red Porsche 911, or any vehicle where only perfection will do, this is the path.
Professional-grade touch-up involves custom-mixed paint, professional sprayers for single-stage blending, and skilled wet sanding and polishing. This is often a job for a detailer or paint specialist. The cost reflects the labor and expertise.
The other side of this tier is prevention with Paint Protection Film (PPF). This is a clear, self-healing urethane film applied to high-impact areas like the front bumper, hood, and mirrors. Think of it as a durable, invisible shield that takes the stone chip instead of your paint. A full front-end PPF install is the single best way to prevent chips.
For a new car or a cherished garage queen, investing in PPF is smarter than planning for repairs. The film can be removed later without harming the original paint. At this level, professional installation is not just recommended, it is required. The cost is significant, but so is the peace of mind.
Final Thoughts on Paint Chip Care
Your best move is to shield your paint with a quality sealant or film, as prevention is always simpler than repair. When a chip appears, grab a precise touch-up pen and fill it carefully to seal out the elements.
Skip these steps, and that tiny chip will become a rusty, spreading stain that requires much more work to fix.
Deep Dive: Further Reading
- Home – Dr. ColorChip
- The TouchUp RX Kit – TouchUp RX
- r/howto on Reddit: How do I fix the paint chip on my car?
- Advice on how to fix “small” car paint chip – DoItYourself.com Community Forums
- How To Fix Paint Chips On Car Like A Pro