Can You Really Repair Car Scratches at Home? DIY Methods That Work
That new scratch on your paint looks worse every time you walk past the car. You want it gone without a huge bill.
This article will teach you how to tell a surface scratch from a deep one, which home remedies actually work, the best store-bought kits for the job, and a step-by-step process for tackling severe scratches.
Use the wrong method on a deep scratch, and you will lock in the damage, making a professional fix far more expensive later.
Key Takeaways: What You Can Really Fix at Home
Before you touch a single product, you need to know what you’re up against. Matching the method to the scratch depth is everything. Using a heavy compound on a light swirl will waste your time. Trying to buff out a deep gouge will only make you angry.
I keep this simple table taped inside my detailing cart. It sets realistic expectations right away.
| Scratch Type & Depth | Recommended DIY Approach | Est. Time | Likelihood of Success |
|---|---|---|---|
| Light Clear Coat Scratches (Swirls, Cobwebs) | Polish with a fine finishing polish & dual-action polisher. | 30-60 min per panel | Very High. This is the sweet spot for DIY. |
| Moderate Clear Coat Scratches (Can feel with fingernail lightly) | Compound with a cutting compound, then polish to restore clarity. | 60-90 min per panel | High. Requires more skill but is very doable. |
| Paint Layer Scratches (See base color, definite catch) | Clean, touch-up paint with precision brush, level, and polish. | 2-3 hours with dry time | Moderate. You can make it nearly invisible from 5+ feet. |
| Primer or Metal Scratches (White/Grey, deep groove) | Clean, touch-up primer, touch-up paint, level, and polish. | 3+ hours with dry time | Low to Moderate. These are not truly “repaired” at home, only significantly improved. The goal is corrosion protection and visual reduction. |
Deep scratches into the primer or bare metal are not truly “repairable” at home, only improvable. A real repair involves spray guns, blending, and clear coating entire panels. What we do at home is damage control and cosmetic improvement. That’s okay. It saves money and protects your car.
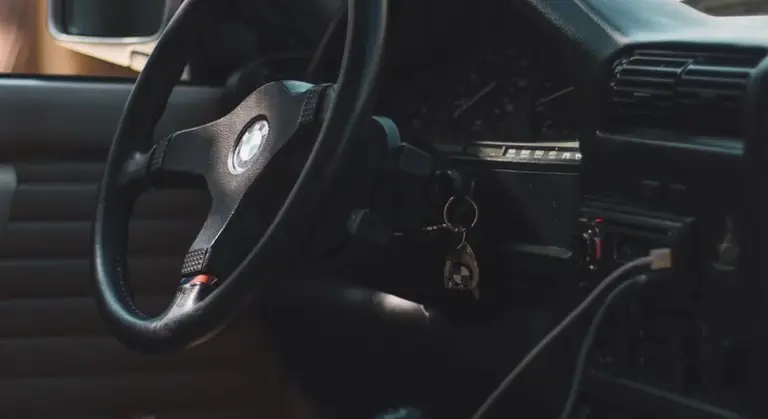
Think about my fleet. The black BMW’s hood is a map of fine swirls, a perfect candidate for a weekend polishing session. The dark blue F-150, my workhorse, has a deep scrape on the rear bumper from a loading dock. I touched it up to stop rust and make it less glaring, but I can still see it if I look. I’m at peace with that.
The Scratch Test: How Deep Is It Really?
Your first tool is your fingernail. Find the scratch and run your nail across it, perpendicular to the scratch direction. Do this under a good light, like a sunny day or a bright LED work light. Your sense of touch will tell you more than your eyes at first.
Here’s how I break it down, using an analogy my dad taught me: your car’s paint is like an onion. The clear coat is the thin, protective outer skin. The color coat is the layer underneath. The primer is the next layer, and the metal is the core.
- Clear Coat Scratches: Your fingernail glides right over it. It feels smooth. You see the scratch as a light line, often only visible in certain light. These are the scratches you can “buff out” completely. This answers the common question right up front. If your nail doesn’t catch, you can usually polish it away.
- Paint Layer Scratches: Your nail catches slightly in a tiny groove. You can see the color of your car inside the scratch. The clear coat is fully breached, and the damage is in the pigmented layer. This needs touch-up paint after a proper cleaning.
- Primer or Metal Scratches: Your nail drops into a definite trench. The color you see is white, grey, or a dull metallic. This is deep. The paint and clear are gone, and you’re looking at the primer or, worse, bare steel or aluminum. This needs immediate attention to prevent rust, starting with a primer pen.
Black cars, like my jet black BMW, are the ultimate truth-tellers. They show every flaw, every wisp of a swirl. A scratch you might miss on a white car screams at you on black paint. It sets your expectations. On that car, even a clear coat scratch looks severe. The good news is, those are also the scratches that disappear most dramatically with the right polish.
Your Scratch Repair Arsenal: Tools & Chemicals You’ll Need

Walking into this without the proper gear is how good intentions turn into a worse finish. I’ve been there, staring at new swirls on my black BMW after using the wrong towel. Let’s build your kit from my experience.
Gather these tools first. They are the foundation of every repair I do, from light scuffs on the Odyssey to deep scratches on the F-150’s bumper.
- You need 300+ GSM microfiber towels for any paint contact. The high thread count creates a plush, deep nap that cradles dirt instead of scratching. Thin towels grind particles into your clear coat. The ones I use on my 911’s paint feel like soft fleece.
- A dual-action polisher with a 15mm throw is your safest power tool. This random orbital action jiggles instead of spins, making it very hard to burn through paint. I use this exact machine to maintain the soft clear coat on my Tesla and correct holograms on the BMW.
- Grit guards for your wash buckets are a silent hero. These plastic grids sink dirt to the bottom, keeping your wash mitt clean. Skipping them is like washing your car with sand in the water. I have them in every bucket.
- A bright handheld LED light reveals the truth. Scratches disappear in flat light. Angling a strong LED shows you every ridge and valley in the paint. I use mine constantly during correction on the Miata’s aging single-stage paint.
Choose your chemicals with care. The right liquid makes the work flow; the wrong one creates more problems. Here is what I always have on my shelf.
- A pH-neutral detailing spray is your multi-purpose lubricant. Use it for claying, as a drying aid, or to lubricate your polisher pad. It won’t attack existing wax or sealants. I use it weekly on the Porsche’s PPF to keep it slick.
- Start with a mild rubbing compound for deeper defects. This contains fine abrasives to level the scratch edges. I used a gentle compound to cut through the oxidation on the F-150’s hood, bringing back the blue without haze.
- Follow with a fine polishing compound to restore gloss. This refines the surface after compounding, removing any micromarring. It’s the step that makes black paint look like liquid glass again on the 3 Series.
- Isopropyl alcohol mixed with water is your essential cleaner. A 1:1 ratio in a spray bottle removes oils, wax, and residue for perfect product bonding. I wipe every panel with it before I start and after I polish to inspect my work.
Avoid these common mistakes absolutely. I’ve fixed too many cars after well-meaning DIYers used the wrong stuff.
- Harsh household cleaners like dish soap or degreasers will strip your protection. They are formulated for grease on plates, not polymers on paint. They leave the surface dry and vulnerable.
- Magic erasers are just melamine foam sandpaper. They will instantly haze and scratch your paint. I tried one on a door sill of the Odyssey and created a cloud of fine scratches that needed a full polish to remove.
- Brake fluid does not remove scratches; it destroys paint. This is a dangerous myth. Brake fluid is a corrosive solvent that can eat through your clear coat and cause irreversible damage. I had to repaint a fender on a customer’s car where they tried this.
Your workspace matters as much as your tools. Find a clean, shaded, and cool surface to work on. Direct sunlight cooks products onto hot paint, making them impossible to remove evenly. A garage is ideal, but a shady driveway spot works. Sweep the ground first. A single piece of gravel can be picked up by your pad and ruin your whole repair.
Kitchen Cabinet Cures: Do Home Remedies Like Toothpaste Work?
The Truth About Toothpaste and Baking Soda
You see the fine line on your door. It catches the light. Your first thought might be to grab the toothpaste. I get it. Let me explain how this works, and more importantly, when it does not.
Toothpaste contains mild abrasives, things like hydrated silica or calcium carbonate. Think of them as tiny, gentle polishing beads. These abrasives can only polish out the shallowest marks that live strictly in the clear coat layer of your paint. If your fingernail catches in the scratch, it is too deep for toothpaste. The clear coat is the thin, transparent shield on top. Toothpaste cannot rebuild missing paint.
If you want to try it, do it right. Find a hidden test spot first, like the edge of a door jamb.
- Wash and dry the area completely. Any dirt will act like sandpaper.
- Squeeze a pea-sized amount of plain white toothpaste onto a clean, soft microfiber cloth. Do not use gels or whitening formulas.
- Rub the toothpaste onto the scratch using small, tight circles. Use light pressure. You are polishing, not scrubbing.
- After 30 seconds, wipe it away with a separate, damp microfiber. Inspect the area under good light.
People ask me, does baking soda remove car scratches? It is similar but different. Baking soda is a softer, more irregular abrasive. In my tests, a baking soda paste often requires more work for less result than toothpaste used for car scratch repair, and it can be grittier, increasing the risk of new fine scratches. I would stick with toothpaste for this kind of experiment.
Here is the real risk, especially on modern cars. That soft clear coat on my white Tesla Model 3? It hazes easily. Overworking an area with toothpaste can leave a dull, cloudy patch that is more noticeable than the original scratch was. You trade a thin line for a foggy smudge. If you see any hazing after your test, stop immediately. You have reached the limit of this home remedy.
Other Home Myths: Nail Polish, Vinegar, and Shoe Polish
When a scratch shows color, panic sets in. The kitchen cabinet offers other tempting but bad ideas. I have seen them all.
Using nail polish as a touch up paint is a classic mistake. Nail polish is not formulated for automotive paint or UV exposure. It will almost always yellow and crack over time, creating a shiny, discolored blemish that is harder to fix than the scratch. It does not adhere properly to the edges of the scratch, so moisture gets underneath. On my black BMW, a previous owner tried this. I had to sand and polish it out, which was far more work.
Can you remove a scratch with apple cider vinegar? No. Vinegar is a mild acid. It is good for dissolving water spots or cleaning glass. Vinegar will clean the scratch, making it look less visible for a moment, but it does not fill or remove any material. Once it evaporates, the scratch is still there. It is like wiping dust off a cracked mirror. The crack remains.
Shoe polish is the ultimate quick cover up. It is a colored wax. You rub it in, and the pigment fills the scratch. For about five minutes, it looks okay. Shoe polish is a temporary, messy fix that will wash away with the first rain or smear onto everything that touches it. It offers no protection. On a red car like my Miata, a brown shoe polish fill would look terrible in sunlight. It is not a repair. It is just hiding the problem poorly.
Store-Bought Saviors: A Product Tier List for Scratch Repair
Not all scratches are equal, and neither are the products to fix them. I sort my garage shelf by these tiers. It tells me what job I am facing and how much time I need to set aside.
Budget / Drive-Through Tier
This is the pharmacy aisle solution. You will find scratch removal pens and pre-mixed liquid rubbing compounds here. They work by using a very mild abrasive to level the clear coat around a shallow scratch, making it disappear from view.
Their biggest limitation is that they only work on scratches confined to the clear coat. If your fingernail catches in the groove, these will not fill it. They will only clean up the edges. Think of them as a cosmetic bandage, not a structural repair.
They are perfect for my grey Honda Odyssey, the “Kid Hauler.” A shopping cart ding in a parking lot, a light scrape from a bicycle handlebar, or fine scuffs along the door edge usually only mar the top layer. A quick pass with a pre-mixed compound on a microfiber towel can often make those vanish in minutes. It is a five-minute fix that stops me from obsessing over it.
- Best For: Clear coat scratches, scuffs, and very fine swirls.
- Safety Note: Always clean the area first. Rubbing dirt into the paint is worse than the scratch. Work in the shade on a cool panel.
- The Test: Run your fingernail across the scratch. If it does not catch, this tier might work.
Enthusiast Tier
This is where real correction happens. You graduate from all-in-one liquids to a dedicated two-step system: a cutting compound followed by a finishing polish. You pair them with a dual-action polisher and quality foam or microfiber pads. For deeper scratches that expose color, you add a touch-up paint pen with a separate clear coat applicator.
This tier is for the detailer who accepts that fixing a problem properly takes time and the right sequence of steps. The compound cuts away damaged clear coat to level the scratch, while the polish removes the hazy marks the compound leaves behind, restoring the gloss.
This is my go-to for the Ford F-150’s “Workhorse” paint. Branches along a trail leave medium scratches. It is also the only way I manage the jet black BMW, the “Swirl Magnet.” Removing spiderwebs and light holograms requires this precise two-step approach. For a scratch down to the primer, I use the paint pen to fill the trench layer by layer, let it cure for a day, then sand it level gently before compounding and polishing it smooth.
- Best For: Deeper clear coat scratches, swirl marks, oxidation, and careful touch-up work.
- The Process: 1. Wash and dry the panel. 2. Apply compound with a polishing pad. 3. Wipe clean. 4. Apply polish with a finishing pad. 5. Wipe clean and apply protection.
- Pro Tip: Tape off trim. Start with the least aggressive pad and polish combination. You can always apply more pressure or switch products, but you cannot put removed clear coat back.
Show Car / Precision Tier
This is for the perfectionist and the professional. We are talking about professional-grade polishers (often rotary), multi-stage paint correction systems, and advanced touch-up kits that include solvent-based blending solutions to melt new paint into old.
This work carries risk but offers the highest possible finish when done correctly. The tools cut faster and generate more heat. The blends require an artistic eye for color and texture. It is not for your daily driver’s first scratch.
I use this tier for specialized problems. On the red Porsche, I might need to carefully polish a faint scratch at the very edge of the Paint Protection Film without damaging the film itself. For the classic red Miata, its single-stage paint (no clear coat) requires a completely different approach. Restoring its faded, pinkish haze to a deep red involves heavy compounding with specific products made for older paints, followed by a meticulous jeweling polish to bring out the depth. This tier is for bringing a finish back from the dead.
- Best For: Severe oxidation, deep paint correction, blending professional touch-ups, and restoring classic or high-end vehicles.
- Critical Caution: Rotary polishers can burn through paint in a heartbeat. Practice on a junk panel first. Solvent-based blends can damage surrounding paint if misused.
- Mindset: This is not repair, it is restoration. It requires patience, research, and respect for the thinness of the paint you are working on.
Step-by-Step: Buffing Out Light Scratches and Swirls

This is where we turn back the clock. Light scratches and swirls only live in your car’s clear coat. You can fix them without repainting. My black BMW is the perfect teacher. In the sun, its hood looked like a spiderweb. Every wrong wash I ever gave it was on display. Follow these steps to get that deep, liquid black back.
Step 1: The Perfect Wash & Decontaminate
You cannot polish a dirty car. Any grit left on the paint will get caught under your pad and create deeper scratches. This step is non-negotiable. I use the two-bucket method on the BMW every single time. One bucket with soapy water, one with clean rinse water. A grit guard in the bottom of each bucket traps dirt.
- Wash the car from the top down with a plush microfiber mitt.
- Rinse the mitt in the clean water bucket after every pass to shed dirt.
- Dry with a clean, soft drying towel. Do not air dry. Water spots are a nightmare to remove later.
After washing, run your hand inside a plastic sandwich bag over the paint. If it feels gritty, you need to clay bar. That grit is bonded contaminants. Claying is like using a very fine, sticky file to pull that junk off the surface. Lubricate the panel well with a detail spray and glide the clay bar back and forth. The surface should feel smooth as glass when you are done.
Step 2: Tape It Up & Work Small
Get a roll of painter’s tape. Before you touch the polisher, tape off any plastic trim, rubber seals, and edges. Compound will stain trim and is a pain to clean off. On the BMW, I taped along the edge of the hood and around the headlights.
Work on one section at a time. A section is about the size of a single car door panel or half a hood. This gives you control. You can see your progress before you move on. On black paint, if you rush and miss a spot, you will see it forever.
Step 3: The Cut – Removing the Scratch
Here is the answer to “Will a polishing compound remove scratches?” It depends. A true compound is an abrasive liquid designed to cut. It removes a tiny layer of clear coat to level the surface, making the scratch shallower until it disappears. A polish is a finer abrasive designed to refine and add gloss after the cut.
For my BMW’s swirls, I started with a medium-cut compound on a foam cutting pad attached to my dual-action polisher. I put four pea-sized drops of compound on the pad, spread it over the section at low speed, then increased the speed to work it in.
- Keep the polisher flat. Do not use the edge of the pad.
- Use slow, overlapping passes. Let the machine and product do the work.
- Buff until the product becomes almost clear and forms a light dust.
Wipe the residue off with a clean microfiber towel. Inspect the area under a good light. The heavy swirls should be gone, but the paint might look hazy. This is normal. The compound leaves behind microscopic scratches. That is what the polish fixes.
Step 4: The Refinement – Bringing Back the Shine
This is where you answer the question for real. A polishing compound, or more accurately just a polish, will not remove a deep scratch, but it is absolutely essential for removing the haze left by the cutting compound and bringing out a deep, reflective shine. Switch to a soft foam polishing pad and a fine polish.
Repeat the same process: a few drops, spread, then work in with slow passes. The polish will refine the surface, removing the haze and revealing the true color and depth. On the BMW’s hood, this is the moment the black stopped looking dull and started looking like a dark mirror.
Here is a practical tip. If you are working by hand on a very small, light scratch, a clean, soft nail buffer pad (the kind with multiple fine grits) can sometimes work for this final polishing step on a test spot. I would never use it as a primary tool for compounding or on a large area, as it is too small and inconsistent, but for a final gloss pass on a single scratch, it can be an option in a pinch.
Step 5: Lock In Your Work
You just removed a layer of your car’s protective clear coat. You must replace that protection immediately. After polishing, wipe the entire panel down with a prep spray or isopropyl alcohol diluted with water (a 10:1 mix works). This removes any leftover oils so your protection can bond.
Apply a sealant or wax. A synthetic sealant will last longer. I prefer a spray ceramic sealant on my daily drivers. It beads water for months. Apply it to one panel, let it haze, and buff it off. Your paint is now corrected and protected. The swirls are gone, and the scratch is history.
Tackling the Tough Ones: A Guide to DIY Deep Scratch Repair
Cleaning and Prepping the Wound
You cannot fill a dirty scratch. The paint will not stick. The first step is always a surgical cleaning of the scratch itself. Forget the rest of the panel for now.
I take a clean microfiber cloth, fold it into a small pad, and soak a corner with isopropyl alcohol. The 70% or 91% stuff from the pharmacy is perfect. I gently rub it directly along the length of the scratch. You will see the cloth pick up wax, road grime, and polish residue. This step removes all the invisible barriers, preparing the surface for any DIY scratch repair.
Yes, you can use rubbing alcohol for car scratches, but only for this exact purpose of cleaning and degreasing the bare scratch channel before you apply paint. It is a solvent. Do not use it on your clear coat as a regular cleaner or for any other reason especially not on paint. For this prep step, it is the right tool. Wear nitrile gloves to protect your skin. Let the alcohol evaporate completely. You should be left with a perfectly clean, dry scratch.
The Layered Touch-Up Method: Paint, Clear, and Sand
This is the method I used on the deep, white scrape on the plastic bumper of my F-150. It takes patience, but it works. You will need your exact color match touch-up paint, a separate clear coat brush or pen, a toothpick, ultra-fine sandpaper (3000 grit and up), and a polish.
Do not use the brush that comes in the paint bottle. It is almost always too big and will glob paint everywhere. Snap the tip off the bottle or use a small artist’s brush.
- Apply the paint in microscopic layers. Dip just the very tip of a toothpick into the paint. Carefully drag it along the bottom of the scratch, letting the paint flow in. Your goal is to fill the scratch from the bottom up, not to paint the surface around it. Let this first layer dry for at least an hour. Add a second, thin layer. It might take 3 or 4 layers over a couple of days to build the paint up just above the level of the surrounding clear coat.
- Apply the clear coat. Once the color paint is fully cured (24 hours is safe), use the same toothpick method to apply clear coat over just the repaired area. Build this up slightly higher than the paint. This clear mound is what you will level down.
- Level the repair. After the clear coat cures for at least 48 hours, the real work begins. Wrap a small piece of 3000-grit wet sandpaper around a firm, flat foam pad. Keep it and the area very wet with a spray bottle of water mixed with a drop of car wash soap. Gently sand only the raised bump of clear coat you created. Sand in one direction, with very light pressure. The goal is to slowly cut the high spot down until it is perfectly level with the factory clear coat around it. You will know you are level when the sanding marks look even across the whole area.
- Polish to perfection. Now you polish out the sanding haze. Follow up with 5000-grit sanding if you have it, or go straight to a light cutting polish on a small foam pad. Work the area until the haze is gone and the gloss returns. Finish with your favorite spray wax or sealant.
Set your expectations now: a perfect, invisible repair on a deep scratch is nearly impossible outside a professional spray booth. On my blue F-150, if you know where to look, you can see a slight texture difference in the repair. From five feet away, the white gash is gone. That is a win.
When to Stop: The Limit of DIY
There is a line where DIY stops being cost-effective or even possible. I have learned this line by crossing it a few times.
If the scratch is longer than your hand, covers a complex curve like a fender arch, or you can see bare, unprotected metal at the bottom of it, a professional painter is your best bet. A pro can blend the new paint over the entire panel for a seamless finish. My attempts at blending large areas at home always ended with a visible “patch.”
Deep scratches on large, flat panels like a hood or door can sometimes be tackled, but the sanding and polishing area becomes huge and intimidating for a first timer. This is where cutting and polishing car paint scratches can help. It’s often the next step after initial sanding to restore the surface.
Trying a DIY fix on a deep scratch is never a waste of time, even if you later go to a pro. You learn how paint layers work. You feel the difference between wet sanding and polishing. You gain respect for the craft. You might also make that ugly mark 80% better, which is often enough to stop the rust and let you enjoy your car again without cringing every time you walk up to it. That is a worthwhile result all by itself. If you want a clear path, the scratch repair paint correction workflow guides you from inspection to finishing polish. It helps you select the right steps, abrasives, and protection for repeatable, predictable results.
Scratch Repair Myths and Mistakes: What Not to Do
Let’s clear the air on some common beliefs that can lead you astray. I’ve seen these mistakes in my own shop, and I’ve made a few myself early on.
The biggest myth is that wax or scratch remover fixes a scratch. It does not. Products like paste wax or a quick “scratch remover” liquid work by filling the microscopic valleys of a scratch with oils or very fine fillers. They make the scratch less visible to the eye by refracting light differently. On my black BMW, I use a spray wax after every wash to hide the fine cobweb scratches. But after two or three washes, that filler washes away and the scratch reappears. It’s a cosmetic bandage, not a repair. So, can you fix a deep scratch on your car with wax? No. You can only hide it for a very short time. Understanding the effectiveness of car scratch removers helps separate hype from reality. In the next steps, we’ll compare products based on real-world results.
Frustration leads to bad decisions. Please, do not reach for household items in a moment of desperation.
- Abrasive Pads: Green Scotch-Brite pads, steel wool, or even a rough sponge will inflict deep, permanent scratches. They are far too aggressive for automotive clear coat.
- Harsh Chemicals: Acetone, nail polish remover, or generic “cleaners” can chemically burn and haze the surrounding paint. They strip protection and can permanently dull the finish.
- Improper Tools: Using a heavy-duty power sander, or even buffing with a dirty rag, will create more damage than you started with. Detailing requires controlled, fine abrasives.
This leads to a vital question. Do car scratches ever buff out completely? The honest answer is yes, but only under one specific condition. You can only completely remove a scratch if it does not penetrate through the clear coat layer into the colored base coat or primer. Run your fingernail across the scratch. If your nail does not catch, it’s likely a clear coat scratch you can polish out. If your nail drops into a groove, the scratch is too deep for complete removal. You can make it 80-90% better by leveling the edges, but a trace will often remain. My Miata’s single-stage paint is more forgiving, but on my modern Tesla or Porsche, the clear coat is a finite resource. Polish too much, and you burn through it. If the scratch has penetrated the clear coat, you may be facing repair deep scratches car paint rather than simple polishing. Deeper fixes often require smoothing, sealing, and possibly color-matching to restore the finish.
Fixing a scratch is only half the job. The repaired area is now fresh, bare paint, completely exposed. You must seal every repair with a protective layer, like a sealant or ceramic spray, to shield the paint and make future cleaning safer. On my daily driver F-150, after I touch up a rock chip, I always coat it with a layer of ceramic spray. This prevents dirt from sticking in the repair and adds a layer of sacrificial protection against the next bit of road debris.
Here is my final piece of advice from the heart. Not every mark on your car needs to be fought to the death. My Honda Odyssey, the kid hauler, has a small scuff on the rear bumper from a shopping cart. I cleaned it, touched it in, and left it. Chasing perfect paint on a vehicle that lives a full, active life will drive you mad. Focus your energy on repairing the damage that bothers you most and protecting the whole car, rather than obsessing over every single flaw. A well-maintained and protected car with a few honest imperfections always looks better than a perfect, neglected one.
Smart Scratch Repair for a Lasting Finish
The most important rule is to match your fix to the scratch depth. I always start with a gentle cleaner wax on a test spot, a method that preserved the fragile clear coat on my black BMW when a harsher compound would have done more harm.
Skip this step, and you can easily burn through the clear coat, leaving a permanent dull patch that no amount of polishing can fix.
Citations and Authoritative Sources
- r/AskMechanics on Reddit: What is the best DIY fix for those scratches? What results can I expect?
- Car scratches- DIY methods or an easy way to fix it yourself – Off-topic & Debates – TechEnclave
- 5 DIY Scratch Removal Tips – Get Your Car Looking Spotless Again! | Mercedes-Benz of Fort Walton Beach
- Different Types Of Scratches On Cars And How To Fix Them | Synchrony
Max is an automotive enthusiast having worked as a car mechanical and in interior detailing service for over 25 years. He is very experienced in giving your old car, a new fresh vibe. He has detailed many cars and removed very tough smells and stains from all kinds of cars and models, always ensuring that his work and advice helps his customers. He brings his first hand experience to his blog AutoDetailPedia, to help readers breath new life into their car interiors.