How Do You Safely Remove Minor Scratches from Your Car’s Surfaces?
That new scratch on your paint or interior trim stares back at you, a small insult to your pride. I get it-my Jet Black BMW is a swirl magnet, and I’ve learned to fix these flaws myself.
I will walk you through my hands-on process for identifying scratch types, choosing safe products, and applying precise techniques to paint, plastic, and upholstery.
Use the wrong method on a deep scratch, and you will burn through the clear coat, leaving a permanent cloudy patch.
Diagnosing Your Scratch: The First, Crucial Step
Before you touch a bottle of polish, you need to know what you are dealing with. Getting this wrong wastes your time and can make the problem worse.
The most reliable test is simple. Run your fingernail gently across the scratch. If your nail does not catch, the defect is likely confined to the clear coat. If your fingernail catches in the groove, the scratch is through the clear coat and into the color or primer, meaning a simple polish will not fix it. This test changed how I work on my own cars.

Scratches generally fall into three categories:
- Clear Coat Marring: These are fine scratches, swirls, and spiderwebs that only affect the top clear layer. They reflect light poorly, making the paint look hazy or dull. My black BMW is a magnet for these. They feel smooth to a fingernail.
- Primer Scratches: Here, the scratch has cut through the clear and the color paint, down to the primer layer. You will often see a different color in the groove, like a light grey or tan line. A key mark or a scrape from a bush on my F-150’s bed rail often reaches this depth.
- Through-and-Through to Bare Metal: The worst case. The scratch has gone through all layers, exposing bare steel or aluminum. You will see a shiny, metallic silver line. This demands immediate attention to prevent rust.
Your repair path follows a simple rule. Light scratch in the clear coat equals polish. Deep scratch that catches your nail equals touch-up paint. This basic flow saves you from frustration.

Your Scratch-Fighting Arsenal: Tools & Chemicals
Having the right stuff makes the job possible. Using the wrong stuff can ruin your paint. This is my core kit for scratch repair.
Start with the basics for prep and finish:
- 70% Isopropyl Alcohol: For wiping down the area before and after work. It removes oils and residue without harming paint.
- pH-Neutral Car Wash Soap: You must wash the area first. A harsh dish soap strips wax but can dry out the paint.
- 500+ GSM Microfiber Towels: Heavy, plush towels for removing polish and applying sealants. Cheap, thin towels can scratch.
- Grit Guard for Your Bucket: This little insert traps dirt at the bottom of your wash bucket, keeping your mitt clean.
For polishing, the tool matters. A 15mm throw Dual Action (DA) polisher is the ideal starter machine; it oscillates and spins, making it very forgiving and almost impossible to burn through the clear coat. Compare this to a forced rotation rotary polisher, which spins in one direction and is a tool for experts. It cuts faster but can damage paint in seconds if you are not skilled.
Next, compounds and polishes. They are not the same.
- Cutting Compound: This is your aggressive abrasive. It contains larger particles to level down clear coat and remove defects like scratches. It often leaves a hazy finish that needs refining.
- Finishing Polish: This uses fine abrasives to remove the haze left by the compound and bring back a deep, reflective gloss. It is the final step before protection.
For deep scratches, you need touch-up. An OEM paint pen from your dealer is best for color match. For a professional finish on a larger chip, a 2K clear coat in an aerosol can is remarkable. A proper respirator with organic vapor cartridges is non-negotiable when using 2K clear; the isocyanates in the hardener are extremely hazardous to your lungs. I used this on a deep chip on my Miata’s fender with great results.
Machine vs. Hand: Can You Fix Small Scratches Without a Polisher?
Yes, but with a major caveat. For paint defects, a machine is superior. It is faster, applies even pressure, and generates the heat needed for the compounds to work properly. The results are more consistent. Trying to correct the swirls on my BMW by hand would take days and my arms would fall off.
If you must work by hand on paint, here is how. Use a soft foam hand pad, not just a cloth. Work on a section no larger than two feet by two feet. Apply the product and use moderate, consistent pressure in straight-line or small circular motions. You will need significantly more patience and multiple passes. The result will be an improvement, but likely not perfection.
For plastics and interior surfaces, hand application is often your only choice. Polishing a gloss black trim piece on the Porsche’s console or cleaning a scuff on the Odyssey’s hard plastic door panel is delicate work. A machine is too powerful for these small, complex surfaces. Your hands and a microfiber applicator give you the control you need.
How to Get Light Scratches and Swirls Out of Car Paint
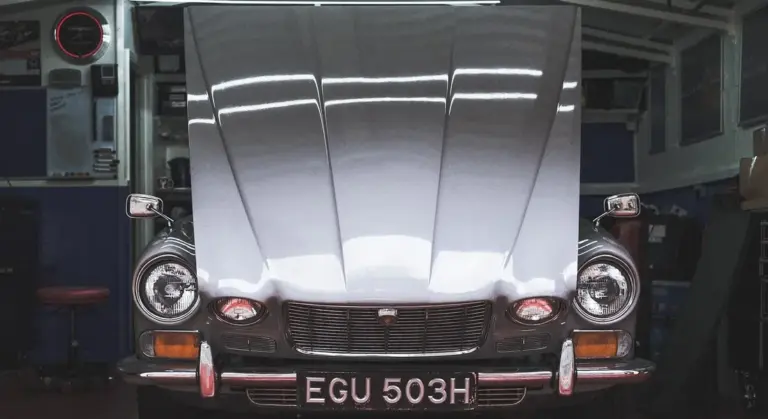
My 2016 BMW 3 Series is Jet Black. In the sun, the hood doesn’t look like a solid color. It looks like a spider web. Those are swirl marks. They are fine scratches in the clear coat, put there by improper washing. They do not go down to the color layer. You can fix them at home.
Paint correction is simply removing a microscopic layer of clear coat to level the surface, making scratches disappear. You must work in a cool, shaded spot. Direct sun will make your polish dry into a crust before you can work it. A garage is best. An overcast day can work.
The Five-Step Process for a Perfect Hood
We will use my BMW’s hood as our example. It is a flat, large panel perfect for learning. Follow these steps in order. Do not skip one.
- Wash. Give the car a proper two-bucket wash. You must remove all loose dirt first. If you polish over grit, you will make deep scratches. Dry the hood completely with a clean microfiber towel.
- Clay. Feel the paint. Does it feel smooth like glass, or rough like sandpaper? That rough feeling is embedded contamination. Take a detailing clay bar and a clay lubricant spray. Knead the clay into a flat patty. Spray a 2×2 foot section of the hood generously. Glide the clay bar back and forth with light pressure. You will feel it glide smoothly. This step does not remove scratches, but it creates a perfectly clean canvas for the polish to work evenly. Wipe the area dry with a fresh microfiber.
- Tape. Get a roll of painter’s tape. Tape off any trim, edges, or badges on the hood. This protects plastic and rubber from polish stains and your polisher from catching an edge. It takes five minutes and saves you hours of clean-up.
- Polish. For swirls, you use a polishing compound, not a heavy cutting compound. I use a dual-action polisher. It is safer for beginners than a rotary tool. Apply four small dots of polish to a foam polishing pad. Spread it on a 2×2 foot section at low speed. Then, increase speed to about 4 out of 6. Make three slow, overlapping passes left to right. Then three more passes up and down. Keep the pad flat. The polish will turn from its original color to a thin, clear film. This is called “breaking down” the abrasives, and it means the work is done. Wipe the residue off immediately with a clean, soft microfiber towel. Move to the next section.
- Protect. The polish has just cleaned and perfected the paint. It has also stripped off any old wax. You must seal it. Apply a paint sealant or a high-quality ceramic spray wax. This new layer will protect your hard work and make the next wash easier.
Detailer’s Pro-Tip: The Lighting and Wipe-Down Check
After you polish a section, you will think it looks incredible. The oils in the polish fill the tiny scratches and make them invisible. This is an illusion. You must check your true work.
Get a bright LED work light. A garage door opener light is not enough. Turn off the overhead lights. Hold your LED light at a very low angle, almost parallel to the paint. Shine it across the hood. Those spider webs will light up if they are still there. If they are gone, you will see just a pure, deep reflection. This is the only way to see paint defects.
Now for the wipe-down. Mix a spray bottle with 10% isopropyl alcohol and 90% distilled water. Lightly mist a microfiber towel with it-do not spray the paint. Wipe down the polished area. This removes the polishing oils. This reveals the true, finished surface of your clear coat, without any hiding agents. Check it again with your LED light. This is what you are actually protecting with your wax. If you see scratches, you need another polishing pass. If it looks flawless, you can celebrate and apply your sealant.
Fixing Deeper Scratches and Paint Chips
When a scratch is deep enough that your fingernail catches in it, you need a new plan. The goal changes. You are not removing the scratch anymore, you are filling the canyon it left behind. This is where touch-up paint becomes your best friend. It is a compromise, but a smart one that saves your paint from rust and your wallet from a big repair bill.
The Touch-Up Pen Process: Patience is Paint
Doing this right is about technique and, more than anything, time. Rushing ruins it. For my F-150’s hood, littered with highway rock chips, this is the only sane way to manage the damage.
- Clean the Area Impeccably. Wash the panel, then use isopropyl alcohol (mixed 1:1 with water) on a clean microfiber to strip any wax or oils from the chip. Any contamination trapped under your paint will stay there forever.
- Apply the Color in Micro-Thin Layers. Shake the pen well. Do not glob it on. Use the brush or nib to place a tiny drop of paint only inside the chip. Your first coat should look pathetic and barely cover the primer. This is correct.
- Walk Away. For Days. This is the hardest part. Let that first coat dry for at least 2 hours, then add another microscopic layer. Repeat until the paint is just barely proud of the surrounding surface. Then, you must let it cure. Hard. I leave mine for a minimum of 48 hours, preferably a week. The paint needs to fully shrink and harden before the next step.
- Level the Repair. Once cured, the touch-up will be a raised blob. Wrap a small piece of 3000-grit sandpaper (used wet) around a soft eraser or a sanding pad. Gently, with light pressure, sand the high spot of the touch-up until it is flush with the factory paint. Switch to a fine polishing compound on a soft foam pad to remove the sanding marks and restore gloss.
- Seal Your Work. After polishing, apply a sealant or wax over the entire area. This protects your repair and helps blend the edges.
Real-World Examples: A Truck and a Roadster
My blue F-150 gets stone chips constantly. For these, I use the factory-matched touch-up pen. The metallic flake in the paint never lines up perfectly, but from 5 feet away, the chips disappear and the metal is sealed. The goal is protection and making flaws less obvious, not achieving perfection.
My 1995 Miata is a different story. Its classic red paint is single-stage, meaning there is no clear coat. A chip goes right down to the primer. When I touch it up, the new paint sinks in and looks different at first. I have to be extra careful with the leveling step, as I am sanding and polishing the colored paint itself, not a clear layer. The result is a seamless repair that maintains the car’s original character.
The Cost of Compromise
Let’s talk numbers. A quality touch-up pen from the dealership or an automotive paint supplier costs about $30. My time is free. A professional respray of a single hood or fender starts at $300 and goes way up, especially for metallic or tri-coat paints. A $30 DIY repair that is 80% effective is almost always a better financial decision than a $300 perfect repair. You reserve the pro work for the big, emotional damage. For the everyday wear and tear, the touch-up pen is your pragmatic partner in the fight against rust and decay.
Repairing Scratches on Interior Surfaces
Your car’s interior takes daily abuse. Keys scrape the console. Shoe heels scuff door panels. The good news is you can fix most of it. The first, most critical step is knowing what material you’re touching. Using a paint correction technique on a soft plastic dash will ruin it, and using a vinyl protectant on a leather seat won’t fix a scratch.
Modern car interiors are almost never raw, natural leather. What you’re usually dealing with is a coated material. Here is a quick guide:
- Coated Leather (Most Common): This is a thin layer of leather with a colored polyurethane coating on top. Scratches typically only affect this clear, plastic-like top coat. My BMW’s seats are a perfect example of this.
- Vinyl and Plastic Trim: This includes dashboards, door cards, and lower consoles. It can be textured, smooth, or a frustratingly glossy “piano black.”
- “Vegan” or Synthetic Leather: Common in cars like my Tesla, this is a high-quality plastic designed to mimic leather. It’s durable but can still scratch and scuff.
How to Remove Scratches from Leather Seats and Dash
Start simple. Most marks on leather are not true scratches but transferred material from jeans, shoes, or dirt. Your first line of defense is a proper clean.
For light scuffs and surface marks, a dedicated leather cleaner and a soft horsehair detailing brush are your best friends. Spray the cleaner directly onto the brush, not the seat, to control moisture. Gently agitate the stained area in a circular motion. The soft bristles will lift the grime from the grain without harming the coating. Wipe clean with a microfiber towel. This method fixes ninety percent of the issues on my family’s Honda Odyssey seats. These same steps work well for clean stains on leather car seats in other vehicles. They can help keep the interior looking like new.
For a real scratch that has cut into the colored coating, you need a repair kit. I learned this on the Odyssey’s captain’s chair after a suitcase zipper left a white gash.
- Clean the area thoroughly with isopropyl alcohol to remove all oils and dressings.
- Use a leather filler compound from a repair kit. Apply it sparingly with a small spatula, overfilling the scratch slightly. Let it dry completely.
- Sand the area gently with a very fine grit sanding pad (included in kits) until it is flush with the surrounding leather.
- Apply matching dye with the included pen or airbrush. Apply in thin, light layers, letting each dry. Build up the color slowly.
- Finish with a leather conditioner to blend the sheen and protect the repair.
A serious warning here. Household cleaners like dish soap, all-purpose sprays, or ammonia-based products will strip the protective coating from your leather, leaving it dry, cracked, and vulnerable. Always use pH-balanced products made for automotive interiors.
How to Remove Scratches from Plastic and Vinyl Trim
This breaks down into two very different categories: textured and glossy.
For textured plastic, which covers most dashboards and door trim, scratches often hide well. Your goal is not to remove the scratch physically, but to minimize its visual impact by restoring the color and sheen of the surrounding plastic. First, clean the panel with an interior cleaner. Then, apply a quality plastic restorer with a microfiber applicator. This product will darken the plastic and provide a uniform, satin finish that makes shallow scratches virtually disappear. Be careful not to overdo it; even excessive application won’t fix deeper scratches.
Now, for glossy piano black plastic. I sigh just thinking about it. This trim, found around shifters and infotainment screens, is a scratch magnet. Piano black trim is almost always clear-coated, just like your car’s paint, but with a much softer clear coat. This means you can often fix light swirls and scuffs the same way.
Use a very gentle polish, one designed for fine finishes. Apply a tiny amount to a soft, clean microfiber towel. Apply light pressure and polish the area in straight lines. Check your progress often. You are removing a microscopic layer of clear coat to level out the scratches. Go slow. It is easy to burn through. Deeper car paint scratches may require a light cutting/polishing step to even the surface. Always proceed slowly to avoid removing too much clear coat.
Let my Tesla Model 3’s center console be your cautionary tale. The plastic is incredibly soft. A single wipe with a dusty towel put fine swirls in it. For soft plastics like this, prevention is the only real cure. A careful polish can fix it once, but then install a pre-cut adhesive film protector. It is the only way to keep it looking new.
Repairing Scratches on Exterior Trim, Glass, and Plastics
Your car’s paint gets all the attention. The trim and glass just live around it. But a scratch on a black bumper or a hazy windshield can ruin the whole look. The approach is different here. You are often dealing with the material itself, not just a clear coat on top.
The rule is simple: identify the exact surface you’re working on before you touch it with any product or tool. What works on painted trim will ruin textured plastic. What polishes glass does nothing for cloudy headlight lenses.
How to Get Scratches Out of Plastic Bumpers and Trim
Look at your trim closely. Run your fingernail over it. Is it rough and pebbly, or is it slick and shiny? Your answer decides everything.
For textured trim, like the black arches on my Ford F-150 or the lower panels on the Honda Odyssey, you cannot polish out a scratch. The texture is part of the finish. Trying to sand or compound it will just create a smooth, shiny spot that looks worse.
Your best move is to make the scratch less obvious.
- First, clean the trim thoroughly with a dedicated plastic cleaner or a diluted all-purpose cleaner. You need to strip off any old, faded dressings.
- Rinse and dry it completely.
- Apply a high-quality trim restorer or ceramic trim coating. These products soak into the plastic, restoring the deep black color. A filled-in, dark black scratch is far less visible than a white scratch on faded grey plastic.
For smooth, painted trim, treat it like paint. The lower bumper section on my BMW is a perfect example. It’s color-matched plastic with a clear coat.
- Wash and dry the area.
- Follow the same steps you would for paint: use a polishing compound by hand or machine to level the clear coat and remove the scratch.
- Always follow with a protectant like wax or sealant.
For faded plastic that’s not scratched, just tired, you have a powerful option. The grey trim on older cars turns chalky and pale. A heat gun, used very carefully, can bring the oils back to the surface.
Move the gun constantly, never letting it sit. You will see the color return before your eyes. It is temporary, often lasting a season or two. For a permanent fix, a product like Solution Finish is a stain that dyes the plastic. It lasts for years.
Whichever method you choose, the goal is uniformity-making the whole piece look consistent so any minor scratches simply fade into the background.
Can You Remove Scratches from Glass?
Glass is hard. This is a blessing and a curse. It resists fine scratches but is a nightmare to fix when it gets them, especially on car window glass.
Most of the time, you are not dealing with a single deep scratch. You are dealing with thousands of micro-scratches from wiper blades, creating a hazy, blurred look, especially in low sun or at night with oncoming headlights.
This light haze is the only thing you should attempt to fix yourself. You need a dedicated glass polishing kit. It usually includes a small buffer pad and a specialized compound like cerium oxide.
It is messy, slow work. You must keep the glass and pad cool with frequent sprays of water. The results can be remarkable, bringing back sharp clarity. I do this on my own cars every few years when the wiper haze gets annoying.
Now for the hard truth. A deep, fingernail-catching scratch from a key or gravel is a different story. Removing enough glass to level that scratch weakens the structural integrity. On a windshield, this is a critical safety issue.
Do not attempt to polish out a deep glass scratch. A professional glass company might be able to fill it with a resin to improve clarity, but removal is not a safe DIY task. Your safety and the safety of your passengers is not a detail. It is the rule, especially when it comes to scratches on car windows.
Making It Last: Protecting Your Repair
You just put in the work. You leveled that scratch, polished the swirls, and brought the color back. It feels good. But if you walk away now, you have wasted your time. A perfect surface is a fragile surface. It needs a shield.
Without protection, your fresh repair is just a cleaner target for the next scratch, stain, or sunbeam. The final step is not optional. It is the step that makes everything else worthwhile.
Shielding Your Paint: From Quick Wipes to Years of Gloss
For your paint, you have a spectrum of options. Think of it like sunscreen. A spray sealant is your daily SPF 30. A ceramic coating is your heavy-duty, all-day expedition-grade sunscreen.
On my daily drivers, like the F-150 or the Odyssey, I reach for a quality spray sealant. It takes five minutes after a wash. Spritz it on a panel, wipe it in with one microfiber, and buff it to a shine with a second, dry one. It beads water beautifully for four to six months. It is the perfect balance of effort and reward for a car that sees real life.
For my garage queen, the 911, or after a full paint correction on the BMW, I use a true ceramic coating. This is a different league. The surface must be perfectly clean and decontaminated. You apply it in controlled sections, watching for it to flash to a haze before gently wiping it off. It is a commitment. The payoff is two to five years of relentless protection, chemical resistance, and a slickness that makes dirt slide right off. The first time you rinse a coated car, you will understand.
Guarding Interiors and Exterior Trim
Your interior needs love too. For the “Vegan Leather” in my Tesla or the real leather in the BMW, a dedicated conditioner is key. It keeps the material supple and prevents it from drying out and cracking. After a deep clean on the Odyssey’s cloth seats, I use a fabric guard. It creates an invisible barrier so the next juice box spill beads up instead of soaking in.
Exterior plastic and rubber trim fades when its oils are stripped by sun and cleaning. On the F-150’s bumper trim and the Miata’s window seals, I use a UV-protectant dressing. It restores a rich, dark color without being greasy. This is not just for looks. It prevents the plastic from becoming brittle and cracking.
The Ultimate Defense: Paint Protection Film
Sometimes, the best repair is preventing the scratch altogether, especially when it comes to colored car paint. For that, there is Paint Protection Film, or PPF. It is a clear, urethane film applied to the paint. It is self-healing for light swirls and takes the brunt of rock chips and scratches.
My 911 has the full front end wrapped. I watched a small branch scrape across the bumper last fall. My heart sank. Later, in the garage, I poured warm water over the mark. The film healed itself. The scratch vanished. That is peace of money well spent. If you have a new car or a cherished paint job, PPF is the strongest physical barrier you can buy. It lets you enjoy the drive, not just fret over the finish.
When to Call a Pro: DIY Limits and Cost Reality
Knowing when to stop is a skill. I’ve pushed a scratch repair too far on my black BMW and made a small problem into a bigger, more expensive one. It taught me to be realistic. Here’s where the do-it-yourself road ends and the professional driveway begins.
What Does Professional Scratch Repair Actually Cost?
Prices vary wildly by location, shop reputation, and your car. These are rough averages for a standard sedan or SUV to give you a ballpark.
- Professional Paint Correction (for swirls, light scratches): $300 to $1,500+. This is for the whole car. The cost climbs with the level of defect removal. My BMW’s full two-stage correction was at the top of that range, but for a white Tesla with lighter marks, you might be at the lower end.
- Spot Repair for a Deeper Scratch (paintwork): $50 to $300 per scratch. A good detailer can often wet-sand, polish, and blend a scratch without repainting. A body shop will repaint the entire panel, starting around $500 and going up.
- Interior Surface Repair (plastic, vinyl, leather): $75 to $300+ per panel. Specialists use dyes, fills, and grain pads to make scratches vanish. Repairing a scratched leather seat bolster costs more than a dash panel.
- Full Interior & Exterior Detail: $150 to $500+. This is cleaning, not repairing. It makes your car spotless but won’t remove scratches. It’s the maintenance step after a repair is done.
Finding “Car Scratch Repair Near Me”: Detailer vs. Body Shop
You get different results from a detailer and a body shop. You need to know who to call.
A professional detailer or paint correction specialist is your go-to for surface-level issues. They fix clear coat scratches, swirl marks, and light etching. They use polishers, compounds, and skill. Their goal is to preserve your factory paint. Look for online portfolios with 50/50 shots (half the panel corrected, half untouched). Read reviews that mention communication and process. A good one will explain exactly what they can and cannot do for your scratch.
A body shop is for when paint is gone and metal or plastic is exposed, or when there’s a dent. They sand, prime, repaint, and blend. It’s a more invasive process. For a deep key scratch on your door, a detailer might make it 80% better. A body shop will make it 100% gone but will repaint the whole door.
Ask any pro you vet this simple question: “Can you show me a repair you did on a scratch like mine?” If they hesitate, look elsewhere.
The Red Flags: Where Your DIY Kit Stays in the Cabinet
If you see any of these, close the laptop and pick up the phone. Trying to fix these yourself will likely cause damage.
- The Fingernail Test Fails: You drag your fingernail across the scratch and it catches deeply. This means it’s through the clear coat and into the color layer or primer.
- A Dent Accompanies the Scratch: Any crease or depression in the metal means the panel’s shape is changed. No amount of polish fixes a dent.
- Large, Connected Areas: A network of deep scratches across a whole door or quarter panel. DIY spot repairs will look mismatched and blotchy.
- Structural Damage or Rust: If the scratch has exposed bare metal and you see the start of rust (little brown specks), this is beyond a cosmetic fix. It needs professional treatment to stop the corrosion.
- Uncertainty on Sensitive Materials: Deep scratches on a matte wrap, Paint Protection Film (PPF), or sensitive interior trim like open-pore wood. Experimenting here gets very costly, very fast.
The Truth About “Magic” Scratch Repair Pastes and Pens
I’ve tried them. Most are a temporary fix, not a repair. They are heavy fillers, often waxy or oily, that sit in the scratch and mask it by making the edges less reflective.
They work by hiding the scratch, not removing it. The results can look okay for a week or two. Then you wash the car, or it sits in the sun, and the product washes out or evaporates. The scratch reappears. On my Miata’s single-stage paint, a popular “scratch remover” paste just left a greasy smear that attracted dust. It didn’t really improve anything, even though some scratch removers claim to be effective.
Some paint pens for chip repair are useful for tiny, pinpoint stone chips if you take your time. But the pastes and liquids marketed for long scratches? View them as a very short-term cosmetic cover-up, not a solution. For repairing car paint scratches beyond chips, a proper fix matters more than a quick cover. For lasting results, consider the right method or a professional. For a car you’re selling tomorrow, maybe. For a car you love and want to keep, invest in the right method or call a professional.
Maintaining That Showroom Shine
From my experience correcting the Jet Black BMW, I know the true secret is perfecting the finish then locking it in with a protectant. Always apply a durable wax or sealant after polishing to shield the fresh surface.
Leaving the paint bare after a repair invites rapid fading and new scratches from daily exposure.
Research and Related Sources
- Repair & Renew Scratch Remover for Cars | Repair & Restore |
- Not All Scratch Removers Work-These Are the Ones That Smoothed Out the Scrapes on Our Car
- r/cars on Reddit: Best way to remove scratches from paint?
- Car Scratch Remover in Exterior Car Detailing – Walmart.com
- How to Remove Car Scratches – Chemical Guys
Max is an automotive enthusiast having worked as a car mechanical and in interior detailing service for over 25 years. He is very experienced in giving your old car, a new fresh vibe. He has detailed many cars and removed very tough smells and stains from all kinds of cars and models, always ensuring that his work and advice helps his customers. He brings his first hand experience to his blog AutoDetailPedia, to help readers breath new life into their car interiors.