What Do You Need to Know Before Applying Ceramic Coating to Your Car’s Paint?
Ceramic coating can lock in that showroom shine for years, but a rushed or incorrect application will waste your time and money. Getting it right depends on more than just the bottle in your hand.
We will cover the non-negotiable paint preparation, the precise application method, the strict curing requirements, and the vital compatibility checks for your vehicle’s specific paint and condition.
Miss a step or ignore a factor, and you risk permanent high spots, poor bonding, or a coating that fails within months.
What Does Ceramic Coating Actually Do for Your Paint?
Think of a ceramic coating as a liquid shield. It is a polymer-based liquid that you wipe onto clean paint. It then chemically bonds and cures into an exceptionally hard, glass-like layer. This layer is measured in microns. It is thinner than a human hair. You will not see it, but you will absolutely feel its slickness.
To understand its role, compare it to traditional protection. A good carnauba wax is like a light, nourishing sweater for your paint. It looks deep and feels great, but it washes away after a few months. A synthetic sealant is like a durable windbreaker. It lasts longer and sheds water well. A ceramic coating is a full rain slicker. It is designed for maximum environmental resistance and longevity. The coating’s job is not to look different, but to protect what’s underneath for years, not months. Unlike wax or sealants, it requires less frequent reapplication.
The real-world benefits are immediate and tangible.
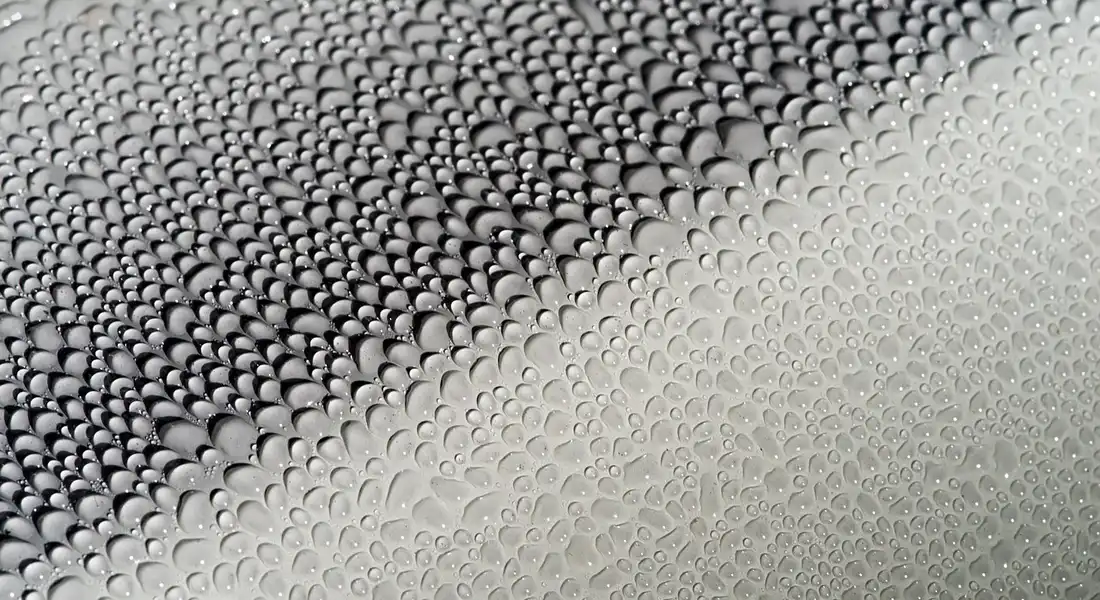
- Extreme Hydrophobics: Water does not sheet. It beads up into tight, round pearls and rolls off the surface, taking loose dirt with it. This makes rinsing your car effortless.
- Chemical Stain Resistance: Bird droppings, tree sap, and bug acids have a much harder time etching into your clear coat. They sit on top of the slick coating, giving you crucial time to remove them safely.
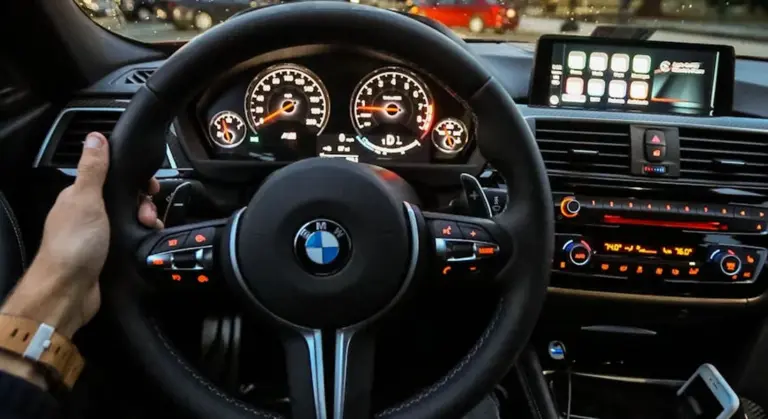
- Reduced Marring: The hard, slick surface means dirt and grit slide off during washing with less friction. This directly translates to fewer fine scratches and swirls over time, a lesson my black BMW taught me the hard way.
People often ask how we know these coatings work. Manufacturers test them. They use standardized methods for measuring hardness, chemical resistance, and UV stability. This is how they arrive at those 2-year, 5-year, or 9-year durability claims. Set your expectations here. It is a semi-permanent layer, not a magic force field.
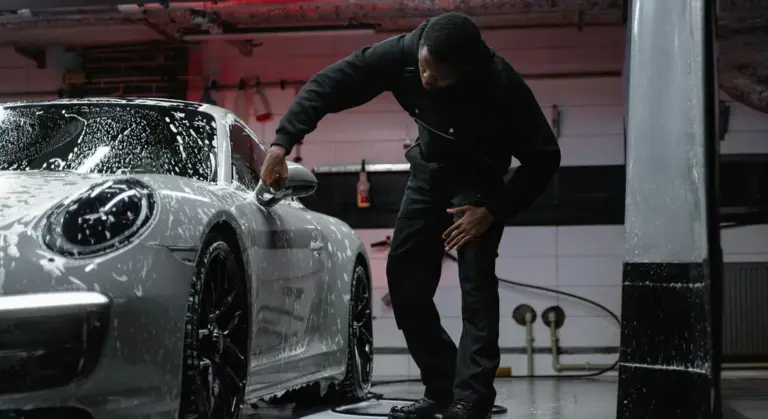
This brings us to what it does not do. A ceramic coating will not prevent rock chips or door dings. It is a chemical barrier, not a physical one. For impact protection, you need Paint Protection Film (PPF), like what’s on the Porsche. It also will not make a scratched, swirled car look perfect. It locks in the condition you apply it over. Apply it over scratches, and you seal those scratches in for years.
Before You Start: Is Ceramic Coating Right for Your Car?
Not every car or situation is ready for a coating. Asking these questions now saves hours of frustration and wasted product later.
Can I Ceramic Coat My Old Car or Weathered Paint?
The age of the car is irrelevant. The condition of the paint is everything. You must evaluate two things: oxidation and paint type. For an old car, understanding paint aging techniques can reveal how the finish has held up over time. This awareness guides your evaluation and future restoration decisions.
Run your hand over the paint. Does it feel chalky, rough, or dull? That is oxidation. The clear coat (or the pigment in single-stage paint) is breaking down. Applying a coating over this is like varnishing rotten wood. It will not adhere properly, and it will look terrible. The coating needs a sound, stable surface to bond to.
Modern cars have a clear coat over color. Older cars, like my 1995 Mazda Miata, often have single-stage paint where the color and protective layer are one. Single-stage paint can oxidize badly, turning a bright red into a muted pink. The rule is the same for both: the surface must be cleaned, polished, and refined until it is as perfect as you want it to be for the next several years. For the Miata, that meant a full paint correction to bring the red back to life before the coating ever came out of the bottle.
Is My Paint Type or Wrap Compatible?
Most ceramic coatings are formulated for standard glossy clear coat. That covers 95% of modern vehicles. But special finishes need special attention. For ceramic coating car paint protection, the right formulation ensures proper adhesion and long-lasting protection on nonstandard surfaces. We’ll cover practical options for these finishes next.
- Matte or Satin Wraps/Paint: These finishes have zero gloss. A standard coating will make them shiny, ruining the look. You must use a coating specifically labeled for matte finishes. These are designed to protect without adding gloss.
- Vinyl Wraps: Yes, you can coat vinyl. It adds great protection against staining. Always use a coating recommended for vinyl or a dedicated wrap sealant, as some chemicals can affect the plasticizers in the film.
- Paint Protection Film (PPF): The Porsche’s front end is covered in PPF. You can absolutely apply ceramic coating over PPF. In fact, it makes keeping the film clean much easier. Just ensure the PPF is fully cured (usually 30 days after installation) and perfectly clean.
Can You Ceramic Coat a Car Outside?
You can. I have done it in a pinch. But I do not recommend it, and you must be fanatical about the conditions. The curing process is sensitive.
You need three things: shade, cool temperatures, and low humidity. Direct sun will make the coating flash dry on the panel before you can level it, causing high spots that look like hazy streaks. High heat or humidity can ruin the curing chemistry. Ideal conditions are in a climate-controlled garage.
Applying a coating outdoors introduces huge risks of contamination that get permanently locked under the hardened layer. Dust, pollen, insects, and even morning dew can land on your fresh coating. These become permanent, textured bumps in your finish. The risk is simply not worth the result for a product meant to last years.
What About Other Coatings or Recent Body Work?
The coating must bond directly to the paint, wrap, or PPF. Anything in between will cause bonding failure. This means you cannot layer it over old wax, sealant, or a previous coating.
You must start with a bare surface. A thorough wash followed by a panel wipe or paint prep solution is non-negotiable. This step removes any lingering oils or silicones.
Be extra cautious with recent body work. Many body shops apply a heavy “wax seal” or glaze before returning a car. This fills in sanding marks to make the repair look shiny fast. This glaze must be completely stripped off, or your ceramic coating will slide right off with it in a few months. If your car has been repainted, wait at least 30-60 days for the paint to fully outgas and cure before applying any coating.
The Detailer’s Toolkit: Must-Have Supplies for Ceramic Coating
You cannot apply a ceramic coating with a dirty rag and hope. The job demands specific tools. Think of this list as your recipe for success. Skip an ingredient, and the whole thing can fail.
Using the wrong tools is the fastest way to waste your money and lock defects into your paint for years.
Tools & Chemicals: The Exact Specs
- Microfiber Towels: You need two types. For coating removal, use thick, plush towels in the 300 to 500 GSM range. For the final buff, use soft, low-pile towels around 70 GSM. I keep a stack of each labeled so I never mix them up.
- Polisher: For paint correction, a dual-action polisher with a 15mm to 21mm throw is the sweet spot for beginners and pros. Match it with a firm, 5-inch backing plate for consistent pad rotation.
- Chemicals:
- pH-neutral car shampoo. It cleans without stripping existing protection.
- Iron Remover (chemical decon). This purple spray dissolves embedded brake dust particles.
- Paint Prep Spray. This is usually a 10-20% isopropyl alcohol mix. It removes all final oils and residues.
- Bucket with Grit Guard: This isn’t just a bucket. The guard traps dirt at the bottom, keeping your wash mitt clean. It is your first line of defense against wash-induced scratches.
Other Non-Negotiable Essentials
- Clay bar or a synthetic clay mitt for mechanical decontamination.
- Multiple foam applicator blocks. Use a fresh one for each panel to avoid contamination.
- Nitrile gloves. Protect your hands from chemicals and keep skin oils off the pristine paint.
- Very good lighting. A bright LED work light is essential. You must see every speck of dust and every high spot before the coating flashes.
Some consumer kits include a basic towel and applicator. That is fine for a first try. For professional, lasting results that look perfect under the sun, you need professional-grade supplies. My F-150’s hood taught me that lesson after a bad experience with a cheap, included towel.
The Prep Work Protocol: Getting Your Paint Perfectly Ready
This is the whole game. The ceramic coating is just a liquid sealant. It does not hide anything. It only seals in the surface you present to it. A perfect coat over a scratched surface gives you perfectly sealed scratches. It won’t fix any issues.
The coating amplifies the condition of your paint, for better or much, much worse.
The Ceramic Coating Prep Checklist
Follow this order. Do not jump ahead. Each step builds on a cleaner surface than the last.
-
Wheels and Tires
Always start here. Wheel cleaners and brake dust are corrosive and will splatter onto your clean paint later. Get the messiest part done first. I use a dedicated wheel brush and iron remover on my Porsche’s alloys to melt the heavy brake dust away before I even touch the body.
-
Contact Wash
Use the two-bucket method with grit guards in both. One bucket holds your soapy shampoo. The other is your rinse bucket to clean your mitt. The goal is to lift dirt away, not grind it into the clear coat. A pressure washer for the initial rinse makes this step far more effective.
-
Chemical Decontamination
After washing, spray the iron remover over the entire car, one panel at a time. You will see it turn purple as it reacts with metallic particles. Rinse it off completely. This step dissolves contaminants you cannot see or feel yet.
-
Mechanical Decontamination
Now you clay. Even after the chemical step, microscopic particles are bonded to the paint. Lubricate a section well and glide your clay bar or mitt over it. If it glides smoothly, it is clean. If it drags, there is still contamination. Your paint should feel as smooth as glass when you are done.
-
Paint Correction
This is the transformative step. Using your polisher, you remove swirls, light scratches, and oxidation. This is “optional” only if you are okay with preserving every current defect. For dark-colored cars, it is mandatory.
My 2016 BMW, the ‘Swirl Magnet,’ is the perfect example. Applying a coating without correcting its black paint would have made the spider-webbing permanent and even more visible. The coating’s clarity would act like a magnifying glass on every flaw.
-
Final Paint Prep
After polishing, the paint is covered in oily residues from the compound. These oils will prevent the coating from bonding. Mix your isopropyl alcohol solution or use a dedicated panel wipe. Soak a clean microfiber towel and wipe down every square inch you plan to coat. The surface must be clinically clean.
This entire sequence is the real “ceramic coating step by step procedure.” The actual application is the final, simple act. Rushing the prep is the most common, and most expensive, mistake you can make.
Application Day: How to Apply Ceramic Coating Without Mistakes
This is it. The paint is perfect. Your garage is clean. Your hands are steady. Now you make the magic happen. This process is about patience and method, not speed.
Setting the Stage: Environment and Panel Order
Your coating needs a good home to cure. A cool, shaded, and dust-free garage is perfect. Avoid direct sun and high humidity. Good airflow helps, but keep the bay door closed to stop wind from blowing pollen onto your wet paint.
Plan your attack. You will work panel by panel. Start high and move down. I always begin with the roof. Then I move to the hood and trunk lid. The front fenders and doors come next. Finally, I tackle the bumpers and lower rocker panels.
This top-down order keeps you from leaning over a freshly coated surface and prevents dust from your sleeves falling onto wet areas. Work in small, manageable sections, about 2 feet by 2 feet. Never try to coat an entire door or the whole hood at once.
The Application Technique: Dot, Spread, and Level
The motion is simple. Do not overthink it. For each small section, put two or three small drops of coating onto the foam applicator pad. Do not soak it.
Spread the product onto the paint in a straight-line, cross-hatch pattern. Go left to right, then up and down. You want a thin, even, translucent layer. If you can’t see the product, you are doing it right. A thick, visible layer is wrong and will cause problems.
Now, wait. Let the coating “flash.” This means the solvents evaporate. The coating will change from looking wet and slick to a faint, oily haze. This usually takes 30 seconds to two minutes. Humidity changes this time. When the haze appears, take a fresh, clean, premium microfiber towel and gently buff the area to a clear, high-gloss finish. Use a light touch. Flip the towel to a clean side often.
Detailer’s Pro-Tip: The Light is Your Guide
Your best tool here is a bright, handheld LED light. Shine it across the paint at a low, raking angle right after you buff. This light will instantly reveal any “high spots” you missed-streaky, oily-looking patches where the coating is too thick. Catching them now is easy. Finding them tomorrow is hard work.
Move your arm slow and steady, use almost no pressure on the applicator, and let the LED light show you the truth of your work after every pass.
And to answer the big question: can you ceramic coat your car yourself? Absolutely. I did it on my black BMW. It tests your patience and your attention to detail, but the reward is immense. Just respect the process.
Navigating Complex Areas: Trim, Windows, and Gaps
Paint is easy. The edges are tricky. Untreated black plastic and rubber trim can stain if coating gets on them. The stain looks white and chalky. For permanent trim, use a detailing tape designed for painters. Run a thin line along the edge where the paint meets the rubber or plastic. It takes five minutes and saves hours of frustration.
For textured plastic trim, like on my Ford truck’s bumper, I use a dedicated ceramic trim coating. It’s made for those surfaces and won’t stain.
Glass is your friend. You can apply your main paint coating to the windows. It makes water bead off brilliantly. Just be extra careful around the edges where glass meets trim to avoid buildup.
Panel gaps and emblems are where product loves to hide. When you spread coating, go up to these edges, but do not slather product into the crack. Use a smaller, pointed applicator or a clean microfiber wrapped around your finger to very lightly apply a tiny amount to the raised edges of badges.
Immediate Inspection and Fixing High Spots
You finished the last panel. Do not put your tools away. Grab your LED light again and slowly walk around the entire car. Look at every panel from every angle. Search for those shiny, streaky smears you missed.
If you find a high spot, it is not the end of the world. While the coating is still in its initial cure phase (the first hour or two), you can fix it. Put a little of the prep spray or a dedicated coating eraser on a clean microfiber. Gently rub the high spot. It should dissolve away. Then, buff the area clean with a dry part of the towel. Do this gently. You are correcting a flaw, not scrubbing the floor.
After the Coating: Curing, Maintenance, and Problem-Solving
The coating is on. Now you protect your investment. What you do next matters as much as the application.
The Critical Cure Time: What Not to Do
The coating needs 24 to 48 hours to fully bond to your paint. This is the most vulnerable time. Keep the car completely dry and in the garage. No rain, no dew, no sprinklers. Do not touch it. Do not wipe it. Do not let dust settle on it if you can help it. It’s similar to the curing time for car paint.
People always ask about car covers. Can you cover your car after ceramic coating? Not now. Wait at least a full week for a full, hard cure. Even then, only use a clean, soft, breathable cover. Any friction or moisture trapped under a cover during curing can ruin the finish. Indoors in a clean garage is always best.
Washing and Maintaining a Coated Car
After the cure, washing becomes a joy. The dirt releases easily. Use a pH-neutral car shampoo. Do not use wash-and-wax soaps or strong cleaners. They can degrade the coating over time.
Use the two-bucket method with grit guards. Dry with a clean, soft drying towel or a blower. The goal is to maintain the coating, not challenge it with abrasive dirt.
Every three or four months, use a ceramic booster spray after you wash and dry. It refreshes the water-beading properties and adds a layer of sacrificial protection on top. It takes five minutes and keeps the coating performing like new for years.
Troubleshooting Common Application Issues
Sometimes, things do not go perfectly. Here is a quick guide to common problems.
| Problem | Likely Cause | How to Fix |
|---|---|---|
| Streaks or Haze | Coating applied too thick, not fully leveled, or buffed off too late. | If still fresh (under 2 hours), use prep spray on a microfiber. If fully cured, a light polish may be needed. |
| Poor Water Beading | Product not bonded (too cold/damp during application), surface wasn’t fully decontaminated, or it’s simply the product’s character. | Ensure proper prep next time. Use a ceramic booster spray. Some coatings bead more aggressively than others. |
| White Stains on Trim | Coating residue cured on porous plastic or rubber. | Try a dedicated trim stain remover. Lightly sanding with a magic eraser can work, but test first. Prevention (taping) is easier. |
| Oily Smears That Won’t Buff Off | High humidity extended flash time, or product was agitated too much. | Let the panel sit longer, then try buffing again with tremendous force on a dry towel. If cured, polish is the solution. |
Remember, all ceramic coatings are different. I have tested many. Some are slick, some are glassy, some bead water into tight little marbles, others sheet it off. I also evaluate coatings on a test car to compare real-world performance. That hands-on check keeps the results grounded. Some variation is normal, but dramatic failure usually points to an error in prep or application environment.
How Long Will It Last and When to Recoat?
A consumer-grade coating, applied well and maintained, should last 2 to 5 years. Professional-grade coatings last longer. My daily driver Honda Odyssey has a two-year coating that still beads strong because I use a booster spray.
You will know it is wearing out. The water beading gets lazy. Water stops rolling off and starts sheeting or sticking. Bird droppings and tree sap will stain faster because the slick, protective barrier is gone.
Do not just apply another coat on top. When it is time, the old coating must be completely removed with a thorough polish. Then you start over, from the beginning, with a perfect surface. It is a commitment, but for that glass-smooth, protected finish, it is worth it every time.
Final Thoughts on Ceramic Coating Application
After applying coatings to everything from my daily driver to my garage queen, I always come back to one truth. The coating’s longevity and beauty depend entirely on the hours of prep work you do before the first drop is applied.
Rush the decontamination or skip the iron remover, and you will permanently encapsulate bonded contaminants under a hard, shiny shell.
Industry References
- r/AutoDetailing on Reddit: Can someone explain ceramic coating to me like I’m 5yrs old?
- Best Ceramic Coating for Cars | Ceramic Paint Coating
- CERAKOTE® Professional Ceramic Paint Coating
- Ceramic Coating for Cars | Chemical Guys
- Before You Buy a Ceramic Coating for Your Car, Read This First
- Ceramic Coating for Cars Wax & Polish Detailing Spray
- Amazon.com: Car Wax Spray and Ceramic Coating for Cars – 3 in One Waterless Car Wash and Detailing for Maximum Shine – High Gloss Top Coat, Protective Auto Wax – 16FlOz by Shine Armor : Automotive
Max Gunther
Max is an automotive enthusiast having worked as a car mechanical and in interior detailing service for over 25 years. He is very experienced in giving your old car, a new fresh vibe. He has detailed many cars and removed very tough smells and stains from all kinds of cars and models, always ensuring that his work and advice helps his customers. He brings his first hand experience to his blog AutoDetailPedia, to help readers breath new life into their car interiors.