How Do You Clean and Maintain Vinyl Car Interiors to Prevent Cracking and Discoloration?
You notice the vinyl on your dashboard or seats starting to look dry and faded, and you worry it will crack. I have seen this happen too many times in my own cars, like the grey Honda Odyssey that endures spilled drinks and sun.
This article will teach you my proven approach for safe cleaning techniques, selecting the right protectants, blocking UV damage, and establishing a simple maintenance habit.
Use the wrong cleaner or skip protection, and the vinyl will harden, crack deeply, and permanently discolor.
Key Takeaways: Your Vinyl Care Cheat Sheet
The process is simple. You clean it gently and then you protect it. Every single time.
Forget complicated routines, your core method is this: clean with a pH-neutral cleaner, agitate with a soft brush, wipe dry, and always finish with a dedicated UV protectant. Protection is the step that matters most.
You do not need a garage full of gear. These are the essentials:
- A soft-bristle detailing brush (like a boar’s hair or ultra-soft nylon brush).
- A stack of clean, plush microfiber towels. You will need a few.
- A vacuum with a soft brush attachment to remove dry grit first.
- A dedicated, pH-balanced vinyl and interior cleaner.
- A quality UV protectant spray or wipe. Matte finish is usually best.
I want to be very clear about one rule. It is the difference between a lasting interior and a ruined one.
Applying a UV protectant after cleaning is not a suggestion, it is mandatory if your goal is to prevent cracking and fading. Cleaning removes grime but leaves the vinyl naked, so it’s especially important after washing wrapped cars to protect vinyl surfaces. The protectant is the sunscreen that keeps it alive.
I learned this lesson in my own van, the 2019 Honda Odyssey. The driver’s side armrest was matted and gray, stiff to the touch. It felt like sandpaper. My kids’ sunscreen and sweat had baked into it. A dedicated vinyl cleaner and a soft brush brought the original color back. But it only felt right again after I applied a protectant. The surface regained a slight, healthy suppleness. Without that final step, I would have just cleaned a dying surface.
Why Vinyl Cracks and Fades: It’s Not Just Dirt
Dirt hides on the surface. Damage happens beneath it. Two silent processes are always at work.
First, the plasticizers slowly evaporate. These are the oils that keep vinyl soft and pliable, like the moisture in your skin. As they leave, the material shrinks and gets brittle.
Second, ultraviolet light from the sun attacks the molecular bonds. It breaks them down. This causes fading and, combined with the loss of plasticizers, leads to cracks.
You can feel the difference. Run your hand over a neglected vinyl dashboard. It feels stiff, maybe even chalky. It might have a pale, faded color. Now feel a well-maintained vinyl seat bolster. It should feel supple, slightly soft, and have a consistent, deep color.
The vinyl on your dashboard and the vinyl on a convertible top fight the same enemy. Interior vinyl just gets a little more time before the sun wins. The sun’s heat magnifies the problem inside your car. It bakes the surfaces, speeding up the evaporation of those crucial plasticizers.
This is why your choice of cleaner is critical. Most people reach for a household all-purpose spray or a strong degreaser.
These common cleaners are a primary cause of premature damage, as they aggressively strip away the very oils the vinyl needs to stay flexible. You are accelerating the drying process you are trying to prevent. A dedicated, mild interior cleaner lifts dirt without scorching the earth.
The Right Way to Clean Vinyl Seats, Dashboards, and Door Panels
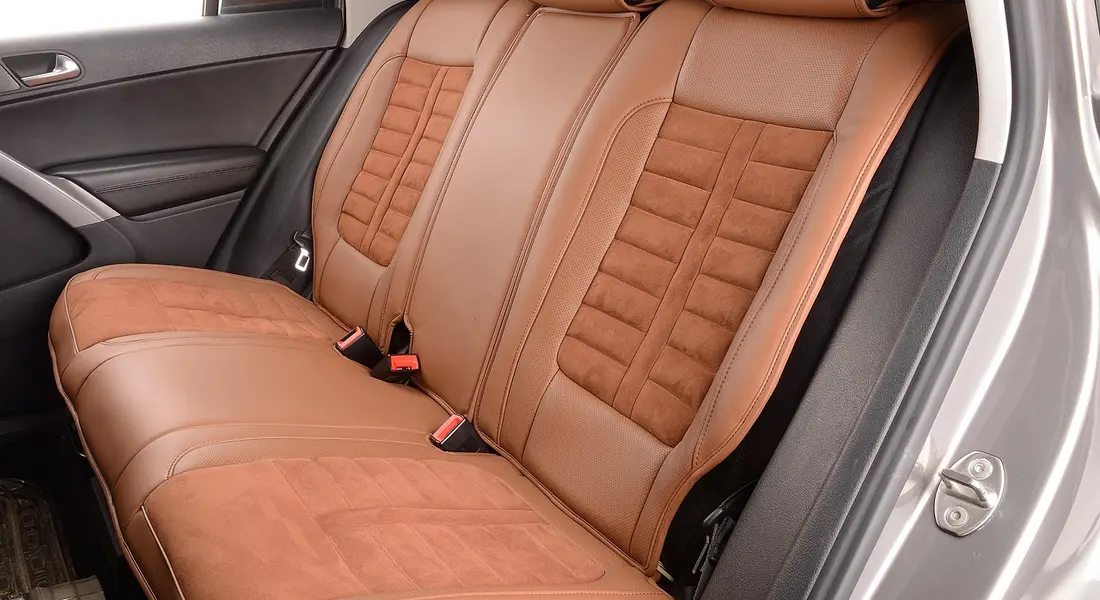
Think of this as one master method. You can use it on any vinyl inside any car, from the crusty cupholders in my Honda Odyssey to the fingerprint-covered dashboard in my black BMW. The goal is to lift dirt without grinding it in.
Step 1: Dry Prep is Everything
Never start wet. Grit and sand are the enemies of a glossy vinyl finish. If you smear a cleaner over a dusty surface, you are basically polishing with sandpaper. I always grab my vacuum and a soft detailing brush first. Use the brush to sweep crumbs and loose dirt from seams and textures toward the vacuum nozzle. For a lightly dusty dashboard, this might be a quick pass. For the mud-caked seat bolster in my Ford F-150, this is a serious workout to get all the dried chunks out. This single step prevents the fine scratches that make vinyl look old and dull over time.
Step 2: The Cleaner and Agitation Dance
Here is a common mistake. Do not spray your cleaner directly onto hot, dry vinyl. It can streak or leave spots as it dries too fast. Spray it onto your microfiber towel or soft bristle brush instead. Dampen your tool, not the surface. For gentle agitation, I use a soft brush. The motion is small, tight circles with just enough pressure to hear the bristles working. This is how you clean dirty vinyl car interior without damage. On a flat dashboard, you can make wider passes. On a textured seat or door panel, those small circles are key to working the cleaner into every pore and groove to lift the grime.
Step 3: The Perfect Wipe & Dry
You have loosened the dirt. Now you need to remove it completely. A clean, damp microfiber towel is your best friend here. Wipe the area you just cleaned to lift the dirty cleaner residue. Rinse your towel in clean water often. If you leave any cleaner film behind, it will attract more dust. For black interiors like in my BMW, I always do a second pass with a perfectly dry, plush microfiber towel. This final buff removes any lingering moisture streaks and brings up a deep, consistent black finish.
What About Exterior Vinyl? (Roofs & Tops)
The method is similar but the products are not. The vinyl on a convertible top, like on my Miata, is a different, more porous beast. Do not use car wash soap or wax meant for paint. These can clog the material. You need a dedicated convertible top cleaner. Use a soft horsehair brush for agitation and rinse it thoroughly with a lot of water. The goal is to clean it without forcing dirt deeper into the fabric. That same careful approach translates to washing a clean vinyl-wrapped car with wrap-safe cleaners and a soft brush. Rinse thoroughly and dry to prevent streaks.
Product Tier List: Choosing Your Vinyl Arsenal
Your choice here depends on your car and your goals. I match the product to the job, not just the price tag.
Budget/Drive-Through Tier
This is for your daily driver that needs a quick, reliable refresh. Look for a respected all-in-one cleaner and protectant. A good one will clean lightly soiled surfaces and leave a UV-resistant layer behind with one wipe. They are perfect for a monthly wipe-down of the family Honda Odyssey’s interior. The key is to find a product labeled for vinyl that is non-greasy and does not leave a high-gloss, slippery film on your dashboard.
Enthusiast/Prosumer Tier
Here, you separate the cleaning and protecting steps. You use a dedicated vinyl cleaner for its stronger cleaning power, then follow with a dedicated protectant. This is what I use on the Porsche’s interior or for tackling a specific stain like ink or dye transfer from jeans. For the best cleaner for vinyl car interiors, you want something pH-balanced that can cut through body oils and grime without needing excessive force. You apply it, agitate gently, wipe it away, and let the surface dry completely before adding your protectant for defense.
Show Car/Preservation Tier
This is for garage-kept classics or high-end interiors where long-term preservation is the goal. The focus is on maximum UV blockage and material replenishment. This tier answers the question: should I use a protectant or conditioner on vinyl? A protectant forms a sacrificial layer on top to block sun and stains. A conditioner is designed to be absorbed slightly to keep the plasticizers in the vinyl supple, fighting the dry, brittle feeling that leads to cracks. For a show car or a classic, I often use both: a deep conditioner followed by a robust UV protectant.
Common Mistakes That Ruin Vinyl (What to Avoid)
Vinyl is tough, but it isn’t invincible. The worst damage often comes from well-intentioned cleaning. Avoid these habits to keep your interior looking new.
Using household cleaners, ammonia, or abrasive wipes is the fastest way to damage vinyl. Kitchen sprays, glass cleaners with ammonia, and rough Scotch-Brite pads are far too harsh. They strip away the plasticizers that keep vinyl soft, leaving it dry and brittle. Can I use household cleaners on vinyl? No. They accelerate the cracking you’re trying to prevent. Stick to products formulated for automotive interiors.
Applying a dressing or protectant to dirty vinyl is a classic error. That shiny layer doesn’t clean. It traps grit and grime against the surface, creating a sandpaper effect every time you touch it. You’ll grind microscopic scratches into the vinyl, making it look permanently dull. Always clean first.
Choosing a protectant that’s overly glossy or slippery is a safety hazard, especially on the dashboard. A high-gloss finish can create a blinding reflection on your windshield in the sun. A greasy, slick surface makes steering wheels and shift knobs dangerous to grip. Look for a matte or satin finish that leaves a natural, non-slippery feel.
Neglecting your windshield as a UV filter is a missed opportunity. The sun’s rays are vinyl’s greatest enemy. A quality sunshade isn’t just for keeping the car cool. It is your first and most effective line of defense against UV fading and the heat that bakes vinyl dry. Use it every time you park outside.
Scrubbing stains aggressively with force is the wrong approach. You risk scuffing the texture or wearing down the color. The right method is to let chemistry do the work. Spray a dedicated vinyl cleaner, let it dwell for a minute to break down the stain, then gently agitate with a soft brush before wiping. For my Odyssey’s milk stains, this patience is everything.
Your Maintenance Schedule: Preventing Problems
Prevention is simpler than repair. This routine is your blueprint. It answers the common question: how often should I clean my vinyl car interior?
Weekly/Quick Wipe
This is a 90-second investment. Keep a clean, dry microfiber towel in your door pocket. Once a week, simply wipe down the dashboard, console, and door panels. This removes dust and abrasive pollen before it can build up. It’s the easiest way to prevent fine scratches and protect your car’s dashboard.
Monthly/Full Clean
This is your core defense session. Block out 20-30 minutes. Start by vacuuming all surfaces to lift loose debris. Then, spray a vinyl-specific cleaner onto a microfiber towel or a soft detailing brush. Wipe and gently scrub all vinyl surfaces. Finally, apply a UV-protectant dressing. Consistency with this monthly protectant application is the real secret to preventing cracking and discoloration. It replenishes lost oils and builds a shield against the sun.
Seasonal/Deep Clean
For vehicles like my kid-hauling Odyssey or a work truck, a deeper clean is necessary. This is for tackling embedded dirt, set-in stains, and restoring a like-new feel. Keeping the car interior clean and fresh between sessions helps prevent buildup and makes the deep-clean easier. Is it necessary for every car? If you keep up the monthly clean, maybe not. But for high-use interiors, plan this every 3-4 months.
- Start with a thorough vacuum.
- Use a stronger interior cleaner or diluted all-purpose cleaner (test first) with a soft brush on all textured surfaces.
- For stubborn stains, use a dedicated stain remover for vinyl.
- Wipe everything clean with a damp microfiber towel to remove all cleaning residue.
- Finish with a double application of your UV protectant, letting the first coat soak in before adding the second.
Solving Vinyl Disasters: Stains, Fading, and Early Cracks
Even with perfect care, life happens. A pen leaks, the sun bakes a dashboard for years, or you notice a tiny split in the seam of your seat. Don’t panic. Here is how to handle the most common vinyl problems.
How Do I Remove Stains from Vinyl?
First, identify your enemy. The method changes based on what spilled. My Honda Odyssey, the “Kid Hauler,” has been a test lab for every stain you can imagine.
For general dirt, grease, or sticky spills, use a dedicated interior cleaner sprayed onto a microfiber towel, not directly on the vinyl, and scrub in a circular motion. This approach is especially useful for clean fabric vinyl car armrests. If the armrest combines materials, test a small area first.
- Oil or Grease: Use an all-purpose cleaner (APC) diluted for interiors. Spray on your towel, agitate the spot, and wipe. You may need to repeat. Always follow with a damp towel to rinse the cleaner residue.
- Ink: This is a common one. Use 70% isopropyl alcohol on a cotton swab. Dab, don’t rub, at the stain. The ink should transfer to the swab. Test this on a hidden area first, like under the seat, as strong alcohol can strip dyes from some vinyl.
- Dye Transfer (like from new jeans): A mild APC often works. For stubborn cases, a dedicated stain remover for fabrics and vinyl is your best bet. Agitate gently with a soft brush.
The universal rule is to start mild, test first, and never let a cleaner dry on the surface. Rinse with a water-dampened towel.
Bringing Back Faded or Discolored Vinyl
Cleaning will not fix sun bleaching. When vinyl fades, the pigments are degraded. My BMW 3 Series, the “Swirl Magnet,” had a dashboard that turned from rich black to a chalky grey. Exterior paint fades under sun exposure just as vinyl does. There are repair options for sun-damaged fading car paint, including color restoration and protective coatings.
For severe fading, you need a product that adds color back, which is more of a cosmetic touch-up than a cleaning detail.
You have two main options:
- Vinyl Dye/Paint: These are aerosol or brush-on products designed to bond with the vinyl. It requires perfect cleaning, light sanding for adhesion, and careful application. It’s permanent and effective for large areas like a full dashboard.
- Colored Vinyl Coatings & Conditioners: These are simpler. They are like a thick, tinted lotion. They temporarily restore a deep, uniform color by coating the surface. It looks great but will wear off and need reapplication every few months.
For an old door panel, a colored conditioner can make it look new for a season. For a permanently restored dash, a proper dye is the answer. Manage your expectations-this is repair work.
When You See Small Cracks: Damage Control
This is the critical moment. Once the vinyl surface splits, you cannot glue it back together or make it seamless again. The goal is to nourish the surrounding material to prevent the crack from growing.
A true crack means the plasticizers are gone and the material is brittle; your job is to rehydrate the area and lock in what flexibility remains.
Immediately clean the area gently. Then, apply a high-quality vinyl and plastic restorer. These products are designed to penetrate and add pliability. They often contain silicones or oils that fill micro-cracks, making them less visible.
Apply it liberally to the cracked area and a wide margin around it. Let it soak in. Reapply every few weeks. It will not erase the crack, but it can make it less obvious and, most importantly, stop it from spreading across your seat or dash.
The ultimate answer to “How do I prevent vinyl from cracking?” is a combination of UV protection, gentle cleaning, and keeping the material supple. If you’re already seeing cracks, that ship has sailed. Now you’re in damage control, and a good restorer is your best tool.
Final Thoughts on Vinyl Care
Keeping your vinyl interior looking new comes down to a simple, consistent habit. Clean it gently with a pH-neutral spray and a soft microfiber cloth, then follow up with a dedicated UV protectant every few weeks. That combination of removing damaging contaminants and applying a protective shield is the single most effective thing you can do for vinyl car seats.
Skip those steps, and the sun and grime will work together to permanently fade the color and turn the soft, pliable surface brittle and cracked.
Deep Dive: Further Reading
- How to clean your car’s vinyl, rubber and leather interiors | Armor All US
- Keep Your Interior Clean with Our Lather, Vinyl, Plastic Interior Cleaner | 3D Car Care
- Car Vinyl Cleaners in Car Interior Cleaners – Walmart.com
Max Gunther
Max is an automotive enthusiast having worked as a car mechanical and in interior detailing service for over 25 years. He is very experienced in giving your old car, a new fresh vibe. He has detailed many cars and removed very tough smells and stains from all kinds of cars and models, always ensuring that his work and advice helps his customers. He brings his first hand experience to his blog AutoDetailPedia, to help readers breath new life into their car interiors.