How Do You Safely Remove Ice and Frost from Your Car Without Causing Damage?
That morning scrape job feels urgent, but hacking at ice with the wrong tool can scratch your paint and cloud your glass in seconds. I’ve fixed those scratches on my Jet Black BMW, and I know how avoidable they are.
Let me walk you through the safe, detailer-approved method. We will cover pre-treating surfaces, selecting gentle tools, step-by-step removal for windows and paint, and caring for sensitive trim.
Use force or heat incorrectly, and you will leave permanent scratches or hazy glass that no wax can hide.
Key Takeaways: Your 5-Minute Game Plan
Rushing this job is the fastest way to ruin your car’s finish. Mastering the car painting process techniques and finish leads to a durable, showroom-worthy look. Paint, glass, and plastic trim each need a different approach. Careful prep and proper technique across the steps—primer, base coat, and clear coat—protect the finish. A good plan turns a chaotic, damaging scramble into a safe, effective routine.
Follow this order every single time. It works on my salt-crusted F-150 and my delicate black BMW.
- Start the engine and set the defroster to max heat, directing airflow to the windshield and front side windows. Modern cars with remote start are perfect for this. Let it idle while you gather your tools. The goal is to warm the glass from the inside, creating a separation layer between the ice and the surface.
- Take a clean, dedicated snow brush and gently sweep all loose snow from the roof, hood, and trunk. Work top to bottom. I keep a separate brush just for paint surfaces; the one that touches the ground never touches my car.
- Apply a quality de-icing spray (not just washer fluid) directly onto the ice on the windows. Spray it along the edges of the ice sheet. The alcohol content melts the bond. This acts as a lubricant, making the next step safe.
- Use a fresh plastic windshield scraper with a smooth, unchipped edge. Hold it at a shallow angle and push gently, letting the fluid do the work. Never saw back and forth.
- The scraper is for glass only. Never, ever drag it across paint, rubber seals, or plastic trim. For ice on those surfaces, you use warmth and de-icer, not force.
The entire goal is to achieve clear visibility without etching the glass or spider-webbing your paint with a thousand fine scratches. If you remember nothing else, remember that the scraper is not a universal tool.
Why a Hurry Causes Hundreds in Swirls and Scratches
I hear that awful sound every winter. It is the dry, gritty scrape of a plastic edge being dragged across a frozen panel. It is the sound of clear coat being permanently scarred. When you are in a hurry, every shortcut becomes a defect.
Using a snow brush on paint grinds all the road salt and sand trapped in the bristles directly into your clear coat. It is like using sandpaper. Yanking frozen wiper blades tears the rubber, leading to streaking and chatter you cannot fix until spring.
Scrubbing at ice on glass without a lubricant forces microscopic particles into the surface. You might not see it on a grey day, but next summer when the sun hits your side window, a permanent, hazy bloom will stare back at you. That is etched glass.
People ask if they can get in trouble for not fully clearing ice. The answer is yes, in two ways. First, sheets of ice flying off your roof are a real hazard to other drivers. Second, and just as costly, is the trouble you create for your own paint. Driving with a foot of snow on the hood or a layer of ice on the roof guarantees that abrasive meltwater will cascade down your panels, dragging dirt into every crevice and scratch. The damage is done before you even consider washing it.
Look at my black BMW. It is a swirl magnet. One rushed, frantic ice removal session with the wrong tool would put weeks of paint correction work to waste. The hurry is never worth it. If you want to actually remove swirl marks from car paint, proper techniques and the right tools are essential. Take your time and follow a proven approach.
Gear Up: Your Winter De-Icing Toolkit
You do not need a garage full of gadgets. You need a few good, dedicated tools. Using the wrong thing, like a credit card or your sleeve, is how you get scratches. This is my go-to kit for every cold morning.
- Soft-Bristled Snow Brush: This is your first line of defense. The bristles must be soft, like a boar’s hair detailing brush, not stiff plastic. Look for a model with a foam core behind the bristles. This cushions the head so it never grinds hard plastic against your paint. The handle should be long enough to reach the middle of your roof without climbing on the tires. My workhorse F-150 gets cleared with a brush like this.
- Dedicated Plastic Ice Scraper: This tool is for glass only. A good one has a firm, non-flexing blade with a sharp, but not razor-like, edge. The handle should be comfortable. I keep one in every vehicle.
- Spray Bottle for Homemade De-Icer: A simple chemical spray bottle. I mix two parts lukewarm water with one part 70% isopropyl alcohol. The alcohol lowers the freezing point of water and melts ice fast. It is safe for glass, trim, and most wraps when used correctly.
- Commercial De-Icing Spray (Optional): These are convenient. Look for a formula that is non-toxic and biodegradable. Read the label. Avoid anything with harsh salts or ammonium compounds, as they can stain trim and harm the environment. A good commercial spray works slightly faster than my homemade mix, but costs more.
- A Large, Plush Microfiber Towel: This is your clean-up crew. Use it to dry glass channels and wipe meltwater off painted surfaces. A dry towel prevents water from refreezing elsewhere.
The right snow brush has a gentle touch, protecting your clear coat while it moves snow.
Now, let’s talk about the special tools people ask about. You see ads for car ice removal machine units, those heated ice remover tools. Are they a gimmick? Mostly, yes. The concept is a heating element in a paddle shape to melt ice. The problem is control. They can get very hot, hot enough to damage weather stripping, crack cold glass due to thermal shock, or even soften plastic trim. For the money and risk, a standard scraper and de-icer is a safer, more reliable method.
This leads to the ice removal tool car idea. Your ice removal tool is for the car’s glass, not the car’s paint. Full stop. The moment you take a scraper or a heated paddle to your hood or roof to break up ice, you are writing a check for a paint correction. My black BMW is a testament to how easily clear coat scratches. Treat your paint and plastic trim with your hands and chemicals, never with a hard tool. Tips to prevent snow and ice from damaging your paint are essential, especially in harsh winter conditions.
The Safe Order of Operations: A Detailer’s Protocol
Rushing leads to mistakes. Follow these steps in order. It prevents you from grinding loose snow into ice, or scraping contaminants across your paint. This is the method I use on my Tesla after a frosty night.
Step 1: Start the Engine and Loosen the Grip
Do not start scraping. Start the car. Turn the defroster to high and the heat up. If you have remote start, use it. Give the vehicle three to five minutes. The goal is to warm the interior air, which heats the glass from the inside out. This creates a microscopic separation layer between the ice and the glass. After a minute, crack your windows slightly. This releases moist air and helps equalize pressure, making the ice release easier. This simple wait makes every step that follows safer and less forceful.
Step 2: The Gentle First Sweep
Grab your soft snow brush. Start at the roof, then move to the hood, trunk, and finally the windows. Brush all loose, powdery snow off the painted surfaces first. Why? If you clear the windows first, snow from the roof will just slide down onto them again. Use a lifting, sweeping motion. Let the brush’s weight do the work. Never scrub or grind. On my Honda Odyssey, clearing the roof is critical to stop a slab of snow from crashing onto the windshield when I brake.
Always remove loose snow from paint before you touch the windows to avoid a messy, repeated job.
Step 3: Apply Your Chemical Assistant (De-Icer)
Now address the ice on the glass. Shake your spray bottle. Liberally spray your de-icer solution over the icy windows. Hit the edges and the rubber seals too. The alcohol in the mix, whether DIY or commercial, will quickly begin to melt and fracture the ice bond. Let it work for about sixty seconds. This is not a waste of time. This step provides lubrication, turning a hard scrape into an easy glide. The commercial sprays often have lubricants added. My homemade mix relies on the alcohol’s melting power. Both are safe for glass and trim when rinsed away later. Do not use hot water from your sink. The sudden temperature change can crack glass.
Step 4: Scrape the Glass with Purpose
Take your plastic scraper. Hold it like you would a spatula spreading frosting. Use a shallow angle, almost flat against the glass. Use long, overlapping strokes from the top of the window down. You are shearing the ice off, not chiseling it. The de-icer will have created a wet layer, so the ice should come off in sheets. For tricky spots like the rearview mirror, use the corner of the scraper carefully. For ice stuck in door handles or window seals, spray more de-icer and use your gloved hand to gently flex the rubber. Never pry with the tool.
Step 5: The Final Wipe and Paint/Trim Check
Your glass is clear. Do not stop. Grab your large, dry microfiber towel. Wipe down the edges of the windows, the bottom of the doors, and the channels. Dry any meltwater that has run onto the painted surfaces on the pillars or door frames. Left wet, this will freeze into a new, annoying layer or leave water spots. Finally, inspect plastic trim pieces, wiper arms, and grilles. If ice remains, spray it with de-icer and use your gloved hand to pop it off. Be patient. Your paint and trim will thank you. Now you can drive away with perfect clarity and no new scratches.
Surface-Specific Guides: Glass vs. Paint vs. Plastic
Treating every surface the same is the fastest way to cause damage. Frost on glass is not the same as an ice sheet on your hood. Here is how to handle each one correctly.
How to Clean a Frozen Car Window Without Scratches
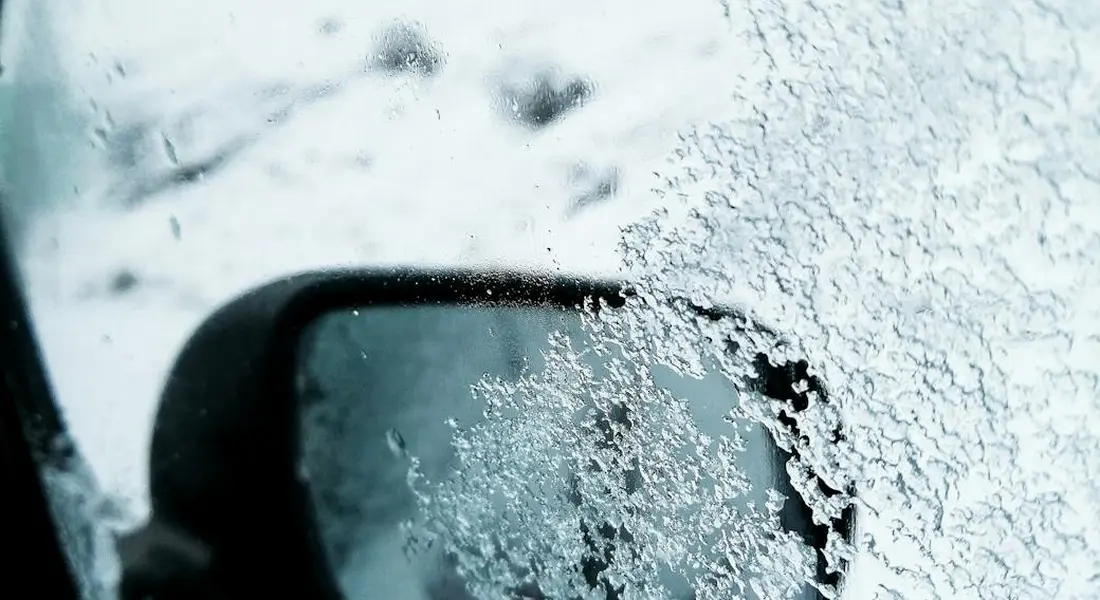
Your windshield feels hard, but its surface is delicate. Frost or light ice is a layer of tiny, sharp crystals bonded to the glass. Dragging a sharp plastic scraper across this frost is like using fine-grit sandpaper, and it will leave permanent, hazy micro-scratches in your glass over time. You see these as swirling distortion in sunlight, especially with wiper fluid smeared across them.
So, how do you remove ice from a windshield? You use chemistry first, mechanics last.
- Start your car. Turn the defroster to full heat and direct it at the windshield. Crank the fan. This begins warming the glass from the inside.
- Apply a dedicated automotive de-icing spray. I keep one in my house. Spray it liberally over the iced glass. The propellant helps crack the ice bond, and the alcohol-based formula melts it from the top down. Wait 60 seconds.
- For remaining frost or softened ice, use a high-quality foam-padded ice scraper. The foam pad glides over the glass, lifting frost without the plastic edge making contact. For thicker ice, use the scraper edge gently at a shallow angle, pushing the ice off in sheets. Never saw back and forth.
- Finish with your wipers and washer fluid only after all solid ice is gone.
The Golden Rule for Paint and Clear Coat
This is non-negotiable. No scraper, brush, or tool ever touches painted metal. Your clear coat is softer than glass. A single slip with an ice scraper will gouge right through it, down to the color layer. I learned this the hard way on a door handle of my black BMW. Luckily, I was able to fix the damage by cutting and polishing the scratches.
For ice on the hood, roof, or trunk, you need a different mindset.
- Patience is your primary tool. Let the engine heat warm the hood from underneath. Let the sun, however weak, do its work.
- Apply de-icer spray to the ice sheet. It will start to melt and loosen at the edges.
- Once it’s lifted or heavily cracked, you can gently lift the entire sheet off with your gloved hands. If it’s still stuck, wait. Apply more spray. Do not force it.
- Any remaining slush can be gently rinsed away with a spray bottle of lukewarm water (never hot) or wiped with a very soft, wet microfiber towel.
Caring for Sensitive Trim and Rubber Seals
Winter makes plastic brittle and rubber seals hard. Forcing frozen trim can snap it. Pulling on a frozen door seal can tear it.
The method here is gentle persuasion. Spray de-icer along the seam where the ice has bonded the trim or seal. Give it a minute to work. Then, try to gently flex the rubber seal with your fingers to break the ice’s grip. For plastic trim, carefully pry ice away with your fingertips, not tools.
After de-icing, a light spray of a water-based silicone protectant on rubber seals will keep them pliable and help prevent them from freezing shut again tomorrow. I do this to my Miata’s weather seals every few weeks in winter.
Common De-Icing Mistakes That Cause Lasting Damage
I see these every winter. They seem like good shortcuts, but they cost you more in the long run.
Pouring hot water on frozen glass. This is a classic. The sudden, extreme temperature change causes thermal shock. The glass expands too fast. This can cause a windshield to crack instantly, especially if there’s a tiny existing chip. It also washes all the de-icer off, so the water just refreezes into a thicker, harder layer of ice.
Using a credit card, CD case, or other hard object as a scraper. These items are not designed for this. They are far harder than plastic scrapers and have unforgiving, sharp edges. They will scratch your glass and will absolutely destroy your paint if you get near it. A proper scraper costs five dollars. If you’re dealing with paint transfer scrape marks, remove them safely to avoid further damage. The next steps cover how to remove paint transfer scrape marks effectively.
Starting the wipers before the windshield is fully clear. The wiper rubber is frozen stiff. Dragging it across ice or even thick frost will shred the wiping edge. It also strains the wiper motor. Clear the glass completely first.
Using non-automotive chemicals like WD-40. Does WD40 remove ice? Yes, the solvents in it will melt ice. But it is a terrible, messy idea. It leaves a greasy, slippery film on your glass that wipers cannot clear, creating a dangerous driving haze. On paint, it will stain and can break down waxes and sealants. It attracts dirt like a magnet. Use the right tool for the job.
Prevention: How to Stop Ice From Bonding in the First Place
Scraping ice feels like a losing battle. I stopped fighting it years ago. The real win is in the preparation. Shifting to proactive detailing strategies makes ice removal trivial, often just a quick brush or gentle push. Think of it like seasoning a cast iron pan so food doesn’t stick.
Treat Your Glass for Easy Release
Apply a dedicated glass sealant every fall, before the first freeze. I treat the windows on my Tesla Model 3 every October. The water behavior changes instantly. Rain and sleet bead up into tight little spheres and roll away. When frost forms overnight, it creates a brittle, crystalline layer that sits on top of the treated surface. A hydrophobic coating on your glass causes ice to form a weak bond that shatters with a light tap from your hand.
For the simplest solution, use a windshield cover. It is a fabric sheet with elastic corners that stretch over your mirrors. You put it on a dry windshield at night. In the morning, you pull it off. The glass underneath is clean, dry, and ready for driving. A simple windshield cover is the ultimate tool for guaranteeing a frost-free view without any chemical or physical effort.
Fortify Your Paint and Trim Before Winter
A high-quality synthetic sealant or wax on your paint creates a slick, hard barrier. Ice cannot easily grip this smooth surface. For black plastic trim and rubber seals, use a UV-resistant protectant. This keeps the material supple and non-porous, so ice does not anchor into tiny cracks. This one-two punch of paint protection and trim dressing lets sheets of ice release cleanly without tearing at your car’s finish.
I have a ritual with my dark blue F-150, the “Workhorse.” Every late fall, it gets a full wash, decontamination, and sealant application. I spend an afternoon on it. That single detail session protects the paint from salt and makes winter washes faster. Giving your whole car a thorough fall protection detail is an investment that pays off all season long in easier cleanup and less damage.
Dry Ice Cleaning: The Icy Confusion (And Why You Shouldn’t Try It)
You may have heard questions like “can dry ice clean your car?” or “does dry ice clean car interior?” Let’s be perfectly clear. Dry ice cleaning has nothing to do with removing morning frost or ice from your windows. It is a professional, industrial blast-cleaning process.
The method uses solid pellets of carbon dioxide that are blasted at a surface. Upon impact, they sublimate-instantly turning from a solid to a gas. This rapid expansion blasts away contaminants. Its real use in detailing is for extreme jobs like stripping old undercoating, removing paint mold from a restoration project, or deep-cleaning a grimy undercarriage.
Forget about “how to clean a car with dry ice” as a DIY project. The equipment is specialized and costly. If you search “how much to dry ice clean a car,” you’ll find it’s a service for professionals, not a home kit. The extreme cold, around -109°F, presents a serious frostbite hazard. Attempting dry ice cleaning yourself risks permanently damaging window seals, cracking plastic trim, and warping thin body panels.
Contrast this with the safe, gentle methods for frost removal. We use a plastic scraper on pre-treated glass or pour lukewarm water from the inside. Dry ice is a powerful tool for stripping things off a car, not for safely getting ice off it.
Smart Ice Removal Protects Your Investment
Your car’s surfaces deserve gentle care, even in a freeze. The single best move is to keep a plastic ice scraper and a bottle of spray de-icer in your trunk from November to March. Also, wash the exterior safely to avoid scratches and damage. Use a dedicated car shampoo and soft sponge for a gentle clean.
Skip these simple tools, and you’ll be left with permanent scratches and costly repairs to clear coat and trim.
Sources and Additional Information
- Amazon.com: Ice Remover Spray
- ICE agents shoot at a moving vehicle on Christmas Eve, injuring 2
- How to Get Ice Off a Windshield Fast | Suntrup Automotive Group
- How do I get ice off my car? Quick tips from an engineer who studies airborne particles | PBS News
- r/AutoDetailing on Reddit: What’s the best way to remove snow and ice from your car without damaging the paint or finish?
- Any ideas for removing ice from a car?
Max Gunther
Max is an automotive enthusiast having worked as a car mechanical and in interior detailing service for over 25 years. He is very experienced in giving your old car, a new fresh vibe. He has detailed many cars and removed very tough smells and stains from all kinds of cars and models, always ensuring that his work and advice helps his customers. He brings his first hand experience to his blog AutoDetailPedia, to help readers breath new life into their car interiors.