How Do You Remove Paint Transfer from Car Paint Without Damaging It?
That sick feeling when you see a fresh white or colored smear on your door after a parking lot mishap is something every car owner knows. Your first instinct might be to panic and scrub, but that’s the worst thing you can do.
I’ve cleaned these marks off everything from my daily driver work truck to my black BMW’s delicate clear coat, and this guide will show you exactly how to do it safely. We will cover how to tell paint transfer apart from a deep scrape, the step-by-step removal process you can do at home, and the biggest mistakes that make the damage worse.
Use the wrong method, and you will turn a simple surface mark into a permanent scratch that needs professional repainting.
Key Takeaways: Your Paint Transfer Removal Cheat Sheet
Here is the simple path forward.
- The core method is a four step process: assess the damage, clean the surface, polish the area, and protect the finish.
- Paint transfer is often completely removable with the right products and technique. True scrapes that have dug through the clear coat will need touch up paint or professional help.
- For a motivated DIYer, removing basic paint transfer is a moderate task. Fixing deep scrape marks is an advanced job that risks making the damage worse.
- Cost can range from a few dollars for a bottle of polishing compound to several hundred for a professional paint correction that blends the repair.
What Exactly Are Paint Transfer and Scrape Marks?
You need to know what you are looking at before you touch it. The wrong fix on the wrong problem wastes your time and can ruin your paint.
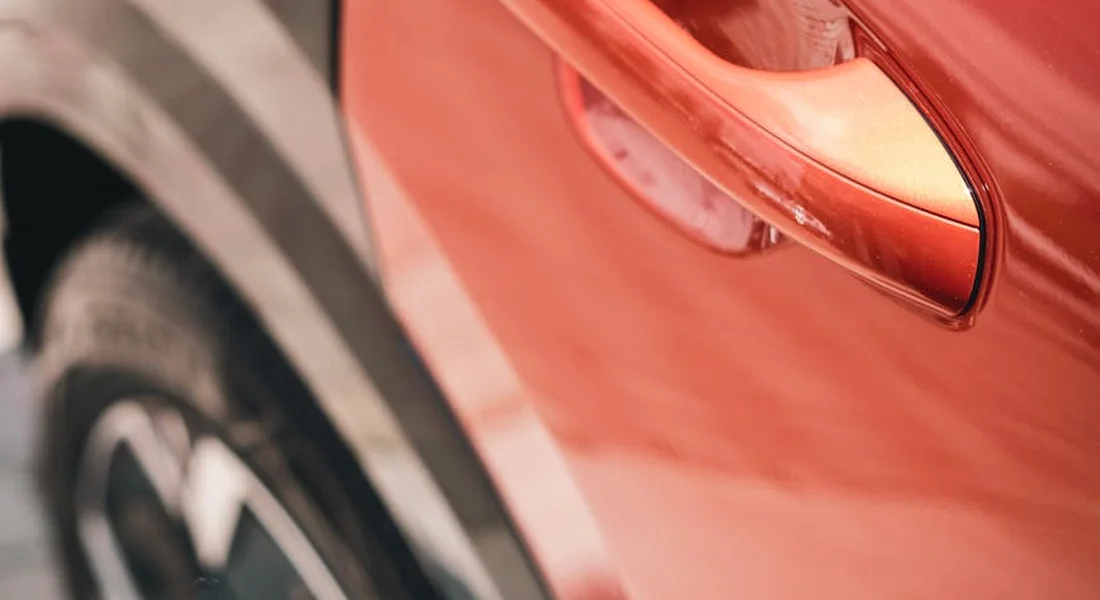
Paint transfer is exactly what it sounds like. It is foreign paint that has been smeared onto the surface of your car’s clear coat. Imagine the side of your white car gently kissing a red mailbox post. That red smudge left behind? That is paint transfer. It sits on top of your paint, like chalk on a chalkboard.
This is how paint transfer in a car accident or a parking lot scrape typically happens: a softer material (like a plastic bumper cover) grinds against a harder one, leaving some of its own color behind on your vehicle’s harder, slicker clear coat.
Scrape marks are different. They are physical abrasions or gouges in your paint’s layers. They can be shallow, only scratching the clear coat. They can be deep, cutting through the clear coat and into the colored base coat beneath. The worst ones go all the way down to the gray primer or even the bare metal.
Here is the easiest way to tell them apart. Run your fingernail lightly over the mark. If your nail catches in a groove or trench, you have a scrape. If your nail glides smoothly over the colored mark, you likely just have paint transfer sitting on the surface. Transfer sits on top. Scrapes dig in.
The First Rule: Diagnose Before You Treat
You see the mark on your paint. Your gut tightens. I get it. But before you grab a product, you need to look. Really look. Find a spot with good, even light, like an open garage door on a cloudy day. Harsh sun creates shadows that hide details. Wash your hands first. You do not want to grind fresh dirt into the spot while you are inspecting it.
The most important thing you will do today is figure out if this is someone else’s paint on yours, or if your own paint is gone. Surface level transfer sits on top of your clear coat like chalk on a sidewalk. A deep scratch has cut through your paint’s layers, down to the primer or bare metal. The fix for each is completely different.
Here is a test I use on every car, from my jet black BMW to my blue F-150. Wrap your index fingernail in a soft, clean microfiber towel. Gently drag it across the mark. Do you feel it catch or snag on the edge of the damage? If your nail glides right over it, the defect is likely shallow or just on the surface. If it drops into a groove, you have a scratch that has removed material.
DIY correction is safe and effective for paint transfer and clear coat scratches. These are surface issues. You can often remove them completely. My BMW 3 Series, the ‘Swirl Magnet’, gets these clear coat scratches all the time. I fix them myself. Deep scratches that show a different color, like white primer or grey metal, are a different story. Trying to buff those out yourself will just make the area wider and thinner. On my F-150, I’ve had scrapes from branches that left deep grooves. For those, I know when to call a professional for touch-up paint or a repaint.
Is It Just on the Surface or Did It Dig In?
Use this simple guide to make your diagnosis. Look at the color.
- If the mark is a foreign color, like white from a parking pole or red from a shopping cart, it is likely paint transfer.
- If the mark is a white or light grey line on your car’s color, it is probably a scratch through your clear coat and color layer, down to the primer.
- If you see a silvery or metallic line, the scratch has gone through all the paint layers to the bare metal.
Remember, many scrapes are a combination of both problems. You might have red paint from another car sitting on top of a scratch it created in your clear coat. You must remove the transfer first to see the true damage underneath. Do not assume it is just dirt. Always clean the area thoroughly with a detailing spray and microfiber before you decide on your next step.
Your Detailer’s Arsenal: Tools and Chemicals for the Job
You can’t fight this battle with paper towels and dish soap. The wrong tools will leave new scratches deeper than the marks you’re trying to remove. I learned this the hard way on my black BMW. Here is exactly what you need, and why it matters.
- Microfiber Towels: You need two types. For polishing and final wipes, use a 300 to 500 GSM towel with a 70/30 polyester/polyamide blend. They feel plush and hold product without scratching. For heavier cleaning and compound removal, a few sturdy 350 GSM towels are perfect. Have at least six clean ones on hand.
- Dual-Action Polisher: A machine is often necessary. Look for one with a 15mm to 21mm throw. This gives a smooth, controlled motion that drastically reduces the risk of burning the paint compared to a rotary buffer.
- Polish Pads: Start with a soft foam finishing pad (usually white or black). Have a slightly more aggressive cutting pad (orange or green) ready if the gentle approach doesn’t work.
- Wash Bucket with Grit Guard: A dedicated bucket with a grit guard at the bottom traps dirt so it doesn’t float back onto your wash mitt. This is non-negotiable for a clean surface before you start correction work.
- pH-Neutral Car Wash Soap: This safely cleans without stripping any existing wax or sealant you want to keep around the repair area.
- Isopropyl Alcohol (IPA) Mix: A 10-20% dilution in distilled water is your final inspection wipe. It removes polishing oils so you can see the true, clean finish.
- Cutting Compound: This is a mild abrasive. Think of it like fine sandpaper in a liquid form. It’s for leveling the clear coat to remove transfer and shallow scratches.
- Finishing Polish: This ultra-fine abrasive follows the compound. It erases the tiny hazing the compound can leave behind, restoring a deep, clear gloss.
- Clay Bar or Synthetic Clay Towel: This is your “gentle first” attack. A lubricated clay bar will often pull off paint transfer that is merely sitting on top of the clear coat.
- Detail Spray (Lubricant): This is used as a slick lubricant for claying and for priming polish pads. Never work dry.
Gear up for safety every single time. Wear nitrile gloves to protect your skin from chemicals. Use basic eye protection. Always work in a shaded, cool area. Direct sun on paint will bake products onto the surface and make correction impossible.
Your product hierarchy is simple: start gentle and move up only if needed. Try the clay bar first with plenty of lubricant. If that doesn’t clear the transfer, move to a finishing polish with your softest pad. Only use the cutting compound for the most stubborn marks that the polish can’t touch. This “gentle first” method preserves your clear coat.
The Non-Negotiables for a Safe Job
There are two rules in my garage. Break them, and you’ll create more work for yourself. I see these mistakes all the time.
Lubrication is not a suggestion. Whether you are claying by hand or polishing with a machine, you must use a dedicated lubricant. For claying, use a detail spray. For machine polishing, the compound or polish itself is the lubricant, and you must use enough of it. Dry rubbing, even with a microfiber towel, is just sanding your paint. You will create swirls. My Model 3’s soft clear coat taught me to be generous with product.
You need more clean towels than you think. Cross-contamination is the enemy. Use one set of towels for compound removal. Use a fresh, clean set for polish removal. Use another for your final IPA wipe. Once a towel touches the floor, it’s done. I keep a laundry basket nearby just for used towels. This habit is the only thing that keeps my black BMW from looking like a swirl-filled hologram.
The Step-by-Step Protocol: Removing Paint Transfer Safely
You need a plan. Rushing at the marks with whatever is under the sink is how you turn a simple scuff into a permanent scratch. This order of operations is non-negotiable. Follow it.
Step 1: The Full Wash
Never work on a dirty panel. That grinding paste of road film and grit will guarantee new scratches. Wash the entire car, or at minimum the entire affected panel, using the two-bucket method with Grit Guards. This foundational step lifts away abrasive particles that would ruin every step that follows. My black BMW taught me this the hard way; one lazy wash created a web of fine scratches that took me a weekend to fix.
Step 2: Decontaminate the Surface
After washing, run your clean hand inside a plastic sandwich bag over the area. It will feel gritty, like sandpaper. That is bonded contamination-rail dust, industrial fallout, old sap. Paint transfer sticks to this gunk. You must remove it first. Use a dedicated clay bar or a synthetic clay mitt with plenty of lubricant spray. Glide it back and forth. You will hear and feel it grabbing. Decontaminating creates a perfectly smooth canvas, ensuring your next steps work on the transfer, not the dirt under it.
Step 3: The Solvent Test
Now we answer the core question: how do you remove paint transfer from a car without cutting your clear coat? You test a chemical approach first. Soak a small, clean microfiber towel with a dedicated paint transfer remover or 70% isopropyl alcohol. Rub it firmly over a small section of the transfer using straight lines, not circles. The goal is to dissolve the foreign paint. You will often see it smearing onto your towel. This method works for fresh, superficial transfer and preserves your factory clear coat. Wear nitrile gloves and work in the shade.
Step 4: The Cutting Compound
If the solvent test only lightens the mark, the transfer is embedded. You must abrade it away. Use a mild cutting compound. Apply a dime-sized amount to a clean foam applicator pad. Work on a section about the size of a playing card. Use very low pressure and make small, overlapping circles. Check your progress every 10-15 seconds by wiping the residue away with a separate clean microfiber. Stop the moment the foreign paint is gone. Your goal is to remove only the transfer and the very top layer of clear coat, nothing more.
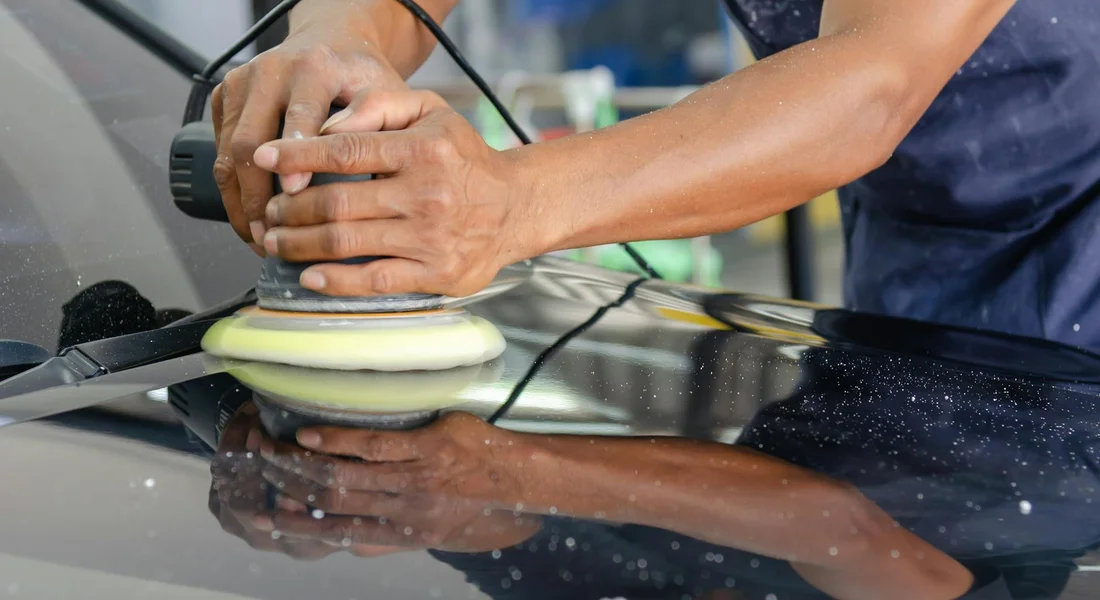
Step 5: Polish to Perfection
Compounding leaves a hazy, dull finish. You must restore the gloss. Switch to a fine polishing compound and a fresh, soft foam pad. Again, use a dime-sized amount and small, gentle circles over the compounded area. This step re-aligns the clear coat molecules to a smooth, reflective state. On my red Porsche’s PPF, I polish after any correction to bring back a deep, liquid shine.
Step 6: Seal the Deal
The area is now clean, smooth, and shiny but completely unprotected. Wipe it down with a 10% isopropyl alcohol mix to strip any leftover oils. Immediately apply your favorite paint sealant or wax. This final layer is critical, as the fresh paint is vulnerable to stains and environmental damage. Waxing is especially important for new or freshly painted surfaces. On my daily drivers, I use a spray ceramic sealant for durability. For the garage queens, I opt for a traditional carnuba wax.
By Hand vs. Machine: Choosing Your Weapon
Your choice here depends on the job’s size and your comfort level.
Working by hand is for small, isolated spots. It gives you ultimate control and is impossible to burn through the paint. The trade-off is time and physical effort. Removing a 6-inch scuff by hand with compound is a serious arm workout. I do all my test spots and tiny corrections by hand.
A dual-action (DA) polisher is for large areas, like a door that brushed against a colored post. It is faster, less physically demanding, and can produce a more uniform finish. The risk is in the learning curve. My Jet Black BMW, the “Swirl Magnet,” earned its name from a rookie mistake I made years ago with a polisher, using too much pressure and the wrong pad, leaving holograms in the sun. DA polishers are generally safer than rotary polishers, but they still require proper technique.
If you use a machine, start with the least aggressive combination. Use a soft foam polishing pad, not a cutting pad. Set your DA polisher to a speed setting of 3 or 4 (out of 6). Let the machine and the product do the work. Apply almost no downward pressure-just the weight of the head. Move the polisher slowly across the paint, overlapping each pass by 50%. This is how you get professional results without creating a new problem.
Dealing with Stubborn Scrape Marks and Light Scratches
You got the foreign paint off. You ran your fingernail across the mark. It catches. You let out a long sigh. “I got the transfer off, but the scratch is still there.” I hear you. This is the moment we separate a surface smudge from actual paint damage.
That scratch you feel is in your clear coat. To fix it, you need to level the surface. You do this by carefully removing a tiny amount of the surrounding clear coat until it’s flat with the bottom of the scratch. This is the core of paint correction.
The process is methodical: you compound to remove the defect, then polish to restore the gloss.
First, wash and dry the area perfectly. Then, use a clean microfiber pad and a light cutting compound. I keep Meguiar’s Ultimate Compound on my shelf for jobs like this. It’s strong enough to work but forgiving for beginners. Apply a few drops to the pad. Work on a section about the size of a dinner plate. Use a dual-action polisher on a low speed, maybe 3 or 4. Keep the pad flat. Move it slowly in overlapping passes. You are not scrubbing. You are letting the abrasives do the work.
Wipe the residue with a clean microfiber towel. Inspect the scratch under good light. Is it gone? Is it just lighter? You might need a second pass. Once the scratch is removed, you will see a hazy finish from the compound. This is normal.
Now, switch to a polishing pad and a fine polish, like CarPro Essence. Repeat the same slow, overlapping passes. This step removes the haze and brings back a deep, reflective shine. The goal is an invisible repair where you can’t tell where the scratch was. For a deeper dive, consult the repair buff polish scratches guide. It provides a step-by-step path to invisible repairs.
The Step Into Advanced DIY: Touch-Up Paint
Sometimes your fingernail doesn’t just catch, it drops into a canyon. You see bare metal or primer. This is beyond polishing. You need touch-up paint. This is an advanced step. If you rush it, you can make a small scratch look like a large, blotchy repair.
The right way takes patience. Clean the scratch with isopropyl alcohol. Use a fine artist’s brush, not the clumsy brush in the bottle cap. Apply the paint in whisper-thin layers. One coat. Let it dry for an hour. Another coat. You might do three or four layers over a couple days, letting each one cure. You want the paint to sit slightly higher than the surrounding clear coat. These steps lay the groundwork for repairing car paint scratches. In the next steps, a linked guide will walk you through finishing, polishing, and protecting the repair.
After it’s fully cured, you level it. This is where many people stop. You place a piece of 2000-grit sandpaper on a soft block, keep it wet, and gently sand the new paint blob until it’s flush with the factory paint. Then you compound and polish the area again to restore clarity. It’s a commitment.
Never, ever use nail polish as a shortcut. Its chemistry is wrong for automotive paint. It will not adhere properly, it will discolor, and removing it will require sanding off even more of your good factory clear coat. It is a guaranteed way to make a simple problem much worse.
And to be clear, touch-up paint does not fix paint transfer. It is for replacing missing paint. If you have transfer, you are adding paint on top of foreign paint. You will trap it there, creating a permanent, ugly mess. Always remove all transfer completely before even thinking about touch-up. You should be careful when removing touch-up paint to avoid damaging the underlying surface.
When the Scratch is Too Deep: The Touch-Up Reality Check
Let’s be honest. A DIY touch-up will not be invisible. On my black BMW, even a perfect touch-up is a dark spot in direct sun. The goal is not perfection. The goal is protection from rust and making the damage far less noticeable from a few feet away.
On a grey Honda Odyssey bumper, it blends in okay. On a red Porsche door, it will stand out. Manage your expectations. You are improving the situation, not performing a miracle.
Before you touch your car, practice on a junk fender from a salvage yard or the inside of a door jamb. Get a feel for how the paint flows from the brush, how it builds, and how it sands. This practice run costs very little and saves you from a panic attack on your own car’s hood. Some scratches are too deep for us to fix perfectly at home, and knowing when to stop is a skill in itself. If you’re curious about a DIY car paint touch up, the next steps will walk you through a simple, beginner-friendly guide. Look for a practical walkthrough in the next steps.
How Much Does Paint Transfer Removal Cost? (DIY vs. Pro)

Let’s talk money. This is the question everyone has after the initial panic fades. The cost to remove paint transfer swings wildly, from the price of a few supplies to a serious professional invoice.
The short answer is you can spend between $20 for a DIY attempt or over $500 for a professional to make it perfect. Your choice depends on the depth of the damage, the value of your car, and your own confidence with a polisher.
Breaking Down a DIY Approach: $20 – $100
If the transfer is light and the clear coat is intact, you can fix this yourself for the cost of some consumables. You might already own some of this.
- Clay Bar & Lubricant: $15 – $25. Your first, least aggressive step.
- Rubbing Compound & Polish: $15 – $30 each. You’ll need both for a proper correction.
- Microfiber Towels (Pack of 5-10): $10 – $20. You need good, clean towels.
- Optional: Dual-Action Polisher: $50 – $150+. This is the big variable. You can do it by hand, but your arm will hate you on a large area.
I keep a bottle of compound and a few dedicated microfiber towels in my kit for exactly this. On my 2016 BMW, the “Swirl Magnet,” I’ve tackled minor parking lot scrapes this way. Hand-polishing a small spot is tedious but possible, and it teaches you a lot about your paint’s thickness and hardness.
Professional Detailer Estimates: $150 – $500+
This is what you pay for when you call a pro. They bring the expertise, the high-end tools, and the guarantee.
- Standard Rate: Most shops charge $50 – $150 per hour for paint correction.
- Severity & Panel Size: A light scuff on a bumper corner is one thing. A deep, long scrape along a door and fender is another. Bigger area, more time, more money.
- Paint Color Matters: This is a real thing. Black, red, and other dark or vibrant colors show every imperfection. Correcting paint transfer on a black car often costs more because the finish work must be flawless to avoid visible holograms or haze.
A pro doesn’t just remove the transfer. They restore the entire panel’s clarity and gloss, often applying a protective sealant afterward. You are paying for an invisible repair.
DIY Value vs. Professional Guarantee
Saving money feels good. I’m a DIYer at heart. But you must be honest about the risk.
DIY saves you cash upfront. It’s satisfying to fix it yourself. The risk is you can make it worse. Burn through the clear coat with aggressive compounding. Leave behind buffer trails or holograms that look worse than the original scrape. On a daily driver like my Honda Odyssey, I might risk a DIY fix on a rear bumper. The consequence of a small mistake there is low.
Hiring a professional guarantees a specific result and saves your most valuable asset: time. They have the trained eye and the muscle memory you don’t. They assume the risk. For them, it’s a standard procedure. For you, it’s a Saturday gone and sore shoulders, with an uncertain outcome.
When Professional Correction is an Investment
This brings me to my 2022 Porsche 911, the red “Garage Queen.” If this car gets a paint transfer scrape, I am not touching it myself.
The paint is soft and expensive. The car’s value is high. A botched DIY job would hurt the resale value and my pride. On a high-value or specialty vehicle, professional paint correction isn’t an expense; it’s insurance for your investment. The $300-$500 to have a master detailer make it disappear is a rational choice. The peace of mind is worth every penny, knowing the job is done to a standard that matches the car itself.
How to Prevent Future Paint Transfer and Scrapes
Getting the marks off is satisfying. But the real win is keeping them from happening again. This is where detailing changes from a reaction to a routine. You move from cleanup to defense.
The best way to handle paint transfer is to stop it from bonding to your clear coat in the first place. A little forethought saves hours of correction work later.
Smart Parking is Your First Layer of Defense
Your parking choices matter more than you think. I adjust mine based on which car I’m driving.
- Take the end spot whenever possible. You get a buffer zone on one side.
- Back into parking spaces. It gives you better control and a clearer view when leaving a tight spot.
- In busy lots, park next to well-kept, expensive cars. Their owners are usually more careful.
- Avoid spots next to beat-up work trucks, shopping cart corrals, or the main door of a store.
My Honda Odyssey, the kid hauler, gets parked far away. The extra walk is worth the peace of mind. The doors on a minivan are wide. They need space.
Build a Slippery, Hard Shield with Sealants or Coatings
Your paint’s surface needs to be slick and hard. A bare, clean clear coat is sticky. A protected one is like Teflon.
I use two main tools for this. A synthetic paint sealant is my go-to for daily drivers. It lasts 6-12 months, beads water beautifully, and makes the surface incredibly slick. A ceramic coating is a longer-term, harder investment. It’s like adding a thin layer of glass over your paint.
Both options create a surface that contaminants struggle to grip, making future marks much easier to wipe away. On my black BMW, a good sealant means pollen and light dust rinse right off. It doesn’t grind into the paint.
My red Porsche wears a professional ceramic coating. Heavy brake dust from its performance brakes doesn’t etch into the wheel finish. It washes off with less effort.
Maintain Your Shield with the Right Wash Technique
A protective layer is useless if you grind dirt into it. Your wash method is everything.
I always use the two-bucket method. One bucket with soapy water. One bucket with clean water for rinsing your mitt. This traps dirt and keeps it off your paint. Use a soft, high-quality microfiber wash mitt. Start from the top and work down.
Regular, gentle washing removes abrasive contaminants before they get pressed into your coating during your next drive. It keeps that slick surface intact.
My Ford F-150 sees mud and road salt. I rinse it weekly, even in winter, to get the heavy stuff off. Then I give it a proper two-bucket wash every month to maintain the sealant. A maintained surface is a resilient surface.
Real-World Proof: The Tesla’s Bumper
My white Tesla Model 3 has a flat front bumper. It’s a bug and debris magnet. Before I coated it, bug splatter would bake on. Removal needed a dedicated bug remover and some scrubbing.
After applying a ceramic coating, the difference is night and day. After a highway drive, I spray the bumper with a detailer spray. The bugs and gunk loosen immediately. I gently wipe with a plush microfiber towel. Most of it comes off in one pass.
The coating provided the hardness and slickness. My regular washing maintains it. Now a minor scrape from a shopping bag or light paint transfer from a plastic bumper would likely clean up with just a detail spray and some patience. That’s the power of proactive care.
When to Wave the White Towel and Call a Professional
You can handle a lot. With patience and the right process, most paint transfers and light scrapes come right out. But some battles you shouldn’t fight in your driveway.
Knowing your limits isn’t a defeat. It’s the smartest tool in your box. Trying to fix a problem that needs a pro often makes it worse, more expensive, and sometimes impossible to truly fix later.
Clear Red Flags That Say “Stop”
Your eyes and fingers are the best diagnostic tools. Here’s what to look for.
- You can see a different color under the transfer. If the scrape reveals a grey primer or, worse, bare, silvery metal, you’ve gone through the clear coat and color layer. No amount of polishing will bring that back. It needs paint.
- The damage covers a large area or multiple panels. A two-inch scuff on a door is one thing. A four-foot long gouge that wraps from a fender into a door is another. Matching the correction level and finish across such a big area is incredibly difficult for a novice.
- The scrape is on a sharp body line or complex curve. Places like the edge of a hood, a sharp fender flare, or a tight door crease have very little clear coat. It’s dangerously easy to sand or polish right through the paint on these high spots. I learned this the hard way on a fender edge of my black BMW.
- You simply don’t feel confident. This is the most important one. If your gut is saying “I shouldn’t sand this,” listen. A moment of doubt is better than a permanent mistake.
What a Professional Brings to the Fight
When you call a pro, you’re not just paying for labor. You’re buying precision tools, controlled environments, and years of muscle memory you can’t replicate at home.
They start with science: a paint thickness gauge. This little device tells them exactly how much clear coat they have to work with, in microns, before they ever touch the car. They map the entire panel to find thin spots. This data guides their entire plan. You’re working blind without one.
Their wet-sanding is surgical. For a deep scrape, they might start with 2000-grit sandpaper, then 3000, then 5000, each step removing the scratches from the last. They use guide coats to see highs and lows, and they work under bright, raking light. It’s a controlled, meticulous erosion of damage.
They can blend new paint seamlessly. If the damage is through the color coat, a good paint technician will feather the edges, blend the new color into the old, and layer on fresh clear coat. They do this in a dust-free spray booth with professional-grade paint that matches your factory finish. This isn’t a rattle-can fix.
Calling for Backup is a Smart Choice
I restore cars. I have a garage full of tools. And I still call professionals. My 1995 Miata, “the Restoration Project,” is a perfect example. Its single-stage red paint was oxidized pink and covered in deep scratches from 30 years of life.
I could have attacked it with a heavy compound. But single-stage paint is delicate; you’re polishing the color itself, not just clear coat. One wrong move and you burn through to primer. I knew the risks were too high for the result I wanted. I handed it to a paint correction specialist. The car came back looking new, with its history preserved and its future secured. That wasn’t a failure on my part. It was the right call for the car.
So, When Do You Need to Visit a Professional?
The answer lives at the intersection of damage, location, and your own skill. Visit a pro when you see primer or metal, when the damaged area is large or on a dangerous curve, or when that quiet voice of doubt gets louder than your desire to try.
Think of it this way: your job is to maintain and protect the paint. A professional detailer or painter’s job is to rescue and restore it. Knowing the difference saves your wallet and your car’s finish.
Final Thoughts on Removing Paint Transfer
The single most important step is to always begin with the mildest method possible. I start every paint transfer job on my black BMW by gently feeling the mark, then trying a clay bar and light polish-this simple approach solves most problems without risking the clear coat.
Bypass this gradual process, and you will almost certainly inflict deeper scratches or haze that demand a full paint correction to fix.
Expert Resources and Citations
- r/AutoDetailing on Reddit: Best way to remove paint transfer?
- A Professional Detailer’s Guide to Removing Paint Transfer on Cars
- How To Perform A Car Paint Transfer Removal | Turtle Wax | Turtle Wax Store
- Best method to remove paint transfer? | Auto Geek Online Auto Detailing Forum
- paint transfer removal?? | Jeep Patriot Forums
- Paint transfer removal – how? | Subaru Outback Forums
Max is an automotive enthusiast having worked as a car mechanical and in interior detailing service for over 25 years. He is very experienced in giving your old car, a new fresh vibe. He has detailed many cars and removed very tough smells and stains from all kinds of cars and models, always ensuring that his work and advice helps his customers. He brings his first hand experience to his blog AutoDetailPedia, to help readers breath new life into their car interiors.