How Do You Choose the Right Ceramic Car Coating? A Guide to Brands, Layers, and DIY vs. Professional Application
Choosing a ceramic coating feels overwhelming, with every brand claiming to be the toughest and longest lasting. I remember the paralysis trying to pick one for my black BMW, the ultimate test for any paint protection.
Let’s cut through the marketing together. I will explain how to evaluate different brands, what the layer count really means for durability, and the stark realities of a DIY project versus a professional detailer’s work.
Pick blindly, and you could end up with a glossy, expensive layer that fails to protect your paint from the very elements you feared.
What a Ceramic Coating Actually Does (And Doesn’t Do)
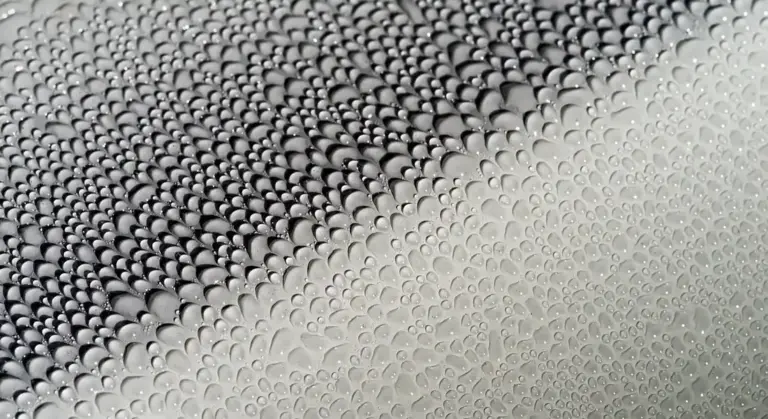
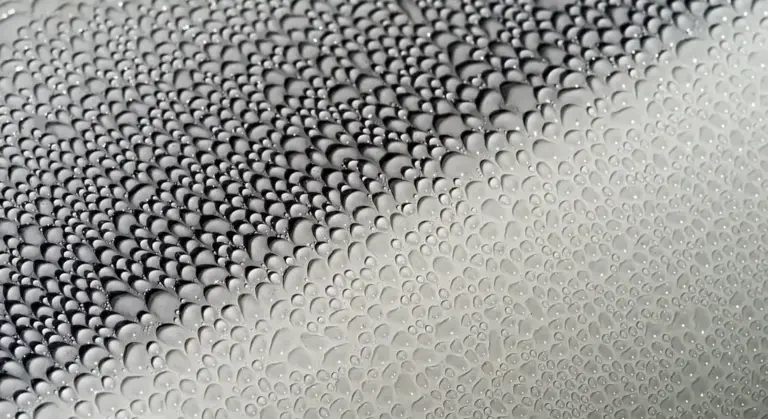
A ceramic coating is a liquid polymer. When you apply it to your car’s paint, it chemically bonds and cures into a hard, slick, and incredibly hydrophobic layer. Think of it like a second, tougher skin for your clear coat.
Let’s use an analogy. A traditional carnauba wax is like a nice wax jacket. It looks great and sheds a little water, but a good rainstorm soaks through and you have to reapply it every few months. A synthetic sealant is a better rain shell. It lasts longer and beads water well. A ceramic coating is a permanent, slick raincoat fused to your skin. Water doesn’t bead so much as it sheets right off in a panic. The gloss is deeper and glass-like. The coating lasts for years, not months. It’s a three-way comparison that goes beyond just color and shine, highlighting the key differences between wax, sealant, and ceramic coating.
The real benefits are why people get excited.
- Extreme hydrophobic effect. Water and dirt struggle to stick. When you rinse, contaminants slide away with minimal effort.
- Chemical resistance. Bird droppings, tree sap, and bug acids sit on top of the coating, giving you more time to clean them off safely.
- UV protection. The coating acts as a shield, helping to prevent your paint from fading and oxidizing in the sun.
- Reduced cleaning effort. Because nothing bonds strongly, washing becomes faster and safer. My grey Honda Odyssey, the kid hauler, is a testament to this. Spills wipe off the coated interior plastics before they become stains.
Now, let’s clear up the myths. This is critical.
A ceramic coating is not an force field against scratches. It can resist light marring and swirls better than bare paint, but a sharp key or a gritty wash mitt will still cut right through it. My black BMW 3 Series, the swirl magnet, taught me this. The coating makes it easier to keep clean, but I still use the two-bucket method every single time. It’s essential to understand the limits of ceramic coating for paint protection.
It is not a substitute for paint correction. You must correct your paint first. The coating will lock in every swirl and defect, making them permanent. You are sealing a perfect, or near-perfect, finish.
A coated car absolutely still needs to be washed. It just stays cleaner longer and the wash process is simpler. The coating protects the paint, but you must maintain the coating. When you wash a ceramic coated car, the routine is gentler on the finish. Use mild soap and a soft wash method to keep the coating at its best.
Your Ceramic Coating Product Tier List: From Sprays to Show Cars
Choosing a coating isn’t one-size-fits-all. Your choice depends on your car, your budget, and how deep you want to go. Here’s how I break it down in my shop.
Budget / “Drive-Through” Tier (Spray Ceramics & Hybrids)
These are fantastic. I use them all the time for maintenance. You spray them on a wet or dry car, wipe them in, and buff off. The paint feels slicker instantly. They add a strong layer of hydrophobic protection that lasts 3 to 6 months.
These are perfect for someone who wants ceramic-like benefits without the intense prep. They are the ultimate topper for an existing sealant or wax, or a great standalone product for a daily driver. I reach for a bottle of Turtle Wax Hybrid Solutions Ceramic Spray Coating or Meguiar’s Hybrid Ceramic Wax after almost every wash on my Honda Odyssey. It keeps the sticky fingerprints and spilled juice at bay with zero stress. When you compare ceramic coating vs spray sealants, you’ll notice differences in durability, gloss, and upkeep. I’ll cover those trade-offs in the next steps.
Enthusiast / DIY Kit Tier (True Liquid Coatings)
This is the real deal in a bottle for home users. These are multi-year coatings that require serious prep. The process is a commitment: a full decontamination and paint correction, followed by a panel-by-panel application with precise timing.
The key here is the prep work and the cure time. These liquids need a clean, warm, and dust-free environment to bond properly. I coated my Ford F-150, the workhorse, with a Gyeon MOHS kit. The entire process took a weekend. The kit had the coating, an iron remover, a prep spray (isopropyl alcohol wipe), and good applicators. Other great brands are CarPro Cquartz and Gtechniq Crystal Serum Light. A good kit gives you everything you need and clear instructions. Follow them exactly.
Show Car / Professional Tier (Pro-Only Formulas)
These are the heavy-duty coatings applied by certified installers. They often come as multi-layer systems with specific warranties. The formulas are typically thicker, harder, and more durable than DIY options.
This tier is for the garage queen or the owner who wants a warranty-backed, maximum-gloss finish applied in a controlled environment. Systems like Ceramic Pro, Gtechniq Crystal Serum Ultra, or Gyeon SYNCRO fall here. This is what I would recommend for a car like my Porsche 911. The high-gloss, self-cleaning effect on top of its Paint Protection Film is stunning, and the warranty offers real peace of mind for a high-value vehicle.
What to Look For on the Bottle: Decoding the Jargon
Product labels can be confusing. Here’s a simple translation.
- SiO2 (Silicon Dioxide): This is “ceramic.” The percentage matters, but it’s not everything. A higher percentage usually means a harder, longer-lasting coating, but the other ingredients and the formula are just as important.
- Hydrophobic & Gloss: These are the results you see and feel. The coating should make water bead and sheet, and make the paint look deep and wet.
- “9H Hardness”: This is a marketing reference to the pencil hardness scale. In reality, it means the cured coating is very hard and scratch-resistant compared to wax, but it is not literally as hard as a diamond. Don’t get hung up on this number alone.
Always prioritize your safety and the environment. These are serious chemicals. Work in a well-ventilated area, like an open garage. Wear nitrile gloves to keep the product off your skin. Have a dedicated trash bag for your used applicator towels and wipes. Do not rinse leftover product down a storm drain.
The Make-or-Break Step: Surface Prep Before the Coating
Applying a ceramic coating is like taking a permanent photograph of your paint’s current condition. That shiny liquid locks in everything underneath it, good or bad. Dirt, scratches, oxidation, they all get sealed under that hard shell. Prep is not just a suggestion, it is ninety percent of the entire job.
Think of my 2016 BMW 3 Series, the Jet Black ‘Swirl Magnet.’ The paint felt rough and looked hazy under the garage lights. I spent eight full hours with a polisher and pads before a single drop of coating came out of the bottle. That is the only way to get a perfect result. The process is not complicated, but it is non negotiable. Follow this sequence every time.
- Decontamination Wash. Use a high quality car shampoo and the two bucket method. This removes loose dirt and grime. Rinse thoroughly. Your goal is a clean canvas.
- Chemical Decontamination. Spray an iron remover over the wet paint. Watch it turn purple as it dissolves brake dust and rail dust. For sticky tar or sap spots, use a dedicated tar remover. This step tackles what soap cannot.
- Mechanical Decontamination (Clay Bar). After the chemical rinse, feel the paint with your bare hand. If it feels gritty, you need to clay. Use a detailing clay bar or synthetic clay mitt with plenty of lubricant. Glide it over the surface to pull out embedded contaminants. You will hear a slight scraping sound when it is working. The paint should feel smooth as glass when you are done.
- Paint Correction (Machine Polishing). This is where you remove scratches, swirls, and oxidation. For true defect removal, a Dual Action polisher is almost essential. Hand polishing will not generate enough heat or consistent motion to level the clear coat. I use my DA polisher on the BMW with a cutting compound, then a finer polish. The paint goes from dull and scratched to a deep, reflective gloss.
- Final Wipe Down with an IPA or Prep Spray. After polishing, microscopic oils and residues remain. Mix isopropyl alcohol with distilled water or use a commercial prep spray. Wipe every panel down thoroughly. This ensures a perfectly clean, oil free surface for the coating to bond to.
Remember this rule. For paint correction, use a machine. For applying the final ceramic coating liquid, you use your hands with the included applicator. Do not try to correct serious defects by hand. You will only get tired and achieve mediocre results.
DIY vs. Professional Application: The Honest Breakdown
This choice comes down to your time, your skill level, and your tolerance for risk. There is no single right answer, only what is right for you and your car. Let us break it down honestly.
The DIY Path
The biggest pro is cost savings and the deep personal satisfaction of doing it yourself. A good consumer kit costs a fraction of a professional job. The cons are very real. It is a huge time investment, often a full weekend of physical labor. There is a real risk of creating high spots, where the coating dries unevenly and looks hazy, or of premature failure if the prep is not perfect.
From the kit’s perspective, here is what you are signing up for. You will read the instructions twice. You will gather all your gear, wash buckets, polisher, towels, and the kit itself. You will commit to that full prep sequence I just outlined. Then, in a clean, shaded space, you will methodically apply the coating to one panel at a time, working in small sections, and buffing off the residue before it flashes. You will need patience and good lighting to check for missed spots.
The Professional Path
The pros here are guaranteed preparation, a valid warranty, massive time savings, and expertise with professional grade products that are often more durable. The con is the significant cost, which can be several thousand dollars for a full correction and coating on a larger vehicle.
When you get a professional quote, it should be very specific. It must state the level of paint correction included, like a one step polish or a multi stage correction. It should name the coating product being used. It must outline the warranty terms, what is covered and for how long. Finally, it should include clear maintenance advice for you to follow. A pro will handle the heavy lifting and the stress, and they stand behind their work.
Here is a clear guideline for you. If your car is new or nearly perfect and you love hands on projects, the DIY route can be very rewarding. If your car needs serious correction, is a high value vehicle like my Porsche 911, or you simply want it done right with zero worry, go with a professional.
How Many Layers Should You Apply?
Let us cut through the marketing confusion. For most consumer ceramic coating kits, one well applied layer is completely sufficient. The coating forms a cross linked chemical bond with your paint. A second layer is generally for redundancy over high wear areas, or for specific system designs that use a base coat for hardness and a top coat for slickness. These ceramic coating layers are a key part of paint protection. They influence hardness, gloss, and long-term durability of the finish.
I caution you against the ‘more is better’ myth. Applying three or four layers of the same product does not make it three times as thick or durable. It can lead to bonding issues between layers, creating a hazy, cloudy finish with visible high spots that are very difficult to remove. Follow the kit’s instructions to the letter. More is not better, better preparation is better.
Caring for Your Investment: The Right Way to Wash a Coated Car
I put a ceramic coating on my black BMW to lock in that perfect shine and make my life easier. The first time I washed it wrong, I almost cried. I saw tiny spiderweb scratches in the sun. A coating is a hard shell, but the paint underneath is still soft. You can mar it with bad technique, especially during car washes, trapping dirt under the coating’s slick surface.
Improper washing will ruin the coating’s performance and swirl the paint you paid to protect. The goal is to glide over the surface without grinding in contaminants.
The Safe Wash Method
This is non-negotiable. I use this on every car, coated or not, but with a coated car it is your religion.
- Pre-rinse: Blast the car with a strong stream of water. You want to rinse off loose grit and dirt. Start from the top and work down.
- Two-Bucket Wash: One bucket holds your clean shampoo solution. The other is your rinse bucket with a grit guard at the bottom. After you wipe a panel with your mitt, you swish it in the rinse bucket to release the dirt before going back to the clean soap. This keeps your wash media clean.
- The Right Shampoo: Use a pH-neutral or coating-specific shampoo. These are lubricated to be extra slick and won’t degrade the coating. I keep a gallon in my shop for all my vehicles.
- Clean Tools: Use a soft microfiber wash mitt, not a sponge. Pat the paint dry with a large, clean plush drying towel. Do not drag it. Just lay it flat and pull it across to absorb water.
Maintenance Products & Warnings
After a wash, I often use a ceramic boost spray on my F-150’s hood and doors. It’s a quick spray-wipe that adds hydrophobicity and fills in minor gaps. A coating-specific detail spray is great for wiping off light dust or water spots between washes.
You must avoid three things: harsh alkaline soaps (like dish detergent), abrasive towels (old t-shirts, cheap microfiber), and automatic brush washes. The brushes are coated with everyone else’s dirt and will scratch your finish. The harsh soaps strip the coating’s top layer over time.
Can you use regular car wash soap?
You can, but you shouldn’t. Many regular soaps are slightly alkaline to cut road film. Over dozens of washes, this can slowly degrade the silica matrix of your ceramic coating. A pH-neutral shampoo cleans effectively without this chemical attack, preserving your investment’s longevity. It’s a simple swap that makes a big difference.
Your Ceramic Coating Questions, Answered
I get these questions all the time in my shop. Here’s the straight talk from the bay.
How long does it last?
Real-world timelines depend on the product, environment, and your care. A consumer-grade DIY kit (1-2 layers) often lasts 1-2 years. A professional-grade coating (applied in multiple layers) should last 3-5 years, sometimes more. My Porsche’s professional coating is going on three years strong with perfect beading. My F-150’s DIY coating needs a booster every 6 months because it sees mud and road salt. No coating lasts forever.
What’s better than a ceramic coating?
For chemical and scratch resistance, a coating is top tier. But for impact protection against rock chips, nothing beats Paint Protection Film (PPF). It’s a physical, self-healing urethane film. Many owners, including myself on the Porsche’s front end, use PPF for the bumper and hood, then coat the entire car (including the PPF) for added gloss and chemical resistance. They work brilliantly together.
Can you coat other surfaces?
Absolutely. This is where you get great value. I coat the wheels on my Tesla. Brake dust wipes off with just water. Glass coatings cause rain to sheet off at speed, improving visibility. Plastic trim benefits greatly. The black trim on my Odyssey was fading, a trim coating restored the deep black color and protects it from UV fading. Always use products formulated for those specific surfaces.
How do you know when it’s failing?
The magic disappears. Water stops beading up into tight, round pearls and instead sits flat or spreads out. Dirt and bug splatter stick more stubbornly to the paint. The surface feels rough, not glassy. On my Miata’s single-stage paint, I knew the old wax was gone when water stopped sheeting off the hood. It’s the same signal.
Can you top it or reapply it?
Yes to both. You can use a ceramic spray sealant as a topper every few months to refresh hydrophobics. For a full reapplication, the old coating must be assessed. If it’s just worn thin, a light polish may remove it. If it’s completely failed and contaminated, a more aggressive correction might be needed to start fresh. It’s not a matter of just adding another layer on top of a dead one.
Your Coating, Your Car, Your Call
The most critical takeaway is this: the right coating is the one you can apply correctly to a perfectly prepared surface. Whether you choose a DIY kit for your daily commuter or invest in a pro-grade treatment for a garage queen, that foundation of clean, decontaminated paint is non-negotiable.
Bypass that essential prep, and you will waste your money on a product that cannot bond, leaving your paint unprotected and vulnerable.
Expert Resources and Citations
- Before You Buy a Ceramic Coating for Your Car, Read This First
- Best Ceramic Coating for Cars | Ceramic Paint Coating
- Best Ceramic Coating for Your Car in 2026 – Car Talk
- Ceramic Coating for Cars | Chemical Guys
- Buy Best Ceramic Coating For Cars | FEYNLAB®
Max Gunther
Max is an automotive enthusiast having worked as a car mechanical and in interior detailing service for over 25 years. He is very experienced in giving your old car, a new fresh vibe. He has detailed many cars and removed very tough smells and stains from all kinds of cars and models, always ensuring that his work and advice helps his customers. He brings his first hand experience to his blog AutoDetailPedia, to help readers breath new life into their car interiors.