What Are the Professional Techniques for Painting a Car Hood Right?
Staring at a hood full of scratches or fading paint? Getting a smooth, lasting finish is all about the method you use.
I have painted and corrected hoods on my own black BMW and red Miata, and I will show you the detailer’s approach. We will cover the non-negotiable prep work, professional spray patterns for even color, and the final sanding and polishing to achieve deep gloss.
Cut corners here, and your new paint will look worse than the old damage in a matter of months.
So, Can You Paint Just the Hood of Your Car?
You can. But matching the new paint to the old car is the real trick. A fresh hood that stands out like a sore thumb is worse than the scratch you started with.
This is where the concept of a “blend panel” comes in. A blend is when the new color is sprayed beyond the repair panel and onto the adjacent ones. You fade it out.
You blend because factory paint and fresh paint lay down differently, and even the same color code can look off due to age and environment. Blending into the fenders and front bumper helps the eye accept the transition. It makes the new hood look like it belongs.
Three things dictate how hard this match will be. First, the hood’s size. It is a massive, center-stage panel. A mismatch on a small door is one thing. On a hood, it’s everything.
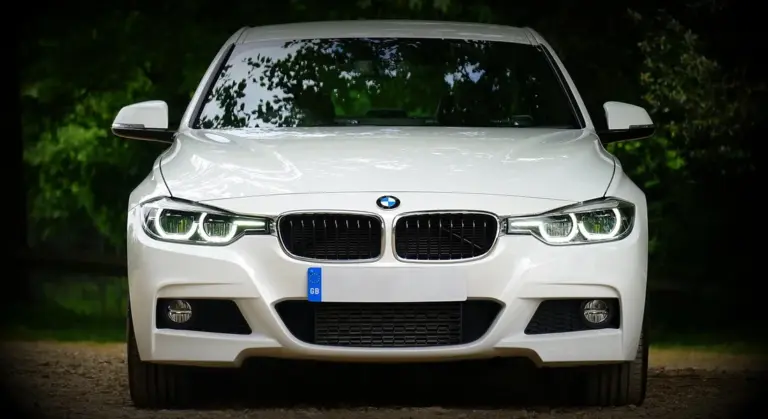
Second, your car’s color. Solid whites and blacks are more forgiving. Metallic, pearl, and tri-coat paints are a nightmare. The flake has to be oriented just right. My Jet Black BMW 3 Series is a swirl magnet, but matching a fresh black hood? That is a straightforward job for a pro.
Third, the paint’s age. Sun fades everything. The hood on my 1995 Miata was a faded pink. You could not just paint it. The whole car needed a cut and polish to restore the original red before any new paint was applied.
When someone searches “can i just get the hood of my car painted,” they are asking about cost and feasibility. They want a fix for a dent or clear coat failure without a full repaint bill. Understanding professional car paint cost helps weigh those options between spot repair and a full hood repaint.
The honest answer is that a proper hood paint job almost always involves blending, which increases the labor and cost beyond just the hood itself. When budgeting for paint car hood cost, consider prep, materials, and the blending work as essential components of the total price.
Compare this to a full repaint. That gives you a perfect, uniform result but at a very high cost. A vinyl wrap is the other alternative. It is far cheaper and protects the original paint. But the texture is different, and it is a temporary fix. For a perfect, permanent finish on just the hood, painting with blending is the professional method. Other alternative car painting methods, such as powder coating or hydrographic printing, can offer different balances of cost, durability, and finish. We’ll explore these options in the next steps.
Tools & Chemicals: The Pro’s Arsenal
This is not a wipe-on, wipe-off job. The right tools are not a suggestion. They are the difference between a show car finish and a garage disaster.
Surface Prep & Sanding
- Sanding Discs: You need a full range. Start with 400-grit for stripping old paint, move to 800-grit for smoothing primer, and finish with 1500 to 3000-grit for final wet sanding before polish.
- DA Polisher/Sander: A dual-action machine for sanding and compounding. Avoid rotary sanders unless you are highly experienced.
- Sandpaper Blocks & Hand Pads: For edges, tight curves, and final hand-sanding.
- Tack Cloths: Sticky cheesecloth rolls to remove every speck of dust before paint hits the surface.
- Surface Cleaner & Degreaser: A dedicated wax and grease remover. Isopropyl alcohol is not enough here.
Masking & Protection
- Professional Automotive Masking Tape: 3M Fine Line tape for crisp edges, standard tape for large areas.
- Masking Paper & Plastic Sheeting: To cover the entire front end, windshield, and fenders. Do not use newspaper. The ink can bleed through with solvent fumes.
The Paint System
- High-Volume Low-Pressure (HVLP) Spray Gun: The standard for professional results. A quality gun with multiple fluid tip sizes.
- Air Compressor: A large, oil-free tank with enough CFM to run your gun consistently.
- Moisture Trap & Regulator: Clean, dry air is non-negotiable. Water in your line ruins the paint.
- Primer: Epoxy primer for bare metal, urethane primer-surfacer for building up smooth layers.
- Basecoat: Your actual color paint. Must be mixed to your car’s exact code and reduced with the correct solvent.
- Clearcoat: A two-part urethane clear. This is what gives you the depth and gloss. It is also what you sand and polish.
- Paint Mixing Cups & Stir Sticks: Calibrated for accurate ratios.
Finishing & Detailing
- Polisher: A forced rotation DA polisher for cutting and finishing the fresh clear coat.
- Compounding & Polishing Pads: A set of foam pads from heavy-cut to ultra-soft finishing.
- Compound & Polish: Specific products for cutting sanding marks out of new clear coat and restoring gloss.
- Microfiber Towels: 350+ GSM, plush towels for final wipe-downs and polish removal. Use them once on fresh paint.
Personal Protection & Environment
Ignoring safety turns a project toxic. Your health is not a detail.
- Respirator: A half-face or full-face respirator with organic vapor cartridges specifically rated for isocyanates found in clear coats. A dust mask is useless.
- Nitrile Gloves: Chemical-resistant. Wear them whenever handling primers, paints, and solvents.
- Disposable Coveralls: Keep paint mist and dust off your clothes and skin.
- Safety Glasses: Full seal goggles are better when spraying.
Your workspace is just as critical. You need massive ventilation. An explosion-proof extraction fan is ideal. Regulate the air temperature if you can. Cold paint flows poorly. Hot paint dries too fast. Dust is your enemy. A clean, dedicated spray booth is the gold standard. A very clean, still garage is the absolute minimum.
The Non-Negotiable Order of Operations
You cannot wing this. Painting a hood demands a strict sequence, and deviating even a little guarantees flaws you will see every time you walk up to the car. I treat this list like law after a botched job on my BMW left me with a hood that looked like a cracked desert. It really highlighted how difficult DIY car painting can be.
-
Remove & Prep. If the bolts come out, take the hood off. Working on a bench is infinitely easier. Degrease the entire surface with a dedicated panel wipe or isopropyl alcohol mix. Strip every trace of old wax or sealant with a clay bar or a light polish. Any silicone or oil left behind will repel new paint and create fisheyes, those tiny craters that ruin your finish.
-
Repair & Sand. Fix dents with body filler, then sand the entire hood. Start with 320-grit paper on a block for deep scratches, feather the edges smooth, and work your way up to 600-grit. This progressive sanding creates a uniform, slightly rough surface that primer can mechanically grip. On my Ford F-150 hood, I spent a full afternoon sanding to erase years of pitting and scratches. For anyone doing repair car dents scratches diy, these steps form the core of a clean, pro-looking finish. With patience and the right tools, you can apply the same method to other panels as part of a DIY auto-body project.
-
Clean & Mask. After sanding, wipe the hood down with a chemical decontaminant. Go over it with a sticky tack cloth to lift every speck of dust. Mask off the fenders, windshield, and grille with high-quality painter’s tape and masking paper. I run my finger along the tape edge to seal it, preventing paint bleed.
-
Prime & Guide. Spray on a high-build primer in thin, even coats. Let it dry, then mist a light guide coat (a contrasting spray powder or paint) over it. Sand the primer with a block and 400-grit paper. The guide coat will sand away from high spots and remain in lows, showing you exactly where the surface is not level. Keep sanding until the guide coat is uniformly gone.
-
Paint & Clear. Apply your basecoat in controlled, misty layers called tack coats. Let each coat flash off. Then apply full, wet coats until the color is even and opaque. Rushing the flash time between coats traps solvents and leads to sags or a cloudy finish. Finally, apply the clear coat in two or three wet, glossy layers for protection and depth.
-
Cure & Finish. Let the clear coat cure completely. This can take 24 hours or up to a week. Do not touch it. Then, wet sand with 2000 or 3000-grit sandpaper to level orange peel. Use a compounding polish to remove sanding marks, then a finer polish to restore gloss. Only after this multi-step correction should you apply a protectant like ceramic coating, just as I do on my Porsche after any paintwork.
How to Paint a Car Hood: The Core Techniques
Spraying a hood is a physical skill. It feels like detailing a vast, flat canvas where every mistake is visible.
Your spray technique boils down to four things: overlap, distance, arm speed, and trigger control. Maintain a 50% overlap on each pass so you never get stripes. Hold the gun 6 to 8 inches from the surface. Move your entire arm at a steady, walking pace-about one foot per second. Squeeze the trigger fully before the panel starts, and release it only after you have passed the edge.
Flash time is not a suggestion. It is the mandatory waiting period for solvents to evaporate between coats. If you paint over a coat that is still wet underneath, you will lock in solvents that later escape as bubbles or ruin the adhesion. In a 70-degree shop, I wait a solid 10 minutes between basecoat layers. Check your paint manufacturer’s sheet for exact times—especially for paint coats wait time.
A large hood will test you. The edges and corners can get dry spray because paint tends to drift away, while the center can sag if you pour it on too thick. To combat this, make your first and last spray passes just beyond the physical edge of the hood, and keep the gun moving steadily across the middle to avoid pooling.
Technique Tweak: The Spray Pattern Dance
Here is the exact motion. Start your pass off the panel, trigger down, move across in a smooth, steady walk, release trigger off the panel. Practice this on cardboard until it is muscle memory. Your arm should flow like you are brushing on a clear coat of wax.
Lighting tells the truth. Position a bright work light at a shallow, raking angle to the hood surface. This glancing light will reveal every thin spot, drip, and bit of texture (orange peel) in real time, letting you correct your next pass immediately. I use this same light angle when polishing the Jet Black BMW to find swirls.
The motion is identical to using a polisher on a big, flat panel. When I correct the paint on my Ford F-150’s hood, I move the polisher in straight, overlapping lines with consistent pressure. You do the same with a spray gun. It is a rhythmic, full-body movement that covers the area evenly without pause.
Making the Color Match (or Choosing a New One)
Getting the color right is where a pro separates from an amateur. It is not just about the paint code. The color on your twenty year old hood has faded. The paint from the factory has a slightly different texture. You have to match what is there now, not what left the plant.
Pros start with the code inside your driver’s door jamb, then they make a spray-out card. They mix a small batch of paint and spray it on a separate metal or plastic card. They let it dry. Then they hold that card next to your hood in direct sun, in shade, and under garage lights. You look for a match from every angle. This tells you if the mix is right before a single drop touches your car.
Even with a perfect spray-out card, you often cannot just paint the hood and stop. The new paint may look slightly off against the old fenders. This is where blending comes in. A pro will lightly sand and scuff the paint on the adjacent fenders, just along the edge. They then spray a light, feathered coat of the new color over that prepared area. It creates a gradual transition your eye cannot see. My Jet Black BMW taught me this. A perfect hood panel stuck out like a sore thumb against its slightly faded fenders. Blending made it invisible.
Painting the hood a different color is a bigger commitment. It is not just prep. You must plan for the line. Do you stop at the hood’s edge, creating a stark contrast? Or do you continue the new color onto the fenders, cowl, and front bumper for a cohesive look? Either way, the prep is exhaustive. Every square inch of the old finish must be sanded to a perfectly smooth, dull matte finish. Any remaining clear coat or glossy paint will cause the new color to peel. You also need a high-build primer to create a uniform base. Think of it like painting a wall. You would not put a new color over old, glossy paint without sanding and priming first. Your car is no different.
What Goes Wrong: Troubleshooting Common Hood Paint Problems
I have made these mistakes. Every detailer has. The hood is a big, flat canvas that shows every error. Here is what happens and how to fix it.
Runs and Sags
This looks like a tear of clear coat sliding down the panel. It feels like a ridge under your finger. The cause is always too much material applied too quickly. The fix is patience; let the run dry completely, then sand it level with the surrounding area and polish. Do not try to wipe it when it is wet. You will make a much bigger mess.
Fish Eyes
These are small, crater-like divots in the fresh paint. They look like someone poked it with a pin. The cause is silicone or wax contamination. Something oily is on the surface. The pro fix is to stop immediately. Let the paint dry, sand the entire area back down, and reclean with a wax and grease remover. I keep a dedicated, lint-free towel for this step on my Ford F-150 to avoid transferring oils from my hands.
Orange Peel
This is very common. The finish looks wavy, like the skin of an orange. It lacks a deep, reflective shine. It happens when the paint is not flowing out smoothly, often due to incorrect air pressure, distance from the panel, or temperature. A mild orange peel is normal from a spray gun and is fixed by wet sanding with very fine grit paper (2000-3000) and then compounding and polishing. My Porsche’s clear coat had a slight peel right from the factory. A careful polish brought out the mirror finish.
Sanding Scratches That Show Through
You finish painting and see faint, straight-line scratches ghosting under the new paint. This is a prep failure. You skipped grit steps. You might have sanded with 400-grit paper but then jumped straight to 1000. The deeper scratches never got smoothed out. The only fix is to sand it all off and start over, following a proper grit progression (like 400 > 600 > 800). The surface must feel like smooth glass to your bare hand before any primer or paint is applied.
The Real Cost: DIY vs. Professional Car Hood Painting
Let’s talk numbers. Not the shiny brochure numbers, but the real ones from the garage floor. Painting a hood seems simple. It’s one flat panel, right? I learned the hard way on my Jet Black BMW. A deep scratch led me down the DIY path. The final tally was eye-opening.
The True Price of a Proper DIY Job
Forget the cost of a spray can. A proper job means a finish that lasts and matches. For a DIY car painting project, choosing the right spray gun matters. Your choice affects coverage, finish, and ease of use. Here is what you actually need to buy or rent.
- Tools & Supplies (Non-negotiable): A decent HVLP spray gun ($150+), an air compressor with enough CFM to run it ($300+), a quality respirator with organic vapor cartridges ($40), sandpaper in multiple grits (80 to 2000+), tack cloths, mixing cups, and strainers. This is over $500 before a single drop of paint.
- Materials (The Paint System): Primer, basecoat, and clearcoat. For a modern metallic color like my BMW’s, you need a 2K (two-component) clearcoat. This is professional-grade material. A quart of good basecoat and a quart kit of 2K clear can easily run $300-$500. This is not the single-stage paint from the hardware store.
- The Environment (Booth Time): A dust-free, climate-controlled space is mandatory. You can try a garage with plastic sheeting, but one stray hair or piece of dust ruins it. Renting a spray booth is an option if you can find one. Expect $50-$150 per hour, with a minimum rental time.
For a correct DIY attempt, a realistic budget starts at $1,000, not including your time or the high risk of error. My first DIY hood attempt cost me about $800 in materials and tools, and the result had orange peel and dust nibs I had to wet-sand for days to correct.
What Professional Car Hood Painting Really Costs
When you get a quote for car hood painting cost, the price swings wildly based on one factor: prep work. A reputable shop’s price includes their labor, expertise, and guaranteed environment.
- Basic Blend & Paint ($300 – $600): This is for a hood in decent shape. They’ll sand it, prime any small spots, and spray it. The color should match well. This is a common range for a local shop or a franchise.
- Full Strip, Repair, and Paint ($600 – $1,200+): This is for a hood with rust, dents, or severe damage. It involves removing the hood, stripping it to bare metal, doing metalwork, applying epoxy primer, then the full paint system. This is where excellence lives. For my Porsche’s front end, this level of care is the only option.
- Why “Local” Matters: Labor rates define the price. A “mobile car hood painting near me” service might be cheaper but works outside a controlled booth. A high-end restoration shop will charge more. Always ask to see examples of their work, especially on metallic or tri-stage paints.
A professional job buys you a warrantied result from someone who breathes this stuff every day. Their overhead (the booth, the dust extraction, the mixing room) is part of your fee. It’s worth it.
The Investment: Your Time, Skill, and Sanity
So when do you hire a pro? It comes down to three questions.
First, what is your skill level with a spray gun? Laying down smooth, even coats of 2K clear is an art. It’s not like painting a fence. A beginner’s result will need compounding and polishing, which is its own advanced skill set. Choosing the right spray gun for car painting matters. The right tool helps you deliver smooth, even coats.
Second, how perfect does it need to be? Painting the hood on my ’95 Miata project was a fun learning experience. Painting the hood on my show-car-quality 911 would be insane. The value of the vehicle and your expectations dictate the path.
Third, how much is your time worth? A DIY job is not a Saturday afternoon. It’s days of prep, painting, waiting for flash times, and then careful wet-sanding and polishing. A pro shop can often turn it around in 2-3 days.
Hire a professional if the hood is highly visible, the color is complex (metallics, pearls, black), or you have zero tolerance for flaws. The DIY route is for the hobbyist who values the process as much as the result, and who has a vehicle where “good enough” is acceptable. For everyone else, the pro’s invoice is the cheaper option when you factor in the cost of your own mistakes.
Preserving Your Hood’s New Paint
The core principle is simple: perfect preparation prevents poor paint performance. All the professional techniques in the world won’t save a job that started on a dirty, uneven surface.
Ignore this, and you’ll watch the new finish chip and peel within months.
Further Reading & Sources
- How to Paint the Hood of a Car (with Pictures) – wikiHow
- r/Autobody on Reddit: Best way to paint hood of car?
- DIY – painting car’s hood – DoItYourself.com Community Forums
- Car Hood Painting Ideas
- What method is used to paint a hood? | Chevy Tri Five Forum
- Painting a hood with a spray can possible? | BobIsTheOilGuy
Max Gunther
Max is an automotive enthusiast having worked as a car mechanical and in interior detailing service for over 25 years. He is very experienced in giving your old car, a new fresh vibe. He has detailed many cars and removed very tough smells and stains from all kinds of cars and models, always ensuring that his work and advice helps his customers. He brings his first hand experience to his blog AutoDetailPedia, to help readers breath new life into their car interiors.