Can Rust-Oleum Spray Paint Save Your Car’s Finish?
You see that fading trim or rusty wheel well, grab a can of Rust-Oleum from the garage, and wonder if it’s the cheap fix you need.
We will cover where Rust-Oleum works on a car, the critical preparation it demands, and the finish quality you can realistically expect.
Skip the proper steps, and you will be left with a messy, peeling eyesore that hurts your car’s value.
The Hard Truth About “Rattle Can” Car Paint Jobs
Let’s be honest with each other. A Rustoleum car paint job will never look or feel like the finish that rolled out of Detroit, Stuttgart, or Tokyo. The paint that comes from an automotive spray gun is a complex, layered system engineered for years of abuse. What comes from a rattle can is a simple, single-stage coating. Managing your expectations is the first and most important step, especially when you’re DIY painting your car.
Automotive paint is formulated to be incredibly hard. It resists scratches from branches, gravel, and the swirls we detailers fight so hard to avoid. It’s loaded with UV inhibitors to keep that deep black or vibrant red from turning pink or chalky under the sun. The gloss is engineered to be deep and reflective. Rust-Oleum, while durable for what it is, simply doesn’t have the same chemical makeup. The film is softer, more prone to scratches. The UV resistance is lower, meaning colors will fade faster. The initial gloss is nice, but it won’t have that liquid, mirror-like depth of true automotive clear coat.
So, what’s the point? The point is a smart, economical fix for specific problems. The primary use case for Rust-Oleum on a car is functional protection, not cosmetic perfection. I’ve used it on the frame of my F-150 to keep winter salt at bay. It’s perfect for a beater truck’s hood that’s rusting through, just to buy another year. It’s a great choice for a quick, single-color change on a project car like a dirt track Miata, where a glossy, perfect finish is the last thing on your mind.
If you’re asking “can i paint my car with rustoleum,” you need to know exactly what you’re signing up for.
Common Mistakes
People get disappointed because they don’t know what to expect. Here’s what usually goes wrong.
- Not Expecting Orange Peel: The texture of the finished paint will look like the skin of an orange. It’s a given with spray cans. You can wet sand and buff it to improve it, but it’s a lot of work.
- Poor UV Fade Resistance: That beautiful blue will start to chalk and fade in a year or two of direct sun. On a garage-kept project, it’s fine. On a daily driver, be ready for it.
- Using the Wrong Primer: You must use a primer designed for your surface (bare metal, existing paint) and compatible with your top coat. A mismatch causes peeling.
- Rushing Dry Times: The can says “dry to the touch in 1 hour.” That doesn’t mean you can mask it or apply a second coat then. The paint underneath is still soft. Waiting days between coats is not uncommon for a good result.
What You Absolutely Must Do Before Spraying Anything
I tell every DIYer the same thing. Spraying the paint is the easy, fast part that comes at the very end of a long, dirty process. That means you must tackle prep, including repairing rust and sealing the metal, before any color goes on. The quality of your rustoleum car paint for rust or color change is 90% determined by the work you do before you ever shake a can. Skip a step here, and your paint will fail.
Start with a multi-step strip-down. You need to remove all dirt, grease, wax, and loose material. Wash the area with a strong automotive soap and a brush. Then, you must address the existing finish. If the old paint is peeling or bubbling, you have to sand it all off. If it’s sound, you need to scuff every single inch of it with sandpaper so the new paint has something to grab onto. I use a grit progression: start with 320-grit to level bad spots and feather edges, then move to 400, and finish with 600 for a uniform scratch pattern. Your hand should feel a completely smooth, dull surface.
Now, rust. The question “can i paint over rust on my car” has a tricky answer. You should never paint over active, flaky rust. It will just bubble under your new paint. You have two choices. For surface rust, convert it using a rust converter primer, which turns the iron oxide into a stable, paintable surface. For anything more than surface speckling, you must remove it. Grind it off, sand it off, use a chemical stripper. Get down to bare, bright metal. If you’re trying to remove rust spots from car paint, doing it carefully now will protect the rest of the finish. Then, you must immediately apply a primer designed for bare metal to prevent flash rusting.
After all sanding, the surface is covered in invisible dust and oils from your skin. You must make the surface surgically clean. Wipe the entire area down with a clean microfiber towel and isopropyl alcohol. Change towels frequently. Do this right before you plan to spray. Do not touch the prepped surface with your bare hands.
Finally, masking. Use a high-quality automotive crepe tape, like the green or blue kind. It has a clean edge and removes without leaving residue. For large areas, use proper masking paper or plastic sheeting. Cheap painter’s plastic is too static-prone and attracts dust. Secure everything tightly, but run your finger along the edge of the tape to ensure it’s sealed. Any gap, and overspray will creep underneath and ruin your line.
Choosing Your Weapons: Not All Spray Paint is the Same
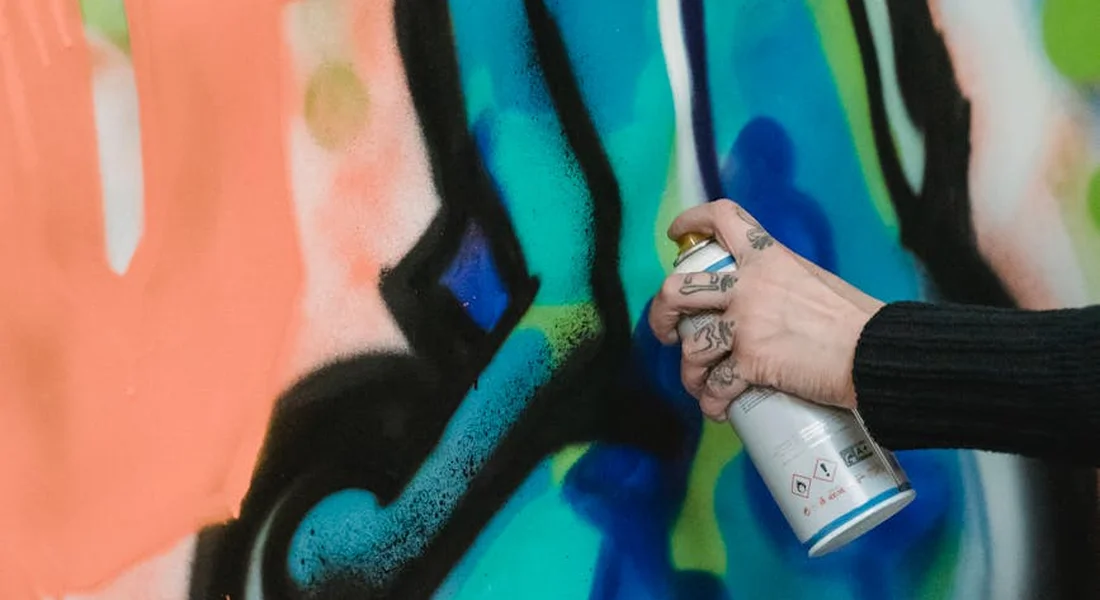
Walk down the spray paint aisle and you will see a wall of Rust-Oleum cans. They are not all the same. For your car, you are choosing between a few main lines. Getting this wrong is how projects fail. For automotive work, you want to use automotive-grade spray paint that is built to last. Choosing the right one makes the difference between a durable finish and a flaky, mismatched coat.
The standard Universal line is for everything from mailboxes to lawn furniture. The paint is thicker and designed to stick to anything with minimal prep. It dries with a noticeable orange-peel texture. This is fine for a truck frame. It is a bad choice for a smooth body panel.
The Professional line is a step up. It often has a better spray nozzle for a finer mist. The paint flows out better for a smoother finish. I have used their black for repainting faded plastic trim with decent results. It is more forgiving than the universal paint.
Your best bet in the can is the Rust-Oleum Automotive line. This is formulated specifically for metal car surfaces. It has better UV resistance and color retention. The finish is designed to look closer to factory paint. If you are looking for Rust-Oleum car paint colors for a specific touch-up, this line has your best chance of a decent match, though it will never be perfect.
Primer is not optional if you want paint to last. Its job is to stick to the bare metal and give the color coat something to grip. Yes, you can use Rust-Oleum primer. Should you? For a DIY job on a budget, it is the logical companion. Just make sure you use the same “family.” Use Rust-Oleum automotive primer under their automotive color. Mixing paint brands is asking for a chemical reaction that wrinkles your fresh paint. For proper primer application to bare metal, apply thin, even coats and follow the can’s drying times. That careful primer application helps the color coat lay down smoothly.
This brings us to the critical question. What clear coat goes with Rust-Oleum? The safest answer is the clear coat from the same product line. A Rust-Oleum Automotive color coat should be topped with Rust-Oleum Automotive clear coat. Even then, you must let the color coat cure fully, not just dry, before applying clear. If you spray a professional urethane clear from a gun over a Rust-Oleum can color, you risk the solvents in the clear coat melting and wrinkling the base coat. It happens fast.
Product Tier List
Think of this as matching the tool to the job. Your goal defines your choice.
Budget/Utility Tier: Standard Rust-Oleum
This is for parts you feel, not see. The frame on my 1995 Miata was coated with standard Rust-Oleum. Underbody components, trailer hitches, and inside wheel wells are perfect candidates. It provides solid corrosion protection at a low cost. Do not use it on exterior body panels.
Enthusiast/Body Panel Tier: Rust-Oleum Automotive or Professional
This is for the DIYer painting a hood, a fender, or an entire project car. The better flow and finish are worth the slight extra cost. When I painted the brake calipers on my Tesla, I used a high-temperature paint, but the application principle is the same. You need a paint that lays down smooth and can be wet-sanded and polished. This tier can get you there with immense patience. This is where your search for rustoleum car paint brands and rustoleum car paint near me makes sense.
Show Car Tier: Not Applicable
Let us be clear. No spray can paint, not even the best automotive line, belongs on a show car. Professional automotive paint, sprayed from a gun with a compressor, is in a different league. It has higher solid content, more durable resins, and is designed for professional polishing and decades of exposure. A rattle can paint, at its absolute best, will look like a decent 10-foot paint job. A professional basecoat/clearcoat will look deep and liquid. They are different tools for entirely different goals.
The Art of the Aerosol Can: Technique is Everything
A spray can is a one-pound paint gun. You control the air pressure by warming the can and your distance by your arm. Master this, or you get runs and a sandy texture. When you use aerosol spray paint, keep the can moving in smooth, light passes to avoid drips. Practice on a scrap surface first.
First, warm the can. Place it in a bucket of warm (not hot) water for five minutes. This increases the pressure inside slightly and helps the paint atomize into a finer mist. Shake it for a full two minutes after. You will hear the mixing ball rattling freely.
The technique is all in the pass. Start your spray off the panel, move across with a steady, even motion, and stop spraying after you pass the edge. Keep the can about 8 to 10 inches away. Each pass should overlap the previous one by 50 percent. This is called a “50% overlap” and it is the only way to get an even coat without stripes.
You never apply a wet coat first. You use a “tack coat.” This is a very light, dusty first layer. It barely covers. Let it flash off for a few minutes. Then apply your first true wet coat. It will grip onto that tack coat instead of sliding on bare metal and sagging. You might do three or four of these wet coats, with proper flash time between each.
The environment is your silent partner. Paint between 70°F and 85°F in low humidity. High humidity makes paint blush, leaving a milky haze in the finish. Do it in a clean, wind-free space. A dusty garage will land specks in your paint. I wait until evening when the wind dies down and have a spray booth made from plastic sheeting.
How many cans to paint a car? For my Ford F-150, a full truck, you are looking at a massive job. A more realistic example is my Mazda Miata. A small roadster like that might need 8-12 cans for color, plus primer and clear. If you’re planning this project, you’ll want to estimate paint quantity car for your model. That helps you budget and avoid buying too little or too much. A good formula: one 12-oz can covers about 10-12 square feet. Measure your car. A door might be 10 sq ft. A hood might be 15-20 sq ft. Do the math and then buy an extra can. Running out is a disaster.
This is the biggest point beginners miss. Dry to the touch is not cured. Paint may feel dry in an hour. You can handle it in a day. But it takes weeks, sometimes a month, for all the solvents to fully evaporate and for the paint to reach its maximum hardness. If you polish or wax it too soon, you will seal those solvents in and create a soft, gummy finish forever. Wait at least 30 days before any abrasive polish or protective wax.
People ask about rustoleum car paint sprayer pressure, hoping to use a can with a gun. You cannot. The pressure is fixed inside the can. A real spray gun lets you adjust air pressure, fluid flow, and fan pattern. It is the difference between a garden hose and a firefighter’s nozzle. The control is not comparable.
And can i use rustoleum clear coat on my car? You can, following the rules above. Use it over a compatible Rust-Oleum color that has fully flashed. Apply it in multiple thin tack coats, then two or three wet coats. Sand and polish it after a full month of cure time for the best possible result from a can.
Protecting and Living With Your DIY Paint Job
Your paint is dry to the touch, but the real work is just beginning. The paint and clear coat from a Rust-Oleum car paint job needs time to fully harden, or cure. Think of it like concrete. It sets up quickly, but it takes weeks to reach full strength.
Aftercare: The Critical Cure Time
Do not rush this. For the first month, treat the new paint like wet glass. I parked my Miata project in the garage and did not touch it, even for DIY paint touch-ups.
- Do not wash it for at least 30 days. Dust it lightly with a clean, soft duster if you must.
- Do not wax or seal it for a full 60 days. Wax traps solvents trying to escape from the curing paint, which can cause cloudiness or softening.
- Keep it out of direct, blistering sun if possible during this period. Park in the shade.
- Avoid tree sap, bird droppings, and bug splatter. If something lands on it, clean it off immediately with a quick detailer and a plush microfiber, using zero pressure. Let the fluid do the work.
Managing Expectations on Durability
This is not factory paint. A DIY rattle-can finish is more delicate. You must be its guardian.
Gasoline spills will stain and likely soften the finish permanently. Be extra careful at the pump. Bird droppings are acidic and will etch into the soft clear coat in hours, not days. Road salt is the enemy. On my F-150 Workhorse, a professional coating laughs at salt. A Rust-Oleum finish will need frequent, gentle rinses in winter to prevent dulling and microscopic corrosion.
Your long-term maintenance tips are simple: be gentle, be proactive, and never let contaminants bake on the surface.
How to Perform Light Paint Correction
After 90 days, you might see light scratches or swirls from careless dusting. Correcting this is a high-risk operation. The paint film is thin.
- Wash the panel thoroughly with a lubricating shampoo and the two-bucket method.
- Use the absolute least aggressive method first. A fine finishing polish and a soft foam pad on a slow-speed polisher is your only safe starting point.
- Test a small, inconspicuous area first. If the pad instantly turns the color of your paint, you have cut through the clear coat. Stop immediately.
- Apply almost no pressure. Let the polish and pad do the work. Your goal is to gently refine the surface, not cut defects out.
- After polishing, you can finally apply a synthetic sealant (preferred) or a carnauba wax. This adds a sacrificial layer of protection.
When to Consider a Professional Respray
I have layered rattle-can over rattle-can on old tools. On a car, it rarely ends well. Consider a pro respray when:
- The existing DIY job is failing badly-cracking, peeling, or severe fading.
- You discover deeper rust you simply cannot grind out completely.
- You want a show-quality finish or a perfect color match for a modern vehicle.
- The car has significant value, like my 911 Garage Queen, where a DIY finish would hurt its worth.
Laying another DIY layer over a failing job just buries the problem. It will fail again, faster. A professional can strip it properly, apply primer, basecoat, and a durable, hard clear coat designed for automotive abuse. Knowing when to call a pro saves you money, time, and heartache.
Where Rust-Oleum Fits in Your Detailing Toolkit
For a small chip or a hidden bracket, a Rust-Oleum touch-up can be a perfectly acceptable, budget-friendly fix if you prep the metal correctly and top it with a proper automotive clear coat. For any panel larger than a coin, or for any exterior finish you want to last, investing in automotive-grade spray paint is non-negotiable for a professional, durable result.
Skip the meticulous prep or the dedicated clear coat, and you’ll watch your hard work peel and fade long before the next season.
Relevant Resources for Further Exploration
- Automotive Spray Paints | Rust-Oleum
- Rust-Oleum Automotive Brand Page
- Rust-Oleum Automotive – Automotive Paint – The Home Depot