How Do You Remove Scratches from Your Car’s Dashboard and Interior Trim?
That scratch on your dashboard isn’t just a mark; it’s a constant reminder that your car’s interior feels worn. You want it gone without causing more damage.
I’ll walk you through the same process I use on my own vehicles, from my kid-hauler Odyssey to my black BMW swirl magnet, covering identifying the type of scratch, choosing the right fillers or polishes, the step-by-step repair method, and how to protect the surface afterward.
Use the wrong product or technique, and you can cloud the plastic or set the scratch in permanently.
Understanding Your Interior Plastic: Scratch Types and Surface Finishes
First, you need to know what kind of scratch you are dealing with. A surface scuff is a light mark that sits on top of the plastic. It might look white or hazy. You cannot feel it with your fingernail. A deep gouge is a trench. You can catch your fingernail in it. It often shows the plastic’s true color underneath the surface finish.
Scratches come from daily life. Keys sliding off the console, dog nails on the door panel, a vacuum hose hitting the kickplate. Even a rough microfiber towel can leave fine marks. I have seen it all in my Honda Odyssey, the “Kid Hauler.” Crayons, toy cars, and seatbelt buckles leave a gallery of defects on its grey plastic. If you’re curious about how to fix scratches on car interior surfaces, stay tuned for simple, practical tips. The next steps will walk you through quick fixes and lasting solutions.
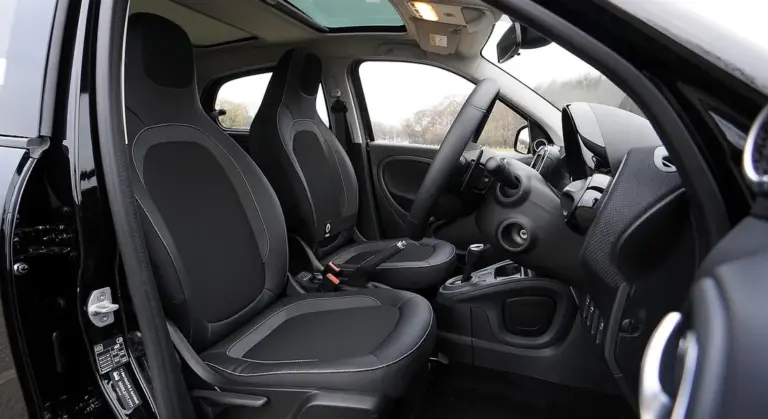
Different plastics hide and show scratches in unique ways. Hard, glossy plastic in older cars shows every single swirl. Modern soft-touch vinyl, like the dash in my Tesla Model 3, has a velvety feel. It hides light scuffs well but is easily damaged by abrasion. A textured plastic, like the lower door trim, is more forgiving. It masks scratches within its pattern.
People often ask, “can you buff scratches out of plastic?” The answer is yes, for many surface-level marks. Another common search is “remove interior scratches from Mazda CX9.” The process is the same for any make or model. Toyota, Ford, BMW, it does not matter. The principles of plastic care are universal, whether you’re dealing with interior trim or plastic car bumpers.
How to Tell if a Scratch Can Be Buffed Out
Use the fingernail test. Gently drag your fingernail across the scratch. If it snags or catches, the scratch is too deep to remove completely. You can only improve its appearance. If your nail glides over it smoothly, the defect is likely in the top layer and can be corrected.
You are only fixing the finish, not the plastic itself. Think of it like a scratch on your sunglasses. You can polish the lens coating, but if the scratch goes into the glass, it is permanent. For plastic, you work on the clear coat or the pigmented surface layer. Structural damage, a real gouge, is there to stay.
The Two Main Plastic Finishes: Hard vs. Soft-Touch
Hard plastic is common in older vehicles. It feels solid and often has a shiny, glossy finish. It is durable but shows swirls and scratches very easily. Buffing it can yield great results.
Soft-touch plastic is the modern standard. It has a rubbery, matte coating applied over hard plastic for a premium feel. This coating is thin and delicate. Aggressive buffing can wear right through the soft-touch layer, leaving a shiny, patchy spot that cannot be fixed. My Tesla’s dashboard is a perfect example. You must be gentle.
The Detailer’s Arsenal: Tools and Chemicals for Plastic Scratch Removal
This is not a job for heavy power tools. Precision and control win here. You need the right gear to do it safely and effectively. Before you even think about polishing, you must clean the surface properly. This answers the common question, “what should I use to clean my car’s plastic surfaces?” for this specific prep work. Using the best cleaning methods and tools is essential to ensure that the surface is primed for polishing.
Essential Tools and Safety Gear
Here is your kit. Get these items together before you start.
- Polisher: A low-speed, dual-action polisher with a short throw (8mm or less). It offers control. I use one for all my interior correction.
- Pads: 3-inch foam polishing pads. Use soft, fine foam. Do not use wool pads. They generate too much heat for plastic.
- Microfiber Towels: Plush, 300 GSM or higher towels for wiping. They must be clean.
- Safety Gear: Nitrile gloves to protect your hands from chemicals. Safety glasses to shield your eyes from splatter or dust.
Do not use a rotary polisher or heavy cutting compound meant for car paint. They create too much friction heat. They can melt, warp, or burn through interior plastics in a heartbeat. The goal is to coolly refine the surface, not attack it.
Choosing the Right Plastic Scratch Remover and Cleaner
You have two main types of products for scratch removal. A glaze is a filler. It contains oils and light pigments that sink into microscopic scratches to hide them. It does not remove material. A polish is a very mild abrasive. It physically levels the top layer to remove the scratch. For deep color restoration on hard plastic, a polish is needed. For scuffs on soft-touch vinyl, a glaze is often safer. This is why choosing the right scratch remover product is crucial.
For cleaning, always use a pH-neutral cleaner (around 7.0). Alkaline or acidic cleaners can dry out and fade plastic over time, making it brittle. A neutral cleaner safely lifts dirt without damaging the material. This is your essential first step.
Let’s talk about home remedies. Many people ask about toothpaste. Toothpaste is a mild abrasive. It can work on hard plastic in a pinch, but it often leaves a hazy residue on soft-touch surfaces. It is inconsistent. A Magic Eraser is even worse. It is melamine foam, which acts like ultra-fine sandpaper. Using a Magic Eraser on your dashboard is like scrubbing it with micro-sandpaper. It will permanently dull the finish. Stick with products made for automotive interiors.
The Step-by-Step Protocol: How to Buff Out Scratches on Plastic Car Interior
This is not a suggestion. This is the method. I learned it the hard way, by making a few dashboards look worse before I made them look better. You must follow these steps in order. The goal is to level the plastic around the scratch, not grind dirt into it or smear oils around. This method also applies to repairing scratches on dashboards and other interior trim surfaces.
The Order of Operations: Your Removal Checklist
Think of this as your flight checklist before takeoff. Miss one item, and the result is a mess. Skipping a step is how you turn a simple scratch into a permanent, cloudy blemish.
- Vacuum & Dry Brush
- Deep Clean with pH-neutral Spray
- Decontaminate with Isopropyl Alcohol Wipe
- Inspect Under Cross-Lighting
- Apply Scratch Remover
- Buff with Polisher
- Final Wipe and Protect
Skipping step three, the alcohol wipe, is the most common and costly mistake I see. Your dashboard spray, your skin oils, any previous product leaves a film. That film prevents the scratch remover from making true contact with the plastic. The polish will just slide over the scratch, doing nothing.
Step 1: The Critical Deep Clean
You are not just cleaning for looks. You are cleaning for surgery. Every single speck of dust, sand, or grit in a crevice near your work area is a threat. When that polisher spins, it can pull that debris onto your pad and turn it into sandpaper.
Start with a dry, soft-bristle detailing brush. Gently agitate the vents, the seams where the dash meets the windshield, the textured grooves on the door panel. Listen for the soft *shush-shush* sound of clean bristles on plastic. Hear a gritty scraping sound? There’s still dirt. Vacuum all the loosened debris away.
Next, spray a pH-neutral interior cleaner onto a fresh microfiber towel-never directly onto the surface, to avoid overspray into electronics. Wipe the entire area down thoroughly. This lifts the final layer of grime. Your surface should feel clean to the touch, not slick or oily.
Step 2: Apply, Buff, and Inspect
Now we answer the core question: how do you get scratches out of plastic car interior? With precision, not force. When it comes to trim—such as plastic door panels and dashboard accents—the same careful approach helps you remove scratches from car trim.
Take your dedicated plastic polish or mild abrasive compound. Apply a dime-sized amount to a clean, soft foam polishing pad attached to your dual-action polisher. Spread it over a 2×2 foot section at low speed before turning the polisher on.
Use a slow, methodical arm speed. Let the machine and the product do the work. You will see the product begin to clear, or “flash,” turning from a paste to a near-transparent film. This is the plastic being leveled. After about three to four passes, stop.
The truth is in the wipe, not the buff. Take a clean, short-pile microfiber towel and wipe the residue away. Immediately grab your LED flashlight. Hold it low, parallel to the surface, and look from where the driver sits. This cross-lighting makes scratches jump out as white lines. Did they diminish or disappear? If not, repeat the process once more. For a deep gouge on a door panel, you may need a few more focused sessions, but patience always beats aggression here.
Detailer’s Pro-Tip: Technique Tweaks for Flawless Results
Anyone can follow steps. A detailer knows how to feel them. These nuances come from years of correcting the piano black trim on my “Swirl Magnet” BMW and being extra careful around the Alcantara in the “Garage Queen” Porsche.
Pressure and Pad Speed: The Gentle Touch
Interior plastic is not car paint. It is softer and more heat-sensitive. Your goal is to generate just enough friction to melt the polish and smooth the plastic, not melt the plastic itself.
Set your polisher to a speed setting of 2 or 3 (on a scale of 1 to 6). You want a gentle, steady rotation. For pressure, use the weight of the machine itself-about 5 to 10 pounds. I rest my hand on the polisher’s head and let my arm relax. If you press down, you create excessive heat and risk burning a dull spot into the trim. If you see any hazing or the plastic feels unusually warm, you are going too fast or pressing too hard.
Lighting Angles and the “Disappearing” Scratch
Overhead garage lights are liars. They flood the surface with light, hiding defects. You must see the plastic from the same angle you see it while driving.
Your flashlight is your most important tool, more than the polisher itself. After each wipe, turn off the main lights. Crouch in the driver’s seat. Hold your flashlight at a shallow, raking angle across the dashboard or door panel. Every scratch will cast a tiny shadow, revealing itself as a white line. As you buff correctly, you will watch these lines fade and vanish under that light. When they are gone under your flashlight’s beam, they will be gone to your eye in the sun.
Keeping It Scratch-Free: Prevention and Long-Term Care
Fixing a scratch feels good, but the real win is keeping it from happening again. Think of it like this: you just spent time carefully restoring that plastic. Now, your goal is to protect that work. If you’re asking “how can I make my scratched plastic look new,” the honest answer has two parts: a careful repair followed by consistent, gentle protection. The repair gets you back to zero. The daily habits keep you there. My Honda Odyssey, the ultimate kid hauler, taught me this. Without a system, it would be a scratched and sticky mess within a week.
Daily Habits to Protect Dashboards and Trim
Your hands and the things you carry are the main threats. Changing a few simple habits makes all the difference.
- Use a sunshade, every single time you park. This isn’t just about heat. UV rays are what turn soft, flexible plastic into a brittle, chalky shell that scratches if you look at it wrong. A good sunshade is cheap insurance.
- Keep hard objects off the dash and door panels. I see it all the time: keys, sunglasses, tools, even pet carriers tossed onto the passenger seat and sliding into the trim. Designate a cup holder or the center console bin for your keys. Put the pet carrier on the floor.
- Store a clean microfiber towel in your door pocket. When dust builds up, you can give the dash a quick, safe wipe. Using your sleeve, a paper towel, or a rough cloth is like using fine-grit sandpaper over time. A dedicated towel prevents that.
The goal is to never let anything harder than a clean microfiber touch your interior surfaces. It sounds simple, but this one rule prevents 90% of new scratches.
Choosing a Protectant After Scratch Removal
Once the surface is clean and repaired, you need to shield it. A good protectant does more than just shine; it adds a sacrificial layer and fights the sun.
First, decide on the look. Do you want a matte, OEM-style finish or a glossy, “wet” look? For most modern cars with soft-touch or grained plastic, a matte protectant is best. It leaves no shine, just a rich, natural color. Glossy protectants can look great on older, harder plastics but often feel slick and attract more dust. Always test any protectant in a small, hidden area first to make sure you like the finish and it doesn’t react poorly.
Your main weapon should be a product with UV inhibitors. Sunlight is the enemy of color and flexibility. A monthly application with a UV-blocking spray or wipe keeps the plastic nourished and resistant to fading and cracking. On my black BMW’s interior, I use a matte UV protectant every 4-6 weeks. It keeps the plastics looking deep black and never sticky.
So, when you search for how to remove interior plastic scratches, remember the final step. That same care extends to repair scratches on interior plastic trim. Protecting the surface after the fix helps it last and resist future damage. Applying a quality UV protectant is what locks in your repair, defends against the sun, and makes the restored surface last. It’s the difference between a temporary fix and a long-term solution.
Getting Your Interior Back to Showroom Condition
Figuring out how deep that scratch really is will save you time and materials. Getting it right means a finish that looks untouched and stays protected for years.
Ignore this step, and you risk letting a deep scratch trap grime and worsen over time, forcing a more costly repair later.
Further Reading & Sources
- r/Lexus on Reddit: How do I remove scratches on my dashboard?
- How to Remove a Scuff Mark or Scratch From Your Car Dashboard
- How do I fix scratches on the interior plastic/dashboard? – Nissan 370Z Forum
- How to Remove Scratches from Car Interior Dashboard
- Interior dashboard scratches | Auto Geek Online Auto Detailing Forum
Max is an automotive enthusiast having worked as a car mechanical and in interior detailing service for over 25 years. He is very experienced in giving your old car, a new fresh vibe. He has detailed many cars and removed very tough smells and stains from all kinds of cars and models, always ensuring that his work and advice helps his customers. He brings his first hand experience to his blog AutoDetailPedia, to help readers breath new life into their car interiors.