How Do You Remove Mold and Mildew from Car Seats and Carpet?
That faint musty smell isn’t just annoying; it’s a sign of a problem that can damage your car’s interior and your health. I get it, the moment you spot those fuzzy patches or catch that damp odor, you want it gone.
This guide will walk you through identifying mold versus mildew, the critical safety gear you need, step-by-step cleaning for cloth upholstery, genuine leather, vinyl, and carpet, and how to stop it from ever coming back.
Ignore proper removal, and you risk permanent stains, ruined materials, and letting a health hazard grow in your daily driver.
Key Takeaways: The Battle Plan
Mold in your car is not just dirt. It is a living colony. You have two jobs. First, you must kill the active spores to stop the growth. Second, you must lift the stains and organic residue they leave behind. This is a health job for you and a preservation job for your car’s interior. To fully reclaim the cabin, you may need to remove mold fungus from car interiors. This completes the cleanup and helps prevent future growth.
You cannot use the same chemical on every surface and expect a good result. Treating the delicate, dyed leather in my BMW is nothing like attacking mold in the thick carpet of my F-150. Each material needs a specific, thoughtful attack plan to clean it without causing permanent damage.
If you remember one thing, let it be this. Complete, bone-dry drying is the only way to win this fight. Mold thrives on moisture. If you leave any dampness behind, the mold will return. It always returns. Rushing the drying step guarantees your hard work was for nothing.
On a scale of washing your car to polishing out deep scratches, this is a 7 out of 10. It requires patience, the right tools, and a genuine respect for the fungi. You are not just wiping a surface. You are conducting a small-scale remediation project.
Your Arsenal: Tools & Chemicals for the Fight
Do not start this job halfway prepared. Gathering everything first makes the process smoother and safer. I learned this the hard way on my Honda Odyssey after a milk spill went unnoticed. Here is what you need.
Your Protection (Non-Negotiable)
- N95 or P100 Respirator: You are stirring up microscopic spores. Inhaling them can cause serious respiratory issues. A dust mask is not enough. This is your most important tool.
- Nitrile Gloves: Protect your skin from both mold and the cleaning chemicals.
- Eye Protection: Safety glasses. Splashes happen.
Your Cleaning Tools
- A Vacuum with a Upholstery Tool: A strong shop vac is ideal. You need powerful suction to pull up loose spores and debris before any liquid touches the surface.
- An Extractor or Wet/Dry Shop Vac: This is critical for carpets and fabric seats. It injects cleaning solution and, more importantly, powerfully sucks the dirty water back out. If you do not own one, you can rent a compact carpet cleaner.
- Soft-Bristle Detailing Brushes: These agitate cleaner into fabric fibers and stitch lines without being abrasive.
- Microfiber Towels: Have two types. Use thicker 350-500 GSM towels for scrubbing and applying solution. Use softer, lower-pile 300 GSM towels for gentle blotting and drying.
- Plastic Scraper or Old Credit Card: For carefully lifting away any thick, matted growth on surfaces before cleaning. Be gentle.
Your Chemicals (Choose by Material)
- For Leather & Vinyl: A pH-Neutral Leather Cleaner. The dyes and top-coats on modern leather are sensitive. An acidic or alkaline cleaner can strip them, leaving permanent discoloration. I use a dedicated pH-balanced cleaner on my BMW’s seats and my Tesla’s vegan leather.
- For Fabric & Carpet: Distilled White Vinegar Solution. Mix it 1:1 with water in a spray bottle. The acidity kills many mold types and is safe for colorfast fabrics. Always test in a hidden area first. For stubborn stains, a dedicated fabric cleaner or diluted all-purpose cleaner (10:1) can follow the vinegar treatment.
- Enzyme-Based Odor Eliminator: Mold leaves a musty smell. After cleaning, an enzyme spray breaks down the remaining organic odor molecules at a chemical level. It is more effective than masking scents.
- Isopropyl Alcohol (70%): A final wipe-down with IPA on hard, non-porous surfaces like plastic trim kills residual surface germs and helps remove any final vinegar smell. Do not use it on leather or unfinished plastics.
Your Drying & Environmental Tools
This is what separates a lasting fix from a temporary one.
- Dehumidifier: The single best tool for this job. Run it inside the car with the windows up. It pulls moisture directly from the air and the materials.
- Powerful Fans: Create constant airflow across all treated surfaces. Use at least two, positioning one to blow air in and another to pull it out.
- Sunshine & Warm, Dry Air: If weather permits, park the car in direct sun with all windows down. The heat and UV are powerful natural aids. Combine this with the fans for the best result.
The Protocol: Your Order of Operations
Do not skip steps. This order exists for your safety and to prevent spreading spores. I follow this exact sequence in my own shop.
1. Safety & Assessment
Mold spores are airborne irritants. You must protect yourself first.
- Gear Up: Wear an N95 mask, nitrile gloves, and safety glasses. Old clothes you can wash immediately are a good idea.
- Open all doors and windows. Work outside if possible. Good airflow is non-negotiable.
- With a flashlight, inspect every surface. Look under floor mats, in seat crevices, along door seals, and in the trunk spare tire well.
- Take pictures with your phone. This documents the issue for insurance or simply to track your progress.
2. Containment & Dry Removal
Your goal here is to remove the dry, loose spores without getting anything wet and making a bigger problem.
- Keep the area ventilated. A fan blowing out a window helps.
- Use a vacuum with a true HEPA filter. A shop vac with a HEPA bag works. Your standard home vacuum will blow spores right through the exhaust.
- Vacuum every affected and adjacent surface thoroughly. Go slow. Use a soft brush attachment on fabrics and leather to avoid grinding spores in.
- Remove and bag any severely contaminated, disposable items (like a ruined paper filter).
3. Material-Specific Attack
Now you clean. Different materials need different tactics. Always test any cleaner in a hidden spot first.
For Fabric and Cloth Seats/Carpet:
This is the most common battleground. My Odyssey’s fabric seats have seen this fight.
- Mix a cleaning solution. I use a dedicated fabric cleaner or a solution of distilled white vinegar and water (1:1). Vinegar kills mold naturally. For stubborn cases, an enzyme-based cleaner breaks down organic matter.
- Apply the solution lightly with a spray bottle. Do not soak the fabric. You want it damp, not wet.
- Agitate with a soft-bristled brush (a detailing or upholstery brush is perfect). This loosens the mold from the fibers.
- Extract, extract, extract. Use a wet/dry vacuum or a dedicated carpet extractor to pull the dirty moisture out. This is the key. If you leave moisture behind, the mold will return.
- Repeat the application and extraction with clean water only to rinse.
For Leather and “Vegan Leather” (Synthetic):
Leather is more delicate. My BMW and Porsche require a gentle hand.
- Use a pH-balanced leather cleaner. Avoid household soaps or all-purpose cleaners, which can dry and crack the hide.
- Apply the cleaner to a soft microfiber cloth, not directly to the seat. Wipe the affected areas with light pressure.
- For mold in stitching or pores, use a soft detailing brush (like a horsehair brush) with the cleaner.
- Wipe clean with a separate, damp microfiber cloth to remove any cleaner residue.
- Dry immediately and completely with a third, dry microfiber towel. Letting water sit on leather is bad.
For Hard Plastic and Vinyl:
These are the easiest. An interior cleaner or diluted isopropyl alcohol (IPA) solution (10-15%) on a microfiber cloth will usually wipe it away. Follow with a dry towel.
4. The Nuclear Option (If Needed)
Sometimes you kill every spore you can see, but the deep, musty smell remains in the foam or vents. That calls for an ozone generator.
This is a serious tool with serious safety rules.
- Ozone generators are for odor removal only, after all physical cleaning is done.
- Run it only in a completely empty car (no people, no pets). Seal the car up with the generator inside on a timer.
- After treatment, ventilate the car thoroughly for at least 30 minutes before entering. Ozone is a lung irritant.
- It worked on the sour milk smell in my Odyssey. It is powerful, but it is the last step, not the first.
5. Verification & Protection
The job is not done until everything is bone dry and protected.
- After cleaning, air out the car completely. Use fans, a dehumidifier, or climate control on a dry setting.
- Check for dampness by feel. The foam under fabric is the last to dry. This can take a full day.
- Once 100% dry, apply protectants. Use a fabric guard on cloth seats and carpet. Condition cleaned leather. This creates a barrier that makes it harder for mold to take hold next time.
- Monitor the area for a few days. If the smell or spots return, you missed a moisture source.
Why Mold Moves into Your Car (And How to Spot It)
Mold is not picky. It is a simple organism. It needs just three things to move in: food, moisture, and a lack of sunlight.
Your car provides a feast. Think of the dirt, skin cells, food crumbs, and spilled drinks. That is the food. A leaking sunroof drain, wet floor mats, or just high humidity provides the moisture. The dark interior, especially under seats, is the perfect shady spot.
Think of my Honda Odyssey after a spilled juice box was forgotten for a week in summer heat. That is a mold paradise. Warm, damp, and full of sugar. It happened once. Never again.
How to Spot an Invasion
- The Smell: A musty, earthy odor is often the first clue. You notice it when you first open the door on a damp day.
- Sight: Look for fuzzy or slimy spots. Colors vary: black, green, white, or even pink. It often starts in patterns or clusters.
- Feel: You might feel increased stuffiness or respiratory irritation when driving. Your allergies may act up.
Your Questions, Answered Here
Is car mold dangerous? For most people, it causes allergy-like symptoms. For those with asthma or compromised immune systems, it can be a serious trigger. You should not ignore it.
What else smells like mold in a car? A clogged air conditioning evaporator drain is the main culprit. Stagnant water in the system creates a similar sour, musty smell that blows from the vents. This requires a different fix, like an A/C disinfectant treatment.
High-Risk Zones to Check
- Under Floor Mats: Water gets trapped here and never dries. Pull your mats out regularly.
- A/C Evaporator Cores: Dark, cold, and often wet. The source of “dirty sock” smells.
- Seat Foam: Spills seep down and fester out of sight. The smell comes from deep within.
- Trunk Spare Tire Wells: A leaky seal or a wet spare tire can create a hidden pool of moisture.
Gear Up: Safety First, Always
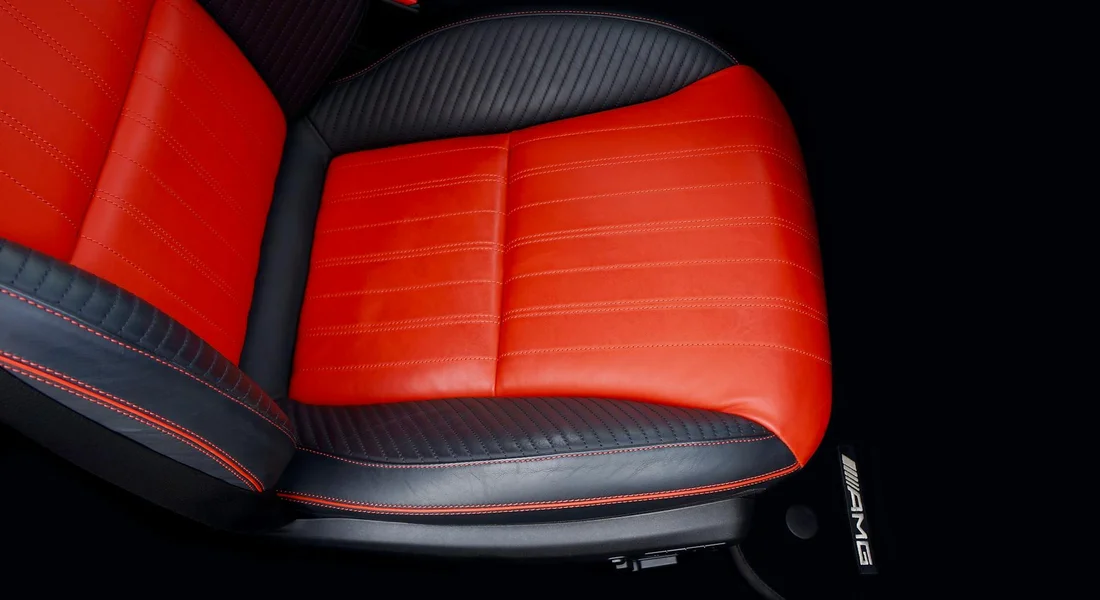
This is not a regular clean. Those black or green spots mean live spores, and they are airborne irritants and allergens. If you skip safety, you risk your health before you even start cleaning.
You need a respirator, not a dust mask. A cheap dust mask lets tiny spores right through. A proper respirator with P100 filters seals to your face and stops them. I wear mine for every mold job.
Gloves and eye protection are mandatory. I use long-cuff nitrile gloves. They keep chemicals and spores off your skin. Safety glasses shield your eyes from sprayback during scrubbing.
Command full ventilation. Work outside if you can. In a garage, open all doors and windows. Run a fan pointing outward to pull contaminated air away. My garage fan is always humming on jobs like this.
Contain the mess immediately. Bag heavily infested, disposable items like a molded paper floor mat. Seal the bag before you move it. This simple step stops spores from spreading to your garage or the car’s clean areas.
How to Clean Mold from Fabric and Cloth Car Seats
This is the most common battleground. The fabric in seats, like the grey cloth in my “Kid Hauler” Odyssey, soaks up moisture and grows mold quietly. You must approach this slowly and methodically, or you’ll just spread the problem.
Testing for Colorfastness
This hidden step saves you from dye disaster. Modern car fabrics can bleed color surprisingly easily. Pick a hidden spot, like under the seat bolster or behind a headrest, and apply a dab of your chosen cleaner. This is especially important for clean cloth fabric car seats, where dyes can migrate. Always test on a hidden spot before proceeding. Blot it with a white microfiber towel after a minute. If you see any color transfer, you need a milder cleaner or much less agitation.
The Vacuum & Brush-Out
Never add liquid first. Use a vacuum with a soft brush attachment. Gently brush the moldy area to loosen dry spores and lift the fibers. Vacuuming dry material first prevents you from grinding a wet, muddy paste into the seat fabric later. Do this thoroughly until no more loose debris comes up.
Choosing Your Weapon: Cleaner Showdown
Your cleaner choice depends on the severity. Here is my honest take from cleaning hundreds of interiors.
- The Vinegar Solution: A 50/50 mix of white vinegar and water. Its acetic acid kills many molds and it’s natural. But the smell can linger, and it can over-wet fabric. For “car seat mold removal vinegar,” it’s a decent first try on light surface mold. You must rinse the area with clean water after.
- Isopropyl Alcohol: Great for wiping down non-porous surfaces like plastic trim or seat belts. It disinfects and evaporates fast. For fabric seats, alcohol doesn’t penetrate well, so I never rely on it for a deep clean. Use it for final wipe-downs on hard surfaces.
- Commercial Enzyme Cleaners: My personal go-to for biological messes. These cleaners use enzymes to break down the organic matter mold feeds on. They “eat” the source of the odor. I used one on a soured milk spill in the Odyssey. It removed the musty smell for good.
- Dedicated Fabric Mold Removers: These are the heavy artillery. They contain powerful fungicides. Follow the bottle’s instructions exactly. Most require good rinsing. Reserve these for serious, established mold colonies where other options have failed.
The Scrubbing & Extraction Dance
Mist your cleaner onto the fabric. Do not soak it. Use a soft-bristled detail brush or a gentle horsehair brush to agitate. Work in small sections. Your goal is to foam the cleaner at the fiber tips, not flood the seat cushion underneath. Then, immediately use an extractor or a shop-vac in wet mode to pull the dirty solution out. This “inject and extract” dance is key. You may need two or three passes.
The Dry-Down
This step wins the war. Mold returns if any dampness remains. Use portable fans to blow air across the seat. A dehumidifier in a closed garage works wonders. To check for hidden moisture in the seat foam, press your hand firmly on the fabric and hold it there for ten seconds. If the spot feels cooler or damp when you lift your hand, it’s not dry. In my experience, proper drying can take a full day. Be patient.
How to Clean Mildew from Leather and “Vegan” Leather Seats
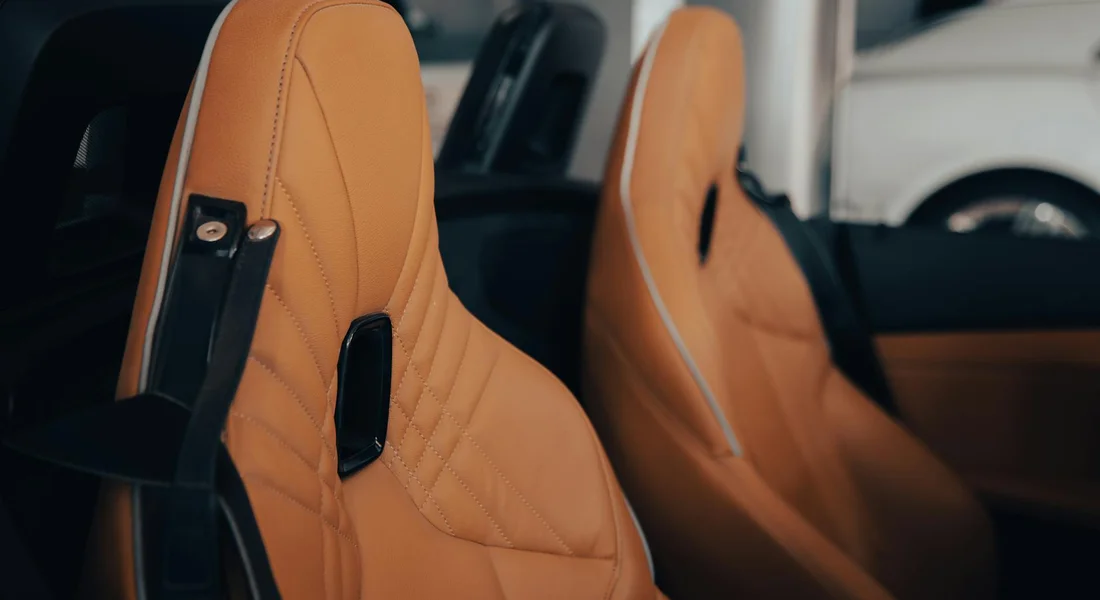
Leather is a different beast. The mold you see is almost always growing on the surface coating, not the hide itself. Your goal is to kill and remove it without stripping that protective top coat. Harsh cleaners will ruin it, leaving the leather dry and cracked.
I learned this the hard way on my black BMW’s seats. Using the wrong product left a dull, stiff patch. Now I follow a gentler, more effective process.
The Initial Wipe-Down
Start with a pH-balanced leather cleaner. Avoid all-purpose interior cleaners here. They are often too alkaline. Spray the cleaner onto a soft, damp microfiber towel, not directly on the seat. Gently wipe the affected area to lift away the surface mold. You will see the grime transfer to your towel. This is a key step in cleaning and maintaining leather car seats. With regular care, your seats will stay supple and look newer for longer.
Work in small sections and rinse your towel often to avoid just smearing the spores around.
For Stubborn Stains: The Diluted Alcohol Pass
If a shadow or smell remains, you need to disinfect. Isopropyl alcohol is effective but risky. You must dilute it. A mix of 1 part 70% isopropyl alcohol to 4 parts distilled water is my go-to. Always test this in a hidden spot first, like under the seat bolster.
Lightly mist your diluted solution onto a clean microfiber. Wipe the area, do not soak it. The alcohol will flash off quickly, killing remaining mold. This step requires a light touch.
The Critical Conditioning Step
Any cleaning, especially with alcohol, dries out leather. Skipping conditioning is how you get stiff, cracked seats. After the seat is completely dry, clean and condition your leather car seats. I use a product with lanolin. Work it into the leather with your fingers in a circular motion; the warmth helps it penetrate.
Conditioning restores flexibility and replenishes the oils your cleaning just removed. It is not optional.
Synthetic Leather (Tesla, etc.) Specifics
My Tesla’s “vegan” leather is more resistant to mold than real leather, but it has its own rules. Solvents can damage the polyurethane coating, causing it to become sticky or peel. For my Model 3, I use a dedicated synthetic leather cleaner or a very mild soap like Optimum No Rinse at a quick detailer dilution. The process is the same: wipe, disinfect with a mild solution if needed, and protect with a UV-protectant spray meant for synthetic materials. Avoid heavy conditioners; they can sit on the surface and attract dirt.
How to Clean Car Carpet Mold (And Save Your Floor Mats)
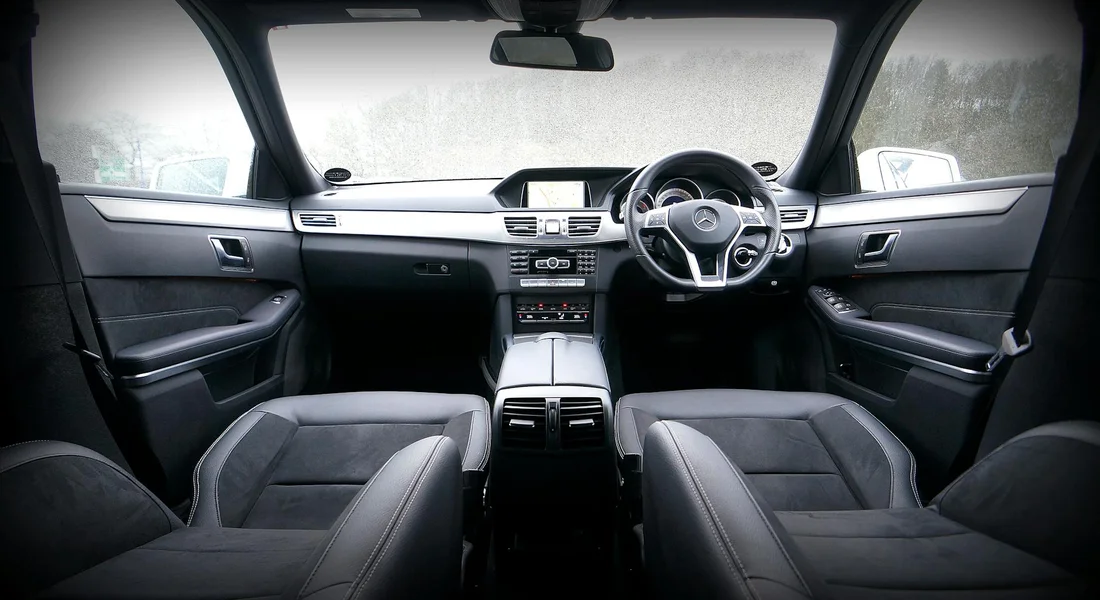
Carpet holds water like a sponge. If your car has a mildew smell, the carpet or floor mats are the usual suspects. This is often the worst area because moisture gets trapped deep in the fibers and the foam backing underneath.
In my Honda Odyssey, a spilled water bottle that slid under a seat taught me this lesson. The smell appeared a week later.
Removal is Mandatory
You cannot clean this properly inside the car. Remove all floor mats. Then, try to lift the edges of the carpet itself. Check the padding underneath. If that foam is wet or moldy, surface cleaning the carpet top won’t solve anything. You need to address the root.
The Rubber Mat Salvage
Rubber or all-weather mats are easy. Pull them out, scrub them with a brush and an all-purpose cleaner or diluted dish soap, hose them off, and let them dry in the sun. They are the simplest part of this job.
The Carpet Extraction Protocol
For fabric carpets and mats, you need a methodical approach. This is where you fight the moisture.
- Dry vacuum thoroughly. Use a strong vacuum with a clean crevice tool to pull up every bit of dry spore and debris you can.
- Apply your cleaner. An enzyme-based odor eliminator is best, as it breaks down the organic matter. Spray it generously onto the moldy area.
- Agitate with a stiff brush. A drill brush works wonders here. Scrub the cleaner deep into the carpet fibers and down into the backing.
- Extract, extract, extract. This is the most important step. Use a wet-dry vacuum or, ideally, a carpet extractor to pull the dirty water back out. Go over the area multiple times with the vacuum until you are pulling up almost clean water. Your goal is to leave the carpet as dry as possible.
Lay the carpet flat in the sun with fans blowing on it, or hang it over a railing. This may take days to dry completely. Do not reinstall it while it is even slightly damp.
When to Consider Replacement
Sometimes, the battle is lost. If the foam backing has disintegrated into a crumbly, smelly mess, you cannot save it. If a persistent, musty smell returns after multiple professional-level cleaning and drying attempts, the mold is too deep.
Replacement is the healthy choice. Breathing those spores is not worth it. New carpet sections or mats are a definitive solution for a healthy cabin.
Don’t Forget the Air: Ventilation System and Hidden Spaces
Cleaning your seats and carpet but ignoring the air conditioning system is like washing one hand and leaving the other dirty. You might get one part clean, but the problem will come right back. Mold spores lurking in your vents will blow out and settle on your freshly cleaned surfaces.
Recognizing A/C Mold
You know the feeling. On a humid morning, you start the car, turn on the A/C, and a damp, musty blast of air hits your face. That is not just stale air. It is the classic sign of mold growing on the cold, wet evaporator core deep inside your dashboard. In my Honda Odyssey, the kid hauler, I get this smell every spring after a wet winter.
That musty odor when you first turn on the air conditioning is a clear signal of mold in the HVAC system.
The Simple Fix: Cabin Air Filter
Always replace the cabin air filter first. It is inexpensive, often under twenty dollars, and it is the most common source of that musty smell. A dirty filter holds moisture, pollen, and dust, which is a perfect meal for mold. For most vehicles, you can find it behind the glove box. It takes five minutes to swap.
Start every A/C odor battle by installing a new cabin air filter; it is a cheap and easy win.
Evaporator Core Treatment
If the smell remains after a new filter, you need to clean the evaporator core. Use an EPA-approved foaming HVAC cleaner. You spray it through the A/C drain tube, usually found under the car near the passenger side, or into the fresh air intake at the base of the windshield. The foam expands, kills the mold, and then drains away. Be cautious. Wear gloves and safety glasses. This step is essential because it targets odors that won’t go away with just a surface clean, like those caused by mold or rotten food in your car.
I did this on my Ford F-150 workhorse after a muddy season. Follow these steps.
- Locate the A/C drain tube under the dashboard or chassis.
- Attach the cleaner’s extension hose and spray until foam begins to exit.
- Wait 15 minutes as the foam works, then run the A/C on high for 10 minutes to dry the system.
A foaming evaporator core treatment is a very effective DIY step for killing hidden mold.
Cleaning Under Dashboard Trim
Mold can grow anywhere dust and moisture meet. That includes under your dashboard trim panels. I found a faint mildew smell in my BMW, the swirl magnet, and traced it to dust buildup under the center console. Use a can of compressed air to blast dust out of vents and crevices. Then, wipe all plastic surfaces with a mild interior detail spray.
Cleaning hidden dust with compressed air removes the organic material that mold uses for food.
Keeping the Mold Gone: Smart Prevention Habits
Getting rid of mold is one thing. Keeping it from coming back is what matters. Build these habits into your regular car care routine.
Moisture is the Enemy
Your goal is to keep the interior dry. In my Tesla Model 3, during our humid summers, I drop a few reusable silicone gel packs into the cup holders. They silently absorb moisture. Use rubber floor mats, not carpeted ones, to contain spills and wet shoes. After a drive through car wash, crack your windows for a few minutes to let the trapped condensation escape.
Fight humidity with desiccant packs and smart ventilation to create an environment where mold cannot start.
Clean Spills Immediately
Do not wait. Not later. Not tomorrow. When my kids spill juice in the Odyssey, I grab an absorbent microfiber towel and blot it up right away. Smearing a spill just pushes liquid deeper into the seat foam or carpet fibers. Cleaning spills in upholstery or carpet requires immediate attention. For leather seats, like in my Porsche, I follow up with a quick wipe using a leather cleaner to prevent any sticky residue.
Blot spills the moment they happen with an absorbent towel to prevent moisture from soaking in and creating a mold nursery.
The Power of Airflow
Stagnant air is a mold’s best friend. If you are storing a car, like my Mazda Miata project, you must keep air moving. A small solar powered vent fan placed in a window works wonders. If you do not have one, leave each window open just a crack and use a breathable car cover. This allows moisture to escape.
Always provide airflow for a stored vehicle to prevent the damp, still air that mold spores crave.
Regular Deep Cleaning
Vacuuming your interior thoroughly is not just about looks. An often-clean car interior helps prevent odors and mold. Regular vacuuming is part of that routine. It is about removing the food mold needs to live. Every few weeks, I vacuum all carpets, seats, and floor mats in my cars. I use the crevice tool to get into the seams of the seats and under the pedals. This sucks up the skin cells, crumbs, and dirt that mold feeds on.
A thorough, regular vacuum removes the organic debris that would otherwise fuel mold growth.
FAQ: Car Seat Molding in Garage
If your car seats are developing mold in the garage, the issue is almost always climate and airflow. Garages can get very humid. First, make sure the space itself is ventilated. Consider using a portable dehumidifier. For the car, use moisture absorbing products like silica gel packs under the seats. When I store any car, I use a breathable cover and check on it weekly for dampness.
Prevent garage mold by controlling the storage environment’s humidity and ensuring constant, gentle airflow around the vehicle.
When This Job is Too Big: Calling a Professional
I love a good DIY challenge. Getting my hands dirty on the Honda Odyssey’s sticky cup holders is a point of pride. But with mold, you have to know your limits. Being honest about what you can’t handle builds real trust, both with yourself and your car’s long-term health.
Some situations are simply a call to the pros. Here are the red flags that tell you it’s time.
- Extensive Growth: If you see visible mold or mildew covering more than about 10 square feet-think an entire seat back and the carpet beneath it-the problem is likely deep in the foam and insulation.
- The Stubborn Stench: You’ve done a thorough clean, everything looks good, but that wet, musty smell creeps back a day or two later. This means spores are alive and well deep inside the materials.
- Flood Water Damage: If the moisture came from a flood (even a minor one), it’s not just surface water. Contaminants from the road or your driveway are now in the padding, and only complete extraction and sanitization will prevent future issues.
- Health Comes First: If you or any regular passenger has asthma, allergies, or other respiratory sensitivities, don’t risk stirring up a cloud of spores. Protecting your health isn’t a DIY project.
A professional remediation detailer doesn’t just have better spray bottles; they bring a hospital-grade clean room to your car. Their arsenal is what makes the difference for severe cases.
- Industrial HEPA Air Scrubbers: These machines actively pull air from the cabin, trapping 99.97% of particles, including mold spores, and recirculating clean air. This stops spores from just resettling elsewhere.
- Truck-Mounted Extractors: My little 1-gallon portable extractor is great for a stain. Theirs is a powerhouse that pulls vastly more water and contaminants from deep within seat foam and carpet backing.
- Commercial Ozone Generators: For odor elimination at the molecular level, a high-output ozone treatment in a sealed, vacant car is incredibly effective. It’s a tool that requires respect and proper safety protocols.
- Expertise in Disassembly: They know how to safely remove seats, center consoles, and door panels to treat the problem at its source, not just its surface.
If you’re searching “car seat mold removal near me,” be selective. You’re not looking for a basic car wash or even a standard detailer.
Look for shops or mobile detailers who specifically mention interior odor removal, water damage restoration, or “remediation” services. Ask them directly about their process for mold. A qualified pro will explain their use of antimicrobial cleaners, extraction, and air scrubbing without hesitation.
A full interior remediation for a severe case is an investment. It can easily run several hundred dollars. But weigh that against the cost of replacing contaminated seats and carpets, or the value of breathing clean air every time you drive. For the health of your family and your vehicle, it’s often the only real solution.
Final Thoughts on a Fresh, Healthy Interior
Getting rid of mold and mildew starts with acting fast, before it has a chance to root in deep. The right cleaner, some elbow grease, and ensuring everything is completely dry are the keys to winning the fight and keeping it from coming back.
Ignore a mildew problem, and you’re inviting that musty smell to become permanent, risking damage to your car’s materials and your own comfort on every drive. Take action to remove mildew, damp, and stale odors before they take hold. A quick treatment can restore materials and keep your car smelling fresh on every drive.
Expert Resources and Citations
- r/cars on Reddit: Advice on cleaning mold from car interior?
- Car Interior – Mold Removers – The Home Depot
- Looking for recommendations for services to remove mold …
- Mold In Car? Causes, Removal Tips, And Prevention
Max Gunther
Max is an automotive enthusiast having worked as a car mechanical and in interior detailing service for over 25 years. He is very experienced in giving your old car, a new fresh vibe. He has detailed many cars and removed very tough smells and stains from all kinds of cars and models, always ensuring that his work and advice helps his customers. He brings his first hand experience to his blog AutoDetailPedia, to help readers breath new life into their car interiors.