How Do You Blend Car Paint for an Invisible Repair?
Staring at a fresh scratch on your paint, you worry the fix will look worse than the damage. I get it-from my Jet Black BMW to my classic Miata, I’ve felt that same knot in my stomach.
Here, I’ll share the hands-on methods I use, covering mixing paint to match your exact color, mastering spray cans for a smooth finish, and blending primer to hide the repair line.
Without this know-how, you’ll end up with a cloudy, mismatched patch that shouts “DIY fail.”
What Paint Blending Actually Means (And When You Need It)
Think of paint blending like fixing a small tear in a favorite pair of jeans. You don’t replace the whole pant leg. You carefully patch and stitch just the damaged area, making the repair as invisible as possible. A full panel repaint is replacing the entire leg. Blending is that careful patch job for your car’s paint.
The main goal is to avoid a hard, obvious line between your fresh paint and the old, weathered paint. This line is called a “hard edge” and it screams “repair.” Blending techniques soften that transition so your eye slides over the area without stopping. Your goal isn’t to make the repair invisible from six inches away, but to make it disappear from six feet away as you walk around the car. Spot repair techniques in car paint focus on targeted blending to minimize the need for a full repaint. They help you achieve a seamless finish that looks natural up close or from a distance.
You would use blending in a few specific cases:
- A cluster of stone chips on your hood or front bumper.
- A deep scratch or scuff that went through the color layer but is confined to one area.
- A section of a panel that has faded more than the rest, like the top of a rear fender.
Blending has its limits. It cannot fix structural problems. If there is a major dent, bubbling rust coming from behind the metal, or clear coat that is peeling off in sheets, blending new paint over it is a waste of time and materials. The underlying issue must be repaired first.
The Non-Negotiable First Step: Getting the Color Right
That little bottle of factory touch-up paint from the dealership? It is almost never a perfect match for a car that has lived outside for a few years. Sun, rain, and road grime fade and change your paint’s color slightly. The factory paint is a formula for a brand-new, unfaded finish. On my dark blue F-150, the touch-up paint for a new chip is always a shade darker and richer than the sun-bleached paint around it, especially compared to faded paint from sun exposure.
Getting the color right is a process. You start with your vehicle’s paint code, found on a sticker in the driver’s door jamb or under the hood. Take this code to a professional automotive paint supplier. They will use a sophisticated camera system, called a spectrophotometer, to scan your car’s current paint and account for fade. They mix a custom batch for you. Do not skip the next part: testing.
Always spray a test card or a piece of scrap metal. Let it dry completely. Then, hold it next to the repair area on your car in direct sunlight. Move it around. Look at it from different angles. This tells you if the match is close. A perfect match on a metallic or pearl color is incredibly difficult, as the flake alignment and depth change with every spray pass.
For these complex paints, blending becomes even more critical. A blending solvent, often called a “blender,” is a clear product used during the final stages of spraying the clear coat. It slightly re-melts the edge of the new clear coat into the old, helping to hide the transition. It is not a magic potion for a bad color match, but it is the final tool for hiding a good one. Remember to work in a well-ventilated space and wear a proper respirator when using any of these products.
Setting Up Your Space and Surface
Think of your workspace as the foundation for a perfect blend. If this foundation is shaky, the paint will show it. I set up in my garage for the BMW, my black 3 Series. That car shows every flaw, so prep is non-negotiable.
Safety is not optional when you are spraying paints and clears; you must protect your lungs and skin from the start. I wear a NIOSH-approved respirator with organic vapor cartridges, nitrile gloves, and safety glasses every single time. Open doors, use fans, and get fresh air moving. Those fumes are no joke. Always read labels and the Safety Data Sheets before mixing or applying anything. It helps you use chemicals car paint safely and reduce risk.
Your prep zone needs to be a clean room. Sweep the floor. Wipe down surfaces. You want a still, dust-free space with good light. No wind, and aim for a day with lower humidity. Wind blows dust into your wet paint. Humidity can make it dry cloudy or slow.
Surface prep is where the real work happens. You cannot blend paint onto a dirty panel.
- Start with a deep wash and a decontamination clay bar. Run your hand over the area. It should feel as smooth as glass.
- Now, sand the repair spot. I use a sanding block and work through grits. Start with 800 to level, move to 1000, then finish with 1500. This creates a fine, uniform scratch pattern for the new paint to grip.
- Feathering the edges is critical. You must gently sand the transition from the repaired area out into the factory clear coat. Taper the sanding marks so they disappear. This makes the edge invisible for the new paint to fade into.
Do one final wipe. Use a dedicated wax and grease remover on a clean, lint-free towel. Wipe the entire area, then wipe it again with a fresh side. This final wipe removes every invisible oil and fingerprint that will cause the paint to fisheye or peel—easily even those stubborn fingerprints on car paint.
The Professional Blending Technique: A Step-by-Step Walkthrough
This is the moment. You have a clean, sanded panel. Now you learn how to blend a paint repair on a car. Breathe. Go slow. I walked through this on my Miata’s fender, bringing the faded red back to life.
Step 1: Applying the Basecoat
Shake your paint well. For a spray can, warm it in a bucket of lukewarm water for five minutes. This improves the spray pattern. When using aerosol spray paint, hold the can at a consistent distance from the surface. Apply in thin, even coats for a smooth finish.
The secret is spray blending: you start on the repair and let the color fade into nothing on the original paint. Position the can or gun about six inches from the center of your sanded area. Press the trigger, make a pass, and as you move onto the good paint, gradually release the trigger. Do not stop spraying abruptly at the edge.
Apply multiple light, misty coats. We call these tack coats. Let each coat flash off for a few minutes until it looks dull and dry to the touch. Building up thin layers prevents runs and gives you control over the color intensity for a seamless match. Three or four tack coats are better than one heavy, wet coat that will sag.
Step 2: The Clear Coat Blend
The clear coat is your protective shell and your final chance to hide the blend. You must cover a wider area than the basecoat.
Use the same fade-out technique. Start in the center, spray over your new basecoat, and continue moving outward onto the factory clear coat, releasing the trigger as you go. Extend this blend at least a few inches beyond where your basecoat ended.
Apply enough clear coat material to build a slight thickness; you need this buffer for the next step of sanding and polishing it level with the surrounding paint. Usually, two to three medium-wet coats will do. Watch for a glossy, wet look that slowly settles to a shine.
Technique Tweak: The Spray Gun Dance
Whether using a pro gun or a spray can, your movement is everything. I call it the spray gun dance.
Keep the nozzle 6 to 8 inches from the panel. Move your whole arm at a steady, even pace. Imagine you are painting a stripe. Each new pass should overlap the previous one by 50%. This double coverage ensures an even film without streaks or dry spots.
Look for the visual cue. A proper wet coat will look deeply shiny and wet for a moment, then it will flow out to a smooth, high gloss. If it looks orange-peely or dry immediately, you are too far away or moving too fast. That steady arm speed and consistent distance are what separate a DIY job from a pro-quality finish.
How to Blend Car Paint with Spray Cans (The DIY Compromise)
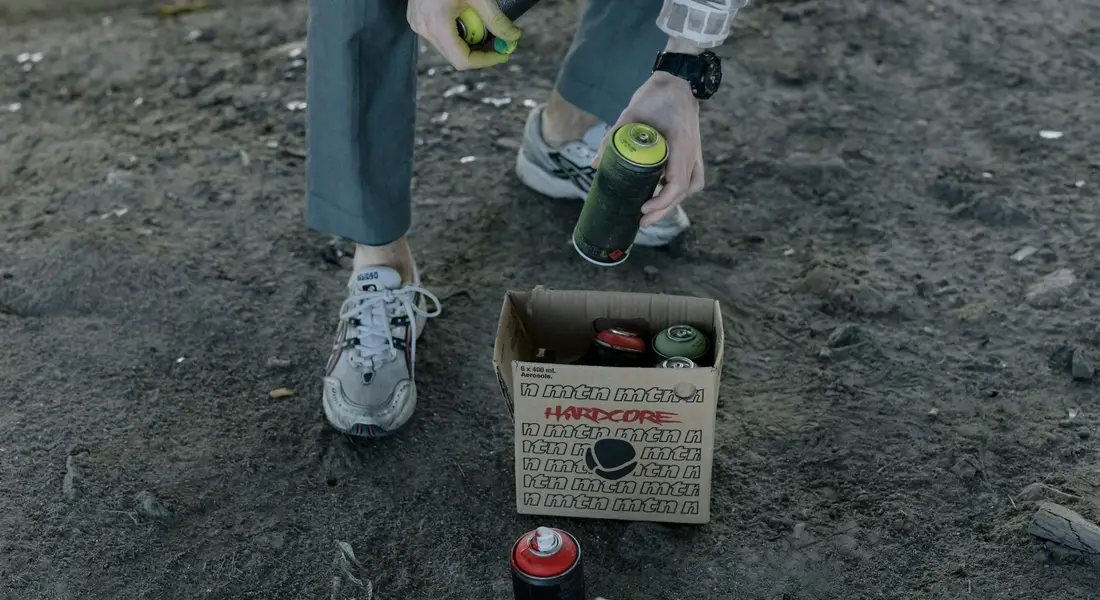
Let’s be honest. A professional spray gun will always give you more control and a finer finish. But for a tiny rock chip on your door or a scratch on your mirror cap, a spray can is a practical tool. I keep a few matched cans for my vehicles, like the classic red for my ’95 Miata. This method works best for spots smaller than a credit card; anything larger and the finish will likely look blotchy and thick.
Preparation is everything with a rattle can. First, warm the can in a bucket of warm water for five minutes. This thins the paint slightly and increases the pressure for a more consistent spray. Second, invest in a spray can trigger handle. It costs a few dollars and gives you the finger control of a real gun, reducing hand fatigue and wobble.
You must adapt the professional blend technique. Hold the can about 10-12 inches from the surface. Start your spray off the panel and sweep across in a steady, straight motion. Your coats need to be even lighter than with a gun. Think of it as laying down a faint mist. Apply three or four of these dust-like coats, letting each one flash off for a minute or two before the next. The goal is to build color slowly without creating runs or heavy texture. If you’re looking to use spray cans for car painting, these light coats translate well to an automotive finish. Keep the can moving steadily and apply thin, even layers to prevent runs.
Spray can material is thicker and dries slower than modern basecoat. This means runs and sags are a constant threat. Work in a warm, dry, and very well-ventilated space. If you see a run starting, do not try to fix it wet. Let it dry completely, then carefully sand it level with 1500-grit sandpaper before applying another ultra-light coat.
Do not use the clear coat that comes in a standard rattle can. It remains soft and yellows quickly. For any repair you want to last, you need a 2K (two-component) aerosol clear. It has a separate hardener button you pop inside the can. It cures to a much harder, more UV-resistant finish. Wear a proper respirator when using 2K clear; the isocyanates are harmful to breathe. This is the one place in a DIY spray can job where you should not compromise.
Primer Blending: The Foundation for a Seamless Repair
Blending isn’t just for color. The most critical blend happens earlier, with the primer. If you’ve sanded a dent repair on your black BMW, you have a smooth but obvious dip in the panel. Primer blending fills and levels that dip so the color coat goes on a flat surface. Primer blending happens before any color touches the panel, and it’s what hides the repair’s edges from your eyes and fingers.
The technique is straightforward but requires timing. After sanding the repair area with a feathered edge, spray your primer-surfacer as normal, covering the bare metal and feathered paint. Immediately, while the primer is still wet and tacky, grab a separate spray gun or bottle filled only with a “blender” or the reducer for your primer. Lightly mist this solvent just over the feathered edges of the primer, outside the repair zone.
This solvent mist lightly dissolves the primer’s edge and helps it flow into the surrounding original clear coat. It melts the transition. Think of it like using a wet brush to smooth the edge of a stroke of acrylic paint on a canvas. The goal is to eliminate any hard ridge or texture step-down. When done right, after it dries, you can run your fingernail across the area and feel no lip.
The final step is wet sanding. Once the blended primer is fully cured, block sand the entire area with 400-grit sandpaper on a soft pad, using plenty of water. You are not trying to sand through the primer. You are sanding it perfectly level with the surrounding factory paint. When the surface is uniformly flat and dull, you have created the perfect canvas for your basecoat, making the subsequent color blend infinitely easier to hide.
Wet Sanding and Polishing: The Magic Finale
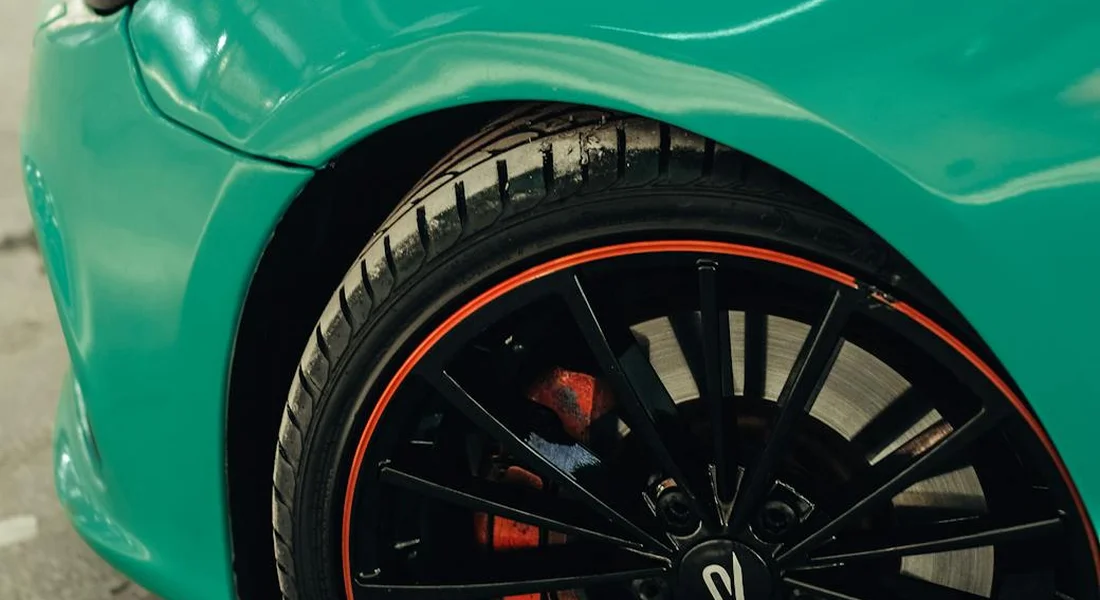
You have sprayed your base coat and clear coat. The blend looks good, but the texture is off. It has what we call “orange peel,” that bumpy, dimpled skin of a fresh paint job. That is where the real artistry happens. You have to wait, though. Rushing this ruins everything. After the new clear coat has fully cured, often 24 to 48 hours depending on the product and temperature, the real work begins.
This process is all about turning a textured, flat-looking patch into a flawless, glossy finish that disappears into the factory paint. It is hands-on and requires a careful touch.
The Wet Sanding Process
Start with a sanding block wrapped in 2000-grit wet sandpaper. Keep the area and the paper soaked with a spray bottle of clean water mixed with a drop of car shampoo. The lubricant is critical. You are not trying to remove paint, just level the high points of the orange peel texture. Sand in straight, light, overlapping passes. Do not press down. Let the abrasive do the work.
The goal is to sand the entire repaired and blended area until it looks a uniform, dull satin with no shiny spots peeking through. Those shiny spots are low spots you have not touched yet. Once the 2000-grit has done its job, move to 3000-grit. This finer paper removes the deeper scratches from the 2000-grit and prepares the surface for polishing. The difference is real. 3000-grit scratches are far easier and faster to remove with a polisher.
Restoring the Gloss
Now for the machine. A dual-action polisher is your best friend here. It is forgiving and effective. I use mine on my Jet Black BMW, the ultimate swirl magnet, every time I correct the paint. You will need two compounds: a heavier cutting compound and a finer polish. This is the core of cutting and polishing car paint scratches, restoring clarity and depth. Details on applying the technique will come in the next steps.
- Mount a medium-cut foam pad on your polisher. Apply a few dots of cutting compound to the pad.
- Work the sanded area in small, slow sections. Use moderate pressure on the first pass to break down the compound and remove the sanding marks. You will see the gloss start to return right away.
- Do a second pass with lighter pressure to refine the finish. Wipe the area clean with a microfiber towel.
- Switch to a soft finishing pad and a fine polish. Repeat the process. This step removes any haze from the compound and brings up the deep, wet shine.
This step is what makes the repair disappear. The before is a cloudy, scratched patch. The after is a deep, reflective surface that flows seamlessly into the surrounding paint. You run your fingers over it and feel nothing but smooth, slick clear coat.
Paint Damage Prevention: Common Blending Mistakes to Avoid
I have made some of these mistakes myself. Everyone who tries to learn this does. Knowing them ahead of time saves you time, money, and a lot of frustration. These are the pitfalls that turn a decent repair into a obvious one.
Mistake 1: Skipping the Test Panel
You mix your paint, you think it looks right in the cup, and you just start spraying. This is a sure path to failure. Color mismatch is the most common blending failure. Always, always spray your mixed paint on a test card or an inconspicuous area and let it flash dry to see the true color. Check it in direct sun and in shade. Modern metallics and pearls can look totally different when sprayed versus in the cup. This five-minute step is non-negotiable.
Mistake 2: Applying Paint Too Heavy
Getting a run or a sag in your clear coat is a heartbreaking sight. It means stopping, letting it cure fully, sanding it out, and respraying. It happens when you move too slowly or hold the sprayer too close. Apply paint and clear in multiple light, even coats, allowing proper flash time between each. It is better to need an extra coat than to fix a run. A wet, glossy coat should develop over several passes, not one.
Mistake 3: Not Blending the Clear Coat Far Enough
You do a beautiful job fading the base coat. Then you spray a tight, small patch of clear coat over just the repair. When you polish, you will see a hard, shiny ring around the repair area. This is called a witness line. Applying a proper clear coat protective coating is essential for durability and protection of the repaired area. Use even, steady strokes to ensure full, feathered coverage. You must spray the clear coat well beyond the blended base coat area, feathering it out as you go. The final polished edge of the clear should be so thin and gradual that it cannot be seen or felt. If you feel a ridge with your fingernail, you did not blend the clear far enough.
Mistake 4: Polishing Too Soon
The clear coat feels dry to the touch after a few hours. It is not hard. Polishing before it has fully cured, or “gassed out,” generates heat that can soften it. This leads to hazing, the polish gumming up, or even pulling the soft clear coat right off. Follow the product’s full cure time recommendations, and when in doubt, wait longer. Patience here protects all your hard work.
Mistake 5: Confusing “Paint Bleeding” with Blending
This is a separate defect, but I hear the terms mixed up. Paint bleeding is when an underlying layer, like a red primer or an old lacquer paint, seeps up and stains your new topcoat. It creates a discolored halo. This is not part of the blending process. It is a prep failure. Bleeding is prevented by using a proper sealer or isolation coat over old, unstable paint before applying new color. If you see a strange stain appearing hours after your paint job, that is likely bleed, not a blending error.
Troubleshooting Your Blended Paint Job
Even with careful prep, things can go sideways. This is normal. Every professional has been here. Let’s fix it.
Problem: A visible line or halo.
You step back, and instead of a seamless transition, you see a faint line, ring, or a cloudy “halo” around your repair. It screams “touch-up.”
This almost always means your clear coat blend failed, or your sanding preparation wasn’t wide enough. The clear coat isn’t fading out; it’s creating a hard edge. On my Jet Black BMW, a halo shows up like a neon sign under garage lights.
The fix isn’t subtle. You must sand it back.
- Mask off a much wider area than your original repair.
- Using a very fine grit sanding disc (like 2000 or 3000 grit), carefully wet-sand the entire blended zone and well into the surrounding factory clear coat. Your goal is to remove that hard edge and feather everything smooth.
- Clean, dry, and re-apply your blended clear coat, making your passes even lighter and wider at the edges. The key is a gradual fade to nothing.
Problem: The color looks off.
In the sun, the spot looks too dark, too light, or just a different shade. This is the toughest fix.
A bad color match or misaligned metallic flakes means you have to start over with a better base. With metallics, like on my Dark Blue F-150, if you spray at the wrong angle or distance, the flakes lay differently and never match. Sunlight reveals everything.
Do not try to clear over a bad match. It will not improve.
- Stop. Let the color coat dry completely.
- Sand it off carefully with 800-1000 grit sandpaper, staying within your primer area.
- Re-evaluate your paint code and mix. Consider a “spray-out card”-spraying your mix on a spare panel to check the match in different light before touching the car again.
- Re-apply your primer blend if needed, then re-spray the color, holding the can or gun at a consistent angle and distance.
Problem: Dull, hazy, or sandy finish after polishing.
You’ve sanded and polished, but the spot feels rough or looks hazy compared to the glossy paint around it.
You either skipped a sanding grit or jumped to a compound that was too aggressive. You left behind deeper sand scratches that your polish couldn’t remove. The soft clear coat on my white Tesla Model 3 is especially prone to this haze if you rush.
The fix is to step back in your polishing process.
- Do not sand again. Go back to your polishing machine.
- Use a less aggressive, finer finishing polish (often called a “fine cut” or “ultra fine” polish).
- Pair it with a soft, foam polishing pad-never a heavy cutting pad.
- Work the area slowly with light pressure. Your goal is to gently remove the haze, not cut more.
- Wipe clean and inspect. It should now match the surrounding gloss.
Wear your mask during sanding and work in a ventilated space. Rushing creates problems. Slow, methodical work creates invisible repairs.
Final Thoughts on a Seamless Blend
The most important part of blending paint isn’t the spray gun or the reducer you choose. It’s your patience during surface preparation and your willingness to let each layer cure fully before moving on. Rushing these steps guarantees a result you’ll see every time you walk up to the car.
Skip this disciplined approach, and you will be left with a harsh, visible paint line that no amount of polishing can hide.
Expert Resources and Citations
- How Professional Auto Paint Shops Fix Scratches, Chips, and Faded Paint | B&J Body Shop
- Paint Chip Fix in Chicago | Restore Your Car’s Finish
- Why is the invisible car cover in car paint care more expensive – SINO VINYL
- Invisible Car Paint Chip Repair: Our Satisfaction Guarantee
- How To BLEND Clear Coat Like a PRO (Invisible Paint Repair Transition) – YouTube
- Ultimate Car Paint Repair Guide: From DIY Solutions to Professional Protection – Flexi
- DIY Car Paint Chip Repair – Fast Home Fixes for Pro Results
Max Gunther
Max is an automotive enthusiast having worked as a car mechanical and in interior detailing service for over 25 years. He is very experienced in giving your old car, a new fresh vibe. He has detailed many cars and removed very tough smells and stains from all kinds of cars and models, always ensuring that his work and advice helps his customers. He brings his first hand experience to his blog AutoDetailPedia, to help readers breath new life into their car interiors.