Does Car Wax Effectively Remove Scratches? The Detailer’s Take on Repair and Protection
You just found a scratch on your car’s paint, and now you’re staring at that tub of wax, hoping it’s a miracle cure.
From my garage to yours, I’ll use my hands-on experience to explain what wax truly does to scratches, the vital difference between hiding and removing them, and how wax functions as essential, long-term paint protection.
Misapply wax on the wrong type of scratch, and you will seal in damage that continues to weaken your clear coat.
Key Takeaways: The Quick Answer on Wax and Scratches
Car wax does not remove scratches. It cannot fix them. A wax is a protectant, not an abrasive.
Think of your car’s clear coat as a thick sheet of hard plastic. A real scratch is a groove carved into it. Permanent scratch repair requires you to remove a tiny amount of the surrounding clear coat to level out that groove, and wax simply cannot do that. Its job is to sit on top.
The true role of a good wax is to provide a slick, hydrophobic layer that beads water and adds depth of gloss. This glossy layer can reflect light more evenly, which makes very fine, shallow defects like light cobwebbing or swirl marks less visible to your eye. It fills them by optical illusion, not by physical repair.
- Wax CAN help mask: Light swirls, faint cobweb scratches, minor water spot etching, and dullness from light oxidation.
- Wax CANNOT fix: Scratches you can feel with your fingernail, scratches down to the primer or bare metal, or any scratch that looks white or colored differently than your paint.
The Straight Truth: What Wax Can and Cannot Do for Scratches
Let us answer the questions directly. Can car wax remove scratches? No. Can wax fix scratches? No. Can wax hide scratches? Yes, but only the very shallowest ones, and only temporarily until the wax layer wears off or is washed away.
The fastest rule is the fingernail test. Run your fingernail gently across the scratch. If it catches, if you feel a notch, that scratch is in the clear coat too deep for any wax to address. You are feeling a canyon, and wax is just a thin fog settling over it.
This is the core difference between a wax and a compound or polish. Compounds and polishes contain precise abrasives. They are designed to cut away microscopic layers of clear coat to level the surface. Wax, whether it is a paste, liquid, or spray, is designed to lay down a sacrificial layer of protection (carnauba, polymers, sealants) on top of the surface. That’s where the car polish vs wax difference comes into play: polish for correction, wax for protection. Understanding this difference helps you decide which step to take next.
You will see products labeled “scratch repair wax.” This is where expectations get broken. These are typically pre-mixed solutions containing a very mild abrasive (like a polish) and some protective elements (the wax). They can slightly diminish the appearance of a light scuff by cleaning and filling it, but they will not erase a true scratch, especially when compared to more effective methods that involve using rubbing compound to repair scratches. They are a marketing compromise, not a true repair.
What about “scratch repair wax for car black” from the store? Black paint, like on my BMW, shows every flaw. These products work on the same principle. They might clean and fill a little better on dark paint because they often contain fillers and gloss enhancers, but they do not perform magic. A scratch that is through the clear coat on a white car is just as unfixable by wax as it is on a black car, no matter how much you try to repair it.
When Wax is a Helpful Band-Aid
There are times when waxing is the perfect quick fix. It is for managing appearance between full paint corrections.
Light swirl marks from automatic car washes are a prime example. My black BMW 3 Series is a swirl magnet. After a wash, under garage lights, it can look like a spider web. A thorough hand wax with a quality product does not remove those swirls, but it fills them and adds such a deep, wet gloss that they virtually disappear for a few weeks. It is a cosmetic fix, but a valuable one.
Wax can also help with faint water spot etching and minor surface stains. The wax layer can smooth over the microscopic roughness left by the spots, making them less obvious to light and touch. For light oxidation on single-stage paints, like on my old Miata, a cleaning wax can pull off some dead paint and leave protection behind, restoring color temporarily.
When Wax is a Waste of Time
Do not waste your product or effort waxing over severe damage. It will not help, and it can hurt.
If a scratch is deep enough to show a different color (white primer or grey metal), wax does nothing. You are looking at a bodywork or touch-up paint job. If the clear coat is failing, peeling, or has deep chemical etching, wax cannot re-adhere it or rebuild it. Applying wax over these problems simply seals in contaminants and can make the proper repair process harder later, as the technician will need to thoroughly strip the wax to begin work. It’s just one of the common car waxing mistakes that can end up costing you more in the long run.
Wax is a top coat, a final step. It is not a primer, not a filler, and certainly not a paint correction tool. Save it for a healthy paint surface, or one with only the most superficial imperfections. For anything your fingernail catches, reach for a polish or compound, not a wax.
How Wax “Fixes” Scratches: The Science of Filling vs. Removing
When you apply wax to a scratch and it seems to vanish, magic is not happening. The scratch is still there. You have simply filled it. Think of your car’s clear coat as a smooth, glassy lake. A scratch is a groove cut into that surface. Light scatters inside that groove, making it look white or hazy to your eye, just like wax-filled swirl marks.
Waxes and sealants contain oils and polymers. As you spread them, these ingredients flow into the microscopic canyon of the scratch. They fill the space, creating a temporary, level surface that reflects light evenly again. To your eye, the scratch disappears.
It is like filling a crack in an old sidewalk with fine sand versus repaving the entire slab. The sand fills the gap and makes the surface look flat. But when it rains, the sand washes out. The crack is still there, waiting to be seen again.
This is exactly how a wax fill works. Every car wash, rainstorm, and pass of a dry towel slowly erodes that protective layer. The oils evaporate. The polymers break down. After a few weeks, sometimes just days, the scratch reappears. It feels like a betrayal, but it is just physics.
True scratch removal is different. It is called correction. You use a polish, a liquid with microscopic abrasives, and a pad. Together, they gently shave down the clear coat surrounding the scratch until its walls are level with the bottom of the groove. You are not filling the valley. You are lowering the entire hillside to match it. The scratch is gone for good, because you removed the material that defined it. This is the permanent repair you perform on a car like my black BMW, the ultimate swirl magnet.
The Role of Oils and Glaze in “Scratch Repair” Products
Walk into any auto parts store and you will see tubes and bottles promising instant scratch removal. They often have words like “miracle” or “repair” in bold print. Let’s look inside.
These products are typically loaded with heavy oils, silicones, and what detailers call “glaze.” These are supercharged filling agents. They are thicker and shinier than the oils in a standard wax. When you rub them on, they flood defects with these reflective oils, providing an incredible, instant transformation. The paint looks deep and wet. Scratches seem to melt away.
That instant gratification comes with a short lifespan. Those heavy oils have little staying power. They lack the durable protective polymers found in a good sealant. They can also attract dust and be tricky to layer over with a true protective coating. You get a spectacular result that might last one or two washes. For hiding a scratch on a car you are selling tomorrow, they have a place. For protecting your daily driver, they are a temporary theater.
Your Scratch Repair Toolkit: Knowing Your Options
Fixing scratches is not one job. It is a spectrum. Your choice depends on the scratch depth and your willingness to work. Here is your toolkit, from easiest to most involved: remove minor scratches yourself.
- Wax/Sealant (Temporary Fill): Your standard paint protection. It will mask only the very finest swirls and give a great shine. It is maintenance, not repair.
- Cleaner Wax (Light Correction & Fill): An all in one product with very mild abrasives. It can polish out the tiniest surface marks while laying down protection. A great biannual step for a maintained car.
- Hand Applied Polish/Compound (Targeted Correction): For a single, deeper scratch you can feel with your fingernail. Using a dedicated compound by hand takes serious effort but can level the defect without a machine.
- Machine Polisher (Full Correction): The permanent solution for a scratched or swirled paint job. This is how professionals and serious enthusiasts restore clarity. It requires practice but is the only way to truly remove defects.
Between liquid and paste wax, paste waxes often contain a higher concentration of natural carnauba. This can give a slightly better initial filling effect and a warm, deep gloss. These performance differences come from the wax composition and binder systems used. Understanding the types car wax composition can help you choose the right product for your goals. Liquid waxes and synthetic sealants typically offer easier application and longer durability. For filling ability alone, a high quality paste has a slight edge. For durability that masks scratches longer, a synthetic is my choice for a daily driver.
Choosing your weapon is simple. Can you catch the scratch with your fingernail? If yes, wax will not remove it. You need polish or compound, likely by machine. If your nail glides over it, it is a surface scratch. A cleaner wax might fix it. If it is just general haze, a good wax will hide it beautifully.
This is why a search for “scratch repair wax for car” is tricky. True repair requires abrasives (polish), not just wax. A search for “scratch repair wax near me” will often lead you to a professional detailer, because they have the machines and compounds to actually fix the problem, not just hide it.
Cleaner Waxes and All-in-One Products
Cleaner waxes are the savvy middle ground. I use them on my Ford F 150 workhorse every spring. They contain gentle abrasives, like a very fine polish, and protective wax in one bottle.
As you apply them, the abrasives scrub off the very top layer of oxidized paint and embedded contaminants. They can erase water spots, light swirls, and shallow scratches that are only in the very surface of the clear coat. Immediately after, the wax component deposits a protective layer on that newly cleaned surface.
Think of a cleaner wax as a gentle exfoliant and moisturizer for your paint. It refreshes the surface and protects it in one step. It is perfect for reviving a finish that has dulled over a season but does not have deep defects.
Just know its limits. It will not remove a scratch you can feel. It will not correct the spider webbing on my black BMW. It is for maintenance and very light revival. For deeper damage, you must step up to dedicated polishing compounds and separate protection.
Step-by-Step: How to Use a Scratch Repair Wax for Best Results
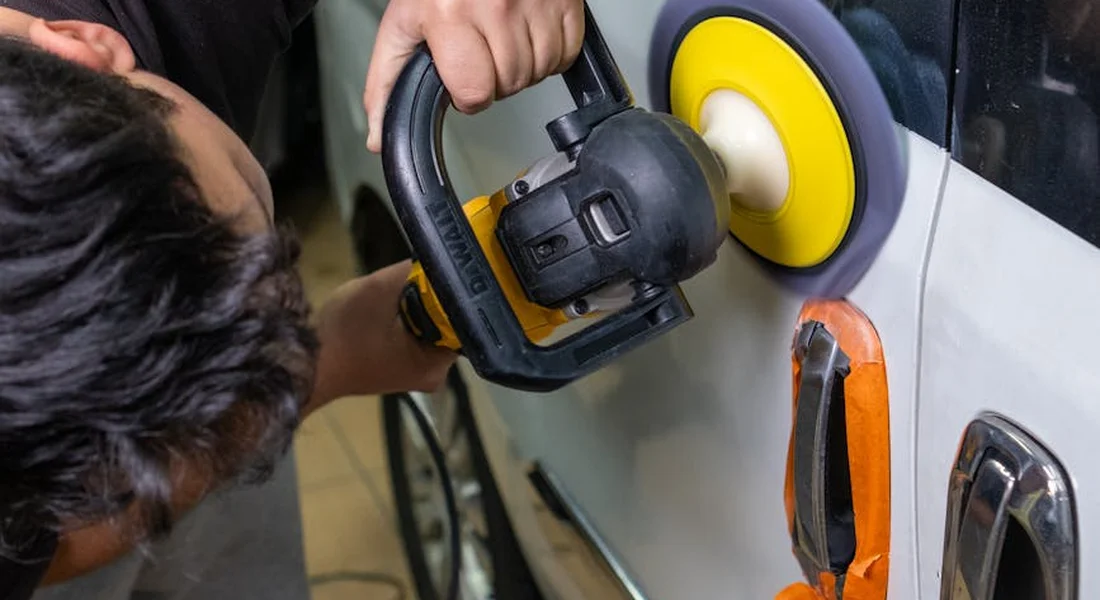
Using a filler wax correctly gives it the best chance to hide those fine scratches. A poor technique will just waste product and leave streaks. This method focuses on preparation to protect your paint and a simple application to maximize that filling effect.
The most important step happens before you even open the bottle: you must start with a perfectly clean and decontaminated paint surface. Applying any product over dirt is like trying to fill a scratch with mud. You will just grind the contaminants in and create more damage.
Step 1: Wash and Decontaminate the Area
Do a full two-bucket wash on the entire panel or vehicle. This prevents you from washing new dirt onto the area you plan to fix. After washing, your paint might feel smooth, but it often is not. Microscopic bits of industrial fallout and embedded grit remain.
This is where my Ford F-150 comes in. After a week on salted roads, it looks clean, but the paint feels like sandpaper. I spray an iron remover over the panel. It turns purple as it reacts with the metallic contaminants. I rinse it off. Then, I use a detailing clay bar or synthetic clay mitt with plenty of lubricant spray. I glide it gently over the surface. I can hear and feel it pulling the remaining contamination out. The paint goes from gritty to glass-smooth. Only now is it safe for a wax.
- Wash the car using the two-bucket method with grit guards.
- Spray an iron remover (like Iron X or Sonax Fallout Cleaner) on the area. Let it dwell and change color, then rinse thoroughly.
- Using a clay bar or clay mitt with lubricant, gently decontaminate the paint until it feels perfectly smooth to the touch.
- Dry the panel completely with a clean microfiber drying towel.
Step 2: Apply the Product with Correct Technique
Work in the shade on cool paint. Use a soft, clean foam applicator pad. Squeeze a small amount of product onto the pad-a dime-sized blob is enough for a two-foot square area. You can always add more.
Apply using gentle, overlapping circular motions or straight lines. Cover the scratch and a bit of the surrounding area. Work in one small section at a time, like just a door or a quarter panel.
Applying the wax too thickly is the most common mistake; it will dry into a hard, hazy film that is a nightmare to buff off. A thin, even coat is transparent and easy to remove. If you can still see the paint color clearly under the wet product, you are doing it right. Think of it like applying sunscreen, not peanut butter.
Step 3: Buff and Inspect
Let the product dry to a haze. This usually takes 5-10 minutes. It should look faint and powdery, not wet. Take a fresh, plush microfiber towel-I prefer a Korean-style 500+ GSM towel for this. Fold it into quarters to create a clean buffing surface.
Using light pressure, wipe the haze away. Flip the towel to a clean side often. Use a final, gentle wipe with a separate clean towel to ensure no residue remains.
Now, inspect. Move the car into direct sunlight if you can. Crouch down and look along the paint line. The best tool is a bright LED work light. Shine it across the paint at a very low angle. This “raking” light exposes every imperfection.
Detailer’s Pro-Tip: The Lighting Angle Trick
This trick tells you everything. Set up a bright LED light so it shines across the paint at a shallow, raking angle. Look at the scratch. Now, slowly move your head so you are looking at the spot from a more direct, overhead angle.
If the scratch seems to disappear when you look straight down but magically reappears when you view it from the raking angle, the wax has filled it, not removed it. This is the expected result with a filler wax. True removal would mean the scratch is gone from every angle. Move your head, not just the light, to inspect from multiple viewpoints. This is how I check every inch of my black BMW after a detail.
Machine vs. Hand: Choosing Your Method for Scratch Repair
You need to separate the idea of scratch *repair* from scratch *filling*. The tool you choose depends entirely on your goal.
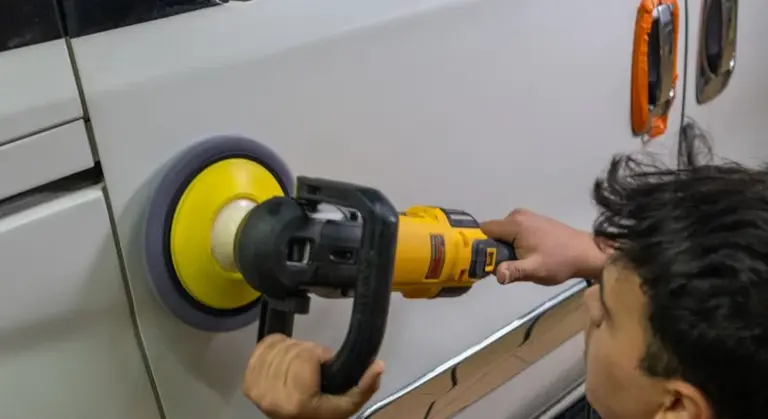
For true scratch removal that lasts, you need a Dual Action (DA) polisher, the correct cutting pad, and a abrasive compound or polish. The machine’s rotation and oscillation allow you to safely level the clear coat to the bottom of the scratch. This is permanent correction. My BMW’s swirls only vanish for good after a machine polish.
For applying a filler wax, both hand and machine work, but for different reasons. A machine can apply a sealant or wax with incredible thinness and uniformity, which often leads to better filling and longer durability.
By-Hand Method for Wax Application
Applying filler wax by hand is perfect for beginners or for spot repairs on a single scratch. It is also the only way to get into tight body lines, around badges, and on complex curves where a machine pad cannot fit.
The physical feel is key. You need just enough pressure to spread the product. You are not trying to rub the scratch out. You are laying down a filling layer. Let the product do the work. If you feel significant drag, your paint likely is not clean enough. Stop and re-clay.
Machine Method for Wax Application
For applying a liquid filler wax or a pure sealant, a machine is a time-saver and a quality booster. Use a clean, soft finishing pad (usually black or red) on your DA polisher. Apply 3-4 small dots of product on the pad.
Spread the product over the panel at speed setting 1 or 2 with no pressure. Then, increase to speed 3 or 4 and make one or two slow, overlapping passes over the entire section. The machine spins the pad thousands of times a minute, creating a layer so thin and even that it is nearly impossible to achieve by hand. This method is a lifesaver on large, flat panels like the hood of my Honda Odyssey. You get complete, uniform coverage in a fraction of the time.
Beyond the Wax: Protecting Your Paint from Future Scratches
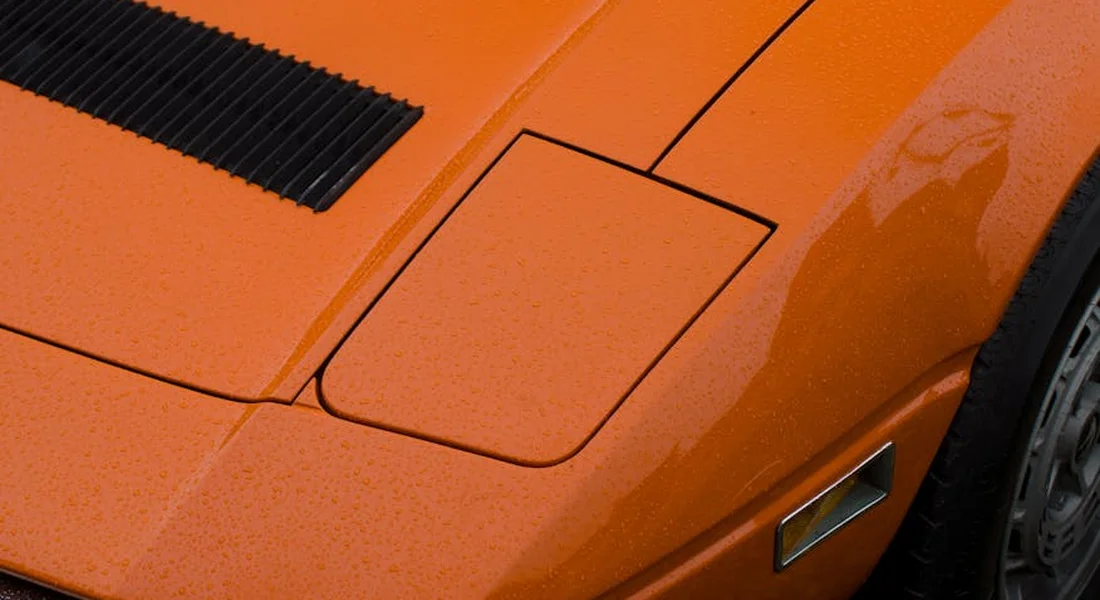
Thinking of wax only as a scratch fix misses its true power. Its primary and most valuable role is prevention. A fresh coat of wax is your paint’s first line of defense against the world.
I apply wax to my BMW, the “Swirl Magnet,” not to hide defects, but to make future cleaning safer. A quality wax or sealant cures into a hard, slick shell on top of your clear coat. This slippery surface does two critical things: it causes water to bead up and roll off, carrying away loose dirt, and it creates a barrier that makes it harder for contaminants to bond to the paint. This slickness means your wash mitt glides over the surface with less friction, dramatically reducing the chance of dragging sharp grit across the paint and creating new swirls. You are literally adding a sacrificial layer that takes the abuse instead of your clear coat.
The Correct Wash Technique is Your Best Defense
You can have the best wax in the world, but if you wash the car wrong, you will scratch it. I see this every day. Most of the fine swirls people try to “fix” with a wax were put there during a wash with a dirty sponge and a single bucket of soapy water. No amount of wax will cover up swirl marks on black cars.
Your washing process is everything. Here is how to do it right:
- Always Pre-Rinse: Use a strong stream of water from a hose or pressure washer (on a wide-angle tip) to blast off the majority of loose dirt and grit. This step alone prevents countless scratches.
- Use the Two-Bucket Method: One bucket holds your clean soapy water. The other is filled with clean water and a Grit Guard at the bottom. After you wash a section of the car, you rinse your mitt in the rinse bucket, rubbing it against the Grit Guard to trap the dirt you just picked up. This keeps your wash mitt clean.
- Invest in Quality Microfiber: Use a soft, high-pile microfiber wash mitt, not a sponge or a rag. The deep fibers lift and trap dirt away from the paint surface.
- Dry with Care: Use a large, clean microfiber drying towel. Pat and glide the towel across the surface. Do not scrub or wipe in circles with a dry towel, as any remaining dust can act like sandpaper.
When I clean the family Honda Odyssey, the “Kid Hauler,” after a muddy soccer weekend, this is my exact process. The goal is to get the dirt off without grinding it into the paint. Proper washing doesn’t just clean your car, it preserves the finish you work so hard to protect.
Upgrading Your Protection: Sealants and Coatings
Traditional carnauba wax is fantastic, but technology offers longer-lasting options. When you weigh synthetic vs carnauba wax, you’ll see durability and maintenance trade-offs that shape your choice. Think of it as a spectrum of protection.
- Traditional Wax (Carnauba): Beautiful, warm depth of shine. Feels amazing to apply by hand. Typically lasts 1-3 months. Great for garage-kept classics like my Miata, where the ritual is part of the joy.
- Synthetic Sealant: These are polymer-based. They often last 3-6 months or more, with superior chemical resistance against bird droppings or tree sap. They create an incredibly slick, glass-like surface. I use these on my daily drivers like the F-150 and Model 3 for their durability.
- Ceramic Coating: A semi-permanent, chemically-bonded layer of silicon dioxide. Professionally applied coatings can last for years, offering extreme hardness, unmatched hydrophobics (water beading), and incredible resistance to contaminants. This is the ultimate “set it and forget it” protection for a vehicle like the Porsche 911.
For my white Tesla Model 3, a synthetic sealant is perfect. It makes removing bug splatter from that flat front bumper much easier and protects the relatively soft clear coat common on many modern cars. On the red Porsche 911 with its Paint Protection Film (PPF), I use a coating-specific maintenance spray. This keeps the PPF slick and clean without compromising its self-healing properties.
A common question is how often you need to use a “scratch-filling” wax. The answer is that with a durable sealant or coating in place, you drastically reduce the need for it. The superior surface hardness and slickness prevent many fine scratches from happening in the first place, and the protection lasts so long that you are not constantly re-applying products that might contain fillers. Your maintenance becomes about safe washing and occasional booster sprays, not searching for a temporary visual fix.
Final Thoughts on Waxes and Scratches
Car wax is a shield, not an eraser. Use it to protect your clear coat and temporarily hide fine imperfections, but turn to polishing for the true removal of scratches.
Relying only on wax for a deep scratch allows UV damage and contaminants to permanently etch into your paint.
Sources and Additional Information
- Amazon.com: Car Wax For Scratches
- Scratch Remover – Jax Wax
- Repair & Renew Scratch Remover for Cars | Repair & Restore |
- Not All Scratch Removers Work-These Are the Ones That Smoothed Out the Scrapes on Our Car
- Scratch Removal Paste For All Paint Colors With Sponge …
- Amazon.com: Car Scratch Repair Wax
- Turtle Wax T-234KT Premium Grade Scratch Repair Kit
Max Gunther
Max is an automotive enthusiast having worked as a car mechanical and in interior detailing service for over 25 years. He is very experienced in giving your old car, a new fresh vibe. He has detailed many cars and removed very tough smells and stains from all kinds of cars and models, always ensuring that his work and advice helps his customers. He brings his first hand experience to his blog AutoDetailPedia, to help readers breath new life into their car interiors.