How Do You Use a Steam Cleaner for Car Detailing? Your Complete Guide
You might worry that steam will damage your car’s sensitive surfaces, but with proper technique, it becomes your most powerful cleaning tool.
I will teach you safe interior steaming for plastics and vinyl, effective exterior cleaning on paint and wheels, and fabric restoration for seats and carpets.
Ignore these steps, and you could permanently warp trim or set stains deeper into the material.
Key Takeaways: The Steam Cleaner’s Power
I have steamed the crayon wax out of my Honda Odyssey’s seats and the winter grime from my Ford F-150’s door jambs. Steam is powerful, but it has rules.
- Steam sanitizes with heat, not chemicals. The 200°F-plus vapor kills germs on contact, which is why I use it on every steering wheel I clean.
- It loosens dirt so you can wipe it away, not scrub it. On my BMW’s vinyl, steam dissolves old armor-all gunk without the elbow grease that causes scratches.
- Steam is safe for almost every surface when you respect it. I use it on leather, fabric, plastic, and even paint, but you must control the temperature and distance.
- It is a tool for cleaning and sanitizing, not a magic eraser for all stains. For set-in stains like dye or pet urine, you often need a dedicated cleaner alongside the steam.
- Patience and the right technique matter more than brute force. Rushing with steam can force moisture into places it shouldn’t go. Slow, deliberate passes win every time.
Your Steam Detailing Arsenal: Tools & Chemicals
Think of this as building your go-bag. Having the right tools turns a fight with grime into a simple procedure. This is the kit I’ve assembled from years of detailing my own cars.
- A Quality Steamer: Choose a handheld unit for portability or a cylinder for longer run time. My handheld is perfect for the Porsche’s alcantara, while my cylinder model tackles the entire Odyssey interior.
- Distilled Water: This is non-negotiable. Minerals in tap water will coat the internal parts of your steamer with scale, ruining it. I buy it by the gallon.
- A Brush Selection: You need different stiffnesses. A soft horsehair brush for dashboards and screens, a stiffer nylon brush for carpet fibers. I use a soft detailing brush to gently agitate steam into fabrics.
- Microfiber Towels: Have two piles. Use thicker 300-500 GSM towels for the initial wipe to absorb dirt and moisture. Finish with a soft 70/30 blend towel for a final, streak-free buff.
- A Plastic Trim Tool: This is for crevices. It safely scoops melted gunk from around window switches and air vents without leaving a mark.
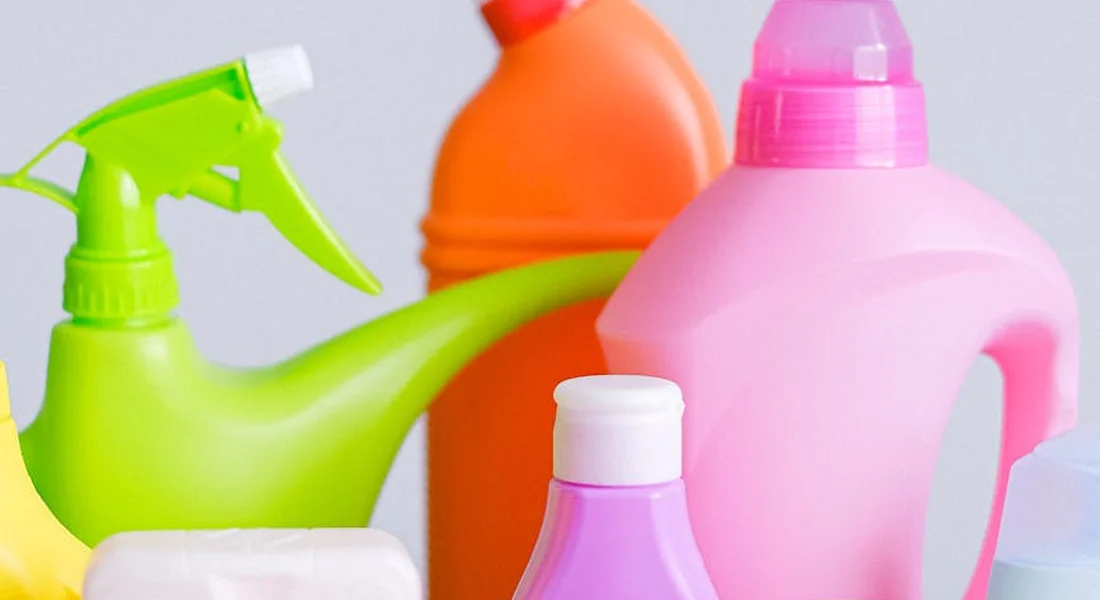
- Dedicated Interior Cleaners: For heavy soil, a pre-treatment helps. On the F-150’s mud-caked pedals, I spray a mild all-purpose cleaner first, then steam. The combo lifts everything.
The Steam Detailer’s Order of Operations
You have your steam cleaner ready. You are excited to start. The first step is not steaming. It is setting up for success. Doing things in the right order prevents you from pushing dirt around or creating new problems. This checklist is not a suggestion.
Follow it every single time.
- Vacuum everything thoroughly first. Loose sand, crumbs, and pet hair will turn into a muddy paste if you hit them with steam. Use a crevice tool and a soft brush attachment. Get deep into the seat tracks and between the console and the seats.
- Pre-treat heavy stains or greasy areas. Steam is amazing, but it is not a miracle worker on old, set-in stains. For a greasy steering wheel or a dried-up juice spill, apply a small amount of dedicated interior cleaner or an APC (all-purpose cleaner) diluted for interiors. Let it dwell for a minute to start breaking things down.
- Work top to bottom. Start with the headliner, then move to the dash, door panels, seats, and finally the carpets and floor mats. Gravity is real. Any drips or condensation will fall onto areas you have not cleaned yet. On my Honda Odyssey, I always start with the sticky handprints on the ceiling above the kids’ seats.
- Use a wiping towel immediately behind the steam nozzle. This is the secret. As you pass the steam over a surface, a separate, dry microfiber towel should follow right behind it. The steam lifts the grime, and the towel captures it. If you do not do this, the dissolved dirt just resettles on the surface as it cools and dries.
- Allow proper ventilation and drying time before reassembling. When you are done, it will feel damp inside. That is normal. Roll down the windows or point a fan into the car for at least an hour. Do not put seat covers back on or stack things on the seats until they are completely dry to the touch. Trapped moisture is how you get mildew.
What Steam Cleaning Actually Does (And When You Should Use It)
Think of steam as a physical force, not just hot water. The science is simple. Intense heat, around 200°F or more, does three things at once. It loosens the chemical bond between dirt and the surface. The low pressure of the vapor jet then helps lift it. The small amount of moisture helps dissolve it.
This is why you can absolutely steam clean your car interior and exterior safely, but you must respect the heat and know the limits of the material you are working on.
It is different from a pressure washer, which uses high-pressure cold water to blast things away, and different from a chemical cleaner, which relies on surfactants to break bonds. Steam is a middle ground. It uses physics to clean, which means you can often use far less chemical, or sometimes none at all.
This leads to the common question. Is steam cleaning effective for stain removal? For fresh spills and surface grime, it is fantastic. For a two-year-old coffee stain that has been baked into the fabric, it has limits. The heat and moisture might lighten it, but you will likely need a specialized stain remover first to break down the organic material. Steam is then perfect for flushing that residue away.
The “Why Steam?” For Your Specific Problem
You do not need steam because it is a cool tool. You need it because it solves specific, annoying problems we all face.
In the minivan, the Odyssey, those plastic cup holders get a biofilm of spilled soda and milk. Spraying them just spreads it. Holding a steam nozzle over them for ten seconds kills the germs and melts the gunk so a wipe cleans it completely. A lot of detail goes into keeping those cup holders clean.
On my F-150’s all-weather floor mats, mud dries into a concrete-like crust. A brush just scours the plastic. Steam turns that crust back into soft mud you can wipe or vacuum up.
The Porsche’s steering wheel gets a greasy film from hand oils. You do not want slippery, harsh chemicals there. A quick pass with a steam jet and an immediate wipe with a microfiber leaves it clean, sanitized, and perfectly matte. However, for those who want to clean and disinfect their car’s steering wheel properly, additional steps might be necessary.
The biggest benefit for me, as someone who details in my own garage, is the dramatic reduction in chemical fumes and runoff. For most interior surfaces, the steam is the cleaner. I am not breathing in aerosol sprays or worrying about residue that might irritate my kids’ skin later.
Where Steam Shines and Where to Be Cautious
Not every surface in your car welcomes high heat. Here is a simple guide to keep you safe.
This brings up another question. Can you steam clean a car engine? You can, but only as a careful, controlled degreasing step on a cool engine. The goal is to use the steam to soften and melt grease and oil buildup so you can wipe it away. You must protect sensitive electronic components like the alternator, coil packs, and open air intakes with plastic bags. It is powerful, but not a substitute for common sense, especially when it comes to using cleaning chemicals.
The Steam Cleaner Arsenal: Picking Your Tools & Setting Up
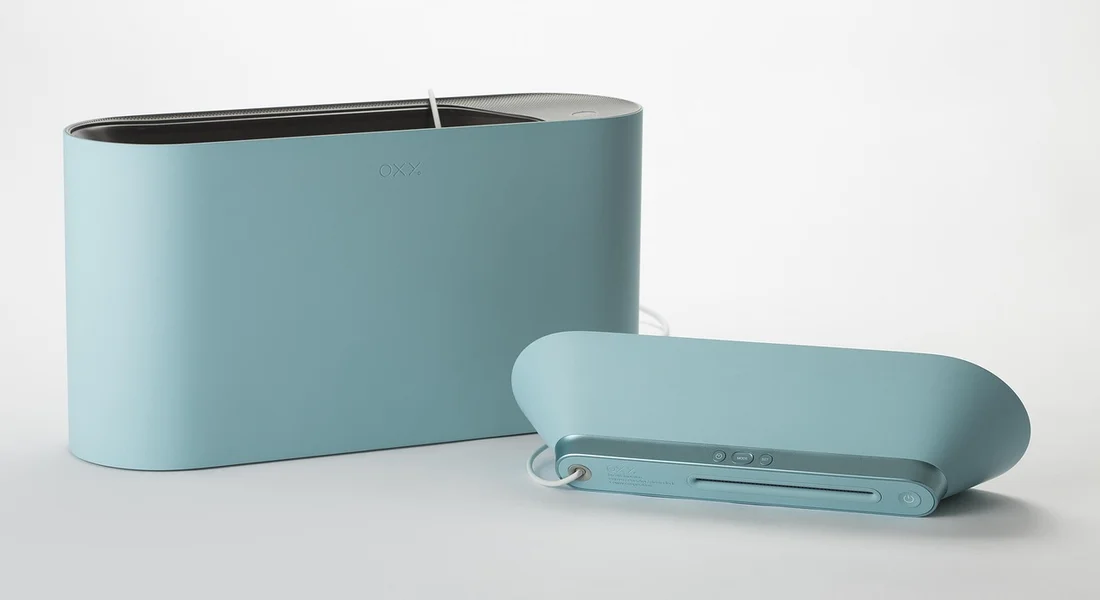
Choosing a steamer feels like picking a wrench. You need the right one for the job. Tank size is your first decision. A small, one-liter tank is light and heats fast. It is perfect for quick jobs like door jambs or a single seat. My go-to for a fast interior refresh on the Tesla. But for a full minivan detail, like my Odyssey, you will be refilling that small tank constantly. A two to three liter tank gives you more steam time. You trade some portability for less interruption.
Heat-up time and pressure matter. A good unit reaches full temperature in under five minutes. You want that steam hot, around 275°F. Pressure, measured in bar or PSI, is what does the work. Look for at least 4 bar. Higher pressure means the steam physically lifts grime instead of just wetting it.
Cordless, lithium-ion models are a game-changer for portability. No wrestling with a power cord across the seats is a luxury. But know the trade-off. Battery life limits your continuous steam time. It is fantastic for spot cleaning and mobile details. For a full, top-to-bottom job in your garage, a plug-in model offers relentless power.
Must-Have Attachments
The steamer is just the engine. The attachments are your tools.
- Brush Heads (soft & stiff): This is your workhorse. A soft bristle brush is for all interior surfaces-dash, door cards, seats. It agitates the dirt so the steam can sanitize. A stiffer brush is for tougher jobs, like textured plastic floor mats or heavily soiled carpet.
- Detail Nozzle (or pencil nozzle): This is your precision instrument. It focuses the steam into a pinpoint jet. I use this for every single vent slat, around window switches, and in the seams of leather seats. It blasts out the gunk you cannot reach with a brush.
- Squeegee for Glass: Do not use a paper towel on tint. This attachment lets you steam the glass and squeegee it clean in one motion. It leaves zero lint or streaks. It is the only way I clean the inside of my BMW’s windows now.
The right attachment turns the steamer from a simple cleaner into a surgical tool for dirt.
Beyond the Steamer: Your Support Crew
Steam is powerful, but it does not work alone. You need a crew.
You will need more microfiber towels than you think. The steam loosens dirt, but the towel wipes it away. Use thick, plush towels for drying and wiping large panels. Use soft, low-pile towels for glass and sensitive surfaces. Have a dedicated bucket for used towels. This keeps the grime off your clean surfaces. After use, wash, dry, and store microfiber towels properly to keep them effective. Proper washing and storage extend their life and performance.
Brushes supplement your steamer attachments. A soft detailing brush knocks dust out of vents before you steam them. A stiff nylon brush is for scrubbing carpet fibers or rubber floor mats. A horsehair brush is gentle enough for cleaned leather, like in the Porsche, to give it a perfect finish.
Do not steam over piles of dirt. A strong vacuum with good suction is non-negotiable. You must remove all loose sand, crumbs, and debris first. Steaming over grit just makes mud.
Finally, use distilled water in your steamer. Tap water has minerals that leave scale inside the boiler. This will kill your steamer over time. Distilled water is cheap insurance for your tool’s life.
The Golden Rules: Your Pre-Steam Prep Checklist
Rushing in with the steamer is the biggest mistake. Preparation is not just a step. It is seventy percent of the entire job. A clean canvas gives you a perfect result.
Start by removing everything. Take out floor mats, car seats, trash, and loose change. Get all of it out. This gives you access and prevents you from steaming around objects.
Next, perform the most thorough dry vacuum of your life. Get every crack. Use crevice tools for the seams of the seats and where the console meets the carpet. Vacuum the dash and door pockets. Your goal is zero loose particles. On my Kid Hauler Odyssey, I find more sand in the cupholders than at the beach. If sand lingers in the seats or carpets, the next steps will cover how to remove sand from car seats and carpets. This will set you up for a thorough post-vacuum clean.
Now, look for stains. For organic stains like milk or soda, pre-treat with an enzyme cleaner. For grease on the steering wheel, a drop of APC on a microfiber works. Let the pre-treatment sit and break the stain down while you set up. The steam will then lift it away completely.
Work on a cool car. Never steam a hot interior. Park in the shade or work in a garage. Hot surfaces cause the steam to flash evaporate. This reduces its cleaning power and can leave residues.
Lay out your tools like a surgeon. Have your steamer, full array of attachments, and two piles of microfiber towels (clean and used) all within reach. Fumbling for a towel while steam is condensing on a surface creates water spots.
Open the doors and ventilate the space. Steam increases humidity. Good airflow keeps you comfortable and helps surfaces dry faster after you wipe them. It is a simple step that makes the whole job more pleasant.
Steaming Your Car’s Interior: Seats, Carpets, and Every Crevice
This is where you get your hands dirty, or rather, clean. Using a steamer inside a car is methodical. You work zone by zone, turning grime into vapor you can wipe away. The key is to never rush. Let the steam do the work, and you follow up with agitation and absorption.
Cloth and Synthetic Seats (Like in the Odyssey or Tesla)
The ‘Vegan Leather’ in my Tesla and the cloth in the Odyssey get the same basic treatment. You always test for colorfastness first. Hit a hidden spot, like under the seat, with a quick burst of steam and press a white towel against it. If no color transfers, you are good to go. That same approach helps you clean and maintain colored fabric car seats without fading. It keeps the color vibrant while you lift dirt.
For a full seat, work in small sections, about one square foot at a time.
- Hold the steam nozzle about an inch from the fabric and give it a few seconds of steam to saturate the fibers.
- Immediately scrub the area with a soft-bristled brush. You will see dirt lift to the surface.
- Take a clean, dry microfiber towel and press it into the fabric. Wipe away the moisture and the suspended dirt.
This steam-brush-wipe sequence lifts ground-in dirt from fabric without overwetting it, which is the secret to a clean, fresh, and quickly-drying interior. For tough stains like the spilled milk in the Odyssey, you focus the steam directly on the spot, agitate more, and use the towel to blot, not rub, until the stain is gone.
Genuine and Coated Leather Seats (Like in the BMW or Porsche)
Leather requires a gentle touch. The goal is to clean the surface’s pores, not cook the hide underneath. On my black BMW or the Porsche’s seats, I use a lower steam setting and keep the nozzle moving constantly, never pausing in one spot. That careful technique is essential for cleaning and maintaining leather car seats.
The steam will loosen body oils and dirt from the grain. I follow the steam pass instantly with a gentle wipe using a microfiber towel. You will be shocked at what comes off on what looks like a clean seat. That’s a core part of steam cleaning methods for car seats. In the next steps, you’ll find a link to a fuller guide on these methods.
The most critical step comes after you finish steaming and the surface is bone dry: you must apply a quality leather conditioner. The heat and moisture can dry the leather. Conditioning restores suppleness and protection. Do not skip this.
Carpets and Floor Mats
Pull the mats out if you can. It is easier. For ground-in dirt and sand, a higher steam setting is your friend. Use a stiffer brush, like a carpet or horsehair brush, to really agitate the fibers after steaming.
Think of your steamer as a handheld carpet extraction machine. The steam loosens the dirt, and your brush and towel extract it. Work in lines, overlapping your passes. For the nap of the carpet, steam and brush against the grain to lift it, then with the grain to lay it back down neatly.
For deep stains, hold the steam directly over them for 5-10 seconds, agitate vigorously with the brush, and then press a towel down hard to absorb as much of the liquefied stain as possible. Repeat if needed.
Dashboards, Consoles, and Hard Plastics
This is where steam feels like magic. Sticky residues from tape, old air fresheners, or spilled drinks simply melt away. Use the lowest effective steam setting here. A short burst into a vent slit or over a button is all you need.
Have your microfiber towel ready in your other hand. As soon as you hit the spot with steam, wipe it. The heat softens the gunk instantly, allowing you to wipe it clean without harsh chemicals that can leave streaks or degrade plastics.
Steam cleans intricate vents and buttons by dissolving grime on contact, leaving no chemical residue behind to attract more dust later. Just do not let the steam sit and soak into seams or electronics.
Headliners and Other Fragile Zones
I will be very direct here. Be careful. The headliner is fabric glued to a foam backing, which is glued to the roof. Soaking it with steam can cause the glue to fail, resulting in a sagging headliner.
Use minimal, distant bursts. Hold the nozzle 6-8 inches away. Use a light, upward dabbing motion with a dry towel immediately after to absorb any moisture and lifted dirt. Never scrub. If you see the fabric getting visibly wet, you are using too much steam or holding it too close.
This gentle approach works for other glued or delicate materials, like the cloth door inserts on some cars or vintage interiors.
Steaming Your Car’s Exterior: Paint, Wheels, and Trim
Can you steam clean a car exterior? Absolutely. It is a powerful pre-wash and detail tool. Always start with a cool car in the shade. Wash and clean the car exterior safely before applying any high heat, especially on a hot black panel in the sun. It’s asking for trouble otherwise.
Is Steam Safe on Car Paint? The Crucial Technique.
Yes, steam is safe on clear coat if you respect one rule: keep it moving. Never, ever hold the steam nozzle in one spot on the paint. You are not pressure washing. You are gently heating and loosening contaminants.
I use it on my white Tesla’s bumper to soften bug guts before a wash. I glide the nozzle in slow, sweeping motions about an inch from the surface. You will see the bugs and road film soften. On my F-150’s muddy flanks, steam helps break up the dried-on film. It makes the contact wash much safer and more effective.
Used as a pre-treatment, steam dramatically reduces the need for heavy scrubbing, which is the main way fine scratches and swirls get into your paint.
Wheels and Tires: Melting Away Brake Dust
Steam is phenomenal on wheels. The high-performance brakes on my Porsche coat the alloys in fine, stubborn brake dust. Steam liquefies it on contact. Hold the nozzle close to the wheel face and watch the dust turn from a powder to a slurry that wipes right off.
Switch to a detail nozzle to get inside lug nut holes and around the intricate curves of the caliper. It blasts dirt from places brushes cannot reach. Once clean, you can use your normal tire cleaner on the rubber. The steam pre-clean means your wheel chemical works better and faster.
Plastic Trim, Weatherstripping, and Grilles
Dull, faded black plastic trim often just needs a deep clean. Steam does this without any chemicals. Run the steam over the trim, following with a brush or towel to wipe away the oxidized grime. You will often restore a rich, deep black color simply by removing years of embedded dirt. If the trim has faded, you can extend these steps to restore faded black plastic trim. The next steps will guide you through the full restoration process.
It is perfect for rubber door seals. Dirty seals squeak. Steam cleans and conditions them in one pass, removing the grit that causes noise. For front grilles and honeycomb vents, the steam cuts through the dead bugs and road film trapped deep inside, leaving a truly clean finish.
Special Projects: Engine Bay and Tough Stain Spot Treatment
Once you master the basics, your steamer becomes a surgical tool for complex jobs. These are not quick blasts. They are careful, methodical projects.
The Engine Bay Deep Clean (Proceed with Caution)
The question always comes up. Can I steam clean my car engine? The answer is yes, but only if you treat it like defusing a bomb.
One wrong move can leave you with a car that won’t start. I learned this the hard way on my old F-150 years ago. The goal is to degrease and brighten plastic and metal, not to pressure wash the electronics.
Here is the only way I do it now.
- Let the engine cool completely. A hot engine can flash steam or crack components.
- Protect the vital areas. Cover the alternator, the open air intake, and the main engine computer if easily accessible with plastic bags and tape. Disconnect the battery’s negative terminal. This is non-negotiable.
- Spray a dedicated engine degreaser on heavy oil and grease buildup. Let it dwell and emulsify. Do not use the steam yet.
- Start the steam. Use a wide-angle nozzle and keep a reasonable distance. The steam’s job here is to rinse the dissolved degreaser and to gently lift grime from wire harnesses and tight nooks your brush can’t reach.
- Work in small sections. Steam, then immediately wipe with a dedicated microfiber towel. Do not flood anything.
- Dry everything thoroughly. This is where my master blower earns its keep. Use a powerful, lithium-ion powered dryer to blow water out of every crevice, from the fuse box lids to the spark plug wells.
- Remove the protective bags, reconnect the battery, and start the engine. Let it run for 10-15 minutes. The heat will evaporate any last bits of moisture.
Steam makes engine detailing safer than a pressure washer because it uses less water, but you must respect the electronics.
Targeting Set-In Stains and Odors
For stains that have laughed at your regular cleaners, steam is your best friend. The heat opens fabric fibers and loosens the bond of the contaminant.
In my Odyssey, a spilled milk stain had set for a week. Smelly. Here was my process.
First, I used an enzymatic cleaner designed for protein stains. I sprayed it on, but did not agitate yet. I then went over the area with the steamer and a soft brush attachment. The heat helped the enzyme solution penetrate deep into the foam under the fabric. After steaming, I used a wet/dry vacuum extractor to pull the now-liquified mess out.
For a dye stain like Kool-Aid, the process is similar but with a dye-specific remover. The steam activates the chemistry.
For odors, steam helps by killing some bacteria and flushing out particles. For true, baked-in smells, steam alone is not enough. After steaming the carpets and seats in the Odyssey, I ran an ozone generator inside for an hour. Ozone is the only thing that destroyed that sour milk odor for good. Steam prepares the battlefield, but sometimes you need heavier artillery.
Think of steam as a force multiplier for your specialized cleaners, not a replacement for them.
Steam Cleaning Troubleshooting and Pro Tips
Every tool has its quirks. Here is how to solve the most common steam cleaning frustrations.
My Upholstery is Still Damp. What Did I Do Wrong?
You over-wet it. It is the most common mistake. You held the nozzle too close or on one spot for too long. The steam condensed into liquid water faster than the fabric could handle.
The fix is simple. Use less steam. Use short, controlled bursts. Follow immediately with aggressive wiping using a thick, dry microfiber towel. Do not just dab. Press and drag to absorb the moisture.
After you finish an entire seat or carpet section, you must aid drying. Turn on the car’s climate control to max heat and direct the vents at the floor. Crack the windows. Use a portable fan. For professionals, a moisture meter tells you exactly when the interior is dry enough to reassemble.
Your goal is to clean with hot vapor, not to soak the material with hot water.
Why Am I Seeing Streaks or Cloudy Residue?
This happens on glass and plastic most often. You see white streaks or a hazy film after you steam. This is usually one of two things.
First, it could be mineral deposits from hard water in your steamer tank. The steam evaporates, leaving the calcium and magnesium behind on the surface. The solution is to always use distilled water in your steamer. It is cheap insurance.
Second, it is dissolved dirt that you did not wipe away. As the steam loosens grime, it becomes a dirty solution. If you do not remove it with a clean towel, it dries back onto the surface. The fix is to change your wiping towels frequently. Use one side for the initial pass, then flip to a clean side.
On glass, my method is steam, wipe quickly with a clean glass microfiber, and then immediately follow with a clean, dry squeegee. This removes the solution entirely for a perfect, streak-free finish.
Getting the Most From Your Machine and Staying Safe
Your steamer is an investment. Treat it well and it will last for years.
- Descale it regularly. Even with distilled water, some buildup occurs. Every few months, run a mix of half white vinegar and half water through it, then flush with clean distilled water.
- Never point the nozzle at yourself, others, or pets. The steam is over 200°F and can cause instant, severe burns.
- Wear gloves. I use simple nitrile gloves under a pair of heat-resistant cotton gloves. It keeps your hands safe and clean.
- Let the unit heat up fully. Most machines have a ready light. Wait for it. You want dry, superheated steam, not a sputter of hot water.
- Store it properly. Empty the tank, coil the hose, and keep it in its carrying case. This protects it from dust and damage in the garage.
When you learn its rhythms, a steamer stops being a mystery and becomes the most versatile, chemical-saving ally in your detailing kit.
Your New Secret Weapon
The most powerful part of a steam cleaner is its simplicity: it’s just hot water vapor. Mastering the slow, deliberate motion and keeping the nozzle moving is what unlocks deep cleaning without causing damage. Patience here is not a suggestion; it’s the fundamental rule for transforming grimy surfaces.
Rush the process, and you’ll leave behind moisture that breeds mildew or use excessive heat that can warp delicate plastics and vinyl.
Industry References
- You Don’t Know Clean Until You Know Steam: The Best Car Steam Cleaners, Tested
- Best Car Steamer for Auto Detailing & Cleaning – Portable Car Interior Steam Cleaner – Aquaprovac.com
- r/AutoDetailing on Reddit: Best budget steam cleaner
- Amazon.com: Steamer For Car Detailing
- What is the best steam cleaner for car detailing?
Max Gunther
Max is an automotive enthusiast having worked as a car mechanical and in interior detailing service for over 25 years. He is very experienced in giving your old car, a new fresh vibe. He has detailed many cars and removed very tough smells and stains from all kinds of cars and models, always ensuring that his work and advice helps his customers. He brings his first hand experience to his blog AutoDetailPedia, to help readers breath new life into their car interiors.