How Do You Wrap Your Car? A Start-to-Finish Guide for Roof, Hood, and Trim
You have the vinyl and the dream, but the thought of bubbles, wrinkles, and wasted material makes you hesitate.
This guide will show you the entire process. We will cover setting up your workspace, essential tools, proper surface prep, techniques for large flat panels like hoods and roofs, the challenge of doors and windows, handling complex trim, and final sealing.
Skip the proper steps and your new wrap will begin peeling at the edges within weeks.
Why Choose a Vinyl Wrap Instead of a New Paint Job?
Let me put it this way. A proper paint job means stripping the car, spraying in a sealed booth, and waiting for it to cure. You are looking at several thousand dollars and your car is gone for weeks. A vinyl wrap can be done in your garage, costs significantly less upfront, and when you are done, you just drive away. The wrap is a removable skin that leaves your factory paint untouched, while paint is a permanent alteration. When you look at car paint vs wrap cost, the upfront price and long-term value both matter.
Think about protection. My 2018 Ford F-150, the workhorse, gets pelted with gravel. A quality vinyl wrap acts like a tough second skin. It absorbs the impact of stone chips and blocks the sun’s UV rays that fade and oxidize paint. Five years from now, you can peel the wrap off and your original paint will be as fresh as the day you applied it.
Now, for the fun part. Paint offers a gloss or metallic finish. Vinyl opens a catalog of possibilities. You can have a matte black roof, satin grey doors, or a chrome trim accent. There are finishes that mimic brushed steel or change color in the light. For experimenting with a radical new look without permanent consequences, vinyl wrap is the ultimate tool.
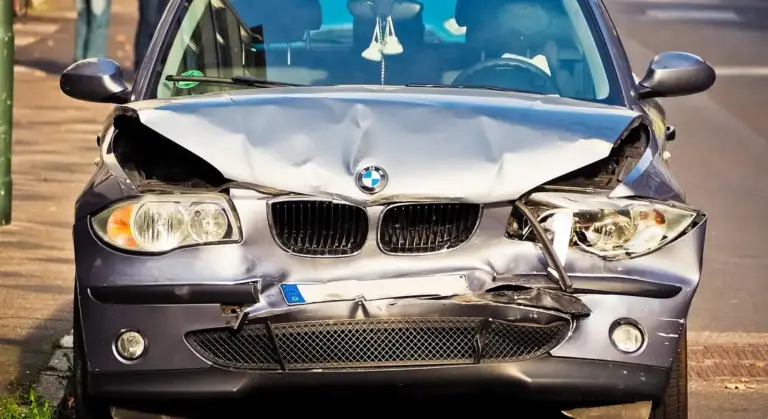
Paint is still the right choice for some jobs. If your car has deep rust or major body damage that needs welding and filler, you must repair and paint it. A wrap will only highlight those flaws, especially when wraps are used over compromised surfaces. Also, for true custom artwork with intricate designs, paint is the only method that works. But for a color change, a finish update, or paint protection, wrapping is the practical and creative solution.
Before You Start: Planning, Budget, and Realistic Expectations
Start with the math. You need to estimate how much vinyl to buy. Grab a tape measure. For a rough guide, a compact car needs about 150 square feet. A full size truck or SUV can need over 200. Vinyl wrap installation cost per square foot for the material alone ranges from $3 for basic colors to $10 or more for premium metallic or chrome finishes. Budget $500 to $2000 just for the vinyl roll.
Be honest about your time. Those speedy tutorial videos are edited. This is slow, meticulous work. For your first full car wrap, clear your schedule for 40 to 60 hours of focused effort. That is a full week of work, maybe two if you are doing it after your day job. Rushing leads to wrinkles, bubbles, and wasted material.
It is smart to research “vinyl wrap installation cost near me” before you begin. Get quotes to have your car wrapped professionally. A pro job can range from $2,500 to $5,000 or more. Comparing the DIY material cost to a professional quote gives you a clear picture of the value of your own labor and skill. For some, paying a pro is worth every penny.
Do not skip this step. Find a junkyard panel. An old hood or a flat door from a salvage car is the perfect practice canvas. You must learn how the vinyl stretches, how heat softens it, and how to squeegee out air on a surface you are not afraid to ruin. I learned more from wrapping a dented Miata hood than from any video. It saved my Porsche’s perfect roof from my early mistakes.
If you are considering a do it yourself car wrap kit, read the details carefully. Many cheap kits use thin, inferior vinyl that is prone to tearing and leaves adhesive glue behind. Invest in known brands like 3M or Avery Dennison, as their film is more consistent, easier to handle, and removes cleanly. A good kit provides enough material, a felt-edged squeegee, a sharp knife, and often a basic heat gun. Consider a vinyl wrap tool kit to keep these essentials organized, so you can work more efficiently as you wrap.
The Non-Negotiables: Professional-Grade Tools and Prep Steps
Good vinyl work is not about strength. It is about control. The right tools give you that control. Using household items leads to frustration, wasted material, and a finish that looks like a DIY project. Gather these before you unroll a single inch of vinyl.
The Tool Kit You Cannot Skip
- Professional Squeegees: You need two types. A soft, felt-edged squeegee for initial tacking down and smoothing large areas without scratching. A hard, clear plastic squeegee for applying final, firm pressure to remove all the slip solution and ensure adhesion.
- Heat Gun: Not a hair dryer. A proper heat gun gives you precise, adjustable heat to make the vinyl pliable, help it stretch around curves, and relax it to prevent wrinkles and fingers.
- Precision Knife Blades: A sharp, fresh blade is a safe blade. Dull blades tear vinyl and can jump, slicing your paint. I use a snap-off blade knife and change the segment every panel.
- Application Gloves: Nitrile gloves stop fingerprints and skin oils from contaminating the adhesive side of the vinyl. They also give you a better grip on the material.
- Spray Bottle with Slip Solution: Mix a few drops of baby shampoo or a dedicated wrap slip solution into distilled water. This mist lets you position the vinyl before you commit.
- 70% Isopropyl Alcohol (IPA): The final prep step. This removes every last trace of wax, silicone, and detailer spray.
- Premium Microfiber Towels: Use low-pile, clean towels for the IPA wipe-down. You want zero lint left behind.
Surface Prep: The Secret to Longevity
Your vinyl is only as stuck as your paint is clean. Think of it like a bandage. If your skin is oily or dirty, the bandage peels right off. Your car’s paint is the same.
Start with a full two-bucket wash. I do this on my black BMW, the swirl magnet, every single time. Dry it completely with a clean towel.
Next, run a clay bar over the entire surface. You will feel the difference. The paint should feel as smooth as glass. Any tiny bonded contaminant will create a bump under the vinyl you will see forever.
The final, non-negotiable step is a wipe-down with 70% isopropyl alcohol. Spray it on, wipe it off with one side of a microfiber, then immediately buff it dry with a clean side. This leaves you with a perfectly sterile surface for the adhesive to grab.
To Remove or To Wrap Around?
This decision separates a decent wrap from a great one. Removing parts gives you clean, hidden edges. Wrapping in-place is faster but risks dirt catching on the visible edge over time.
Remove these if you can: factory emblems, antenna mast, side mirror caps, and sometimes door handles. On my old Miata, I took off the front and rear badges. It took ten minutes and the result was seamless.
Wrap in-place with careful trimming: window trim, roof rails, most bumper vents. The key is to use minimal heat, stretch the vinyl gently into the crevice, and make one confident cut with your fresh blade. Do not saw back and forth.
Do you need to prep a car before wrapping?
Yes. Absolutely. There is no maybe here.
Skipping prep guarantees failure. The vinyl will not stick properly. It will develop bubbles as contaminants break the adhesive bond. Edges will lift within weeks. On a curved panel like a hood or fender, a lack of adhesion means the vinyl’s tension will pull it right off. Prep is not just cleaning. It is creating a foundation that holds your work together for years, not months. I learned this the hard way on an early project. The vinyl on the hood started lifting at the corners after a single summer. The reason was a leftover sealant I missed. Now, the alcohol wipe is my religion.
The Core Technique: How to Tackle Flat, Curved, and Complex Surfaces
You need a reliable method. The hinge method works on every surface, from a flat hood to a curved door. It is your starting point for control.
First, peel back the liner. Do not remove it all. Just expose about a foot of adhesive. Mist a slip solution onto the sticky vinyl and onto the car’s clean panel. I use distilled water with a drop of car wash soap. Position the vinyl where you want it. Use your squeegee to tack down one straight edge firmly. This tacked edge is your hinge.
That hinged edge lets you lift and reposition the vinyl until you are happy with the placement.
Now lay the sheet down. Work from the hinge outward. Use your squeegee in overlapping strokes. Push the fluid and air bubbles toward the edges. Go slow. Rushing creates wrinkles you cannot fix.
Curves require heat. A heat gun on low setting makes vinyl soft and pliable. Warm a section before you stretch it. Apply gentle tension with your hands. Pull the vinyl over the curve. Do not overstretch. On the fenders of my Ford F-150, I heat small areas and stretch just enough for the vinyl to lay flat. It should look relaxed, not tight.
Heat lets the material conform without fighting you, but too much stretch will cause it to shrink back later.
After the vinyl is down, you must post heat. Run your heat gun over the entire panel. Use wide, even sweeps. You will see the vinyl relax and the gloss become uniform. This step activates the adhesive fully. It ensures edges will not lift. I skipped this once on my Tesla’s roof and found a corner peeling after a week.
Post heating locks the wrap in place, making it durable through seasons of sun and cold.
Trimming is the final touch. Always use a brand new, sharp blade. Change it often. Hold the knife at a very low angle, almost flat against the paint. This prevents you from cutting into the clear coat. Follow panel edges and body lines. For complex shapes like door handles, make small relief cuts first. Then trim the excess. On my Porsche’s mirrors, I let the vinyl’s tension guide the blade for a smooth cut.
A sharp blade held flat is the difference between a clean edge and a costly scratch.
How Are Cars Wrapped? A Panel-by-Panel Mindset
Do not look at the car as one giant piece. See it as a collection of panels. Wrap the roof. Then the hood. Then the doors. This makes the job manageable. Plan your seam locations before you cut any vinyl. Seams should hide.
Place seams in door jamb areas, under trim pieces, or along sharp body lines. On my Honda Odyssey, I ran seams under the rubber window seals. When the door is closed, you cannot see them. This planning gives a factory finish.
Thinking panel by panel turns an impossible task into a series of simple, achievable wins.
The Panel Guide: From a Flat Roof to a Curved Bumper
Wrapping a car is not one job. It is a series of smaller jobs, each with its own puzzle. The technique you use on a flat hood will fail on a curved bumper. Your success depends on recognizing the shape you’re working with and changing your approach. That same adaptability is crucial in a DIY car wrap installation, where you tailor techniques to each panel. With careful planning and the right tools, you can tackle the wrap yourself.
I learned this the hard way on my black BMW. I tried to wrap a simple fender like it was a roof. The vinyl fought me every step, leaving me with wrinkles and wasted material. Now, I treat every panel as its own project.
How to Wrap a Car Roof or Hood (The “Easy” Flat Panels)
Do not let the word “easy” fool you. A flat panel is only easy if you have a clean workspace and a method. A single piece of dust under the vinyl on your hood will haunt you every time you wash the car.
The goal for roofs and hoods is to lay the vinyl down from the center outward, trapping no air, and cleanly wrapping the edges out of sight.
- Cut your vinyl piece with at least 4-6 inches of overhang on all sides. More is better here.
- Peel the backing paper just halfway. Fold the adhesive side back onto itself. This creates a manageable “handle.”
- With a helper, float the vinyl over the clean panel. Start at the front center for a hood, or the middle for a roof. Let it gently kiss the surface.
- Using a soft felt squeegee, tack the vinyl down along that centerline. Work from the center out to one side, then the other, pushing air toward the edges.
- Now, slowly pull the remaining backing paper out from under the laid-down vinyl as you continue to squeegee. Go slow. If a bubble forms, lift the vinyl back and re-squeegee.
- Once the full sheet is down, use your heat gun on a low setting to warm the overhanging vinyl. This makes it pliable.
- For a roof, tuck the warmed edge under the roof rail trim or into the gutter. For a hood, stretch and wrap it into the drainage channel or under the edge. Trim any excess with a fresh razor blade.
On my Tesla’s white hood, I use this method. The flat surface is simple, but the long edges must be perfect. Any flaw in a flat panel is glaringly obvious.
How to Wrap Vehicle Doors and Quarter Panels (Handling Body Lines)
This is where wrapping gets real. A door is rarely flat. It has a sharp character line running through it. This ridge wants to trap air and create a finger-like bubble that you cannot push out.
Your strategy is to conquer the hardest part first the sharpest body line. Lay the vinyl down over that crest before you do anything else.
Start by applying your vinyl over the character line. Do not try to do the top or bottom of the door first. Use your fingers and a squeegee to gently work the material over that sharp edge. Apply medium heat to help it relax and conform without over-stretching.
Once that line is perfectly laid down, you can work the material up to the window line and down to the rocker panel. You are now working two smaller, flatter areas.
Door handles are the next challenge.
- Best Method: Remove it. On most cars, this is a few bolts behind the interior door card. Removing the handle gives you a clean, professional finish with no seams.
- If You Can’t Remove It: Lay the vinyl over the entire handle area. Use a very sharp razor to make a small “X” or a circle cut directly over the handle’s pivot point. Gently work the vinyl down around the base with heat and your fingers. Use a separate, small piece of vinyl (an inlay) to cover the remaining post. This creates a seam, but placed strategically, it can be nearly invisible.
How to Wrap a Car Bumper or Mirrors (The Deep Stretch Challenges)
Bumpers and mirrors are the final boss. They are concave, complex, and demand respect. Trying to force a single piece of vinyl into a deep fog light recess is a guaranteed tear.
For severe curves and recesses, you must use inlays. An inlay is a separate, smaller piece of vinyl that fills a complex area, allowing the main piece to lay flat over simpler contours.
Look at the front bumper on my Ford F-150. The area around the fog light is a deep bowl. Here is my process:
- Apply the main bumper vinyl up to the edge of the recess. Use high heat to stretch the vinyl *toward* the hole, but not into it. Tuck and trim it right at the lip.
- Cut a separate piece of vinyl several inches larger than the fog light hole. Apply this piece separately, stretching it down into the recess with concentrated heat and a gloved hand. It will overlap the main piece.
- Take a fresh razor blade and cut a single, clean seam line where the two pieces overlap. Remove the excess trim from both sheets. The result is two perfect pieces meeting at a seam that follows the body contour, not a wrinkled, over-stretched mess.
For mirrors, the same rule applies. Wrap the main body of the mirror, then use a small inlay for the tight curve at the base near the door. Use your heat gun constantly, but keep it moving. Too much heat in one spot will thin the vinyl and cause it to lose its adhesive, leading to a failure later.
Remember, vinyl has memory. When you stretch it with heat, it wants to shrink back. On a cold bumper, that shrink-back can pull your seams apart. Always post-heat every stretched area once it’s fully applied and trimmed. Sweep the heat gun over it evenly to “set” the stretch and activate the adhesive fully.
Special Cases: Grilles, Badges, Plastic, and Chrome Trim
Most panels are flat or gently curved. The real test comes with the fiddly bits. Wrapping trim, badges, and grilles separates a basic job from a professional one. You can do it, but you need the right approach.
Can You Wrap a Car Grill, Badges, and Trim? Yes, But Here’s How.
Can you wrap a car grill? Yes, but you will likely need to remove it. Trying to wrap a grille while it’s on the car is a fight with edges and deep recesses you cannot win. On my F-150, the grille pops out with a few clips and screws. Once it’s on your workbench, you have two choices.
You can wrap each individual slat separately. This is time-consuming but gives the cleanest finish, with no seams over complex shapes. The other method is to wrap the entire housing as one piece, stretching the film into the honeycomb openings. This is faster, but you must post-heat every single opening to relax the film and lock the adhesion. Either way, removal is your friend.
Can you wrap car badges? Yes, and you have two clear paths. For a simple cover-up, you can carefully lay film over the badge and use a sharp, fresh blade to cut around its perimeter. This leaves a visible seam right at the badge’s edge. For a seamless, color-matched look that looks factory, remove the badge.
Most badges are held on with adhesive foam tape. Use fishing line or a dedicated plastic trim tool to saw behind it. Clean the old adhesive off, making sure to remove any residue from the car paint, especially when it comes to automotive surfaces. Then, wrap the badge itself on a flat surface, and re-attach it with new automotive-grade double-sided tape. I did this on my BMW’s trunk badges. It looks infinitely better than trying to cut around them on the car.
Can you wrap chrome trim on a car? Yes, but chrome is a slippery enemy for adhesive. That mirror finish is not ideal for vinyl to stick to long-term. Thorough cleaning is not enough. You must use an abrasive pad and alcohol to completely dull the surface, removing all shine and gloss. This gives the adhesive something to grip.
For any chrome trim that you plan to keep wrapped for years, applying a plastic primer promoter is non-negotiable. This clear spray creates a bonded layer that the vinyl loves. Skip this step, and you will likely find edges peeling up within months, especially with temperature swings.
Can you wrap plastic car parts / plastic trim? Yes, but manage your expectations. Smooth, hard plastic like mirror caps or dashboard trim is ideal. It wraps like paint. Textured plastic, like the matte black trim on most modern bumpers and wheel arches, is a different story.
The vinyl will conform to the texture, but it will still show through. You cannot make a pebbled surface smooth with a thin film. The wrap will look glossy and colored, but textured. Test a small piece first so you are not surprised.
How to Wrap Car Windows (For a Tinted Look) and Interior Trim
This is a common point of confusion. You can apply vinyl to glass, but it is not window tint. Real tint is a dyed or ceramic film that blocks heat and UV rays, and its darkness is regulated by law. Vinyl is a colored, adhesive plastic.
Using vinyl on side or rear windows gives a cosmetic tinted look from the outside. It provides almost no heat rejection and should never be applied to the windshield, as it is not optically clear and is unsafe. For applying to side windows, clean the glass perfectly, use a generous slip solution, and treat it like a large, flat panel. Expect it to wear faster than paint film from wipers and cleaning.
How to vinyl wrap dashboard trim. Interior plastic is often more fragile and heat-sensitive than exterior parts. The sun has already made it brittle. You must use vinyl specifically formulated for interiors. This vinyl has a much lower initial tack. It allows you to position it without instantly sticking and burning your fingers trying to lift it.
If a trim piece pops out, like the gloss black around your shifter, remove it. Wrap it on the bench. If it does not remove easily, be extra cautious with heat. Use a low temperature on your heat gun. Too much heat will warp or melt the soft plastic underneath. Go slow, stretch gently, and post-heat carefully to set the adhesive without damaging the substrate.
Keeping It Fresh: Cleaning and Maintaining Your Wrapped Vehicle
Think of your vinyl wrap like a delicate, colored skin. It needs gentle care. I learned this the hard way on my Tesla Model 3. I used a wax-based detail spray on its wrapped mirror caps once. It left a hazy, streaky residue that took me an hour to fix. Your wrap will only look as good as the products you use to clean it. Be sure to use the right techniques when you wash your vinyl wrapped car.
Stick to a simple, pH-neutral car shampoo. I keep a gallon of it in my shop for everything from my F-150 to the Porsche. It cleans without stripping or damaging the vinyl’s adhesive or top coat. Avoid any wash soap with added waxes or gloss enhancers. They can create a cloudy film or cause the vinyl to yellow over time. If you want extra protection, you must use a sealant specifically made for vinyl wraps. Regular car wax will not bond properly and can lead to issues.
Be very careful where you wash your car. Those automatic tunnels with spinning brushes are a hard no. I saw one rip a section of wrap clean off a door edge. Even some pressure washers are risky. Keep the nozzle at least a foot away and use a wide fan pattern. A direct, high-pressure stream can get under the vinyl’s edges and start peeling it up. If your car is wrapped, washing it with care protects the vinyl. Gentle methods help the wrap last longer.
People always ask me, how long does a vinyl wrap last? The honest answer is three to seven years. It depends on your habits and environment. Sun exposure is the biggest enemy, drying out the vinyl and fading the color faster than anything else. My red 911 sits in a garage, so its wrap looks new. My buddy’s wrapped truck, parked in Arizona sun, started to crack and fade after just four years. Poor cleaning with harsh chemicals will also shorten its life dramatically. So understanding the vinyl car wrap lifespan helps you plan maintenance and expectations. Simple steps—like cutting back on aggressive cleaners and limiting sun exposure—can noticeably extend it.
Contaminants happen. Bird droppings and tree sap are acidic. They can etch into the wrap’s surface if left too long. For bug splatter on the hood or sap on the roof, I use a different method. Soak a microfiber towel in warm water and lay it over the spot for a few minutes. This softens the gunk without abrasive rubbing. Then, gently wipe it away. For tougher sap, a tiny drop of isopropyl alcohol on a cloth can help, but test it in an inconspicuous area first. The goal is to lift the contaminant, not scrub the wrap.
Common Vinyl Wrap Installation Mistakes and How to Avoid Them
I’ve fixed more botched wrap jobs than I can count. Most failures come from a few simple, avoidable errors. Let’s walk through them so you can get it right the first time.
- Inadequate Cleaning: This is the number one cause of bubbles and lifting. If there’s a speck of dust or a fingerprint of grease on the paint, the vinyl will not stick. I clean the panel with isopropyl alcohol and a fresh microfiber until the cloth comes away perfectly clean. No shortcuts.
- Using Too Much Heat: A heat gun is a tool, not a magic wand. Overheating the vinyl makes it too soft and weak. It can shrink later or lose its adhesive properties. I use short, sweeping bursts of heat, just enough to make the vinyl pliable. If it starts to gloss over, you’ve gone too far.
- Stretching Vinyl Over Sharp Radii: Vinyl has memory. Stretch it too hard over a sharp edge like a door handle cutout or a hood corner, and it will try to pull back. This causes lifted edges and wrinkles. For complex curves, you need to use relief cuts or work with smaller pieces.
- Using Dull Blades: A fresh, sharp blade is non-negotiable. A dull blade will tear the vinyl instead of cutting it cleanly. It can also slip and scratch your paint. I change my blade after every major panel. It’s cheap insurance.
- Rushing the Process: Wrapping is a marathon, not a sprint. If you rush, you will get air bubbles, misalignment, and frustration. Take your time. Work from the center out, smoothing as you go. Patience is the real skill here.
So, what if you see a bubble or a wrinkle? Small, fingernail-sized bubbles often contain just air. You can usually poke them with a pin and smooth the air out. Larger bubbles or wrinkles mean there’s contamination or a fold underneath. You must lift that section back, clean the adhesive side and the paint again, and re-apply. If an edge is lifting more than a day after installation, the surface wasn’t clean enough, and that piece needs to be replaced. Don’t try to glue it down. It won’t hold. Knowing when to re-do a section saves you from a bigger headache later.
The Core Principle for Vinyl Wrap Success
After wrapping the roof of my Model 3 and the flanks of my 911, I know the make-or-break step is the one you do before the vinyl even comes out of the box. Your entire project depends on creating a perfectly clean, bare surface that the adhesive can grip without any interference from wax, grease, or dust.
Ignore this, and you’ll be peeling up a wrinkled, dirt-speckled mess long before the vinyl’s lifespan is up.
Deep Dive: Further Reading
- HOW TO VINYL WRAP A CAR AND CARE FOR IT – THE FULL DIY GUIDE
- DIY Car Wrap Step By Step Guidelines – vinylfrog
- How To Wrap Your Vehicle | Wrap Installation Tips | Rvinyl
Max is an automotive enthusiast having worked as a car mechanical and in interior detailing service for over 25 years. He is very experienced in giving your old car, a new fresh vibe. He has detailed many cars and removed very tough smells and stains from all kinds of cars and models, always ensuring that his work and advice helps his customers. He brings his first hand experience to his blog AutoDetailPedia, to help readers breath new life into their car interiors.