What Are the Best Ways to Fix Car Dents and Scratches at Home?
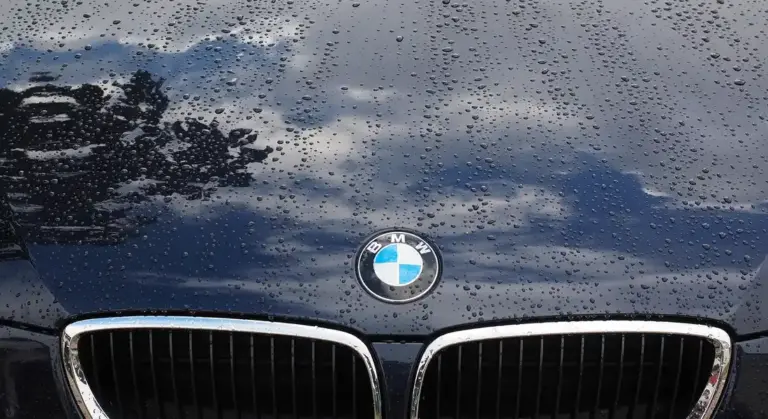
Finding a new dent or scratch on your paint can ruin your week. I know the feeling, staring at a fresh scuff on my jet black BMW, but a professional shop isn’t your only option.
I will show you how to handle these flaws safely, covering assessing the damage correctly, using paintless dent repair tools, polishing out light scratches, applying touch-up paint like a pro, and using vinyl wraps for cosmetic coverage.
Leave a scratch untreated or a dent poorly addressed, and you invite rust, clear coat failure, and a steep drop in your car’s value.
Your DIY Bodywork Arsenal: Tools & Chemicals You’ll Need
Working on your car’s paint is a commitment. You cannot cut corners. Having the right tools from the start is the difference between a successful repair and making the problem worse. I learned this the hard way on my black BMW, trying to buff out a scratch with a cheap towel. Let’s break down what you need to have on hand before you touch the car.
For Any Repair Job
These are your non-negotiables. They are the foundation of safe, clean work.
- Microfiber Towels: You need two types. For applying compounds and polishes, use a 300 to 500 GSM towel; the plush weave holds product and cushions the surface. For your final wipe-down, use a soft, low-pile 70 GSM towel. This prevents fine scratches on your fresh finish.
- Bucket with a Grit Guard: Never wash your car without one. The Grit Guard sits at the bottom, trapping dirt and sand so your wash mitt doesn’t pick it back up and swirl your paint. This is critical.
- pH-Neutral Car Wash Shampoo: For pre-repair cleaning, you must use a neutral pH soap. Acidic or alkaline cleaners can stain or damage the paint you are about to work on.
- Isopropyl Alcohol (diluted 1:1 with distilled water): Your final prep step. This removes any leftover wax, grease, or oils so your repair products bond correctly.
- Painter’s Tape: Essential for masking off trim, lights, and areas you are not working on. The blue 3M tape is my go-to.
- Safety Gear: Nitrile gloves protect your skin from chemicals. Safety glasses are a must for sanding and polishing. A basic respirator is non-optional if you are dry sanding; you do not want to breathe that dust.
Specialty Tools for Scratches
Scratch repair is about abrasives and precision. This kit is for paint correction.
- Dual-Action Polisher: For beginners, a polisher with a 15mm to 21mm throw is easier to control and less likely to cause holograms. My first was a 21mm, and it saved the finish on my Miata’s single-stage paint.
- Polish & Compound: Start with a fine polish. Have a more aggressive compound on hand for deeper defects. Brands like Meguiar’s or Sonax offer reliable, user-friendly options.
- Foam Pads: A medium-cut (orange) pad for compounding and a finishing (white or black) pad for polishing. Match the pad to the product’s aggressiveness.
- Wet/Dry Sandpaper: For deep scratches only. You will need a range, from 2000 to 5000 grit. You always sand with plenty of water and a sanding block.
- Scratch-Specific Pen or Kit: For a scratch down to the primer, a quality touch-up pen with clear coat is needed. Avoid the cheap, gloppy ones.
Specialty Tools for Dents
Dent repair is about physics and patience. This is for pushing and pulling metal.
- Dent Puller/Paintless Dent Repair Kit: These often use hot-melt glue tabs you stick to the dent, then pull with a bridge or slide hammer. They work well on shallow dings.
- Body Panel Access Tools: A long, flexible rod or specific panel tools. This is for reaching behind a panel to push a dent out from the inside, which is why access is everything.
- Rubber Mallet & Dolly Block: For gentle tapping on the backside of a panel. The dolly provides a firm backing surface. Never use a standard hammer directly.
- Hair Dryer or Heat Gun (on low): Gentle heat can make metal more pliable. Use extreme caution to avoid burning the paint. If the panel is warm to the touch, stop.
First, Assess the Damage: What Can You Actually Fix at Home?
Before you spend a dime or lift a tool, you need to diagnose the problem. This step saves you hours of frustration. Walk around the car with me, and let’s look at it like a detailer would.
The Scratch Diagnosis
Run your fingernail gently across the scratch. If your nail catches in the groove, that scratch is through your clear coat and into the color layer or primer. This is a deep scratch. If your nail glides right over it without catching, the scratch is likely confined to the clear coat. Think of your clear coat like a scratch on your eyeglasses; it can often be polished out.
A clear coat scratch is a prime candidate for DIY polishing, while a deep scratch requires touch-up paint and managed expectations. For a step-by-step approach, the repair buff polish scratches guide walks you through the right technique and products.
The Dent Diagnosis
Look at the shape. A shallow, round “ding” from a shopping cart door is a world apart from a long, sharp crease from a sideswipe. The ding is a good DIY target. The crease is usually a professional job.
Now, feel the area. Can you access the back of the panel? For my Honda Odyssey’s sliding door dings, I could pop the interior trim and get my hand behind it. For a dent in the middle of my F-150’s door, the window mechanism is in the way. No access means you cannot push it out properly.
Your first question for any dent should be: “Can I get behind it?” If the answer is no, your options shrink to glue-pull kits, which have limits.
Know Your Limits: Common DIY FAQs
Some materials and shapes fight back. Be honest with yourself here.
- Bare Metal or Chrome Bumpers: If a scratch goes down to bare metal, you must address rust prevention immediately with primer. Chrome is brutally hard; polishing it requires specific products. These are advanced projects.
- Complex Contours: A whale-tail spoiler on my old 911, or the sharp trunk ledge on a 4Runner, are nightmares for sanding and polishing. The curves are tight and compound, making it easy to burn through edges or leave visible sanding marks.
- Plastic vs. Steel: Plastic bumpers flex. You can often pop a dent out with heat and pressure from behind. Steel doors are less forgiving and can “oil can” if worked incorrectly.
Setting the Right Expectation
I tell every friend I help: we are not a body shop. We do not have spray booths, frame machines, or professional blending equipment. On my black BMW, I can make a scratch 95% invisible from five feet away, but in direct sun, my eye might still find it.
The goal for successful DIY paint and dent repair is “vastly improved,” not “perfectly invisible.” If you can make the damage disappear from a conversational distance, you have won. Chasing perfection at home usually leads to a bigger, more expensive problem for a pro to fix later. Start small, learn the process, and celebrate the improvement.
How to Repair Scratches: From Swirls to Deep Gouges
The Step-by-Step Process for a Clean Repair
You must clean the area first. This is not a suggestion. If you polish or paint over dirt, you grind it into the clear coat. That makes a scratch into a cloudy, sanded mess. Clean and prepare scratches before repair to set the stage for a smooth finish. Proper preparation helps the repair materials adhere and prevents a cloudy look.
Spray a dedicated waterless wash or quick detailer onto the spot and the surrounding panel. Use a fresh, clean microfiber towel. Fold it into quarters. Gently wipe the area. Turn the towel to a clean side often. The goal is to lift contamination away, not drag it around. For a larger area, a proper two-bucket wash is best.
For light scratches and swirls that disappear when wet, a machine polisher is your best friend. My black BMW taught me this. I use a dual-action polisher, a soft foam polishing pad, and a fine polishing compound. Apply a few dots of compound to the pad, spread it on the paint at low speed, then increase speed and make slow, overlapping passes. It’s important to understand the differences between hand and machine polishing to achieve the best results.
This process gently removes a thin layer of clear coat, leveling the surface until the scratch is no deeper than the surrounding paint. Paint compounding techniques for scratch removal can help refine this step and restore gloss. Work in a two-foot by two-foot area. Stop often to wipe off the residue with a clean microfiber and check your progress.
For a deep scratch you can feel with your fingernail, you need touch-up paint. Clean the scratch with isopropyl alcohol. Shake the factory touch-up pen well. Apply the paint color in thin layers, just filling the scratch. Let it dry for a full day. It will look like a raised blob. That’s normal.
You have two options to level it. The Langka Blob Remover system uses a special solvent on a plastic card to dissolve the excess paint blob without hurting the surrounding clear coat. The more advanced method is wet sanding with 3000-grit sandpaper, keeping it lubricated with soapy water. This is for steady hands only. With either method, you are carefully removing the *excess* paint blob until it is flush with the original paint surface.
Your final steps are non-negotiable. After compounding or sanding, you must polish the area to restore gloss. Use a finishing polish on a soft pad. Then, apply a paint sealant or wax. You have just exposed fresh, unprotected clear coat. Seal it immediately. On my F-150’s repair, I use a spray ceramic sealant for durability.
Detailer’s Pro-Tip: The Lighting and Glide Technique
You cannot fix what you cannot see. A bright LED work light is your most important tool. Do not use overhead garage light. Hold the light at a low angle, almost parallel to the paint. Scratches will cast long shadows and become glaringly obvious.
As you polish, watch for the moment those shadow lines disappear under your pad’s path; that’s how you know the scratch is gone. Be sure you’ve properly applied rubbing compound before polishing.
Arm speed and pressure matter. Do not lean on the polisher. The weight of the machine is often enough pressure. Move your arm slowly, about one inch per second. Let the abrasives in the compound do the cutting. Pressing too hard will stall the machine’s rotation, create heat, and leave holograms. I call this the glide technique. Your arm should feel like it’s guiding, not forcing.
How to Repair Dents: Pull, Push, and Massage
Using a DIY Dent Repair Kit (The Puller Method)
A hot glue dent puller kit can work on shallow dents in metal panels, like doors or rear quarter panels. The key is surface prep and patience. Clean the dent with isopropyl alcohol to remove all wax. The glue must bond to bare paint.
Heat the glue gun thoroughly. Apply a generous dab of glue to a plastic pull tab, then stick it firmly to the center of the dent. Wait for the glue to cool completely. It should be hard and crisp. Attract the slide hammer or T-handle puller to the tab. Now, the crucial part.
You do not yank the dent out in one pull. You apply steady, increasing tension. You often hear a light *pop*. The dent might come out 80%. Remove the tab, clean off the glue, reapply a new tab to a different spot, and repeat. Work the dent up gradually. For a rear quarter panel where you cannot get behind it, this is often your only DIY option.
These kits are for metal. Do not use them on plastic bumper covers. The glue bond can be stronger than the plastic, and you can pull the paint right off. They also do not work on chrome trim.
The “From Behind” Method for Accessible Dents
If you can access the back of the dent, you have a major advantage. This works for door dings where you can remove the interior panel, or sometimes inside a trunk lid. You need a rubber mallet and a shaping tool. I use a rounded wooden dowel or a specialized nylon dent rod.
The goal is not to hit the dent head-on. You massage the metal back. Place the tip of your dowel or rod against the back of the metal, right at the outer edge of the dent’s crease. Use the rubber mallet to give the dowel a light, firm tap. Move along the edge of the dent, tapping as you go. Work the outer ring in first.
You are gently encouraging the metal back to its original memory, starting from the edges and moving toward the center. Use very light force. It is easier to tap again than to reverse a new dent you made by hitting too hard. I fixed a shallow crease on my Odyssey’s sliding door this way. It takes time, but the result can be perfect.
Technique Tweak: The Hair Dryer and Compressed Air Trick
This method is for plastic bumper covers only, and it is risky. I have used it on my F-150’s front bumper with care. The theory is simple: heat the plastic dent with a hair dryer on high for 90 seconds to make it flexible, then quickly cool the underside with compressed air to contract the plastic and pop the dent.
Here are the precise steps to avoid cracking the paint. Heat the dent and a large area around it evenly. Do not concentrate the heat on one spot. Move the dryer constantly. You want the plastic warm, not melting. Then, from behind the bumper, spray the can of compressed air upside down. This releases the cold liquid propellant. A short, one-second blast on the center of the dent’s backside is all you try.
Sometimes it pops. Often it does nothing. The risk is thermal shock; heating the painted surface then flash-freezing the back can cause the paint to crack or delaminate from the plastic. Consider this a last-ditch trick for an old, textured plastic bumper you plan to repaint anyway. If you’re dealing with cracked paint on a bumper, there are safer repair options to consider. A proper repair and repaint guide can help you navigate the process more reliably. It is not for modern, smooth-finished bumpers.
When DIY Isn’t Enough: Smart, Cost-Effective Alternatives
I love a good DIY project. There’s a real satisfaction in fixing something yourself. But after years of working on my own cars, from the Miata to the F-150, I’ve learned to recognize my own limits. Pushing past them can turn a small, inexpensive fix into a massive, costly repair.
Knowing when to call in a specialist isn’t a failure, it’s the smartest money you can spend on your car. It protects your investment and your sanity. Here are the professional services I use when a job is beyond my skills or tools.
Paintless Dent Repair (PDR): The Art of the Push
For dents where the paint is still intact-no cracking, no chips-Paintless Dent Repair (PDR) is a miracle. I had a shopping cart ding on the driver’s door of my F-150. It was a perfect crease, about the size of a quarter. A traditional body shop would have quoted me to sand, fill, and repaint the entire door. A PDR technician came to my driveway and had it looking perfect in 45 minutes for a fraction of the cost.
How it works: A skilled technician uses specialized metal rods and tabs to gently massage the metal back into its original shape from behind. They work the dent out millimeter by millimeter. It requires an incredible feel for the metal and a deep understanding of how panels are structured.
- Best For: Door dings, hail damage, minor creases from minor impacts. The paint must be factory original and unbroken.
- Your Job First: Before they arrive, clean the area thoroughly, inside and out if you can. Remove any interior trim panels they might need access through. A clean car helps them work faster.
- Listen for the Truth: A good PDR tech will tell you if a dent is not repairable this way. If the metal is stretched too far or the paint is cracked, they’ll say so.
Vinyl Wrapping: The Creative Cover-Up
Sometimes a scratch is too deep to polish out, or a paint repair on a single panel will never match the aged color of the rest of the car. This is where vinyl wrap shines. I used this on my old Miata’s rear bumper after a scrape. Instead of a mismatched paint job, I wrapped the lower section in a contrasting satin black. It looked intentional and custom.
Think of high-quality automotive vinyl like a very thick, very conformable sticker. It physically covers the flaw. This is a fantastic middle ground between a full repaint and living with an eyesore, and it lets you add a personal touch.
- Best For: Covering scratches on single panels (like a hood or roof), rocker panels, or creating accent colors. It’s also temporary and removable, which is great for leased vehicles.
- Key to Success: Surface preparation is everything. The panel must be flawlessly clean, decontaminated, and free of any wax or sealant. Any particle underneath will show through.
- A Pro Tip for DIY: If you attempt a wrap repair, use “knifeless tape.” This special tape lets you cut the vinyl without ever touching the paint with a blade, eliminating the risk of slicing into your clear coat.
The Hard Stop: When You Must Call a Painter
There are lines you simply cannot cross with DIY or semi-pro fixes. Crossing them destroys value.
Deep, penetrating rust is one. On my Miata project, I found a bubble in the rocker panel. I sanded it down and found a hole rusted straight through. No amount of touch-up paint or filler will stop that. It needs metal cut out, new metal welded in, and then proper priming and painting. Ignoring it lets the cancer spread.
Large areas of damage are another. A deep scratch that runs across the hood, door, and fender cannot be spot-repaired. A professional painter’s job is to make the repair invisible, which often means blending new paint into adjacent panels for a seamless match. This is an art form requiring a spray booth, proper ventilation, and years of experience.
If you see bare, ragged metal or the damage is larger than your hand, put the rubbing compound down. The next step is a consult with a reputable body shop. It’s the only way to preserve the car’s structure, appearance, and long-term value—especially when DIY car scratch repair isn’t sufficient.
Final Thoughts on DIY Dent and Scratch Repair
Whether you’re touching up a chip on the F-150’s bumper or polishing a scratch on the 3 Series, your best tool is patience. Match the repair method precisely to the damage, and never skip the cleaning and prep.
Rush the job, and you will often make the flaw more visible and permanent.
Sources and Additional Information
- 7 DIY Methods for Removing Car & Truck Dents | CarCovers.com
- DIY Dent Repair & Spray Painting – YouTube
- r/Cartalk on Reddit: Somebody Kicked My Car, In NEED Of Suggestions On DIY Dent Removal? TY!!!
- Mastering Dent Removal: Expert Tips and Techniques from Fort Mill Hyundai – Fort Mill Hyundai Blog
- Car Dent Repair: 5 DIY Hacks That Can Save You Money
- How to Fix Car Dents: Options and Costs to Consider
Max Gunther
Max is an automotive enthusiast having worked as a car mechanical and in interior detailing service for over 25 years. He is very experienced in giving your old car, a new fresh vibe. He has detailed many cars and removed very tough smells and stains from all kinds of cars and models, always ensuring that his work and advice helps his customers. He brings his first hand experience to his blog AutoDetailPedia, to help readers breath new life into their car interiors.