How Do You Paint Plastic Car Trim for a Finish That Lasts?
Faded or scratched plastic trim can ruin your car’s look, but a DIY paint job often peels and disappoints.
I will show you my method, honed on vehicles like my workhorse F-150, covering the critical prep work, choosing the right products, applying paint for even coverage, and locking it in with a durable sealant.
Get the prep wrong, and your fresh paint will crack and flake off before the season changes.
What You Need to Know Before Painting Plastic Trim
You can absolutely paint plastic car trim. The finish can look professional and last for years. But you must follow specific steps. If you skip them, the paint will peel, chip, or crack. It will look worse than when you started.
First, know the difference between painting and dyeing. Painting applies a new layer on top of the plastic. Dyeing actually stains the plastic itself, changing its color from the inside out. Dye is fantastic for faded black trim you want to refresh, not completely change. If you’re searching for how to dye plastic car trim, know it’s a simpler process for restoration, not a full color change. If you’re focusing on how to restore faded car trim, dyeing provides a straightforward option to refresh color. It targets the look without removing texture or requiring a full repaint.
Can You Paint Plastic Car Trim? Yes, But It’s Not Just Spray and Pray
I see this question all the time: can I paint the plastic trim on my car? Can you paint plastic trim on cars? The answer is always the same. Yes, but a pro finish comes from prep, not the paint can. Spraying paint on dirty, glossy plastic is a guarantee of failure.
Think of it like applying a ceramic coating. The coating itself is great. But the magic happens in the wash, the decontamination, the perfect polish before you ever open the bottle. With trim painting, your surface preparation is 90% of the battle for adhesion and durability. A rushed rattle-can job might look okay for a week. Then it starts to flake off in the sun.
Interior vs. Exterior Trim: Two Different Beasts
These are not the same job. They fight different enemies. Exterior trim, like wheel arches, bumpers, and the plastic trim around door windows, faces a brutal world. UV rays from the sun break down chemical bonds. Heat makes plastic expand and contract. Road salt, bug splatter, and rain constantly attack it.
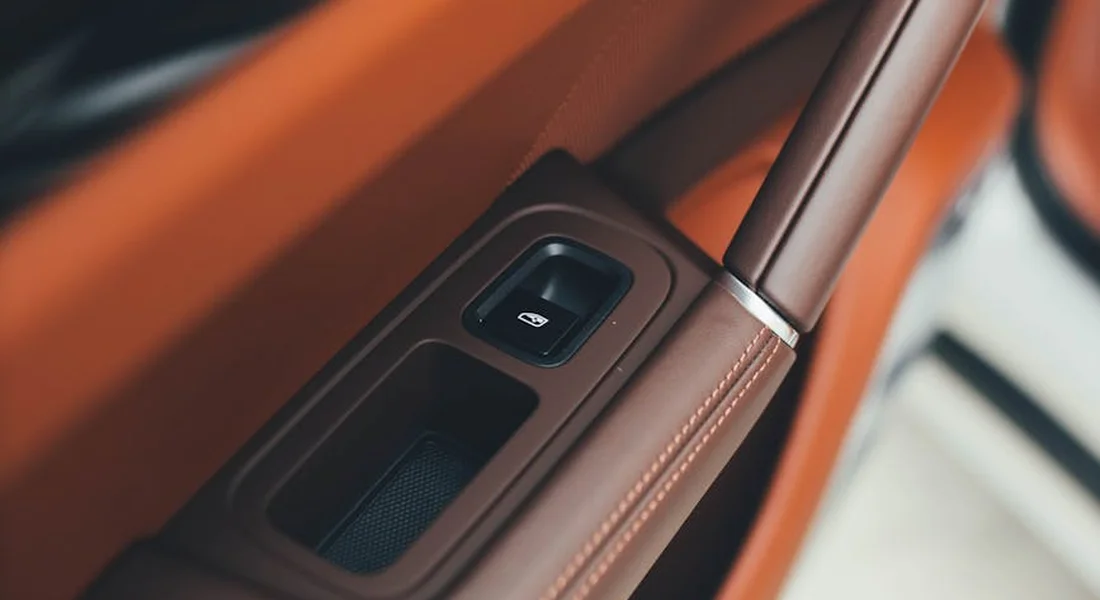
Interior trim, like dashboards, door cards, and center consoles, lives in a different kind of warzone. It faces skin oils from your hands, UV rays through the windshield, and constant abrasion from items rubbing against it. When people ask can you paint interior car trim, I tell them yes, but the paint must withstand touch. It also often needs to be low-VOC for your health inside the cabin. The color match to your car’s interior aesthetics is also more critical, especially when compared to exterior car paints.
And yes, you can paint black plastic car trim. It’s one of the most common projects. The key is deciding if you want to keep it black or change the color entirely. A fresh coat of matte black can make an old SUV look new again.
Choosing the Right Paint: More Than Just Color
This is where jobs succeed or fail. You cannot use just any paint. Standard automotive paint is formulated for metal. Plastic flexes. It bends. Use rigid paint on a flexible bumper, and it will crack like an eggshell the first time you push on it.
You need paint formulated for flexible plastics. For DIYers, this means specific aerosol spray cans labeled for automotive plastic or bumper repair. For a more durable, professional result, a 2K (two-component) system with a hardener is the way to go. It forms a much tougher chemical film.
Adhesion promoter is your best friend. It’s a chemical primer that etches into the plastic and gives the real primer something to grip. Never skip it. A flexible primer is also non-negotiable. It creates the uniform, slightly rough base layer your color coat needs.
When choosing what paint to use on plastic car trim, also think about the final look. Do you want a glossy finish, a satin sheen, or a flat matte black plastic trim paint? Each requires a specific top coat. Gloss shows every imperfection in your prep work. Matte is more forgiving but can be harder to clean.
Gathering Your Arsenal: Tools & Chemicals for the Job
Get everything on this list before you start. Missing one item means stopping mid-job. That ruins your momentum and can introduce dust or contamination. Safety gear is not a suggestion, it is a requirement. Wear nitrile gloves, a proper respirator mask for organic vapors, and eye protection. These chemicals are not for breathing.
Some folks ask about a plastic paint trim roller with wheels. It’s a tool for applying edge trim. I don’t recommend it for painting large trim pieces. It lays paint on too thick and unevenly. For a smooth, professional finish, controlled spraying is the only real method.
The Essential Toolbox: From Scuff Pads to Spray Guns
You need the right tools to touch, shape, and mask the plastic.
- Plastic Pry Tools: To safely remove trim pieces without scratching them or your paint.
- Sanding Supplies: 600-grit to 800-grit sandpaper or a gray scuff pad. This is to deglaze the surface, not sand it down.
- High-Quality Masking Tape: The blue fine-line tape is best for clean edges. Use sheeting or paper to protect surrounding areas.
- Spray System: Your choice here defines the finish.
- Aerosol Cans: Convenient and low-cost for small jobs. Shake them well and keep them warm for consistent spray.
- HVLP Spray Gun: Gives you ultimate control over material flow and pattern. This is the pro’s choice.
- Airbrush: Only for tiny, intricate areas you can’t mask.
- Specific Products: For areas like wheels, a dedicated plastic wheel trim paint is formulated for extreme heat and brake dust resistance.
Chemicals and Preparants: The Secret Sauce
The liquids make the bond happen. Using the wrong one can melt your trim or cause fish-eyes in the paint.
- Wax and Grease Remover: This is your first clean. It strips old protectants, wax, and oily films. A pH-balanced formula is safest.
- Isopropyl Alcohol (IPA): Your final wipe before primer. It removes any last residues and ensures a perfectly clean, dry surface.
- Adhesion Promoter: The critical link between bare plastic and your primer. Spray a light, even mist.
- Flexible Primer: Builds your foundation. Apply in multiple thin coats.
- Flexible Color Coat & Clear Coat: The paint itself and its protective top layer. Always use products designed for automotive plastics.
Specific Tools & Chemicals List with Pro Specs
Here are the nitty-gritty details I use in my shop.
- Microfiber Towels: Use a 200 GSM towel for applying and wiping cleaners. Use a 350 GSM premium, lint-free towel for your final IPA wipe. Any lint left behind will be painted over.
- Polisher/Spray Gun: A dual-action polisher can be used with a very fine pad (3000+ grit) to buff out dust nibs between coats if needed. For an HVLP gun, a 1.3mm nozzle is a great all-around size for primers and paints.
- Chemical pH: Your wax and grease remover should have a pH between 6 and 8. This is neutral enough to not damage or dry out the plastic polymers.
- Grit Guard: Have a bucket with a Grit Guard filled with clean water. Use it to rinse your sanding pad frequently. This prevents the plastic dust you just sanded off from getting ground back into the surface.
The Detailer’s Protocol: Step-by-Step Painting Process
This is not a suggestion. Think of it like the two-bucket wash for paint correction. You can’t skip a step and expect a lasting finish. Every piece of advice here comes from fixing my own mistakes on my trucks and cars. Follow this checklist in order, and your trim will look professional for years.
The Order of Operations: A Non-Negotiable Checklist
Write this down. This sequence ensures each layer bonds perfectly to the one below it.
- Remove or Mask
- Deep Clean
- Scuff Surface
- Final Decontamination
- Apply Adhesion Promoter/Primer
- Apply Paint in Coats
- Cure Fully
- Reinstall or Unmask
Do not treat curing as an afterthought; it is the final, critical step of the painting process itself.
Step 1: Removal or Masking – Setting the Stage
Your first choice is big. Removing the trim gives you the absolute best finish, letting you paint all edges and the back. Masking on the car is faster but risks overspray and weaker coverage on side edges. For simple exterior window trim, masking often works. For complex interior pieces like the Odyssey’s dash trim, I always pull it out.
How to Safely Remove Plastic Trim
You need a set of nylon trim tools. They are cheap and save you from the sound of cracking plastic. Start at a corner and gently work your way around, listening for clips to release. Label every clip location and each piece of trim with painter’s tape as you remove it; you will forget where it goes later. A critical warning: if you’ve used any “shine” or “protectant” like Armor All on this trim recently, you have a problem. Those silicone-based bond-breakers soak into the plastic and cause fisheyes in your fresh paint. The deep clean step is your only hope to fix it.
Masking Like a Pro for On-Car Painting
For painting black plastic trim around windows on the car, you need two tapes. Use 1/4″ fine-line tape for the razor-sharp edge against the glass and painted body panel. Press it down firmly with your fingernail. Then, use wider painter’s tape and plastic sheeting to cover the rest of the door, roof, and glass. You should only see the trim you’re painting. No shortcuts.
Step 2: Cleaning – Banishing All Contaminants
Washing with car soap and water gets the loose dirt. It is not enough. You must follow it with a dedicated automotive wax and grease remover. Pour it on a clean, white microfiber towel and wipe the entire surface. Silicone, dirt, and skin oils are invisible enemies that will ruin adhesion, so this two-stage clean is mandatory. Let the surface dry completely.
Step 3: Scuffing – Creating Tooth for Adhesion
This is the core of how you prepare plastic trim for paint. A perfectly smooth surface gives the paint nothing to grip. Take a grey Scotch-Brite scuff pad. Use light pressure and scrub the entire surface in a cross-hatch pattern until it loses its shine and feels uniformly matte. You are not trying to remove material, just create microscopic scratches for the primer to lock onto. On textured interior trim, be gentle. You want to scuff the high points without sanding away the texture itself. This step is non-negotiable, especially before trying to paint over polished surfaces.
Step 4: Final Clean – Dust is the Enemy
Scuffing creates dust. That dust will now ruin your smooth finish. Wipe the entire piece down with isopropyl alcohol (mixed 1:1 with water) or a fresh tack cloth. If you can see dust particles floating in the air, they will land in your wet paint, so a clean garage or a makeshift paint booth from a cardboard box is a smart move. After this wipe, do not touch the surface with your bare hands.
Step 5: Priming and Painting – The Main Event
Now you are ready for color. But first, you need a foundation.
Applying Adhesion Promoter and Primer
What primer should you use on plastic? You need a flexible, automotive-grade plastic primer or adhesion promoter. Some paints have it built-in. For most jobs, a dedicated primer is safest. Shake the can for a full two minutes. Hold it 8 inches away and apply one very light, even “tack coat.” Let it get tacky for a few minutes, then apply one full, wet coat. It should look smooth, not drippy. This layer is what makes the paint stick through summer heat and winter cold.
Spraying the Paint: Coats and Consistency
Can you use spray paint on plastic car trim? Absolutely. I’ve done it on everything from Miata mirror caps to F-150 bumper trim. The technique is everything when using spray cans for car painting. Shake the can well. Start your spray motion off to the side of the part, sweep evenly across it, and release the nozzle after you pass it. Apply the first coat so light it looks barely there. Wait 5 minutes. Apply a second, slightly heavier coat. For vertical surfaces like window trim, make your passes horizontal to prevent runs, and use even lighter coats. Three to four thin coats will build full, even color without sags. You must let each coat “flash off” and become dry to the touch before adding the next.
Step 6: Curing – Patience is a Virtue
The paint is dry to the touch in 30 minutes. It is not cured. Curing is the chemical process where the paint hardens to its final durability. This can take 24 hours, or up to a week for full hardness. If you handle, reinstall, or get a trim piece wet before it’s cured, you will leave fingerprints, scratches, or cause the paint to peel later. Follow the paint can’s instructions for cure time. I leave painted trim in my warm, dry garage for at least 48 hours before I even think about installing it.
Detailer’s Pro-Tip: Technique Tweaks for a Flawless Finish
Following the steps gets you 90% there. These small technique secrets, learned from watching paint dry in bad light, get you the last 10%.
The Spray Dance: Arm Speed, Distance, and Overlap
Hold the can 6 to 8 inches away. Any closer and you get runs. Any farther and you get a dusty, rough texture. Use your whole arm, not just your wrist, moving at a steady, medium speed. Start spraying before the part, and stop after. Each pass should overlap the previous one by 50% to avoid stripes of thin coverage. Think of it like mowing a lawn. You would not leave strips of uncut grass between passes.
Lighting Angles: Seeing What You’re Spraying
Room lights are useless. They wash out the subtle reflections in wet paint. Set up a bright LED work light and position it low, almost level with the trim. Shine it across the surface at a raking angle. This low-angle light will instantly show you every thin spot, every slight run, and the texture of the paint, allowing you to adjust your next coat in real time. It is the single best trick for a pro-level finish.
Temperature and Humidity: The Invisible Factors
Paint hates the cold and fears humidity. The ideal spot is around 70°F (21°C) with moderate humidity. Painting on a cold plastic surface causes the paint to gum up and dry poorly, leading to cracking. High humidity makes the wet paint absorb moisture from the air, which can cause a hazy, white bloom called “blushing” right in the finish. If your garage is cold, bring the parts and the paint cans inside overnight to warm up. Paint in the warmest, driest part of your day.
Keeping It Fresh: Maintenance and Common Fixes
You did the hard work. The prep, the paint, the clear coat. Now you want it to stay that way. This is where most people slip up. They treat fresh paint like old trim. Let’s not do that.
How to Maintain Your Newly Painted Trim
Think of your newly painted trim like the clear coat on your hood. It needs gentle care. For the first month, just wash it with the rest of the car using a pH-neutral car shampoo and a clean, soft microfiber mitt. Avoid any brushes, even soft detailing brushes, on the fresh paint for a while.
After the paint has fully cured for about 30 days, your best defense is a spray sealant applied every 3-4 months. I use a spray ceramic sealant on my Tesla’s painted lower trim. It beads water and resists UV rays, which are the true enemy of any finish. For black trim, this routine is non-negotiable. It’s the answer to keeping black plastic trim molding looking new again-you protect the new finish you just created.
Interior painted pieces are easier. Dust them with a soft, dry microfiber. For light cleaning, a damp cloth is fine. Never use an interior detailer with silicone or dressings on it, as that can make the surface slick or cause issues later.
Troubleshooting: When Things Go Slightly Wrong
It happens to everyone. A run in the clear, a piece of dust caught in the paint, a weird texture. Don’t panic. Most small flaws are fixable without starting over, but you must wait.
Dealing with Runs, Sags, or Orange Peel
If you see a run or sag, you must let the paint cure completely. This means waiting at least a week, longer if it’s cool or humid. Once it’s hard, you can level it.
For a minor run, wet-sanding is the fix. Use 2000 or 3000-grit sandpaper, keep it lubricated with a spray bottle of water, and sand just the high spot of the run with light pressure. Stop the moment it looks level. Then, use a light polishing compound on a small foam pad to restore the shine. It takes a steady hand, but it works.
Orange peel is that bumpy, textured look the paint sometimes dries with. It’s common. A proper cut and polish with a dual-action polisher after the full cure period will often completely remove orange peel and leave a glassy finish. Start with a light cutting compound and a polishing pad, then follow with a finer polish.
Touch-Ups and Chips: Quick Fixes for Longevity
On my F-150’s front bumper trim, rock chips are inevitable. For tiny chips, I use a toothpick. Not a brush. Dab a tiny amount of your leftover base coat onto the toothpick and gently fill the chip. Let it dry completely, then use the same method with the clear coat. The goal is to fill the hole, not paint over the whole area.
For textured plastic wheel arch trim that gets chipped, a dedicated plastic wheel trim paint in a spray can is a perfect match. Lightly scuff the chipped area, mask around it, and apply very light, dusting coats to build it up. Feathering the edges with light sanding after it cures blends the touch-up seamlessly.
Restoring Faded Trim Without Repainting
Not every faded trim piece needs paint. Paint is the permanent solution. Sometimes you just want a refresh. This is where most people look up how to restore faded black plastic trim.
For mild fading, a dedicated trim restorer can work wonders. These are not dressings that sit on top. They are often dye-based and penetrate the plastic. I’ve used them on my Odyssey’s roof rack with good, though temporary, results. They last a season or two.
For a more permanent fix without spray paint, consider a trim dye system. These kits use a solvent-based dye that actually stains the plastic a uniform black. It’s a fantastic middle-ground that restores color deep into the material, not just on the surface, and can last for years. It won’t fill scratches, but it makes fading disappear.
Which brings us to scratches. Light surface scratches can often be sanded and polished out of smooth plastic. For deep scratches in plastic car trim, especially ones you can feel with your fingernail, sanding and painting is usually the only way to make them truly vanish. A dye or restorer will color them, but the groove will remain. You have to decide if seeing the scratch bothers you more than undertaking a repaint. That same decision also applies to scratches on the car’s painted surfaces. For paint scratches, options range from touch-up paint and clear coat restoration to a full refinishing job.
Sealing the Deal on a Lasting Trim Finish
The single, non-negotiable rule for painting plastic trim is perfect surface preparation. Every minute spent cleaning, degreasing, and scuffing the surface pays off tenfold in the adhesion and longevity of your paint. Pair that clean base with products formulated specifically for flexible plastic, and you build a finish that can handle real-world heat, cold, and vibration.
Skip these foundational steps, and the result is almost guaranteed: the paint will peel, chip, or crack within weeks, leaving you back at square one.
Deep Dive: Further Reading
- r/crv on Reddit: Is it a bad idea to spray paint exterior plastic trim?
- Painting Plastic Car Parts: Everything You Need to Know – JTAPE
- Shine Supply – Trim Paint Black – 16oz
- Trim Paints | Refinish | SEM Products
- DIY: Painting your exterior trim (without removing)
Max Gunther
Max is an automotive enthusiast having worked as a car mechanical and in interior detailing service for over 25 years. He is very experienced in giving your old car, a new fresh vibe. He has detailed many cars and removed very tough smells and stains from all kinds of cars and models, always ensuring that his work and advice helps his customers. He brings his first hand experience to his blog AutoDetailPedia, to help readers breath new life into their car interiors.