What Unusual Substances Can Damage Car Paint, and How Do You Remove Them?
You wash your car, but mysterious stains still appear. I have seen paint etched by things as ordinary as a spilled soda or a drip from a parking garage ceiling.
We will cover common household chemicals, environmental residues, improper products, and the correct removal methods for each.
Ignore these substances, and you risk permanent clear coat damage that no amount of wax can hide.
Key Takeaways: The Unusual Paint Damage Cheat Sheet
- Speed is your best defense against etching and permanent damage.
- The removal method depends on the substance’s composition: acidic, oily, sticky, or abrasive.
- A strong paint sealant or wax is a critical first line of defense, buying you time to clean.
How Car Paint Gets Damaged (The Simple Science)
Your car’s paint is not one thick layer. The part you see and touch is almost always the clear coat. Think of it like the screen protector on your phone. It is a thin, hard plastic layer sprayed over the colored paint. Its only job is to protect.
This clear coat can be damaged in a few basic ways. Knowing these helps you choose the right fix.
- Chemical etching: This is when an acid or a base eats into the plastic. Bird droppings and bug splatter are classic examples. They sit on the hot surface and burn a tiny, dull pit into the clear coat.
- Physical bonding: Some substances glue themselves to the paint. Tree sap and road tar are the worst. When they dry, they bond so tightly that peeling them off can pull up the clear coat itself.
- Staining: Dyes can seep in. A spilled soda or smashed berry leaves behind color that soaks into microscopic pores. The clear coat might feel smooth, but it looks stained.
- Abrasion: This is simple scratching. Gritty stuff like construction dust, sand, or even dried mud has hard particles. Wiping them across the paint scratches thousands of tiny lines into the surface.
Unusual things are harmful because they often mix these damage types. That splash of fast-food soda is sticky, acidic, and has dye. Parking under a pine tree means dealing with sap that bonds like cement and collects abrasive pollen. I see this all the time on my Ford F-150 work truck. Mud isn’t just dirt, it’s a paste of abrasive minerals and sometimes road salt that can etch.
The clear coat on my black BMW is a perfect example of how delicate this balance is. It shows every flaw. A water spot from sprinkler water left to bake in the sun can etch just like a chemical spill. That is why the first rule is always speed. A good sealant, like the spray wax I use on my Tesla, gives you a buffer. It takes the initial hit so the clear coat does not have to.
The Unusual Suspects: A Guide to Weird Paint Killers
Everyone knows about bird droppings and road salt. The real trouble often comes from the things you do not expect. These substances are tricky because you might not even realize they are damaging your paint until the stain or etch is already there. Road salt damages car paint by creeping into small scratches and accelerating wear. You may not notice until the finish shows visible etching or dull spots.
The “Lunchmeat Legend”: Bologna, Cheese, and Other Foods
Yes, it sounds like a weird prank, but I have seen the splotchy stains it leaves. Can bologna eat car paint? Absolutely. Does bologna ruin car paint? It can, and here is why. Bologna is packed with salt, vinegar, and fat. Smear that on a hot panel and the sun bakes it into a corrosive, moisture-trapping paste. The acidic elements work on the clear coat while the fats stain it.
Hot pizza cheese is a similar offender. It melts, sticks like glue, and the oils can leave a faint yellow stain if not removed quickly. I once had to carefully remove dried melted cheese from the hood of a customer’s car that had been parked near a busy pizza shop’s delivery lane. The key is to treat it like a sticky, oily contaminant, not just food.
The salt, fat, and acids in processed foods create a compound that etches and stains paint when heated by the sun.
Backyard and DIY Hazards: Plaster, Creosote, Overspray
Home projects can go sideways fast. Wet plaster or concrete splatter is a nightmare. It is highly alkaline and dries rock-hard, bonding to the paint surface. Creosote, that black, tar-like preservative on old railroad ties or fences, is both acidic and incredibly sticky. It bleeds into the paint and is a bear to remove.
Paint overspray from a neighbor’s project is more common than you think. Those fine mist particles land on your car and cure, creating a rough, gritty texture. I found a fine layer of gray overspray on my F-150 once after the house next door was painted. These contaminants do not just sit on top. They bond physically and can interact chemically with your clear coat, making it important to remove paint overspray from your car promptly.
DIY project residues chemically bond to your paint, requiring specific solvents and techniques to lift them without damage.
Sticky Situations: Tree Sap, Glue, Rubber, and Tar
Pine sap is the usual suspect, but sweet gum tree balls and sycamore sap are just as bad, if not worse. They are stickier. Then there is the glue residue from parking stickers, price tags, or bumper stickers that have been on for years. It turns into a clear, hardened plastic film.
For my 911 after a track day, or any car that sees aggressive driving, rubber “road dots” from burnouts are a concern. Fresh tar from roadwork is a classic, but if you drive over it when it is hot, it splatters and immediately starts to polymerize. All these substances undergo a chemical change. They harden from a liquid to a cement-like state, locking themselves onto your paint.
Natural saps and synthetic adhesives polymerize over time, transforming from sticky goo to a hardened plastic that grips the paint.
Liquid Threats: Sprinkler Water, Fertilizer, Bird Lime
Not all liquids are equal. Hard water from lawn sprinklers is loaded with minerals like calcium and magnesium. When the water evaporates, those minerals are left behind, spotting and potentially etching the paint. Lawn fertilizer overspray is worse. Those chemical salts are designed to be reactive and can cause rapid staining.
We talk about bird droppings, but I am talking about the truly atypical bird droppings. The ones that are pure white and chalky or oddly colored from berries. They often have a dramatically different, more acidic pH. Fish slime or blood from a fishing trip is another one. It is protein-based, dries clear, and can etch the surface if left.
Liquid contaminants are dangerous because they leave behind active chemical residues long after the water has evaporated.
How to Remove Unusual Contaminants Safely
When you find something weird on your paint, do not panic. Follow this step-by-step protocol. Rushing in with the wrong tool is how you turn a small problem into a need for a paint correction.
Step 1: The Initial Assessment and Gentle Rinse
Your first move is to do nothing with your hands. Do not touch or rub. You will just grind the contaminant into the clear coat. Use a gentle stream of water from a hose to remove any loose, dry debris. Look closely. Is the substance dry and crusty? Is it still sticky and oily? Is it rock hard? This visual assessment decides your next step.
Never scrub an unknown substance. A gentle rinse removes loose material and gives you the information you need to proceed safely.
Step 2: Choosing Your Weapon (The Right Solvent)
This is your decision tree. Match the solvent to the contaminant type.
- For oils, tar, or grease (bologna fat, cooking oil, fresh road tar, gun oil): Use a citrus-based degreaser or a dedicated automotive tar remover.
- For tree sap, adhesives, or glue (sap, sticker residue, rubber marks): Use a dedicated tar and glue remover. These are formulated to break down long-chain polymers.
- For mineral deposits (plaster dust, hard water spots, concrete splash): Use a diluted acidic cleaner, like a water spot remover or a very weak vinegar solution, with extreme caution. Rinse immediately.
- For absolute unknowns, start with the least aggressive option: a detail spray or a quick wax. Sometimes, a lubricated wipe is all it takes.
Choosing the correct chemical for the job breaks down the contaminant so you can wipe it away, instead of scraping it off.
Step 3: The Application and Wipe Technique
Do not spray the solvent directly onto the spot. You cannot control the flow, and it might run onto unprotected plastic trim. Spray your chosen product onto a clean, soft microfiber towel first. Fold the towel so you have a fresh, padded surface.
Gently dab and lift the spot. Let the solvent soak in and do the work. For hardened material, press the soaked towel onto it and let it dwell for 30-60 seconds to soften. Never use razor blades, steel wool, or abrasive scrub pads on your paint. You will cut right through the clear coat.
Apply solvent to your towel, not the car, and use a patient dabbing motion to lift the contaminant away without scratching.
Step 4: The Final Wash and Inspection
Once the bulk of the gunk is gone, that area needs a proper reset. Give the whole panel, or better yet the whole car, a proper two-bucket wash. This removes any leftover solvent or residue. Dry the area thoroughly with a clean drying towel.
Now, inspect under good light, like a bright LED work light or sunlight. Move your head to look for reflections. Did the substance leave a stain? Is the clear coat hazy or etched where it was? This inspection is critical. A stain might need a specialized cleaner. Hazing or etching means the clear coat is damaged and the next step is paint correction, which is a story for another day.
A final wash and close inspection tells you if the contaminant is truly gone or if it left behind damage that needs further attention.
Common Mistakes That Make the Damage Worse
I see it all the time. Someone finds bird droppings or tree sap on their hood. They panic and make the problem ten times worse. Avoid these reactions. They turn a simple cleanup into a paint correction job.
- Scrubbing with a dry towel or paper towel. This is the fastest way to scratch your clear coat. Paper towels are like fine sandpaper. A dry microfiber will drag the contaminant across the paint, leaving deep, cloudy marks. My black BMW’s hood is a permanent testament to this mistake from a previous owner.
- Using household cleaners like bleach, abrasive kitchen cleansers, or acetone. These are paint assassins. Bleach will permanently stain and dull the paint. Abrasive cleansers will leave thousands of micro-scratches. Acetone? It can melt your clear coat on contact. If you wouldn’t pour it on your skin, don’t put it on your car.
- Letting it sit for days or weeks, assuming it’s harmless. Time is your enemy. Bird droppings become acidic stains. Tree sap hardens like cement. Brake dust etches into the clear coat. What wipes off today might need a polisher tomorrow.
- Using excessive heat like boiling water. Pouring boiling water on a cold panel is a great way to thermally shock the paint or clear coat. You can cause it to spiderweb, crack, or even delaminate. This is especially risky on plastic bumpers.
- Picking at it with a fingernail or metal tool. Your fingernail is harder than clear coat. A razor blade requires a surgeon’s touch the average person doesn’t have. You will dig a trench or leave a deep gouge. I have a chip on my F-150’s door from trying to flick off a blob of tar.
The rule is simple: if you are using force, you are doing it wrong. The contaminant should be dissolved or lifted away, not scraped off.
The Product Tier List for Contaminant Removal
You don’t need a $500 chemical cabinet. Think of these as toolkits for different levels of commitment. For most car owners, the middle tier is the sweet spot.
Budget / Quick Fix Tier
This is for the “I need it off now and I’m at a gas station” scenario. It works, but with caveats.
- Pre-mixed “Bug and Tar” Remover: The spray bottles at auto parts stores. They work okay on fresh, soft contaminants. They often leave an oily residue you must wash off immediately, and they can stain trim if you’re not careful.
- Isopropyl Alcohol (Diluted 10-20% with water): A fantastic, cheap solvent for sap, glue, and some stains. Spray it on, let it dwell for 30 seconds, and gently wipe. Test on an inconspicuous area first, as it can dull some waxes and sealants.
- White Vinegar Solution (1:1 with water): Only for fresh, superficial water spots. It’s mild and safe for all surfaces. It won’t touch mineral deposits that have baked on.
Enthusiast / Prosumer Tier
This is my daily kit. It handles everything from my kid’s Odyssey mess to road film on the Porsche. If you care for your car yourself, these are the workhorses you should own.
- Dedicated, pH-Neutral Tar and Glue Removers: Products like CarPro TarX or Koch Chemie Eulex. They are designed to emulsify tar and adhesives without harming paint, wax, or ceramic coatings. You spray it on, watch it turn purple as it works, and rinse it away. No scrubbing.
- High-Quality Citrus Degreasers: For grease, oil, and heavy road grime. They cut through the film on lower door panels and wheel arches effortlessly. They are usually biodegradable and safer for the environment than petroleum distillates.
- Iron Fallout Removers: This is the magic pink spray for embedded brake dust and rail dust. You spray it on clean paint, let it turn purple as it dissolves the microscopic iron particles, and rinse. It’s a crucial step before claying or polishing any car that sees daily roads.
A bottle from each of these three categories will solve 99% of the contamination problems you will ever face.
Show Car / Specialist Tier
These are for specific, stubborn problems or absolute perfection on a concours-ready finish.
- Professional-Grade Adhesive Removers: For removing vinyl wrap residue, bumper sticker glue, or industrial adhesives. They are incredibly potent and require gloves and ventilation. They are often “panel wipe” cleaners used before applying ceramic coatings.
- Specialized Sap Removers: Some tree saps (like pine) have unique resins. Pro-grade formulas are engineered to turn even rock-hard, months-old sap into a gel you can wipe off without agitation.
- Dedicated Water Spot Removers: For the etched-in, permanent water spots that vinegar can’t touch. These are mild acid-based products that require precise application and immediate neutralization. They are a last resort before wet-sanding.
When to Stop: Assessing Permanent Damage and Next Steps
You cleaned the spot. You used the right product. But the mark is still there. This is when you need to look closer. Is it a stain sitting on top, or has it eaten into the clear coat?
An etched spot feels different than a stained one. A stain often looks discolored but the surface is still smooth. Etching means the contaminant, like bird droppings or acid rain, has started to dissolve the paint’s top layer. It leaves a dull, rough pit.
The best way to check is with the fingernail test. Gently drag your fingernail across the damaged area. Do it lightly. If your nail catches or snags on the spot, you are feeling an etch. The clear coat is physically damaged. If your nail glides over it smoothly, the contamination might just be sitting on the surface.
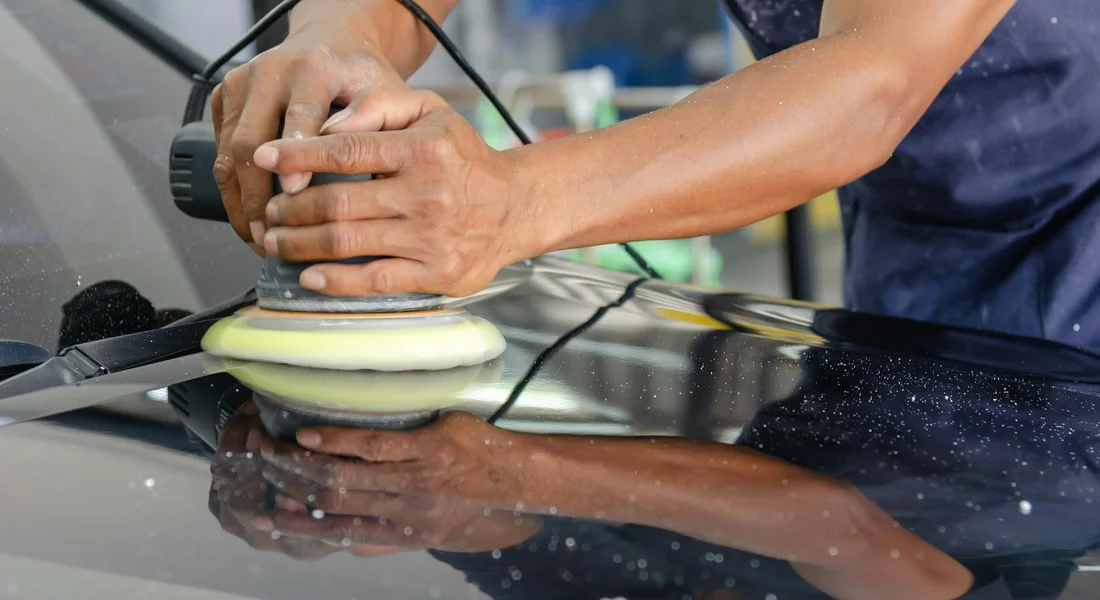
If the stain remains after careful chemical removal, the solution changes. You move from chemistry to mechanics. This means polishing. Polishing uses a mild abrasive to level the clear coat, removing a tiny amount of paint to erase the defect.
For shallow etching, a hand-applied polish might work. But for deeper pits, you need a machine. A dual-action polisher with a cutting compound is the right tool. It spins and orbits, safely removing defects without burning the paint like a rotary buffer can.
Be honest with yourself. If you have never used a polisher, this is a moment to pause. Paint correction is a skill. On my black BMW, the Swirl Magnet, I once had tree sap etch the hood. I tried to fix it by hand. I made it worse. I created holograms in the clear coat. It needed my polisher and two stages of compound and polish to get the gloss back.
For a restoration project like my old Miata, the oxidized paint was beyond any cleaner. The single-stage red had turned pink and chalky. It needed aggressive compounding to bring the color back. If you are not equipped or confident, a professional detailer is a smart call. They have the lights, tools, and experience to fix it without risk. Learning how to fix or remove oxidized paint is a logical next step in the restoration. It helps you decide between DIY methods and professional services.
Your Best Defense: Building a Protective Shield
Fighting damage is reactive. Preventing it is smart. The best way to handle unusual substances is to stop them from bonding to your paint in the first place. Environmental exposure—from sun and rain to pollutants—can also threaten your paint over time. Protecting against environmental damage starts with proactive care.
A strong layer of protection makes cleanup trivial. A fresh synthetic sealant or a ceramic coating acts like a non-stick shield. On my Porsche, the Garage Queen, the ceramic coating lets bug splatter and bird bombs wipe off with just a spray of detailer and a microfiber towel. The contamination sits on top of the slick layer, unable to bite into the clear coat.
Make your regular wash a scouting mission. When you foam the car and rinse it, look for any new spots or textures. Catching a sap droplet or a tar speck early, before it bakes in the sun for weeks, is the key. My routine with the Kid Hauler Odyssey is all about this. A quick wash every weekend lets me spot new messes from the kids or the road before they become permanent.
Where you park matters more than you think. Park away from lawn sprinklers. The water spots from sprinklers are often heavy with minerals and fertilizer. Avoid parking under trees that drop sap or berries. If you are doing a DIY project like sanding or painting nearby, move your car. A little planning saves hours of cleanup.
Your final step after any cleanup is non-negotiable. Always re-protect the paint you just saved. If you used a clay bar or a polish, you stripped the old wax. The surface is bare and vulnerable. I keep a bottle of spray sealant in my garage for this exact reason. After cleaning a mess on my F-150 Workhorse, I mist on the sealant, wipe it off, and know the paint is safe again. It is the most important five minutes of the job.
Final Thoughts on Unusual Paint Contaminants
Your best defense is to remove any odd substance from your paint immediately, before it can bond or react. Quick action on stains and contaminants helps prevent lasting marks on your car paint. Trust a dedicated automotive cleaner and a soft, lifting technique over harsh scrubbing to preserve your clear coat.
Waiting or using the wrong method often etches permanent stains into the paint, turning a five-minute wipe into a full day of correction on my black BMW. That’s why learning how to remove paint spots and stains properly matters. A careful, proven technique can save time and protect the finish.
Citations and Authoritative Sources
- What Damages Car Paint: A Definitive Breakdown | UTI
- What Substances Can Damage Car Paint
- What are the best substances that easily ruin car paint? – Quora
- 5 Substances That Can Ruin Your Vehicle’s Paint
- 8 Substances That Can Damage Your Car’s Paint and How to Address …
- Five Items that Can Damage your Car Paint – Independent Paint Supplies Ltd
- Ten Things That Can Damage Car Paint – Auto Body Shop Blog – Carwise.com
Max Gunther
Max is an automotive enthusiast having worked as a car mechanical and in interior detailing service for over 25 years. He is very experienced in giving your old car, a new fresh vibe. He has detailed many cars and removed very tough smells and stains from all kinds of cars and models, always ensuring that his work and advice helps his customers. He brings his first hand experience to his blog AutoDetailPedia, to help readers breath new life into their car interiors.