How Do You Clean Your Car’s Interior Without Damaging It?
You want that showroom shine on your dashboard and door panels, but the fear of leaving streaks or cracks with the wrong wipe is real. I’ve felt that same dread, especially when facing the sensitive plastics in my black BMW or the sticky mess in my Honda Odyssey.
I will show you my hands-on method, covering identifying your exact interior materials, selecting safe, effective cleaners, executing a scratch-free cleaning process, and applying durable protective coatings.
Use the wrong approach, and you will create permanent gloss on matte surfaces or attract more dust and grime.
Key Takeaways: Your Interior Care Cheat Sheet
You want your car clean. You also do not want to ruin the soft-touch plastic on your dashboard or fog up your instrument cluster. Good detailing is about technique, not force.
Start every clean with a thorough dry vacuum to prevent grinding dirt into surfaces. I cannot stress this enough. Wiping a dusty dashboard is just sanding it with tiny rocks. In my Odyssey, the ‘Kid Hauler’, I find sand, cracker crumbs, and glitter everywhere. I spend a full ten minutes with the crevice tool and brush attachment getting it all up before a single drop of cleaner touches anything. It’s even more important when you clean and maintain your car dashboard.
Always use a pH-balanced interior cleaner for plastics, vinyl, and synthetic materials to avoid drying or cracking. Think of your car’s plastics like your own skin. Harsh, acidic, or alkaline cleaners strip away oils. A pH between 7 and 9 is safe and effective. I learned this the hard way years ago with a blue all-purpose cleaner that left a white, chalky residue on my old car’s door panels. Never again. That experience underscored the importance of safely using car cleaning chemicals. Always follow label directions and test in a small, inconspicuous area before full use.
Work from the top down to avoid re-contaminating cleaned areas. Gravity is your helper or your enemy. Clean the headliner first, then the windows, then the dash and door panels, then the seats, and finally the carpets. Dirt from above will fall down. If you clean the floors first, you will just have to clean them again.
Protection is not optional. Use a UV-inhibitor protectant on dashboards and door panels to prevent fading and cracking. The sun is the single most damaging thing to your interior. A matte-finish protectant acts like sunscreen. It keeps surfaces from getting brittle and fading to that ugly gray color. I apply it every other clean on all our vehicles, especially when I clean and protect vinyl dashboards.
Never use household glass cleaners, armor-all type dressings, or abrasive pads on interior surfaces. This is the triple threat of interior damage. Ammonia-based glass cleaner eats into vinyl and makes screens cloudy. Greasy, shiny dressings attract dust and can make steering wheels slick. Abrasive pads, even the ‘gentle’ Scotch-Brite, will leave permanent micro-scratches on any plastic surface.
For sensitive screens and modern materials, a light touch is everything. My Tesla’s massive center screen is a fingerprint magnet. I use a dedicated screen cleaner sprayed onto a super-soft microfiber, never directly on the glass. For its ‘vegan leather’ seats, I use the same pH-balanced cleaner as the plastics, working in small sections to prevent any cleaner from drying and staining.
Your Interior Detailing Arsenal: Tools & Chemicals
The right tools make the job easy and safe. The wrong ones create more work. Here is exactly what you need.
Microfiber Towels: You need two types. Get a stack of 350-500 GSM (grams per square meter) towels for cleaning. They have more nap to grab dirt. Use 300-400 GSM towels for applying protectant; they are thinner and leave less residue. I color-code mine: blue for cleaning, yellow for applying protectants. It eliminates cross-contamination. To maintain this, wash, dry, and store microfiber towels properly. Regular care prevents odor and preserves absorbency for future use.
Interior Cleaner: Dedicated and pH-neutral. Buy a cleaner made specifically for automotive interiors. Look for a pH of 7-9 on the safety sheet. A good one lifts grime without leaving a residue and has no strong chemical smell. This is different from a harsh all-purpose cleaner you’d use on a garage floor.
Detail Brushes: Soft and stiff. A set of soft, natural bristle brushes is for air vents, instrument clusters, and around buttons. A stiffer bristle brush is for scrubbing carpet fibers and fabric door inserts. A soft-bristled upholstery brush is perfect for lifting dirt from cloth seats before vacuuming.
Vacuum: Attachments are key. A powerful motor helps, but the crevice tool and soft brush attachment are non-negotiable. Use the crevice tool along seat tracks and door jambs. The brush attachment lets you safely vacuum the dashboard, door panels, and even delicate cloth headliners without scratching.
Protectant: Matte finish with UV blockers. Avoid anything labeled “high-gloss” or “shine.” You want a natural, matte, or satin finish. A spray is easiest for large areas; a cream can be better for precise application. The primary job is to block ultraviolet light, which causes 90% of interior aging.
Extras for a Pro-Level Job:
- Plastic trim tools: For prying out coins and debris from tight slots without scratching.
- Dedicated leather cleaner & conditioner: If you have real leather, it needs specific food. Use it.
- A small spray bottle of distilled water: Sometimes for light dust, a damp microfiber is all you need.
A proper car interior care kit is not a pre-packaged box of unknowns. It is a curated collection of the specific, high-quality items listed above. Store-bought kits often include a one-size-fits-all cleaner and a greasy dressing. Your kit should be built piece by piece with products you trust for specific surfaces.
The Detailing Protocol: Your Foolproof Order of Operations
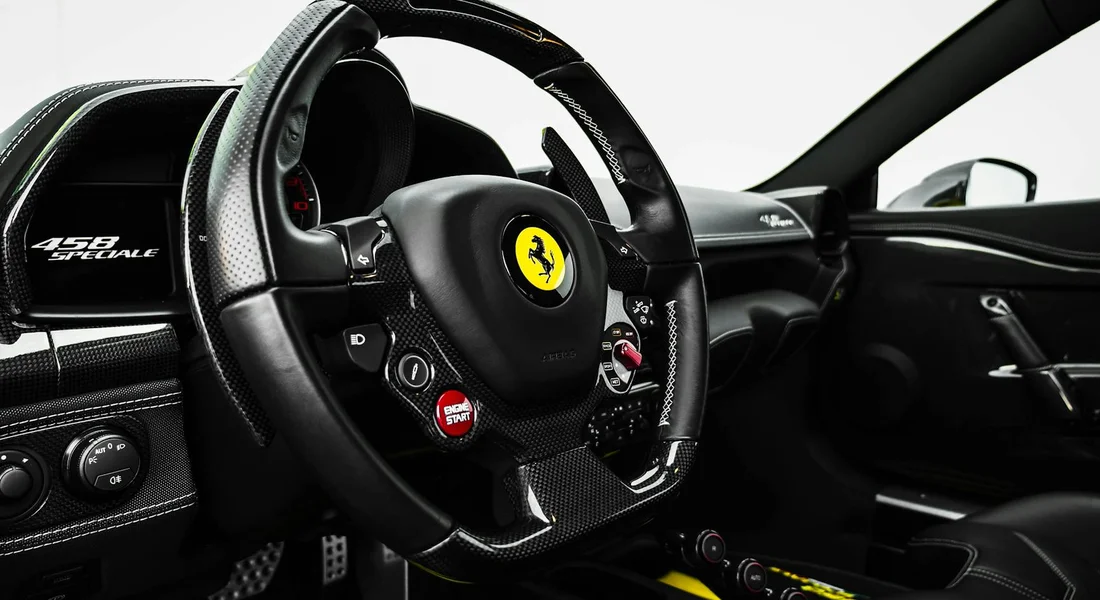
Think of this as your flight checklist. Skip a step, and you risk scratching a surface or spreading dirt. I follow this exact order on every car, from my swirled-black BMW to the family minivan. It saves time and prevents damage.
-
Remove all personal items, trash, and floor mats. Empty every cubby, cup holder, and door pocket. Take out the floor mats and set them aside. This gives you a clear battlefield and prevents you from spraying cleaner on a stray phone charger.
-
Dry vacuum the entire interior, including seats, floors, and cargo area. Use the crevice tool for tight spots. This dry pass is the most important step for preventing scratches, and I will explain why in detail next. Run the vacuum over seats, into all seams, and across the dashboard. You are hunting for loose sand and grit.
-
Clean and protect interior glass and touch screens. Do this now, before you clean other surfaces. Overspray from glass cleaner can streak plastics, but it wipes off glass easily. For touch screens, use a dedicated screen spray or a slightly damp microfiber. Avoid ammonia-based cleaners on modern screens.
-
Clean surfaces from top to bottom. Gravity is your guide. Start with the headliner, then the dashboard, door panels, center console, and finally the seats. Working top-down ensures any drips or dislodged dust falls onto a surface you haven’t cleaned yet. Use a general interior cleaner diluted for light cleaning.
-
Address specific problem areas using targeted techniques. Now tackle the dried ketchup on the seat or the sticky syrup on the console. For a set-in stain, you might use a dedicated fabric cleaner or a steam cleaner. For sticky plastic, a bit of isopropyl alcohol on a towel can work wonders. Always test in a hidden spot first.
-
Apply protectant to all non-fabric, non-glass surfaces. This means your dashboard, door panels, and trim. A good protectant shields against UV rays to prevent fading and cracking, and it makes future cleaning easier. I prefer a matte finish spray for a natural, non-greasy look. Avoid silicone-heavy products that create a shiny, slippery film.
-
Vacuum floors and carpets again, then clean floor mats separately. After cleaning above, dust and fibers will have settled back down. Hit the carpets with the vacuum one more time. For the floor mats, shake them out, vacuum, and wash with soap and water. Let them dry completely before putting them back.
-
Final wipe-down and odor check. Give all the surfaces a quick once-over with a dry microfiber to catch any lint or streaks. Take a deep breath. For persistent smells from spills or smoke, an ozone generator treatment is the only real solution. I had to use one in my Odyssey after a milk carton leaked under a seat. It’s important to know how to properly remove ozone odors after the treatment.
Skipping step two, the dry vacuum, is how you grind sand into your plastic trim and create fine scratches. Do not rush it.
Start Dry: The Critical Vacuum and Prep Phase
Washing a dirty car scratches the paint. Cleaning a gritty interior scratches your plastics and vinyl. A meticulous dry clean is more important than the wet clean for preventing scratches. That loose sand in your carpet is like sandpaper on your door panel if you wipe it with a damp cloth first.
Vacuum every nook. Open all doors wide. For door panels, use the brush attachment on speaker grills and soft armrests. The bristles safely dislodge dust without scratching. Then, switch to the crevice tool. Get deep into the map pockets, along the seams of the armrest, and around the window switches. You want it all gone.
How to clean car door jambs is simple but specific. Wipe the painted metal and rubber seals with a damp microfiber towel, then immediately follow with a dry one. Do not spray cleaner directly into the hinges or latches. That can attract more dirt and lead to corrosion over time.
While the door is open, check the drain holes. These are small slots at the bottom of the door frame. Use a soft detail brush or a blast of compressed air to clear leaves and mud. Clogged drains let water pool inside your door and cause rust. A quick check takes seconds.
I learned this the hard way with my grey Honda Odyssey, the “Kid Hauler.” After a beach trip, the floor was a sandbox. If I had started wiping the dashboard without vacuuming, I would have pushed that abrasive grit into every surface. Removing all loose sand and grit before any liquid touches a surface is your best defense against a worn, scratched interior.
Surface by Surface: Safe Cleaning Techniques for Every Material
Dashboard, Door Panels, and Hard Plastics
Your interior’s most common surfaces are also the easiest to damage with poor technique. The golden rule here is to control your cleaner.
Always spray your chosen interior cleaner directly onto your microfiber towel, never onto the dashboard or door panel. This prevents overspray from dripping into sensitive gauges, speakers, or air vents where it can cause electrical issues or become a sticky, dust-collecting residue.
For those tricky air vents and the intricate grooves in trim, wrap a soft, clean microfiber towel around your finger. Dampen the tip with a little cleaner from your main towel. This gives you control and surface area. A cotton swab seems like a good idea, but it just pushes dirt around and can leave fibers behind.
Car door handles are grease magnets. For these, apply a bit more cleaner to your towel and use gentle, focused agitation. I press my towel-covered thumb into the handle and rotate it to work the cleaner into the textured plastic.
On older cars like my ‘Restoration Project’ Miata, door locks can get sticky. After cleaning the exterior of the lock cylinder with a damp towel, use a dry graphite lubricant sprayed directly into the keyhole, not an oil-based product. Oil attracts dirt and grime, which will make the problem worse over time.
When protecting these surfaces, avoid silicone-based dressings. They create a greasy, high-gloss shine that reflects onto your windshield and acts like a magnet for dust. Look for water-based, matte finish protectants instead.
Upholstery: Fabric, “Vegan Leather,” and Alcantara
Treating all upholstery the same is a fast track to ruined materials. You must match your method to the fabric.
- Fabric Seats & Door Inserts: Use a dedicated fabric cleaner. Spray it on, let it dwell for a minute, then agitate gently with a soft-bristled brush like a boar’s hair detailing brush. For car door fabric inserts, use a damp microfiber with light cleaner and brush gently in one direction to lift the nap without matting it down.
- Synthetic/”Vegan” Leather (like in my Tesla): This material is durable but can be sensitive. Use a mild, non-alcohol cleaner. Harsh chemicals or alcohol can dry out and crack the synthetic surface over time. Wipe with a damp microfiber, then follow with a dry one.
- Alcantara/Suede (like my Porsche’s steering wheel): This is a brushed microsuede. Never use a wet cloth, as it will leave a permanent water spot. Use a dedicated suede cleaner and a soft suede brush. Lightly mist the brush, gently scrub the area in one direction to restore the nap, then let it air dry.
Car interior carpet care follows fabric logic. For stains, use a carpet-specific cleaner. Agitate with a stiff brush to work the solution deep into the fibers. The critical step is to blot the stain with a clean, dry towel to lift the moisture and dirt, never rub it, which only grinds the stain deeper.
Touch Screens, Piano Black Trim, and Other Glossy Surfaces
These are the most fingerprint-prone and scratch-sensitive areas in your car.
For touch screens and glossy trim, use a cleaner made for coated screens or a microfiber lightly dampened with diluted isopropyl alcohol (70% mix). Never use standard glass cleaner, as it can degrade anti-glare and oleophobic coatings over many uses.
Piano black plastic, common in modern cars like my BMW, is a swirl magnet. It shows every single micro-scratch. You must use a pristine, soft microfiber and gentle pressure. Think of it as wiping a pair of expensive sunglasses.
To clean around the edges of buttons and screens without scratching the soft plastic, use a soft detailing brush to loosen dust first. Then use your microfiber to wipe the surface clean.
Solving Common Interior Problems and Stains
What if you can’t get a stain out? Don’t panic. Use a tiered approach. First, identify the stain type. Second, apply a targeted cleaner (like an enzyme cleaner for organic stains). Third, for upholstery, consider a small handheld steam cleaner. The heat and vapor can loosen deep-set grime without harsh chemicals.
My ‘Kid Hauler’ Odyssey is the ultimate test case for this.
- Spilled Milk: This needs an enzyme cleaner. The enzymes break down the proteins. Apply, let it work, then extract or blot thoroughly. Any remaining moisture will sour and smell.
- Crayon on Plastic: Use gentle heat. A hair dryer on low can soften the wax. Then, gently lift it with a plastic trim tool or even a credit card wrapped in a microfiber. Follow with an all-purpose cleaner.
- Cup Holder Stickiness: Spray an all-purpose cleaner into the holder, let it sit, then use a soft brush (an old toothbrush works) to scrub the grooves. Wipe clean with a microfiber.
Sun-faded plastic on door panels looks tired. To restore it, use a dedicated trim restorer product, not a glossy dressing. These restorers often contain dyes and UV blockers that penetrate the plastic, not just coat it. Apply to a small section first to test the color match. This method works especially well for vinyl and plastic surfaces.
Thinking about car interior carpet replacement? That is a last resort. First, try a deep extraction with a carpet cleaner or a professional-grade wet/dry vacuum. For spots, use the blotting technique with a strong carpet spot cleaner. Most stains can be saved with patience and the right tools.
For permanent protection or a color change, interior wraps are an option. Similar to the Paint Protection Film on my ‘Garage Queen’ 911, a vinyl wrap can shield high-wear areas like center consoles or door sills from scratches and UV damage.
Locking in the Shine: Protection and Smart Maintenance Habits
Cleaning your car’s interior is only half the job. Think of it like washing your hands but never applying lotion. Your skin gets dry, cracks, and ages faster. Your dashboard and door panels face a similar fate from the sun. Applying a protectant is the final, non negotiable step that locks in your hard work and prevents damage before it starts.
I learned this the hard way with my black BMW, the “Swirl Magnet.” The previous owner never used any UV protection on the dashboard. After years of sun, the plastic became faded, brittle, and developed a network of fine cracks you could feel with your fingernail. That damage is permanent. A protectant creates a barrier against those UV rays, along with dust and light spills, keeping plastics and vinyl supple and looking new.
How to Apply a Matte Protectant (The Right Way)
You want a natural, satin finish, not a greasy, shiny mess. The key is in the application. I use a dedicated interior protectant with UV inhibitors that dries to a matte finish, especially for matte surfaces.
- Spray the product onto your applicator, not directly onto the surface. A clean microfiber applicator pad is perfect. One or two sprays is enough for a whole dashboard.
- Wipe the applicator evenly over the clean, dry plastic, vinyl, or rubber. Cover the entire area with a thin, uniform layer.
- Wait a minute. Let the product haze over slightly.
- Take a fresh, dry, soft microfiber towel and buff the surface. This removes any excess and ensures that perfect, non greasy matte look.
If the surface looks slick or shiny, you used too much product. Less is always more. A little goes a very long way.
How Often Should I Do Auto Interior Maintenance?
You do not need to do a full deep clean every weekend. A smart maintenance routine breaks the work into manageable chunks.
- Light Maintenance (Every 1 2 Weeks): This is a five minute wipe down. Use the dry microfiber towel from your glove box to dust the dashboard, center console, and door panels. Quickly vacuum the floor mats. It prevents buildup.
- Full Interior Detail (Every 3 6 Months): This is the complete process outlined in this article. Deep clean all surfaces, extract stains if needed, and reapply your protectant. This schedule keeps everything in top shape year round.
Everyday Habits for a Cleaner Car
Your daily habits are your first line of defense. These simple actions make the big cleanings far easier.
- Use a reflective sunshade in the windshield every time you park. It is the single best thing you can do to fight UV damage and heat.
- Clean spills immediately. Do not let coffee, soda, or milk soak in and become a permanent stain or odor.
- Avoid eating messy foods in the car. Crumbs and grease are the enemy of a clean interior.
- Keep a premium, plush microfiber towel in your glove box. Use it for quick dust removal or to tackle a fresh spill on the go.
A Note on Car Interior Care Products (Australia and Everywhere)
Many readers in Australia and other regions search for specific local product advice. The fundamentals are universal. Look for pH balanced, neutral cleaners designed for automotive interiors. Brands may differ, but the specification is the same. Check local detailing suppliers or automotive stores for interior cleaners and protectants that mention UV protection and a matte finish. If it is safe for your car’s materials, the geography does not matter.
Using a Car Interior Camera
A small interior inspection camera, like a borescope, can be a useful tool for a detailer. Its primary role is inspection, not cleaning. You can use it to document the “before” condition for a client, or to check for hidden debris in air vents or deep crevices you might have missed. It helps ensure a thorough job, but your eyes and hands are still your most important tools for the actual cleaning work.
Safeguarding Your Car’s Interior Surfaces
Always match your cleaner and protectant to the specific material you are touching. Test every new product in a hidden spot first, just like I do behind the door handle of my kid-hauling Odyssey, to prevent costly mistakes.
Skip these steps, and you will likely see permanent stains, cracked dashboards, and faded plastics that no amount of cleaning can fix.
Research and Related Sources
- TOP 10 BEST Interior Car Cleaning in Denver, CO – Updated 2025 – Yelp
- r/Cartalk on Reddit: just a girl with a car. how do i clean it?
- Interior Car Detailing Memphis, Germantown, Collierville | Wolf Grey Detail
Max Gunther
Max is an automotive enthusiast having worked as a car mechanical and in interior detailing service for over 25 years. He is very experienced in giving your old car, a new fresh vibe. He has detailed many cars and removed very tough smells and stains from all kinds of cars and models, always ensuring that his work and advice helps his customers. He brings his first hand experience to his blog AutoDetailPedia, to help readers breath new life into their car interiors.