How Do You Clean and Restore Car Window Rubber Seals to Prevent Leaks and Noise?
Hear that whistle or feel a draft? Your car’s rubber seals are crying for help, and left alone, they’ll let in water and racket.
We will cover spotting dry, cracked seals, cleaning them without causing tears, using the correct conditioner to bring back suppleness, and a quick wipe-down to maintain the seal.
Skip this care, and you will trade a quiet, dry cabin for musty smells and a constant roar from the windows.
How to Spot a Dirty or Failing Window Seal
This is how you identify if your car window rubber seals need cleaning or restoration. You look, you touch, and you listen. It’s not complicated.
The Look and Feel of a Neglected Seal
Start with a visual inspection. Healthy rubber is a deep, uniform black and feels pliable. Neglected rubber tells a different story. It fades to a dull, chalky gray. Run your finger across it. Does it feel dry and dusty, like it’s covered in powder? That’s oxidized rubber. The next stage is cracking. Look for tiny hairline fractures. In severe cases, the rubber becomes brittle and hard, losing all flexibility.
I see this spectrum across my own fleet. The Porsche 911, my “Garage Queen,” might just have a slight chalky feel on the driver’s side window seal from occasional sun exposure. It’s a minor neglect. My F-150 “Workhorse” is a different story. After years of baking sun and freezing salt, its rear window seal has visible, deep cracks that feel like dry leather. The transition from supple to brittle is the clearest sign your seals need immediate attention.
Listening for Leaks and Whistles
The functional problems are even more telling. On the highway, do you hear a persistent whistling sound from a window? That’s air forcing its way past a shrunken or mis-shaped seal. After a car wash or a heavy rain, open your door. Do you see a small stream of water dribble from the bottom of the door card or pool on the sill? That’s a direct leak.
Water intrusion is the real enemy. It leads to mildew smells, soggy carpets, and even electrical issues. If you hear whistling or see water where it shouldn’t be, your seal isn’t sealing, and cleaning alone may not be enough. Restoration is your next step to prevent costly interior damage.
What You Need: The Detailer’s Seal Care Arsenal
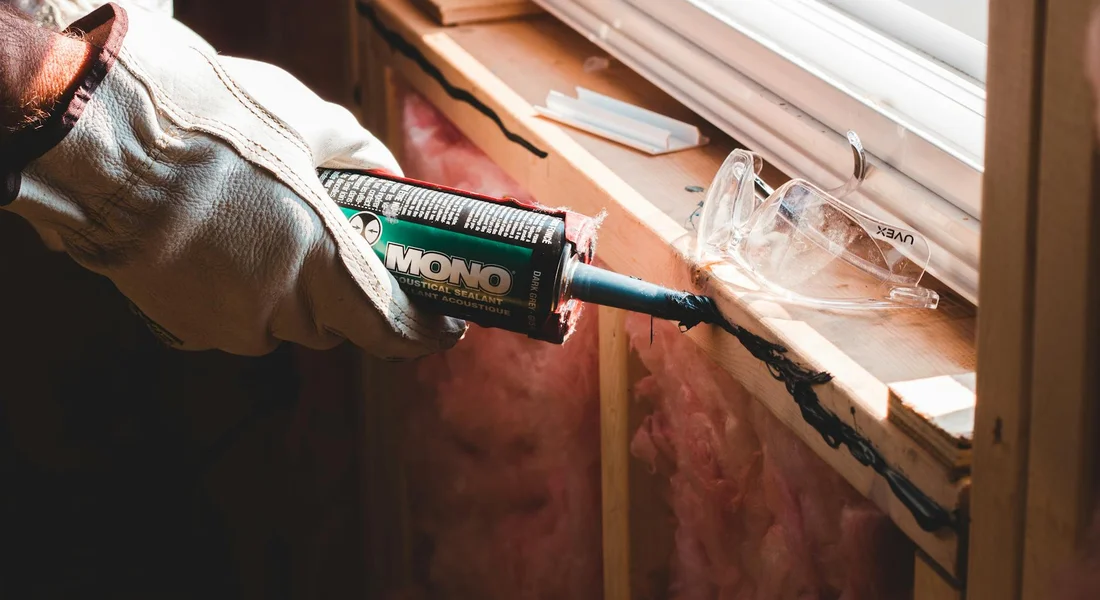
You don’t need a garage full of gear. You need the right few things. This is my kit for cleaning and protecting window and door seals. Always start with safety: wear nitrile gloves to protect your skin and safety glasses for splashes.
Tools & Chemicals: The Specifics
- Cleaner: A pH-neutral all-purpose cleaner (pH 7-8) that’s explicitly safe for rubber and plastics. Avoid harsh degreasers.
- Brushes: A soft-bristle detail brush for scrubbing crevices. A soft-bristle toothbrush or a dedicated wheel woolie brush works perfectly.
- Microfiber Towels: Several soft, clean towels. I use 350 GSM towels for this job-they’re plush enough to be gentle but effective at wiping.
- Protectant: A dedicated rubber and vinyl conditioner. The good ones contain UV blockers to slow sun damage and polymers to keep the rubber supple.
- Bucket of Clean Water: For rinsing your brush. While a Grit Guard isn’t critical here, the principle is: start with clean tools. You don’t want to grind dirt into the soft rubber.
This simple list is everything required for learning how to clean car door rubber seals and how to clean car window rubber seal effectively. Precision beats a pile of products.
What NOT to Use on Rubber Seals
This is critical. Using the wrong product can cause permanent damage, making the problem worse.
- Petroleum-Based Products: Never use WD-40, motor oil, or armor-all type dressings that contain petroleum distillates. They cause rubber to swell, become greasy, and then rapidly dry out and crack.
- Strong Solvents: Avoid brake cleaner, carburetor cleaner, or acetone. These will dissolve the rubber compounds.
- Aggressive Degreasers (APCs with high pH): Heavy-duty degreasers or alkaline cleaners can dry and degrade the rubber over time.
- Stiff or Metal Brushes: Anything abrasive will scratch and permanently scar the seal surface, creating channels for water and accelerating wear.
Stick to products formulated for rubber and plastic; your seals will last for years, not months.
The Right Way to Clean Car Window Rubber Seals
You never want to clean rubber seals on a hot car in direct sun. I learned this the hard way on my black BMW. The heat bakes cleaners into the rubber, leaving streaks and accelerating drying. Always work in the shade on a cool surface to let products work gently and prevent damage. This simple rule makes everything else easier and safer for the material, just like when you wash and clean your car exterior safely.
Many people ask me, “What is the step-by-step process for thoroughly cleaning the rubber seals?” It is not just spraying and wiping. You need a method. Here is the exact protocol I use on every car, from my dusty F-150 to the Porsche in the garage. These steps are part of professional car interior cleaning methods that protect seals and fabrics. This protocol can be adapted to most vehicles.
The Order of Operations: Your Cleaning Protocol
Follow these steps in order. Do not skip ahead. Having a checklist prevents missed spots and ensures the seal gets truly clean, not just superficially wiped.
- Initial Dry Brush. Take a soft, clean detailing brush and gently flick it along the seal to loosen dried mud, pollen, and grit. This prevents grinding debris during the wet stage. On my Miata’s old seals, this stops ancient dirt from scratching.
- Apply pH-Neutral Cleaner and Agitate. Spray a mild, pH-neutral interior or all-purpose cleaner onto the seal. Do not use dish soap or degreasers. They strip oils. Immediately agitate with that soft brush to lift embedded grime.
- Wipe with a Damp Microfiber Towel. Use a soft, damp microfiber towel to wipe away the loosened dirt and cleaner. Fold the towel to a clean side often. You will see the grime transfer to the towel.
- Final Rinse with Clean Water and Wipe. Lightly mist the seal with plain water from a spray bottle. Wipe it again with a different damp, clean microfiber towel. This removes any residual cleaner that could attract dirt later.
- Immediate Drying. Do not let the seal air dry. Move directly to the drying step outlined next. Trapped water is the enemy.
Technique Tweak: The Angled Brush Stroke
How you move the brush matters as much as the brush itself. Do not scrub back and forth across the thin seal lip. Hold your detail brush at a 45-degree angle to the rubber and push or pull along the seal’s length, following its contour. This angled stroke forces dirt out of the lip’s crevice without folding or pinching the delicate rubber. On the Model 3’s tight window seals, this technique gets into the channel without strain. Think of it like combing hair, not sawing wood.
Drying Seals Properly to Stop Mold and Mildew
Water left in the seal’s lip will seep into your door panel or evaporate slowly inside the cabin. That trapped moisture creates a perfect home for mold and mildew. I dealt with a musty smell in my Odyssey, the “Kid Hauler,” for weeks before I traced it to damp window seals from a rushed wash. Proper drying is not optional; it is the final, critical step that protects your interior air quality and prevents issues like mold, mildew, and musty smells.
So, how do you properly dry the seals after cleaning to prevent moisture issues? You need a tactile method, not just a wave of a towel. The goal is to wick moisture from the entire channel.
The Flagging Method for Complete Dryness
Use a dry, low-GSM microfiber towel. These are thin and absorbent. Fold one corner into a tight point. Gently insert this pointed “flag” into the seal’s groove. Run the flagged towel point along the entire length of the seal, applying light pressure to absorb all residual water. Turn the towel to a dry point as it gets damp. On my 911’s complex seals, this method dries the deep channels that a flat towel misses. Your seal should feel completely dry to the touch, not cool or damp.
Bringing Hard Rubber Back to Life
You have clean, bare rubber. Now you need to make it soft again. You have two paths: dedicated restorers or homemade solutions. I have tried both on my fleet.
Dedicated rubber restorers, like 303 Rubber Seal Protectant or CarPro Perl, are my first choice for serious work. They are engineered for this job. On my 1995 Miata, the door seals were so stiff they would not let the door close properly. A dedicated restorer brought them back from crunchy to pliable in two applications. These products are formulated to penetrate and replenish the rubber, not just sit on top.
Homemade solutions have their place. A mix of 1 part isopropyl alcohol to 3 parts water is a fantastic final cleaner to strip old, greasy products. Some people use a tiny amount of silicone-based tire shine for a quick shine. But I am cautious here. Tire shine can be overly slick and may not offer UV protection. It can also sling onto your paint. For a quick fix on a sunroof seal, maybe. For a long-term restoration of door seals, I go with the dedicated product.
What specific products or homemade solutions are best for restoring flexibility to hardened rubber? For true restoration, a dedicated rubber conditioner is best. For cleaning before conditioning, a diluted isopropyl alcohol solution works well. Avoid heavy silicone dressings meant for tires; they often remain greasy and attract dust.
The science is simple but important. Rubber contains oils and plasticizers that keep it supple. Sun, heat, and ozone suck these out. The material dries out, shrinks, and cracks. A good conditioner is designed to replace those lost elements. It soaks in. This is different from just making it look shiny.
Conditioners vs. Protectants: What’s the Difference?
This trips up many people. The terms are sometimes used interchangeably, but their main job is different.
A conditioner aims to restore. Its primary goal is to get inside the rubber and bring back flexibility and swell the seal slightly for a better fit. Think of it as medicine for dry, hard rubber.
A protectant aims to shield. Its primary job is to create a protective, often UV-resistant, layer on top to prevent future damage from the sun and elements. Think of it as sunscreen.
The best products, like the ones I use on my Miata’s convertible top seals, do both. They condition the rubber and leave behind a protective, non-greasy layer. You want a product that absorbs to restore and then leaves a matte, dry finish to protect. For extra defense, a wax sealant ceramic coating can bond with the treated surface to form a durable, hydrophobic shield. This pairing helps preserve the conditioning benefits while adding longer-lasting protection. A product that stays wet and slick for days is likely sitting on the surface and not doing much deep conditioning.
Sealing the Deal: Applying Protectant Correctly
How you apply the product is as important as the product itself. Doing it wrong can create a mess on your paint and glass.
How do you apply a rubber protectant or conditioner correctly? The key is indirect application. Never spray the product directly onto the rubber seal from the bottle.
- Shake the product bottle well.
- Spray a small amount onto a clean, soft foam or microfiber applicator pad. Two or three sprays is plenty to start.
- Gently wipe the applicator along the entire length of the rubber seal. Fold the applicator to get into the crevices.
- For door seals, open the door fully to access the entire seal. Apply to the seal on the door and the body.
- Let the product soak in for a few minutes. If the rubber was very dry, you may see it absorb quickly.
- Take a clean, dry microfiber towel and gently buff any excess. There should be no visible wetness.
You must aim for a thin, even coat. More product is not better. A thick coat will not absorb faster. It will just become a sticky, dust-catching mess that could smear onto clothes or paint. Allow the coat to dry completely before applying another. Wait times between coats vary by product; check the label for the recommended interval.
A proper protectant finish should be non-greasy and UV-resistant, leaving the rubber with a deep, rich, matte look, not a cheap, shiny one. I look for this on my black BMW’s window seals. A greasy finish attracts every speck of dust in the air, unlike ceramic coating used on car windows which provides a clean and lasting finish.
Detailer’s Pro-Tip: The Glove Test
Here is a simple trick to know if you used the right amount. After you have applied the conditioner and buffed it, put on a nitrile glove. Run your gloved finger along the length of the seal.
It should feel slick and smooth. Your finger should glide without effort.
If it feels tacky, sticky, or grabby, you used too much product. The rubber is telling you it cannot absorb any more. Wipe it down again with a clean microfiber towel until the tacky feeling is gone. This test prevents you from closing a door on an overly treated seal and getting product transfer on your paint or glass.
Keeping It Quiet and Dry: Long-Term Care
Think of seal care not as a one-time fix, but as a relationship. A little regular attention keeps everything smooth. I make it a habit to clean and condition my window seals every time I do a full interior detail. For me, that’s about three times a year. My black BMW gets it with every wash to keep the channels pristine.
You should plan to treat your seals with every major seasonal detail, about 2 to 4 times a year, or whenever they look chalky and feel rough to the touch. A quick wipe with conditioner takes two minutes per door and pays off for months.
You will know when a seal is past the point of your help. Look for deep, hard cracks that you can catch your fingernail in. These are stress fractures that conditioner cannot heal. Feel for sections that are literally crumbling apart, leaving black dust on your fingers. Look for seals that are permanently bent or flattened, no longer springing back to shape. These are all signs the material has failed.
The science here is simple but vital. A healthy, supple rubber seal acts like a perfect gasket. It conforms tightly to the glass, creating a physical barrier. This barrier blocks wind from whistling through at highway speeds, which is where that annoying noise comes from. More importantly, it shuts out water. A conditioned seal stays flexible, filling every microscopic gap to keep your interior dry and prevent costly water leaks onto your electronics or carpet.
I have seen too many good seals ruined by the wrong products. Avoid these common mistakes. Never use an abrasive pad or a stiff brush. They will scratch the rubber and glass. Stay away from harsh all-purpose degreasers or strong APC on full strength. They strip the natural oils, especially when trying to remove cured epoxy paint sealants.
Do not use shiny, silicone-based dressings like classic Armor All. They create a slick film that attracts dust and can actually dry out the rubber over time. Finally, always dry the water channel behind the seal with a twisted microfiber towel; leaving it wet invites mildew and accelerates rot.
When to Call It: Signs You Need a New Seal
There comes a time when no amount of product will help. Restoration has its limits. On my old Miata, I had to face this reality. If your seal has deep, structural cracks, it is not sealing. If it is brittle and pieces flake off in your hand, it is decomposing. If it has a permanent kink or collapse from being pinched for years, it will never spring back.
Water inside the car after a wash, or a persistent wind roar you can’t silence, are the clearest signals. When you see these signs, cleaning and conditioning is just a temporary cover-up. The only real fix is replacement. For a modern car, this is usually a dealer or specialized auto glass part. For a classic, it might be a search. It is a bigger job, but it is the only way to restore true quiet and dryness.
Your Seasonal Seal Checkup Schedule
Link this simple routine to the changing weather. It is easy to remember.
- Spring: After the final frost. Clean out all the sand and road salt grit from winter. A full clean and condition preps the rubber for summer heat.
- Summer: Mid-season check. Wipe seals with a protectant to guard against UV rays, which are the number one cause of rubber drying and cracking. This is crucial for my convertible.
- Fall: Before the leaves drop. Clear out leaf debris and pine needles from the channels. Condition the seals to keep them flexible for the coming cold, which can make stiff rubber crack.
- Winter: A visual check. Ensure seals are not frozen to the glass before trying to open a door. If they are, pour lukewarm (not hot) water along the seam to thaw it. Never force it or use an ice scraper on the seal.
This schedule takes maybe ten minutes per season. It keeps the seals on my kid-hauler Odyssey from getting destroyed by sticky hands and spilled juice. It is the best insurance against leaks and noise you can buy.
Keeping Seals Effective for the Long Haul
The single most important habit is to clean and condition your window seals with a dedicated protectant. This stops the rubber from drying out, cracking, and losing its ability to seal out noise and water.
Skip this routine, and you’ll trade a few minutes of care for hours of chasing wind leaks and water stains later on.
Relevant Resources for Further Exploration
- Shop restoration and classic car window seal from Collectors Auto Supply
- Car Window Seal Repair
- Restoring/maintaining rubber window seals | Auto Geek Online Auto Detailing Forum
Max Gunther
Max is an automotive enthusiast having worked as a car mechanical and in interior detailing service for over 25 years. He is very experienced in giving your old car, a new fresh vibe. He has detailed many cars and removed very tough smells and stains from all kinds of cars and models, always ensuring that his work and advice helps his customers. He brings his first hand experience to his blog AutoDetailPedia, to help readers breath new life into their car interiors.