How Do You Clean and Restore a Car Dashboard to Look Like New?
You look at your dashboard and see a film of dust, greasy streaks, and that dull, faded plastic. I know the feeling from my own cars, like the grey Odyssey where milk spills and crayon wax were the first enemies.
I will guide you through my proven process, covering identifying your dashboard material, selecting safe and effective cleaners, the step-by-step deep clean, restoring color and texture, and applying a durable UV protectant.
Use the wrong product or skip protection, and you will set the stage for permanent, chalky cracks no wipe can fix.
The Detailer’s Dashboard Order of Operations (Your Checklist)
You cannot clean a dashboard well by just spraying and wiping. A great result needs a plan. If you skip steps or do them out of order, you will just smear dirt around or leave a greasy film. Follow this exact sequence to lift grime and leave a perfect, protected finish. A clean, well-maintained car dashboard looks better and lasts longer. This guide helps you learn how to clean and maintain it effectively.
-
Identify & Test
Before you touch anything, figure out what you are working on. Look at different sections of your dash. Is it all one material? My 2019 Honda Odyssey has hard plastic, soft-touch vinyl, and a faux wood trim all on the same panel. Run your fingers over the surfaces. Note the texture. Find a hidden spot, like under the glovebox or behind a door, and test your chosen cleaner and protectant there first. You are checking for discoloration, residue, or any adverse reaction. This step prevents a major mistake in plain sight.
-
Dust & Vacuum
You must remove all loose debris first. A damp microfiber cloth just pushes dust into the pores of the material. I use a soft, long-haired detailing brush to gently sweep dust from every vent slit, gauge crevice, and textured surface. Follow up with a vacuum using a soft brush attachment. This dry prep prevents you from creating mud when you apply your cleaner later. In my kid-hauling Odyssey, this step alone removes a shocking amount of cracker dust and sand.
-
Deep Clean
Now you attack the ingrained grime, skin oils, and old product buildup. Use a pH-balanced interior cleaner. Spray it lightly onto a soft, folded microfiber towel, not directly onto the dash. This controls overspray onto the windshield. Work in small sections using light pressure. For grained plastics or sticky spots, a soft-bristled brush can help agitate. The goal is to lift the dirt onto your towel, not dissolve it and rub it back into the surface. Use a fresh, dry towel to buff the area dry as you go. Never let the cleaner air dry.
-
Restore & Protect
Your dashboard is now clean, but likely dry and dull. This step replenishes. For most plastics and vinyl, a water-based protectant is best. It adds a slight sheen and UV inhibitors without being greasy. For leather, use a leather conditioner. For clean, protected vinyl dashboards, choose a vinyl-safe protectant designed for plastics. This keeps the surface looking OEM-like and ready for the next care step. Apply the product sparingly to an applicator pad and spread it thinly and evenly. A little goes a very long way; excess product is what creates a shiny, slippery mess and attracts more dust. On my black BMW’s dash, I aim for a matte, OEM-like finish, not a glossy showroom shine.
-
Final Buff
This is the secret step most people skip. After the protectant has set for a few minutes (check the product label), take a clean, premium microfiber towel and give the entire dashboard a gentle but thorough final buff. This removes any residual product, ensures an even look, and eliminates any surface slickness that could cause dangerous windshield glare. Run your hand over the surface. It should feel smooth and natural, not tacky or oily.
What’s Your Dashboard Made Of? (And Why It Matters)
Using the wrong product can cause permanent damage. You need to know your materials. Here is how to tell them apart by sight and touch.
- Hard Plastic: The most common. It feels rigid and unyielding, often with a textured grain. It’s durable but can fade to a chalky grey from UV exposure. You find this on lower dash areas and door panels.
- Soft-Touch Vinyl: Feels slightly padded or rubbery to the touch. Common on the top of the dash. The fail point here is the coating, which can degrade over 10+ years into a sticky, tacky mess that attracts dirt like a magnet. My older BMW’s door pulls did this.
- Genuine Leather: Found in luxury vehicles, like the seats and dash in my Porsche. It has a distinct, natural grain and smell. It needs conditioning to prevent it from drying out, cracking, and losing its color.
- Synthetic “Vegan” Leather: Used in many modern cars like my Tesla. It feels uniform, often smoother than real leather, and is usually easier to clean. However, strong solvents or abrasive cleaners can damage its top coating.
- Real Wood Veneer: A thin layer of real wood, usually with a clear lacquer coat on top. It should feel smooth and hard. Never use a cleaner meant for plastic on it, as you can haze the lacquer.
- Faux Carbon Fiber: It’s just molded plastic with a printed pattern. Treat it like hard plastic, but be very gentle, as the clear coat over the pattern can scratch.
Cleaning removes what’s on the surface (dirt, grease). Restoring puts something back into the material (oils, UV blockers, color). A cleaner will not fix UV fading. A protectant will not lift ground-in dirt. You must do both steps, in that order.
Be aware of the common fail points. Sticky soft-touch coatings often require a specific and gentle cleaner to de-gunk without making it worse. Faded, brittle plastics can be temporarily improved with a dedicated plastic restorer, but they cannot be made new again. Dried-out leather needs multiple, patient applications of conditioner to rehydrate.
This leads to a common question: can you restore old car dashboard plastic? Yes, but with clear limits. A dedicated plastic restorer or a very mild heat gun technique can sometimes bring back color and flexibility to sun-faded plastic. However, if the plastic is chemically damaged, cracked, or the sticky coating has fully failed, true restoration is often not possible and replacement is the only fix. Prevention with a quality UV protectant from day one is always the better strategy.
Gathering Your Arsenal: Tools & Chemicals for the Job
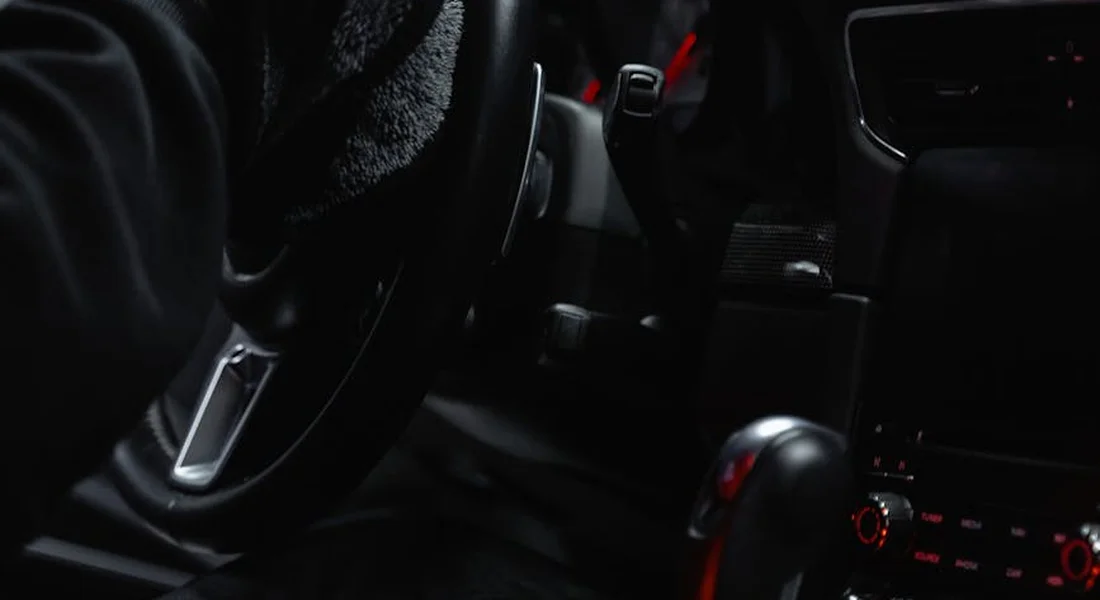
You do not need a truckload of gear. You need the right gear. Using the wrong tool here can leave scratches or a greasy film that attracts dust. I keep my interior kit simple and effective.
The Toolbox
- Soft Bristle Brush Set: These are for agitation. You need a 1-inch detailing brush for air vents and tiny crevices. A wider soft brush helps loosen dirt from textured plastic and fabric speaker covers.
- Quality Microfiber Towels: This is non-negotiable. You need two types. Use a soft, plush towel for applying cleaners and protectants. Use a thin, waffle-weave towel for drying. The waffle pattern grabs moisture from cracks around screens and buttons better than anything else.
- Compressed Air or a Soft Brush Attachment for a Vacuum: A quick blast of air or a careful vacuum with a soft brush gets the loose sand and dust out first. This prevents you from grinding grit into the plastic later.
The Chemicals
Not all cleaners are the same. Match the chemical to the soil level.
- Dedicated Interior Cleaner: This is for your weekly wipe-down. It’s designed for light dust and light fingerprints. It typically leaves no residue and is safe for all interior surfaces, including screens.
- All-Purpose Cleaner (APC): This is your heavy lifter. Dilute it as the bottle says. An APC cuts through the greasy film on steering wheels, the grime on door handles, and old spills. Always test an APC on a hidden spot first, as some can stain if left too long.
- Leather or Vinyl Cleaner: If your dash has stitched leather or leatherette sections, use a pH-balanced cleaner meant for it. My Tesla’s “vegan leather” gets its own specific product to keep it supple.
- Protectant/Restorer: This is where personal taste matters. Products range from matte to high gloss.
Understanding the Shine Spectrum
That greasy, high-gloss look from the 90s is out. Most modern dashes are designed for a matte, OEM finish.
- Matte/Satin: This leaves zero shine. It looks like clean, fresh plastic from the factory. This is my go-to for nearly every modern car, especially my black BMW and the Tesla. It does not reflect onto the windshield.
- Natural Gloss: This enhances the color and gives a light, healthy glow. It’s good for older plastics that have faded slightly.
- High Gloss: I rarely use this. It makes surfaces slippery and creates blinding reflections on the windshield. Avoid it.
Your safest bet for a new-car look is a matte or satin finish protectant. Read the label.
What to Absolutely Avoid
- Household Cleaners: Glass cleaner, dish soap, and multipurpose sprays are too harsh. They strip protectants and can cause fading or cracking over time.
- Abrasive Scrubbers: Magic Erasers, stiff brushes, or paper towels. They will scratch plastic and create a haze you cannot fix.
- Generic High-Gloss Sprays: They attract dust like a magnet and often contain silicones that can make surfaces brittle.
Technique Tweak: The Test Spot is Your Best Friend
Never spray a new product directly onto your dashboard. This is not a suggestion. It is the rule.
Find a hidden spot. Under the dashboard, behind the door panel, inside the glove box. Spray your cleaner or protectant onto a microfiber towel first, then gently rub that hidden area.
Wait a minute. Look for three things:
- Discoloration or staining.
- A change in texture (does it feel sticky or rough now?).
- An unacceptable level of shine.
I learned this the hard way on my Jet Black BMW 3 Series. I used a strong APC on a sensitive piece of lower trim. It left a permanent, whitish stain. The plastic was clean, but ruined. A two-minute test spot would have saved me the cost of a replacement trim piece. Do not skip this.
The Core Protocol: How to Deep Clean Your Car Dashboard, Step-by-Step
Follow these steps in order. Work top to bottom, left to right. This is the same method I use on every car, from the Odyssey to the Porsche.
Step 1: The Dry Prep
Start with a cool, shaded interior. Park the car out of the sun.
- Open all doors for airflow.
- Use compressed air or a vacuum with a soft brush to remove loose dirt, crumbs, and dust from every vent, crevice, and gauge cluster. You are removing the abrasive particles now so you don’t smear them later.
Step 2: The Initial Wipe
Take your dedicated interior cleaner and a plush microfiber. Spray the cleaner onto the towel, not the dash. Wipe down all large, flat surfaces. This lifts the surface dust and fingerprints. You are pre-lubricating the surface for a deeper clean.
Step 3: The Deep Clean (Where Needed)
Now tackle the grime. For most cars, the steering wheel, door handles, gear shifter, and touchscreens are the dirtiest.
- Dilute your All-Purpose Cleaner in a spray bottle.
- Spray it onto your detailing brush or a microfiber towel.
- Gently agitate the soiled area. For textured plastic, use the brush. For smooth surfaces, use the towel.
- For sticky residue (think melted candy or juice spills from the Kid Hauler), let the dwell time work for you. Spray a little APC on the spot, let it sit for 30 seconds to break down the sugar, then gently wipe. Do not scrub hard.
Step 4: The Detail Work
This is where you make it perfect.
- Air Vents: Use your small detailing brush damp with interior cleaner. Work the slats gently. Wipe with a dry corner of your microfiber.
- Buttons & Knobs: Wrap a microfiber around a flathead screwdriver (cover the tip!) to clean around the edges of buttons. For knobs, clean between the ridges with your detailing brush.
- Screens: Use only a cleaner labeled safe for anti-glare coatings. Spray onto a very soft, clean microfiber and wipe gently. No pressure.
- Black Dashboards: They show every streak. The secret is to follow your deep clean with a dry buff. Use a fresh, dry section of your waffle-weave towel and lightly buff the entire dash. This removes any leftover cleaner residue that causes streaks.
Step 5: The Critical Dry
Before you apply any protectant, the dashboard must be completely dry. This is a major safety step.
Use your waffle-weave towel to soak up any pooled cleaner from the seams around the infotainment screen, instrument cluster, and window switches. Trapped liquid can seep into electronics and cause failures.
Run the air conditioning on a cool setting for a few minutes to help evaporate any final moisture from the vents and hard-to-reach spots.
Step 6: Protection & Finish
Your dashboard is clean and dry. Now you keep it that way.
Shake your chosen matte or satin protectant well. Spray it onto a new, clean plush microfiber towel. Apply a thin, even coat to all plastic, vinyl, and leather surfaces using straight-line wipes. Do not use a circular motion.
Let it sit for the time specified on the bottle, usually one to two minutes. Then, take a fresh dry towel and give the entire dash a final, light buff. This ensures an even, streak-free finish with no oily residue.
You are done. The surface should feel smooth, not slick. It should look clean and fresh, not shiny and artificial. It should smell clean, not like chemicals.
Restoring the Look & Feel: Bringing Back that “New Car” Finish
Cleaning gets the grime off. Restoration is where you bring the life back. For a dashboard, this means three things: reviving the deep, original color, restoring a slight suppleness to the surface, and locking in protection against the sun.
You do not want a greasy, shiny mess. A restored dashboard should look rich and new, not like a slip ‘n slide.
Choosing and Applying Your Restorer
Products come in different forms, and how you apply them matters just as much as what you use.
- Spray-On, Wipe-Off: This is the most common method for water-based dressings. Spray a light mist onto a clean microfiber applicator pad-not directly onto the dash-and wipe it in using overlapping strokes. Applying to your towel first gives you perfect control and prevents overspray on the windshield.
- Apply with a Foam Pad: For thicker creams or gels, a soft foam hand pad is my go-to. It lets you work the product into the texture without using too much. This is great for restoring the slightly rubberized feel of older Japanese car dashes, like in my Honda Odyssey.
- Matte vs. Satin Sheen: Know your finish. Modern Audi and BMW dashes are designed to be strictly matte. A “matte finish” protectant will add zero gloss, only darkness and protection. An older Lexus or Mercedes often had a soft, low-luster sheen. A “satin” product will replicate that factory look. When in doubt, test on a small spot in the corner.
The Real Hero: UV Protection
Color enhancers are nice, but UV blockers are non-negotiable. The sun’s ultraviolet rays are what turn your dash pale, make it brittle, and cause it to crack. A quality protectant has ingredients that absorb or reflect these rays, acting like sunscreen for your interior. This is the single most important step for preventing future damage and preserving your work. Reapply every 2-3 months for constant defense, especially if you park outside.
Dashboard Restoration Kits: What’s in the Box?
You’ll see these kits on shelves. They typically contain a strong cleaner, a “primer” or prep solution, and a colored dressing or dye. They work best on faded, but uncracked, dashboards where the color has simply bleached out. The primer cleans deep, and the tinted dressing adds pigment back. They are a band-aid, not a cure, for severe fading. For a crack, they do nothing.
Handling the Tough Cases: Stains, Scratches, and Ghosting
Some problems need a specialist’s approach. Here’s how I tackle the usual suspects.
Fighting Common Stains
Always start with the mildest option and move up. Test any cleaner on a hidden spot first.
- Coffee or Soda: A damp microfiber with a drop of interior cleaner usually gets it. For dried, sticky syrup, I use a diluted all-purpose cleaner (10:1), let it dwell for 30 seconds, then agitate gently with a soft brush before wiping.
- Ink (Ballpoint): Rubbing alcohol (isopropyl) on a cotton swab can work. Dab, don’t rub wildly. For fresh ink, a leather/vinyl cleaner with mild solvents might lift it. Act fast, and always blot from the outside of the stain inward to prevent spreading.
- Sunscreen (The Worst): This is a greasy, chemical nightmare. You need a degreaser. I use a dedicated interior cleaner or a very diluted citrus degreaser on a towel. Wipe, flip the towel, wipe again. It often takes two passes. On my Odyssey’s dash, sunscreen left a hazy film that only came off with a dedicated vinyl cleaner and some patience.
The Limits: Scratches and Cracks
Be realistic. A deep scratch into the vinyl is there for good. You can make it less visible by cleaning it out (a soft toothpick helps) and then applying your protectant, which can darken the scratch line to blend it slightly. A crack cannot be fixed by detailing. Products that claim to “fill” cracks are temporary and often make a mess. For these, the real solutions are professional vinyl repair, a dashboard re-dye, or a custom cover.
Banishing the Ghost: Haze and Film Removal
“Ghosting” is that cloudy, streaky film that won’t wipe off. It’s often caused by cheap, silicone-based dressings that have dried out or broken down, or from years of cigarette smoke residue. It’s a coating on top of your dash.
To remove it, you need to gently abrade it away. This only works on hard, smooth plastics, not soft-touch or textured surfaces. I use a very mild polish meant for plastics, or even a finishing polish for paint, applied by hand with a soft foam pad. On the hard dash of my BMW, I used a dab of plastic polish and light pressure in a circular motion. The haze vanished, revealing the clean plastic underneath, which I then protected properly. This is a last-resort, careful procedure.
Can a Dashboard Be Refinished?
Yes, but it crosses from detailing into restoration. Detailing cleans and protects the surface you have. Refinishing changes the surface. This includes professional vinyl dyeing (spraying a new color coat) or wrapping the dashboard with a vinyl film. These are permanent, costly fixes for faded, cracked, or discolored dashes that are otherwise structurally sound. If your dash is just dirty or slightly faded, a deep clean and protectant will save you a lot of money and look fantastic. That same care can extend to exterior trim—restoring and refinishing faded car trim to match the refreshed interior. It’s a practical path before considering full replacement.
When to Call a Pro: The Real Cost of Professional Dashboard Restoration
Sometimes, a dashboard is too far gone for a bottle of cleaner and some elbow grease. I know the feeling. My old 1995 Miata’s dash had cracks you could lose a quarter in. There are times when paying a professional is the smartest move you can make.
Call a pro if you see deep, physical cracks, severe discoloration that won’t budge, or if you need a perfect color match for a re-dye job. This is common on older cars left in the sun. If you’re already investing in a complete interior detail for a sale or a special event, having them handle a tricky dashboard as part of the package often makes financial sense.
So what does “dashboard restoration near me” actually mean? A true pro does more than clean. For a cracked or faded dash, the process is intensive. They will deeply clean and degrease every crevice. Then, they often lightly sand the damaged areas to create a smooth surface for new material to adhere. They mix and apply a flexible vinyl or plastic dye, not a paint, to achieve a factory-match color. The final step is a high-quality sealant to protect the new surface from UV rays. The result should look and feel original, not like a painted-on cover-up. This approach is part of restoring worn car interior surfaces, not just dashboards. It extends to seats, door panels, and consoles for a cohesive, like-new look.
For a standalone dashboard restoration, expect to pay between $200 and $600, depending on damage and vehicle size. A full interior detail that includes a dashboard revive might range from $300 to $800. Compare that to a DIY kit costing $50-$100 and an entire weekend of your time. The pro cost buys you expertise, a guaranteed color match, and a finish that should last for years.
For classic car dashboard restoration, I always recommend seeking a specialist. The materials and colors are unique. Getting it wrong hurts the car’s value. The cost is higher, often starting over $1,000, but for a cherished vehicle, it is an investment that pays off in both looks and resale value.
Keeping It New: Simple Habits for a Lasting Clean Dashboard
Restoring your dashboard is a victory. Keeping it that way is the real game, especially when it comes to cleaning sticky car dashboard buttons. It comes down to simple, consistent habits that take just minutes.
Make a weekly “dust and touch-up” part of your routine. When you fuel up, grab a clean, dry microfiber towel and wipe down the dash. This removes the abrasive dust that builds up and prevents it from being ground into the surface. My Honda Odyssey needs this every single week without fail after hauling the kids.
Fight the sun. UV rays are the number one enemy of your dashboard. Use a sunshade every single time you park outside. This is non-negotiable for modern cars with massive windshields and glass roofs, like my Tesla Model 3. The heat and UV bombardment through that glass will bake and fade a dashboard faster than you can imagine. No amount of cleaning and protection is enough against that kind of sun exposure.
Be careful what you place on the dash. Those little tree air fresheners often leak oils that stain and eat into the plastic. Adhesive phone mounts or GPS units can leave permanent marks or even pull up the material’s texture when removed. If you must use them, place them on the windshield glass itself.
Schedule a quarterly deep clean and protectant re-application to lock in your hard work. When I do my seasonal tire change, I also give my daily drivers a full interior wipe-down. This is the time to use your interior cleaner and a fresh coat of UV protectant. It takes maybe 20 minutes and ensures your dashboard never backslides into a state that needs another major restoration.
Final Thoughts on a Like-New Dashboard
The single best thing you can do is match your cleaner to your dashboard’s material—vinyl, leather, or plastic—and never skip the UV protectant. This simple duo removes grime safely and builds a barrier against the sun, which is what turns dashboards brittle and faded.
Use a harsh, all-purpose cleaner instead, and you will strip the plasticizers from the vinyl, leaving it dry and prone to cracking.
Further Reading & Sources
- Hand Crafted Dashboard Restoration | Just Dashes
- Classic Car Interior Restoration | Just Dashes
- r/Detailing on Reddit: What products/process to restore dashboards would you guys recommend?
- Dashboard Restoration
- Classic car dashboard restoration
Max Gunther
Max is an automotive enthusiast having worked as a car mechanical and in interior detailing service for over 25 years. He is very experienced in giving your old car, a new fresh vibe. He has detailed many cars and removed very tough smells and stains from all kinds of cars and models, always ensuring that his work and advice helps his customers. He brings his first hand experience to his blog AutoDetailPedia, to help readers breath new life into their car interiors.