Can You Use Acrylic Paint on Car Windows? A Detailer’s Guide to Types and Application
You’re looking at your car’s glass, wondering if that craft acrylic paint is a quick fix for tinting or decoration. I’ve tested this myself, and the short answer requires a serious talk about adhesion and longevity.
Based on my hands-on experience with everything from my daily-driven Ford F-150 to my show-car Porsche, this article will clarify why most acrylics fail on auto glass, the specialized types that might work, the correct detailing methods for application, and how to seal it properly for temporary use.
Use the wrong paint or technique and you will create a brittle, peeling film that requires aggressive scraping and chemicals to remove, potentially scratching the glass.
Key Takeaways: The Short Answer on Painting Windows
Technically, you can use acrylic paint on car windows, but you probably shouldn’t. I view it as a temporary, problematic move for decoration, not a functional window tint or replacement.
I learned this the hard way on an old project car. The core realities are straightforward.
- Poor adhesion to glass means the paint will lift and peel with the first car wash or temperature swing.
- Easy scratching turns a clean swipe with a microfiber cloth into a permanent, cloudy scar.
- Difficulty of removal often requires harsh scrapers and solvents that can etch the glass itself.
- Major visibility and safety issues arise from the paint’s hazy, inconsistent texture, distorting your view.
I rate this a high-risk DIY project. Remember, “cure” is a misleading term here; artist acrylic dries through evaporation, but it never chemically bonds to glass like a true automotive product.
For a clean, durable result, professional window tint film or perforated vinyl decals are the standard. They frame the rest of this discussion.
What Exactly Are You Working With? Glass vs. Acrylic Paint
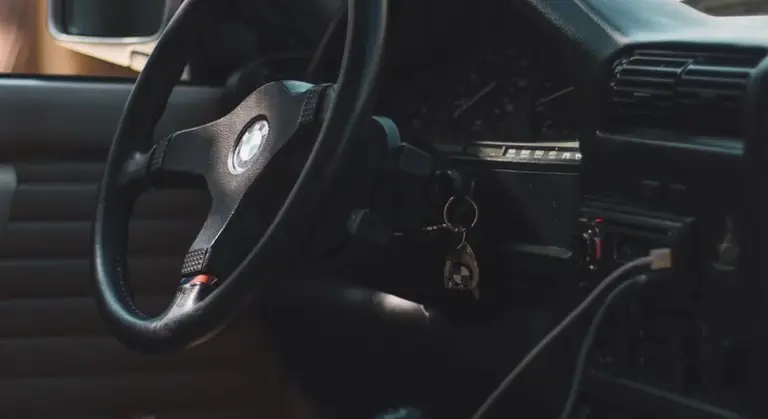
Automotive glass is a formidable surface. It is non-porous, incredibly slick, and engineered to be hard, smooth, and shed environmental contaminants. Run your hand over your windshield. It feels cold and seamless, a perfect barrier.
Artist’s acrylic paint behaves entirely differently on this terrain. It does not absorb or bond; it simply sits on top, curing through evaporation into a brittle film that is prone to peeling and cracking. Think of it like a sticker with weak glue applied to a sheet of ice.
When folks search “can i use acrylic paint on my car,” they’re often thinking of a cheap tint. That paint is formulated for the gentle life of a canvas or wood panel, not for the flexibility and brutal UV resistance demanded by a car’s exterior. The sun will fade it quickly—especially given that UV radiation can cause traditional car paint to fade over time. Temperature changes will make it crackle.
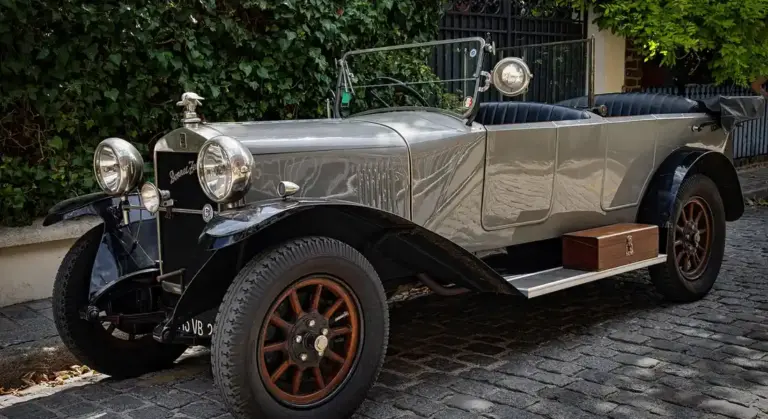
Clarify this point: “acrylic paint” and “acrylic car windows” are not the same. Acrylic car windows are lightweight plastic replacements, sometimes used in vintage or racing vehicles, but they come with pros like weight savings and cons like being soft and easily scratched. They are a different product entirely, requiring specific polishes, not craft paint.
The Professional Detailing Verdict: Why This Is a Bad Idea
Let me save you a weekend of frustration. I have seen this attempted, and I have cleaned up the mess. My grey Honda Odyssey, the “Kid Hauler,” once came home with a “masterpiece” on the rear passenger window. My youngest, in a burst of creativity, used craft acrylics. It was a lovely, chunky blue sun.
Getting it off was a project. The paint had dried into a brittle, opaque film. It wouldn’t just peel. I had to carefully soften it with isopropyl alcohol and a plastic razor blade, working inch by inch to avoid scratching the glass. That experience cemented my view: acrylic paint belongs on a canvas, not on your car’s windows, especially when it comes to spray paint on car glass.
The Inevitable Failures You Will Face
As a detailer, I think about how every material interacts with the environment. Acrylic paint fails every test a car window faces.
- Water Washes It Off: The first rainstorm or trip through a car wash will turn that paint into a running, streaky mess. Acrylic is not chemically bonded to glass; it just sits on top. Water gets underneath and breaks the adhesion.
- Wiper Blades Shred It: On a windshield or rear window, the friction from a single wipe will scrape the paint into gummy shreds. It will immediately smear, creating a dangerous, opaque smear directly in your sightlines.
- Sun Bakes and Cracks It: Your car’s glass gets extremely hot. Acrylic paint becomes brittle under UV exposure and heat cycling. Within days, it will develop a spiderweb of fine cracks, then start to flake off in ugly chips.
- A Smooth Finish Is Nearly Impossible: Glass is unforgiving. To avoid brush strokes, bubbles, and runs, you need a perfectly clean, grease-free surface and professional-grade spraying equipment. Even then, without a proper primer made for glass, adhesion is temporary.
Safety and Legality Are Not Optional
This is where we move from a detailing fail to a serious concern. Your windows are for seeing.
Painting over them, even partially, drastically reduces visibility. At night or in bad weather, that reduction could be the difference between stopping in time and an accident. Most state and provincial vehicle codes have strict laws about window tinting and obstruction; applying an opaque paint will likely violate them, resulting in fines. It is simply not a risk worth taking.
Steer Toward Safe, Removable Alternatives
I understand the desire to customize or create privacy. The good news is that materials exist for exactly this purpose. They are designed for automotive use.
For solid colors or designs, use automotive-grade vinyl. It is cut, applied with a slip solution, and can be removed later without residue. For temporary blackouts, static-cling vinyls are a great, no-adhesion option. If you want tint, have a professional install a dyed or ceramic window film. These products are tested for adhesion, clarity, and durability against the elements.
Your goal should always be a modification that can be reversed cleanly, without damaging the original glass. That is the mark of a smart customization and a detailer’s approach.
If You Must: The Full Preparation and Application Method
I need to be clear. This is a guide on how the process is done, not a recommendation to do it. I detail cars for a living. The thought of putting craft paint on a windshield makes me wince. But I understand temporary art projects or displays for a show car. If you are determined to proceed, this is how you do it right to minimize damage and mess. The goal here is controlled application and, more importantly, clean removal.
Gathering Your Supplies: From Paint to Painter’s Tape
You cannot use just any old bottle of paint. Gathering the right tools upfront is the only way to get a result that doesn’t look like a kindergarten project. Here is what you will need on your bench:
- Acrylic Paint: Not all are the same. Craft store paint is thick. “Fluid” acrylics are thinner and better for an airbrush. “Heavy body” acrylics are like paste. For this, a higher pigment load is better for coverage, but remember, no artist-grade paint is formulated for automotive glass or exterior conditions.
- Application Tools: Fine, soft-bristled artist brushes for detail work, or a dual-action airbrush and compressor for larger areas. Do not use a rattle can. The spray is too wide, too wet, and completely uncontrollable for this task.
- Isopropyl Alcohol (99% or 90%): This is your final cleaner. Nothing else strips oils and silicones from glass as effectively.
- Premium Microfiber Cloths: Use a glass-specific towel or a clean, plush towel reserved only for this job. Lint is your enemy.
- High-Quality Painter’s Tape: I use the green or blue fine-line tape. The cheap stuff bleeds and leaves adhesive behind on your trim.
- Razor Blade Scraper: Have a fresh, new single-edge blade ready for the inevitable removal. This is your exit strategy.
Prepping the Glass: Cleaner Than a Showroom Window
This step is everything. Paint does not stick to dirt, wax, or rain repellent. It fails on clean glass. You need a surface that is chemically bare.
Start with a normal car wash to get rid of grime. Dry the glass completely. Then, soak a microfiber cloth with isopropyl alcohol. Wipe the entire area you plan to paint in straight, overlapping strokes. Flip the cloth to a dry side and buff it off immediately. Do this twice. Your test is the sound and feel: put on a nitrile glove and drag your fingertips across the glass. It should squeak. If it doesn’t, clean it again.
Now, mask. Run your tape along the edges where glass meets rubber seals or painted bodywork. For a clean line on the outside, you may need to tape the body too. Burnish the tape edge down firmly with your fingernail to seal it. Any gap will let paint creep under, and you will be scraping it off your car’s paint later.
Applying the Paint: Brushes, Sprays, and Patience
How you apply it determines the final look. Brushing is the most accessible but the most difficult for a smooth finish. It will show every brush stroke unless you are immensely skilled. Spraying with an airbrush gives a more even, thin layer but requires the equipment and practice to not cause runs.
Think of this like painting a detailed model kit, not a wall in your house.
- First Coat is a Mist: Whether by brush or air, your first layer should be barely there. It is a tack coat. It gives the next layer something to grab. Let it dry to the touch. This might take 20-30 minutes in good, low-humidity conditions.
- Build Slowly: Apply a second thin coat. Then a third. You are building opacity slowly. Rushing leads to thick, gloppy paint that runs, sags, and takes forever to dry deep down.
- Check Between Coats: Hold it at an angle to the light. Look for thin spots or runs. If you see a run while it is still wet, you can sometimes gently lift it with the tip of a dry brush.
People ask how long they should leave the paint on. You need to understand the difference between dry and cure. The surface may be dry to the touch in a few hours. It may feel fully cured in a day or two. But on automotive glass, exposed to weather, vibration, and washing, acrylic paint never achieves a permanent, chemical cure. It remains a brittle, water-sensitive film sitting on top of the glass. It is always temporary. The clock starts ticking the moment you finish that last coat. On cars, the car paint cure time is the key before washing, waxing, or polishing. Real-world cure varies with temperature, humidity, and sun exposure.
Paint Damage Prevention: The Inevitable Mistakes and How to Avoid Them
I have seen every one of these errors in my shop. They turn a simple project into a frustrating mess. Learning from these common mistakes will save you time, money, and a major headache.
Mistake 1: Not Cleaning the Glass Perfectly
Glass looks clean until you paint it. Then every fingerprint and spec of road film shows up as a bubble or peeling edge. On my black BMW, even the slightest oil transfer from a handprint can ruin adhesion. Acrylic paint will not stick to a contaminated surface, and it will peel off in sheets.
Do this instead:
- Wash the window with car wash soap and water, then dry it completely.
- Use a dedicated glass cleaner without wax or additives. Follow it with a 70% isopropyl alcohol wipe down to eliminate any invisible oils.
- For stubborn grime, gently use a detailing clay bar on the glass. It will feel smooth as ice when it’s truly clean.
Mistake 2: Applying Paint Too Thick
This is the fastest way to ruin your work. A thick coat will sag before it dries. It creates runs that look like ugly tears on your window. Thick acrylic takes forever to cure and remains soft and gummy, attracting every bit of dust.
Think of it like applying spray wax to my Ford F-150’s hood. You use light, even passes. Use the same principle here. Apply multiple thin coats, letting each one become touch-dry before adding the next. A thin coat dries faster and bonds better to the glass.
Mistake 3: Using the Wrong “Sealer”
People think a clear coat will protect the acrylic paint. It does the opposite. Applying an automotive clear coat over acrylic paint on glass is a disaster, making removal a nightmare and often causing permanent hazing. The solvents in the clear can react with the acrylic, creating a cloudy film you cannot polish off.
If you feel you must seal the paint, use a water-based acrylic sealer designed for arts and crafts. Test it on a small corner first. Honestly, on a car window, it is usually better to leave the acrylic as is and plan for its eventual removal.
Mistake 4: Attempting This in High Humidity or Direct Sun
Weather matters. I learned this the hard way painting trim on my Honda Odyssey in a humid garage. High humidity traps moisture under the paint, causing milky blushing or preventing adhesion altogether. Direct sun bakes the paint surface too fast, leading to cracks and a brittle finish.
Work in a cool, shaded, and dry space. A garage is ideal. If the air feels damp, wait for a better day. Proper drying conditions are non-negotiable.
Mistake 5: Assuming It Will Be Easy to Remove
This is the biggest assumption and the hardest lesson. Acrylic paint is designed to be durable. Once fully cured on glass, removing it requires aggressive scraping and strong chemicals, which risks scratching the glass or damaging surrounding trim. On my Mazda Miata’s windows, I spent hours removing old decal adhesive, a similar struggle.
Go into this knowing the paint is semi-permanent. This reality leads directly to the final, most critical step of the entire process.
How to Remove Acrylic Paint from Car Windows Without Damage
So the paint is on the glass. Maybe it was an accident, some overspray, or a project that did not go as planned. I have seen it happen. The good news is, yes, you can remove acrylic paint from car windows. Glass is a hard, non porous surface. With the right approach, you can get it clean without a single scratch. Let us walk through the methods, from the easiest to the most stubborn.
Method 1: Rolling Off Fresh, Wet Paint
If the paint is still wet or tacky, this is your best and safest shot. You want to lift it, not smear it. I keep a stack of clean, plush microfiber towels in my garage for moments like this. The key is to use a damp towel and let the moisture help you.
- Dampen a clean microfiber towel with cool, clean water. Wring it out so it is moist, not dripping.
- Gently press the towel onto the painted area. Do not rub. Let the moisture soak into the paint for just a few seconds.
- Using light pressure, roll your finger or the towel itself across the edge of the paint blob. The goal is to get under it and peel it up in one go.
- If it starts to smear, stop. Fold the towel to a clean, damp section and try again from a different edge.
For fresh paint, a moist towel and a rolling motion will often lift it away cleanly, leaving no residue behind. On my kid’s Odyssey, I once caught some craft paint before it dried. This method saved me ten minutes of scrubbing.
Method 2: Scraping Away Cured, Dry Paint
Once acrylic paint cures, it bonds tighter. You need a little more persuasion, but you must be gentle. A plastic razor blade is your best friend here. I use them all the time on my Tesla’s glass roof for removing bug tar and stubborn sap. Metal blades are for bodywork, not glass.
- Get a fresh plastic razor blade. They are cheap and you should always use a new, sharp one to prevent dragging.
- Spray the area with a lubricant. Simple soapy water works. For tougher jobs, I use a dedicated automotive adhesive remover that is safe for glass and rubber seals. Soak the paint for a minute.
- Hold the blade at a very shallow angle, almost flat against the glass. Imagine you are shaving the surface, not digging into it.
- Use slow, controlled strokes. Let the lubricant do the work. Wipe the blade clean after each pass.
Working slowly with a lubricated plastic blade at a shallow angle safely shears off cured paint without contacting the glass underneath. Always check your lubricant is safe for any rubber window trim to avoid drying or cracking it.
Method 3: Polishing Off the Last Stubborn Bits
Sometimes, especially with old overspray, you are left with a faint, gritty film. This is where a very fine polish comes in. I reserve this for my black BMW’s windows when nothing else works. You must treat this like jeweler’s work, not sanding a floor.
- Use a specialized glass polishing compound. Cerium oxide is the classic choice. Apply a small dab to a clean, soft applicator pad.
- Work the polish onto the glass by hand, using small, circular motions with very light pressure. You are abrading microns of residue, not the glass.
- Frequently wipe the area with a clean microfiber to check your progress. Stop the moment the residue is gone.
- Immediately clean the entire window with glass cleaner to remove all polishing dust.
Hand polishing with a fine compound is a last resort that requires patience, but it can restore perfect clarity when done with extreme care. The first time I tried this, I rushed. I learned that slow circles win the race.
The Tools That Will Ruin Your Glass
I need to be clear about what never to use. Glass is hard, but it scratches easily from materials harder than itself. On my old Miata, I saw windows ruined by well-meaning owners with the wrong tools. There are plenty of tricks to remove scratches from car glass, but it’s best to avoid causing any in the first place.
- Steel razor blades or metal scrapers: They will leave fine, permanent scratches that catch the light and never polish out.
- Steel wool or abrasive scouring pads: Even the fine grades can embed metal particles and create a haze of scratches.
- Generic heavy duty paint removers: Many are not formulated for auto glass and can damage anti glare coatings or seals.
If you would not use it on your eyeglasses, do not use it on your car windows. The cost of a replacement window is far higher than a pack of plastic blades or a good polish.
Superior Alternatives: Vinyl, Film, and Professional Solutions
Acrylic craft paint belongs on a canvas, not your car window. I have seen the cracked, peeling results firsthand. If your car’s finish is peeling, learning how to fix peeling car paint is a smart first step before pursuing wraps or coatings. Proper automotive films and wraps are engineered to handle road vibration, UV exposure, and temperature swings that will destroy a layer of paint. This section covers the products that actually work, answering common questions on cost and where to find services.
Vinyl Wrap: The Removable, Durable Choice
Vinyl wrap is a thin, pressure-sensitive adhesive film. You apply it wet to the glass, squeegee out the solution, and it conforms as it dries. The difference from paint is night and day. Unlike vinyl car wraps used on vehicles, this film is designed for glass surfaces specifically.
Think of paint as a brittle shell. Vinyl is like a strong, flexible sticker. High-quality automotive vinyl resists UV fading for years, stretches around curves without cracking, and can be removed cleanly with a heat gun when you want a change. Trying to remove dried acrylic paint from glass is a nightmare of scrapers and solvents.
You might hear “acrylic car window tint” and think it’s a type of paint. It is not. Automotive window tint is a dyed, metallized, or ceramic film. Its job is functional, unlike ceramic coatings used for car windows.
- Pros: Rejects solar heat to keep your cabin cooler, reduces glare, and provides privacy. On my white Tesla, a ceramic tint makes a huge difference in summer.
- Cons: Legal limits on darkness (VLT percentage) vary by state. Installation requires patience and a clean, dust-free environment to avoid bubbles and wrinkles.
Let’s talk cost, because that’s a big factor. For a DIY vinyl wrap or tint kit for your windows, expect to spend $50 to $200. It is a budget option, but the risk of wasting material on a mistake is real. A professional installation for wraps or tints typically ranges from $200 to $600 per vehicle, depending on the car and film quality. If you search for “acrylic car windows near me,” you will find professional wrap and tint shops, which is exactly where you should go. They do not use paint.
Professional Opaque Window Solutions
Sometimes, a car needs permanently opaque windows. For a dedicated race car or a radical show car like a custom 911, professionals can replace the glass with molded acrylic (Plexiglas) or polycarbonate panels. This is a serious modification.
The “acrylic car windows cost” for this service is high, often over $1000, and it involves removing factory glass and installing custom pieces. This is body shop or specialty fabrication work, not a detailing task. For 99% of car owners, vinyl film is the correct answer. If you’re weighing other non-permanent options, car window tinting and even glass paint can change the look without replacing the glass. They offer style along with UV protection and heat control, making them worth considering before you commit to a full acrylic or factory glass swap. You get the look you want without permanently altering your vehicle, and you can always take it off.
Product Tier List: From Craft Paint to Professional Films
Let’s sort your options. This isn’t about brands. It’s about matching the product’s capability to your goal and wallet. Your project’s lifespan depends entirely on what you start with.
Budget/Experimental Tier
This is for fun. Think of a one-day car show, a quick photo op, or a Halloween decoration for your Honda Odyssey. You use the cheap craft acrylics from a big-box store.
The paint feels thick and chalky when it dries. Application with a foam brush leaves obvious streaks and texture on the glass. Adhesion is weak.
This paint is not made to bond with automotive glass or withstand any environmental stress. A heavy dew can make it run. The first trip through a car wash, or even a steady rain, will turn your artwork into a streaky mess.
I used some on a side window of my old Miata for a laugh. It looked okay for a few hours. The next morning, condensation had already made the edges curl.
This directly answers the common question, “can i put washable paint on my car?” Yes, you absolutely can. It will act exactly as advertised: it will wash off. Possibly on the drive home. If not, you might want to remove it properly from car surfaces.
- Materials: Basic craft acrylic paint tubes, foam brushes, low-tack painter’s tape.
- Best For: Ultra-temporary displays. Testing a design concept before committing.
- Prep Note: Clean the glass with isopropyl alcohol. It still won’t last, but it helps.
Enthusiast/DIY Tier
You are committed to using paint. You want a smoother finish and better color. This tier is for the dedicated hobbyist.
You move from craft paint to higher-quality fluid acrylics or even acrylic enamel model paints. The pigment is finer. You might use an airbrush kit for a flawless, factory-like spray application. Premium painter’s tape is non-negotiable for getting those crisp lines.
The result will look far better. It will be more opaque and uniform. It will last longer than craft paint, maybe a few weeks or months if sheltered.
But this is the critical thing to know: even your best work here is not automotive-grade. The paint film remains brittle. Temperature swings make it expand and contract at a different rate than the glass. It will eventually crack, chip, and fail. Cleaning it becomes impossible without damaging it.
I tried this years ago on a quarter window. With an airbrush, it looked fantastic for about a month. Then a hot day followed by a cool night created a spiderweb of fine cracks.
- Materials: Fluid acrylics, acrylic enamel, dual-action airbrush kit, compressor, high-grade masking tape.
- Best For: Longer-term static show cars, personal projects where periodic reapplication is acceptable.
- Safety Note: Always use a respirator when airbrushing, even with acrylics. Ventilate your space.
Show Car/Professional Tier
This is where you stop fighting the wrong product and use the right one. We are not talking about paint anymore. We are talking about professional films designed to live on a car.
For an opaque, painted look, high-performance cast vinyl is the answer. It is flexible, durable for years, and removable. For a tinted look, professional-grade window tint film is the product. These materials are engineered for UV exposure, temperature extremes, and chemical resistance.
The tools matter. A good rigid squeegee, a soft felt squeegee, a reliable heat gun, and a sharp blade are the basics. The installation technique is a skill. You can learn it, or you can pay a professional.
This tier is about achieving the visual goal with materials that are meant to survive on a vehicle, whether you install them yourself or hire an expert. The finish is perfect. The longevity is measured in years.
The blackout trim on my Tesla’s pillars? That’s a high-gloss black vinyl film. It handles car washes, sun, and time.
- Materials: Cast vinyl film (for color), dyed or ceramic window tint film, application squeegees, heat gun, precision knife.
- Best For: A permanent or long-term solution that looks professional and protects the underlying glass.
- Application Reminder: The install is 90% of the result. The surface must be immaculate. Any speck of dust trapped under the film will be there forever.
Making Your Window Paint Job Last
Your success hinges on using the right paint-a flexible, automotive-grade acrylic made for glass-and dedicating real time to cleaning and priming the surface. Get these two things right, and you create a finish that can handle sun, rain, and washes without failing.
Cut corners here, and you’ll be left with a messy, peeling film that scratches easily and ruins the look you wanted.
Further Reading & Sources
- Painting Car Window Acrylic | TikTok
- Acrylic Paint on Car Windows | NoBiggie
- Acrylic Paint to Write on Car Windows
Max is an automotive enthusiast having worked as a car mechanical and in interior detailing service for over 25 years. He is very experienced in giving your old car, a new fresh vibe. He has detailed many cars and removed very tough smells and stains from all kinds of cars and models, always ensuring that his work and advice helps his customers. He brings his first hand experience to his blog AutoDetailPedia, to help readers breath new life into their car interiors.