How Do You Touch Up Paint Chips on Your Car’s Hood, Doors, and Panels Correctly?
You notice every single chip when the light hits your car just right. Each one feels like a personal failure, a spot where your paint’s armor has been breached.
I’ve fixed hundreds of these on everything from my daily drivers to garage queens. We will cover matching your paint code, prepping the chip without causing more damage, applying touch-up paint so it lays flat, and blending the repair to hide your work.
A rushed touch-up job will leave a raised, discolored blob that ruins the clean line of your panel.
Key Takeaways: What to Expect
Fixing a paint chip is a five step dance. You assess the damage, clean the area, fill the chip, level the new material, and finally polish the spot to blend it. That’s the idea behind spot repair techniques car paint, where quick, targeted fixes restore color and gloss without a full repaint. These approaches focus on precision, using color-matched coatings and careful blending to keep the finish seamless.
The biggest thing to understand is the difference between paint that is dry to the touch and paint that is fully cured. Your touch-up will be dry in a few hours. It will not be hard enough to sand or polish for at least 24 to 48 hours. The chemical cure, where it reaches maximum hardness, takes weeks.
I rate this job as “Moderate Patience Required.” You are not using muscle. You are using a steady hand and the discipline to wait between steps. Rushing here creates a bigger mess than the original chip.
Managing your expectation is the first step. On my black BMW, a perfect repair that disappears completely is nearly impossible. The goal is different. Your goal is a near invisible repair from five feet away that seals the metal, stops rust, and makes the chip virtually disappear in daily life. That is a huge win.
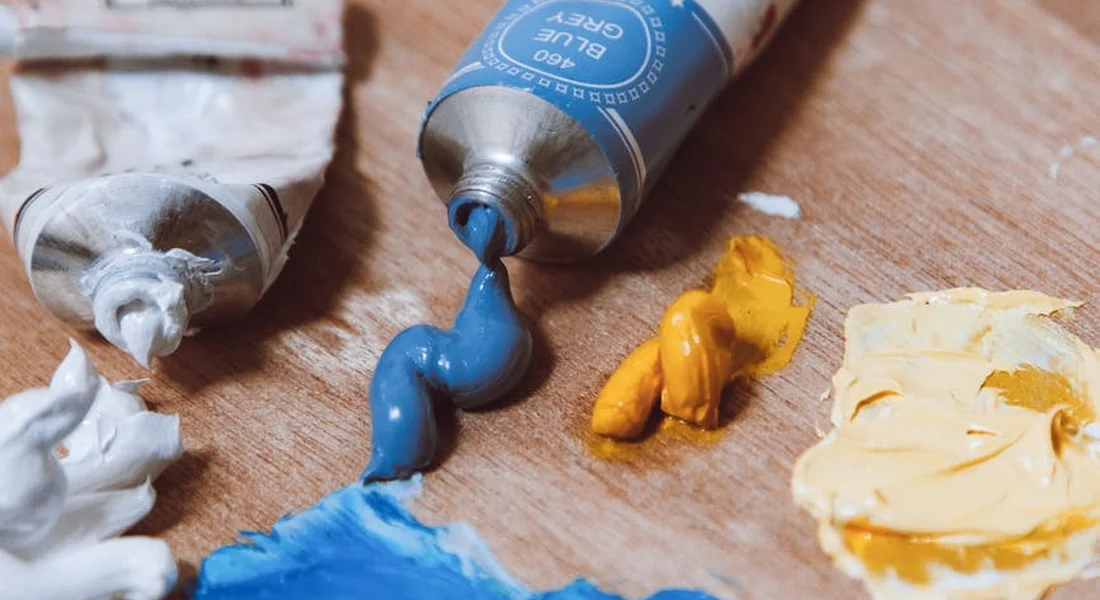
Tools & Chemicals: Your Paint Chip Repair Arsenal
Gather your tools first. Trying to find a clean towel with wet paint on your fingers is a bad time. Here is exactly what you need and why.
- 300+ GSM Microfiber Towels: You need the soft, plush kind. Cheap towels can leave lint strands in your fresh paint, ruining the smooth finish. I use these for final cleaning and for applying polish.
- 70% Isopropyl Alcohol (IPA) & Lint-Free Wipes: This is your final degreaser. IPA evaporates completely, leaving zero residue behind for the paint to stick to. The pre-packaged wipes are perfect for a single chip job.
- Painter’s Tape (3M 1/4″ or 1/2″): The narrow tape is for masking. It lets you protect the immediate area around the chip without covering half the panel. It gives you a clean boundary to work within.
- Touch-Up Paint: Get the exact factory code. A brush-in-cap bottle gives you more control than a pen for larger chips. For very small spots, a toothpick or a specialized applicator like the Dr. ColorChip “Squeegee” tool is far better than the built-in brush.
- Touch-Up Clear Coat: This is non negotiable. Factory paint has a clear coat layer. If you only apply color, the repair will look dull and chalky. Some kits include it.
- 3000-Grit Sanding Pads (Finishing Grade): You need these for the “leveling” step. The pad form factor is easier to control than loose sandpaper. 3000-grit is fine enough to smooth the repair without scratching the surrounding good paint too deeply.
- Dual-Action (DA) Polisher with a 3mm Throw: This is the safe polisher for beginners. The 3mm throw is less aggressive, perfect for final blending. You can do this by hand, but a small DA polisher makes it consistent and much faster.
- A Soft Rubber Block or Pencil Eraser: This is for the “dab, don’t brush” method. You use the rubber to gently push the paint into the chip, which avoids building a tall, messy blob on the surface.
- Detail Spray Lubricant (pH Neutral): This is your sanding lubricant. You must keep the area wet while sanding. Water can work, but a dedicated detail spray provides lubrication and contains surfactants to keep the sanding residue from caking.
Work in a clean, shaded, and dry space. Have good light. I keep all this in a small kit in my garage, ready for the next chip my F-150 picks up on a gravel road.
First, Understand What You’re Fixing: Types of Paint Chips
A paint chip is not a scratch. It is a small crater where an impact has physically removed material. It starts with the clear coat being shattered, then the color layer is gouged out, and it can go all the way down to the primer or bare metal. Knowing what you are dealing with is the first step to fixing it right.
- Surface Scratches (Clear Coat Only): These look like thin, shiny lines you can feel with your fingernail, but they don’t catch. They haven’t broken through the color. This is a polishing job, not a chip repair.
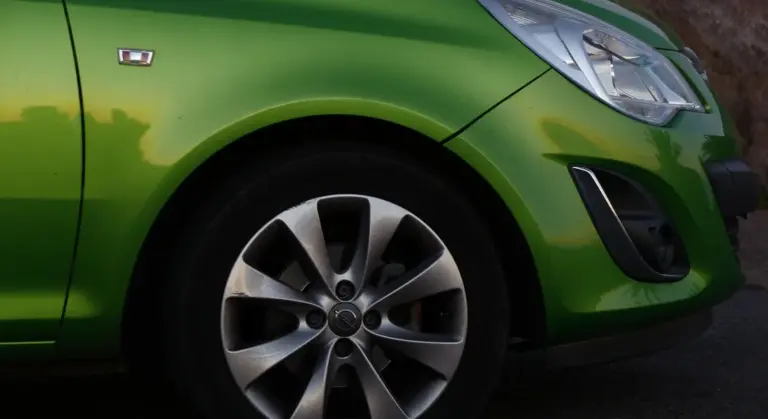
- Deep Chips (Into Primer): This is the most common true chip. You see a distinct, often lighter colored dot. The color is gone, exposing the primer (usually gray or white). My black BMW’s doors have a few of these from parking lot incidents.
- Severe Chips (Down to Metal): These are the nasty ones. You see bare, silvery metal at the bottom, often with a slight ring of rust if it’s been there awhile. The front of my blue F-150’s hood is a map of these from highway driving.
Can chipped paint on a car be fixed? Yes, absolutely, if you follow a careful process. The goal is to fill that crater with new color and protect it, making the spot nearly invisible from a few feet away. A DIY car paint touch up can be a practical option for small chips, using the right color match and materials. With patience and careful technique, you can achieve a seamless blend that looks natural from arm’s length.
The Right Tools for the Job: Your Chip Repair Kit
You don’t need a professional spray booth. A few specific tools will get you 90% of the way to a perfect repair. Using the wrong stuff, like a generic touch-up brush, is why so many DIY repairs look like blobs.
- Paint Match: Your car’s factory paint code is the only truth. Find it on the driver’s door jamb or firewall. Order a small touch-up bottle from the dealer or a reputable online supplier. For my red Miata, I had to get a specific single-stage paint mix.
- Application Tool: Throw away the clumsy brush in the bottle cap. Use a dedicated touch-up pen with a fine nib, a syringe-style applicator, or a set of micro-brushes. I use a toothpick for tiny chips on the Porsche’s rear bumper.
- Surface Prep: Rubbing alcohol (90%+ Isopropyl), lint-free wipes, and a clay bar. You must have a perfectly clean, wax-free surface.
- Final Leveling: This is the secret. You need a specialized compound like Langka’s Blob Remover or Dr. ColorChip’s SealAct. It safely levels the repair without cutting into the surrounding factory paint.
The Step-by-Step Repair Process
Rushing this is the biggest mistake. Each step has a purpose. Do this on a cool, dry day in the shade.
Step 1: The Deep Clean
Wash the entire panel with your regular two-bucket method. Then, focus on the chip. Clay bar the immediate area. This pulls out any embedded contaminants that would get sealed under your repair. Wipe the chip with an alcohol-soaked microfiber to strip every trace of wax or sealant. This level of prep also helps prevent repair paint chips by ensuring the new layer bonds properly and resists future chipping. Think of it as laying a solid foundation for a chip-resistant repair. The chip must be surgically clean and completely dry before any paint goes near it.
Step 2: Applying the Paint (Less is More)
Shake your touch-up paint for a full minute. Dab a tiny amount onto your applicator (toothpick, micro-brush). Gently touch the tip to the center of the chip. Let the paint wick into the crater. Do not brush it on. Your goal is to fill the chip just slightly above the surface. If it’s a deep chip to metal, you may need 2-3 layers, drying 15-20 minutes between each. It is far easier to add a second tiny drop tomorrow than to fix a giant blob of paint today.
Step 3: The Magic of Leveling
Let the final layer of color dry for at least 24 hours. It must be fully hard. Then, put a few drops of your leveling compound on a clean microfiber. Rub it gently over the repaired chip in a circular motion. You will see the excess paint “ball up” and wipe away, leaving the crater filled flush. Wipe clean with another microfiber. This step turns a bumpy mess into a smooth surface.
Step 4: Blending and Protecting
The repaired spot will look dull. Now you blend it. Use a very mild polish on a hand-applicator pad and gently work the area to restore gloss. Finish by applying a dab of sealant or wax over the repair. On my Tesla’s flat bumper, I then apply the same ceramic spray I use on the whole car for uniform protection.
What to Avoid: Common Pitfalls
I have made these errors so you don’t have to. They can turn a small chip into a bigger eyesore.
- Do not skip the cleaning. Wax residue will cause the new paint to bead up and fail.
- Do not use the bottle brush. It holds too much paint and creates an uncontrollable blob.
- Do not sand a fresh repair. You will scratch the surrounding factory clear coat. Use the chemical leveling system instead.
- Do not repair in direct sun or high humidity. The paint will dry too fast or not cure properly.
Fixing paint chips is satisfying work. It stops rust, preserves your car’s value, and keeps it looking sharp. With the right materials and a patient hand, you can make those highway battle scars practically disappear.
Step-by-Step: How to Fix a Paint Chip for Good
Forget what you have seen online. The goal is not to paint over the chip. The goal is to fill the hole it left. This detailer focused flow rebuilds the paint structure layer by layer.
Step 1: The Critical Clean – Removing All Contaminants
Any wax, grease, or road film trapped under your touch up will fail. It will bubble and peel. Start by washing the entire panel with a pH neutral car shampoo and dry it completely with a clean microfiber towel.
Now, focus on the chip itself. Pour some 70% isopropyl alcohol onto a folded, clean microfiber. Gently wipe from the center of the chip outward in one direction, using a fresh section of the towel with each pass. This lifts contaminants out instead of grinding them in. Do not touch the bare metal or primer with your fingers. Your skin oils are the enemy here.
Step 2: Applying the Touch-Up Paint – The “Fill” Technique
Shake your paint pen or bottle for a full minute. This mixes the color pigments thoroughly. Dab just the very tip of the applicator brush into the paint. Do not load the brush.
Now, touch the tip directly to the center of the chip. Let the paint flow off the brush into the depression. Use the smallest amount of paint possible. This is how you fix a paint chip on your car, you fill the hole by letting capillary action pull the paint in, you do not paint like a wall.
Walk away. Let that first microscopic coat dry for at least 15 minutes. On my black BMW, I wait 30. Come back and add another dot. You may need three or four of these tiny layers to build the paint up to just below the surface of the surrounding clear coat. A single thick, gloppy coat will dry lumpy and take forever to cure properly. Patience is your best tool.
Step 3: Adding the Clear Coat Layer
Modern car finishes are a color base coat topped with a glossy clear coat for protection. If you skip the clear, your repair will look dull and will not last. Wait at least an hour after your last color coat, or ideally overnight.
Using the same dot-and-fill technique, apply the clear coat touch up paint over the color. You need to slightly overfill the repair, building the clear coat just above the level of the factory paint. This creates material you can later sand level. Two thin layers of clear, with drying time in between, usually does it.
Step 4: Leveling and Sanding – The Secret to Smoothness
Let the clear coat cure fully. I wait 48 hours to be safe. This is the step that separates a visible blob from a seamless repair. Understanding the car paint cure time will help you time the next steps. You will need a rubber sanding block, 3000 grit wet sandpaper, and a spray bottle with clean water and a drop of car shampoo as lubricant.
Soak the paper. Spray the area. Wrap the paper around the block and sand with very light pressure, using only your fingertips. Keep the area wet. Sand in straight lines over the repair. You know to stop sanding when the repaired spot becomes flush with the surrounding paint and you feel no ridge with your fingernail. The moment you see the color coat appear through the clear, you have gone too far. This takes a gentle touch.
Step 5: Final Polish to Restore the Shine
You are left with a smooth but hazy, sanded spot. Now you restore the gloss. A dual action polisher is ideal for this. Fit it with a soft foam polishing pad and apply a light cutting compound.
Work the compound over the sanded area and a few inches around it using slow, overlapping passes. The haze from the 3000 grit will disappear. Wipe the residue away. Follow this with a fine finishing polish on a clean pad to bring back the deep, reflective shine. This is how you fix chipped car paint and make it look whole again, by rebuilding the structure and then restoring the factory finish. The goal is for the chip to vanish when you look across the panel, only visible if you search for it up close.
Detailer’s Pro-Tip: The Lighting & Magnification Trick
Most people fix paint chips by feel. They dab in the touch-up paint, let it dry, and give it a quick look from straight on. This is a recipe for a repair you can see from ten feet away. The chip might look filled, but it’s almost always a little sunken or has a rough edge. Your eyes will lie to you without the right tools, turning a small chip into a glaring eyesore—especially with unconventional car paint methods.
You need to see the surface like your polisher does. I learned this the hard way on my Jet Black BMW. Black paint shows every flaw. I now treat light and magnification as essential tools, right next to the paint itself.
- Use a bright, handheld LED light held at a low, glancing angle across the surface. Do not shine it directly down on the chip. Hold it so the light rakes across the paint, almost parallel to the panel. This is called “side lighting.” It turns tiny dips and high spots into long, dark shadows you cannot miss. Check your work after every single step-after cleaning, after applying primer, after each coat of color, and before you even think about sanding. This light will show you the true topography of your repair, revealing valleys that need more paint and hills that need to be leveled.
- Get a cheap jeweler’s loupe or a strong magnifying glass. A 10x loupe is perfect. After you apply your final coat and it has fully cured, use this to look directly into the repaired chip. You are looking for two things: a completely smooth, level surface with the surrounding paint, and no visible “halo” or ring around the edges. Magnification removes all doubt and tells you definitively if the chip is truly filled or if you need another micro-coat.
On my black BMW, I never sand or level a touch-up without my side light on. It shows every high spot and texture difference instantly. What looks and feels smooth under normal garage light becomes a mountain range under the raking LED. This trick moves you from hoping it’s right to knowing it’s right. It replaces guessing with certainty.
Troubleshooting Common Paint Chip Repair Problems
You followed the steps. You took your time. The repair still looks off. I have been there, staring at a chip I just touched up on my black BMW, wondering what went wrong. Do not get discouraged. Most issues have a straightforward fix if you know what to look for.
Why Does My Touch-Up Paint Look Bumpy or Raised?
This is the most common issue. You see a small mound of paint where the chip used to be. It feels rough to your fingernail. You have just experienced overfilling.
Overfilling happens when you apply too much touch-up paint in one go. The paint cannot shrink down level as it dries. It just sits there, proud of the surface. On my Jet Black BMW, a bumpy repair catches the light and looks worse than the original chip.
You can fix a raised touch-up with careful, wet sanding and a final polish. The goal is to sand the excess paint down until it is perfectly flush with the factory clear coat around it. If you decide you need to remove the touch-up paint entirely, we’ll cover the removal steps in the next section.
- Let the touch-up paint cure completely. Wait at least 48 hours, longer if it is cold or humid.
- Wrap a small piece of 2000 or 3000-grit sandpaper around a firm, flat foam pad or a pencil eraser. This gives you control.
- Keep the sandpaper and the repair area wet with soapy water or detail spray. This lubricates the surface and prevents deep scratches.
- Sand with very light pressure. Use your free hand to feel the surface. Stop the moment it feels smooth and flush.
- Follow with a gentle polish on a microfiber pad to remove the fine sanding marks and restore the gloss.
It is a nerve-wracking process. Go slow. The moment it feels smooth, you are done.
The Paint Color Doesn’t Match – What Now?
You used the correct paint code from your door jamb. It looked perfect on the bottle cap. On the car, it is just… wrong. This frustrates everyone.
There are two main culprits: factory variance and sun fade. Car paint batches can have slight differences. More importantly, your car’s paint has spent years under the sun. The pigments have faded, especially on horizontal panels like the hood and roof. My 1995 Miata was not just faded. The single-stage red had oxidized to a milky pink.
Permanently matching paint chip paint requires the exact factory code and proper application, but even then, a 99% match is often the best possible result. The goal is to make the chip disappear from a few feet away, not under a microscope.
First, always test the paint in an inconspicuous spot, like the edge of a door jamb. If it is off, you have options. For modern multi-stage paints (like the pearl white on my Tesla), you must apply the base color in thin layers, letting each dry. The final clear coat blend is what makes it sink into the surrounding area.
For older, faded paint, some touch-up systems offer a “fade” additive to mix in. Often, you must blend the repair. This means feathering the edges of your clear coat polish over a larger area to help the color transition. On my blue F-150’s hood, a perfect match was impossible. I focused on filling the chip to prevent rust, then made the surface perfectly smooth so the color difference was less noticeable.
Can I Fix a Chip Without Sanding or Polishing?
Yes, but you must manage your expectations. This is a tactical repair, not a cosmetic one.
The “quick blob” method is exactly what it sounds like. Clean the chip with alcohol. Use the brush in the touch-up bottle to dab a small amount of paint directly into the chip. Let it dry. You are done.
Quick paint chip repair temporary fixes exist, but they are just that – temporary. Chips with rust underneath call for a proper fix—fix rusted paint chips rather than rely on a seal. It will look like a glossy blob. It will sit above the surface. But it will seal the bare metal from air and moisture, stopping rust in its tracks. I do this on my Honda Odyssey’s lower doors before winter. The goal is not beauty. It is buying time until I can do a proper repair when the weather is warmer.
This is fundamentally different from a proper repair. A proper repair aims for a flush, invisible fix. The quick blob is a bandage. Think of it like cleaning a stain on a seat versus just throwing a towel over it. One fixes the problem, the other just covers it up for a little while.
Prevention: How to Stop New Chips Before They Start
You fix a chip, you feel good. Then you hear that dreaded “tink” a week later. I know the feeling. My black BMW is proof that this is a war, not a battle. Winning means stopping new damage before it lands on your paint.
Your Right Foot is Your First Defense
It sounds too simple, but it works. Increasing your following distance, especially behind trucks or on gravel roads, gives debris time to fall. It is not about driving slow. It is about giving space. On highways, I stay out of the tire spray of the vehicle ahead. That mist is full of tiny, hard particles. The single cheapest form of paint chip prevention is a few extra car lengths of patience.
The Only Real Armor: Paint Protection Film (PPF)
Wishful thinking does not stop a rock. A physical barrier does. For high-impact zones, Paint Protection Film is the answer. We used to call it a “clear bra,” and for good reason. It is a thin, transparent urethane layer that absorbs the hit so your paint does not.
I have PPF on the full front end of my Porsche. The install is a job for a professional, but the peace of mind is worth it. Focus on these areas first:
- Full Hood and Front Fenders
- Front Bumper (the biggest target)
- Mirror Caps
- Door Edges and Handle Cups
Think of PPF as a sacrificial layer you replace every 5-7 years, not something you apply to the paint forever. Modern films are self-healing for light scratches and nearly invisible. If you ask me, “How to prevent paint chips on my car? For the hood, consider a clear bra,” this is what I mean. It is the most effective step you can take.
The Truth About Wax and Sealants
This is where I see a lot of confusion. A coat of wax or a ceramic sealant is fantastic. It makes the car shine and sheds water. It protects against chemical etching from bird droppings, sap, and acid rain. But it is not a force field.
Imagine a sheet of ice on your windshield. You can spray it with water repellent, but a pebble will still crack it. Your wax is the repellent. The PPF is the extra layer of plastic you put over the ice. Do not expect your spray wax to stop a stone chip; that is not its job. Use these products for chemical and UV protection, and rely on film for physical impacts.
Paint Chip Repair Cost: DIY Kit vs. Professional Service
Before you start, you need a realistic budget. The cost to fix a paint chip swings wildly based on who does the work. A do-it-yourself kit is a fraction of a professional’s bill. You are paying for your own labor and accepting a “good enough” result that you control. A professional charges for their guaranteed skill, equipment, and the factory-like finish they can deliver.
Think of it like this. Fixing a single chip on your door with a $40 kit is like sewing a small tear in your favorite jeans. It might not be invisible, but it stops the fraying and you did it yourself. Paying a pro $300 to repaint the entire door is like taking those jeans to a master tailor for a seamless repair. Both stop the damage, but the finish is different.
What’s in a Good DIY Paint Chip Repair Kit?
Not all kits are equal. The cheap ones from a general auto store often have a vague “universal white” or “midnight black” paint that never matches. A good kit is specific. You will need your vehicle’s paint code, usually found on a sticker in the driver’s door jamb or under the hood. Using the exact paint color code helps you match the finish precisely. It guides you to the correct shade rather than relying on generic names.
Here is what you should look for in a quality $30 to $60 kit.
- Color Match Paint: This is the base coat. The best kits use your exact paint code to mix a small bottle or pen. Some offer a lacquer (for older cars) or a modern basecoat. My BMW’s Jet Black kit was a lacquer, perfect for its age.
- Clear Coat: A separate bottle or pen. Modern car finishes are always clear-coated. Skipping this step leaves the repair dull and unprotected.
- Fine Abrasive: Often a small block with 3000-grit sandpaper or a polishing compound. This is for leveling the repair after it dries and blending it with the surrounding paint.
- Applicator Tips: Look for micro-brushes or needle-nose tips. The brush on a nail polish bottle is too big. You need precision to fill just the chip, not the whole panel.
- Instructions: Clear, step-by-step photos or diagrams. If the instructions are just a paragraph, put it back on the shelf.
A pro tip. Get a good automotive degreaser or isopropyl alcohol for prep. Rubbing alcohol from your bathroom works in a pinch. Cleaning the chip of all wax and road film is the most important step nobody does. If you skip it, the new paint will not stick.
When Should You Call a Pro for Paint Chip Repair?
I fix small chips on my own cars. But I know my limits. There is a clear line where calling a professional is the smarter, and often cheaper, long-term decision.
Call a pro if you see any of these three things.
- Numerous chips. If your hood looks like it has the measles with dozens of chips, a DIY kit will leave it looking polka-dotted. A pro can sand, prime, and repaint the entire panel for a uniform finish.
- Large damage. A chip wider than a pencil eraser, or a deep scratch that catches your fingernail, is often too big for a simple fill. The repair will be obvious.
- You lack confidence or time. If the thought of sanding your paint makes you sweat, hire it out. A rushed job looks worse than the original chip.
Professional services have different names. “Paintless Dent Repair” (PDR) is for dings without paint breakage. For chips, you want a “spot repair” or “partial panel respray.” They will sand the area, apply primer, your exact color, and new clear coat, then blend it into the factory paint. It is an art.
The cost reflects that skill. A professional spot repair typically ranges from $150 to $400 per panel. The price changes based on your location, the shop’s quality, and your car’s paint color. Tri-coat pearls (like my white Tesla) cost more than a standard black.
So, paint chip repair cost at a body shop is higher, but so is the finish quality. Searching for “paint chip repair near me” is for when the DIY job feels too big, like the front bumper on my F-150 after a gravel road. I did the small ones myself. For the big gashes, I called a guy.
Securing Your Paint’s Future
The most important advice I can give is to never rush the cleaning and degreasing stage. A perfectly matched paint will only look good and last if it bonds to a perfectly clean surface.
Ignore this, and you will seal dirt and road salt against the bare metal, guaranteeing a rusty bubble that ruins the panel.
Citations and Authoritative Sources
- Home – Dr. ColorChip
- The TouchUp RX Kit – TouchUp RX
- r/howto on Reddit: How do I fix the paint chip on my car?
- Advice on how to fix “small” car paint chip – DoItYourself.com Community Forums
Max is an automotive enthusiast having worked as a car mechanical and in interior detailing service for over 25 years. He is very experienced in giving your old car, a new fresh vibe. He has detailed many cars and removed very tough smells and stains from all kinds of cars and models, always ensuring that his work and advice helps his customers. He brings his first hand experience to his blog AutoDetailPedia, to help readers breath new life into their car interiors.