How Do I Remove Bird Poop from My Car Without Damaging the Paint?
You just spotted that acidic mess on your hood, and you’re right to worry it will burn a permanent stain into the clear coat.
I will show you why bird droppings etch paint, what to use for immediate cleanup, the correct step-by-step removal process, and how to protect the surface afterward.
Scrub it off dry, and you will grind the stain deeper, leaving scratches only a polish can remove.
Why Bird Poop is an Emergency for Your Car’s Paint
Bird droppings are not just a messy nuisance. They are a chemical attack on your finish. The primary culprit is uric acid, a highly corrosive compound a bird’s body uses to excrete nitrogen. Think of a fresh dropping as a tiny, hot battery sitting on your paint. It immediately starts a reaction.
Sunlight and heat turn that battery up to maximum. The sun bakes the dropping, concentrating the acids and literally cooking them into your clear coat or paint. What starts as a white or grey splatter can become a permanent, dull scar in a matter of hours on a hot day.
So, can bird poop damage car paint? Absolutely. Can it eat through car paint? It doesn’t literally bore a hole, but the chemical etching can penetrate the clear coat and stain the color layer beneath. Can bird poop ruin your car paint? Yes, if left unchecked. I have a permanent, cloudy etch on the hood of my Jet Black BMW from a dropping I didn’t catch fast enough one summer afternoon. On black paint, it looks like a faint, white shadow I can’t wash off.
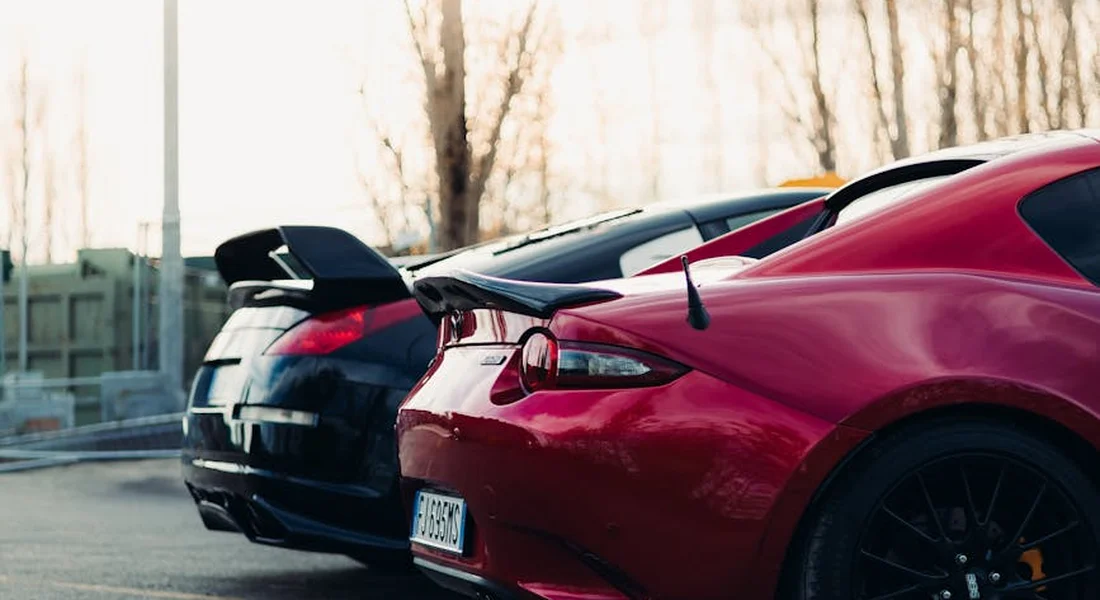
Different paints react on different timelines. A modern car with a thick, healthy clear coat might buy you a little more time, maybe a day. My 1995 Miata with its single-stage red paint has no clear coat shield. The acid attacks the colored paint directly. On that car, a bird bomb left for a few hot hours can permanently stain the pigment, turning a spot from vibrant red to a dull pink.
Heat accelerates the damage from a mild annoyance to a full-blown chemical burn in under an hour.
What You Need in Your Bird Bomb Kit (The Right Tools)
You cannot use just anything to wipe this off. A dry paper towel or an old T-shirt is like using sandpaper. You need the right tools to safely lift the mess away without grinding its grit into your paint. Keep this kit in your trunk.
- Plush, Clean Microfiber Towels: You want a soft, 500+ GSM microfiber towel, like a drying or detailing towel. The deep fibers grab and hold contamination. A cheap, scratchy shop rag or a recycled “glass towel” will drag solids across your paint and leave swirl marks.
- A Spray Bottle of Lubricant: This is your most important product. You need to soak and loosen the dropping.
For the spray bottle, you have three safe choices. First, a detail safe rinseless wash concentrate, mixed with water in a sprayer. This is my go-to. It provides fantastic lubrication and cleaning power. Second, a quick detailer spray. It’s designed for light cleaning and adds a bit of shine. Third, a dedicated bird dropping remover. These are formulated to neutralize acids and are excellent for dried, baked-on messes.
Never use dish soap, window cleaner, or generic all-purpose cleaners from your kitchen. These are often harsh, alkaline, and will strip the protective wax or sealant right off your paint, leaving the area bare and vulnerable. Unlike household cleaners safe for car paint, these can cause significant damage.
The right lubricant lifts the hazard away safely; the wrong one can strip your protection and make the problem worse.
People often search for bird poop removal products or a bird poop removal solution diy. While a dedicated remover is a great product, I strongly advise against homemade mixes like vinegar or baking soda pastes. Vinegar is acidic and can haze plastic trim. Baking soda is abrasive. Both can degrade your wax or sealant faster than the bird poop itself. Stick with products made for automotive finishes.
This same “emergency kit” logic applies to other sudden threats. A common search is can a cat scratch car paint. Yes, a cat jumping on your car can absolutely leave fine scratches. The immediate action is similar: gently flush the area with your rinseless wash solution and lightly wipe with a clean microfiber to remove any dirt or grit the paws deposited, before it gets ground in. Should the scratches be deeper, there are methods to remove and repair cat scratches.
The Safe Step-by-Step: Removing Fresh Bird Droppings
You walk out to your car and see it. A white, grey, or suspiciously purple splat right on the hood or roof. You groan. We all do. This is your “on-the-go” or “just got home” protocol. Speed matters, but technique matters more. The goal is to remove the hazard without adding scratches.
Step 1: Neutralize and Soak
Do not touch it yet. Bird droppings are acidic and can etch clear coat in hours, especially in sun. Your first job is to disarm it. I keep a small spray bottle of water and a folded microfiber towel in a bag in every car.
- Spray the dropping generously with plain water. Soak it completely. If you have no spray bottle, wet a microfiber towel thoroughly and drape it over the spot.
- Wait. Give it two or three minutes. The water begins to rehydrate the waste, turning it from a crusty cement into a soft mush. This breaks its bond with the paint.
You are fighting chemistry, not dirt. Saturating it dilutes the acid and makes physical removal safe.
Step 2: The Gentle Lift
Now you can touch it, but not with pressure. Take a fresh, clean microfiber towel. I prefer a soft, plush towel for this. Spray the towel directly with a quick detailer or a diluted rinseless wash solution. You want it very damp and lubricated.
- Lay the lubricated towel flat over the softened dropping. Do not scrub.
- Using your open hand, gently wipe in one direction, letting the towel glide over the surface. The goal is to let the mush slide off onto the towel.
- If any residue remains, re-wet and repeat. Fold your towel to a clean side constantly.
Imagine sliding a raw egg off a non-stick pan. That is the level of zero pressure you need. Any grit in the dropping must be carried away by the towel, not ground into the paint.
Step 3: Wash and Dry the Zone
The dropping is gone, but invisible acid might remain. You must properly clean that spot.
- If you are at home, wash the entire panel with your normal two-bucket car shampoo method. Pay extra attention to the affected area.
- If this is an emergency cleanup, take your water bottle and a second clean microfiber. Put a few drops of car shampoo in the bottle, shake it, and spray the area. Gently wipe with the wet towel, then follow with a rinse from the plain water bottle.
- Dry the area immediately with a clean, dry microfiber towel. I use a dedicated drying towel for this to avoid any leftover grit.
This wash step removes the final traces of acid and any lubrication from the detail spray, leaving you with a truly clean surface.
Step 4: Final Inspection and Protection
Now, look closely. Angle the panel under a light or the sun. Look for a dull shadow or a slight dimple where the dropping was. That is etching. If you see it, the paint is compromised and needs a polish later. If the surface looks perfectly clear and glossy, you caught it in time.
- Apply protection immediately. A spray sealant or spray wax is perfect for this. Mist it on the spot and spread it thin with a clean microfiber.
- This new layer of protection is your shield for the next inevitable attack.
Protecting the spot right after cleaning is non-negotiable. It seals the clean paint and buys you time next time.
How to Tackle Old, Hardened, or Stained Bird Poop
We have all been there. You come back from vacation, or a busy week, and there it is. A white, crusty, sun-baked blob that has become one with your paint. My black BMW taught me this lesson the hard way. This scenario carries real risk. The acidic waste has had days to chemically etch into your clear coat. Scrubbing it will scratch. Peeling it will chip.
The goal is to soften and lift the deposit without grinding its gritty structure across your paint. Your first tool is not a product, but a simple barrier.
The Painter’s Tape Trick: Isolate the Battlefield
Before you apply any liquid, get a roll of low-tack painter’s tape. Tear off a few small pieces and create a frame around the dried dropping, about an inch away from its edges. This does two critical things. First, it creates a visual boundary so you focus your cleaning only on the contaminated area. Second, it protects the surrounding good paint from any accidental splatter or over-application of your cleaner. It is a five-second step that prevents a bigger problem.
Using a Remover Gel as a Poultice
For this job, a dedicated, pH-neutral bird dropping remover gel is your best friend. I keep one in my detailing cabinet at all times. Unlike an all-purpose cleaner, these gels are formulated to cling vertically and dissolve the crust without being overly harsh.
Here is how to use it:
- Ensure the paint surface and the dropping are cool and in the shade. Never apply chemicals to a hot panel in direct sun.
- Shake the gel bottle well. Apply a thick, generous dollop directly onto the center of the dried dropping. You want to fully encapsulate it.
- Do not touch it. Let the gel sit and work. This is the poultice effect. The gel will soften and break down the minerals and acids from the outside in. This can take 2 to 5 minutes. Watch as the crust begins to dissolve.
- After the time has passed, take a fresh, plush microfiber towel. Fold it into a large pad. Gently place the towel over the softened gel and dropping. Apply the lightest possible pressure and wipe in a single direction to lift the mess away. Do not scrub in circles.
- Immediately flip your towel to a clean side. Spray a detailer or rinseless wash solution onto the area and gently wipe it clean to remove any gel residue. Inspect the spot closely.
When a Stain or Etch Remains
Often, the physical mess is gone but a faint shadow or a slight texture difference remains in the clear coat. This is the chemical etch. If you can catch the edge of the stain with your fingernail, it is a true etch and needs professional polishing. If it is just a cloudy stain, you can attempt a very conservative correction.
For this, use a non-abrasive, fine finishing polish and a soft, foam hand-applicator pad. Put two small drops of polish on the pad. Using only the weight of your hand, rub the polish over the stained area with straight-line strokes for 10-15 seconds. Wipe off immediately with a clean microfiber. This mild abrasion can often level the clear coat just enough to remove the shallow stain. Test on a small section first. If the stain does not improve after two attempts, stop.
This is the natural point where “bird poop removal from car” becomes “paint correction.” If the etch is deep, visible from multiple angles, or your hand-polishing did nothing, the damage is beyond a safe DIY fix. A professional detailer with a dual-action polisher can safely assess and correct it without risking further harm to your paint. It is okay to call for help.
Special Surfaces: Glass, Wraps, and Plastic Trim
The rules change a bit when you move off the painted body panels. Different materials need different tactics.
Glass
Your windshield and windows are much harder than your car’s clear coat. They resist acidic etching from bird droppings far better. The real enemy here is physical scratching from the gritty, dried debris itself. You must lift the waste off the surface first, not scrub it across the glass. It’s important to note that you can’t polish scratches on car window glass to remove damage.
I soak the area with my detailing spray, just like on paint, and let it dwell. For a stubborn, baked-on mess, a dedicated glass cleaner or even isopropyl alcohol (diluted 1:1 with water) can help break it down. Then, I use a clean, plush microfiber towel to gently wipe it away, folding the towel frequently to a clean side.
If a hard, crusty spot remains, you can use a razor blade-but only with the proper technique and tool.
- Use a dedicated single-edge razor blade holder. This keeps the blade at a safe, consistent angle and protects your fingers.
- The glass must be wet. Use your glass cleaner or a soapy water solution as lubricant.
- Hold the blade at about a 45-degree angle to the glass and use light pressure, pulling it toward you in a single, smooth stroke.
Never use a bare blade or scrape on dry glass. You will scratch it. On my Tesla’s massive windshield, this method is my last-resort cleanup for bug guts and tree sap, and it works perfectly for petrified bird bombs too.
Paint Protection Film (PPF) & Wraps
This is where my red Porsche 911 comes in. It’s fully wrapped in a glossy Paint Protection Film. PPF is a urethane film designed to absorb damage, so it’s fantastic at resisting permanent etching from acidic contaminants. The film itself may stain slightly, but that stain should be in the film, not your priceless factory paint.
Your process is similar: soak and gently wipe. I am even more meticulous about rinsing my microfiber towel here. Any grit trapped in the towel could mar the film’s surface. A quick detailer or an PPF-safe waterless wash is my go-to lubricant.
There is one critical spot to watch: the edges of the film. If bird droppings sits right on a seam or edge, the acid can seep underneath over time and start to lift the film. Clean these areas promptly and thoroughly.
For a colored vinyl wrap, be more cautious. The vinyl’s color and top coat are softer. Use only cleaners recommended by the wrap installer or very mild, pH-neutral solutions. Aggressive chemicals or excessive rubbing can dull the finish or even remove the printed color. Treat it like a delicate, matte-paint finish. Compared with paint protection film, a colored vinyl wrap offers more color options but may require gentler cleaning to preserve the color. This difference matters when weighing vinyl wrap vs paint protection film.
Plastic Trim & Headlights
This is a common pitfall. That black textured trim around your windows and wheel arches, or your modern plastic headlight lenses, are vulnerable. Many all-purpose cleaners and even some car wash soaps can leave ugly white stains or residue on uncoated black trim.
My Ford F-150 has miles of this trim. For light cleanup, I use the same bird dropping removal spray, but I rinse the area with clean water immediately after the stain is gone. I never let any chemical dry on the plastic. For tougher aging or discolored areas, I’ll explore clean restore plastic trim techniques to refresh the look.
For more aggressive cleaning, you need a dedicated product. I keep a bottle of trim-safe apc (all-purpose cleaner) diluted for interior use. It’s mild enough for plastics and vinyl. Always test any new cleaner in an inconspicuous spot first, like inside a wheel well. If you’re after the best products clean car interior, our top picks can help you choose wisely.
For headlights, especially the older, yellowed ones on my Mazda Miata project, the plastic polycarbonate is often oxidized. Be gentle. Use the soak-and-lift method with a plastic-safe cleaner. Avoid abrasive scrubbing pads that will add more fine scratches to the already hazy surface. A proper headlight restoration with polish and sealant will be needed later, but for now, just get the contaminant off safely.
Keeping Birds Off Your Car: Practical Prevention
Let’s talk about stopping the problem before it starts. I have heard every myth, from plastic owls to hanging shiny discs. They do not work for long. Birds are not that dumb. Your best defense is a combination of smart parking and a physical barrier on your paint.
Parking strategy is everything. This is not a secret, but it is the most effective thing you can do. Look for open space. Park away from trees, telephone wires, and light poles. These are bird perches. I learned this with my grey Honda Odyssey, the kid hauler. It sat under a pine tree. It was a target. Moving it to the center of the driveway cut the attacks by half. If you can see a place where a bird might land above your car, you are in the wrong spot.
The real magic is a consistent protective layer. I am talking about a wax, a sealant, or a ceramic coating. These are not just for shine. They create a slick, non-stick surface. On my white Tesla Model 3, the modern EV, the front end has a ceramic coating. When a bird hits it, the mess beads up. It sits on top. I keep a bottle of quick detailer in the frunk. A spray, a gentle wipe with a clean microfiber, and it is gone. No drama. A protected surface makes bird dropping cleanup a trivial task, not a paint-saving emergency.
Now, about car covers. They work. A good cover is a full shield. I used one on my 1995 Mazda Miata, the restoration project, over a winter. But for daily use, I find them frustrating. You must put the cover on a perfectly clean car. If there is any grit on the paint, you will swirl it. Taking a wet cover off is messy. Storing it is a hassle. For paint protection, choose a well-fitting cover with soft, non-abrasive material. It helps guard against micro-scratches and UV damage. A car cover is excellent for long-term storage, but for everyday prevention, the daily chore often outweighs the benefit.
When to Call a Professional Detailer
Sometimes, a bird dropping wins. It sits there, bakes in the sun, and digs in deep. Trying to fix it yourself at that point can make things worse. You need to know when to wave the white flag and call in a pro.
You’ll know it’s time when you run your fingernail lightly over the spot and feel a distinct dip or scratch. That’s not a stain. That’s etching, where the acid has physically eaten into the clear coat or paint. On my Jet Black BMW, I once had a spot I ignored for a weekend. It left a permanent crater that needed a full paint correction to fix.
Other clear signs include a stain that has seeped into a vinyl wrap or a Paint Protection Film (PPF) edge. Wraps and PPF are more delicate than clear coat. Aggressive rubbing or the wrong chemical can stain the vinyl or lift the film. My Porsche’s PPF got hit, and the stain looked like it was under the film. That’s a pro-only job. The same goes if your entire hood looks like a target range with a dozen baked-on, crusty spots. The scale of the job changes everything.
So, what will a professional detailer do? First, they assess the damage under good light. They’ll feel the surface just like you did. For most etchings, the solution is a targeted polish or compound. They’ll use a small polishing pad on a machine, often just a one-inch spot pad, to gently abrade the area and level the clear coat until the pit is gone. It’s a precise skill. They know how much clear coat they can safely remove. Afterward, they will always re-protect that area with a sealant or wax to restore the shield you lost.
People often search for things like bird poop removal service near me cost. The price isn’t fixed. For a single, light etching that needs a quick polish, you might pay $50 to $100. For multiple deep spots requiring more extensive correction, the cost can easily reach $200 or more. It depends entirely on the time and skill required. A search for something specific like bird poop removal service near san diego ca should bring up reputable local detailers. Look for shops that show true before-and-after correction work, not just washes.
Don’t feel bad about calling for help. This is one of the most common services we perform, especially in spring and summer. A good detailer won’t judge you for a little bird trouble. We’ve all been there. Getting it fixed right preserves your car’s value and your own sanity.
Your Glove Box Quick-Clean Kit
I learned this the hard way with my black BMW. I came back from lunch to a white splatter on the hood. The sun was out. I had nothing with me but a fast-food napkin. That single wipe left a faint scratch I had to polish out later. Now, I keep a simple kit in every car, even the old Miata. You should too.
A prepared kit turns a potential disaster into a sixty-second task. Here is exactly what to pack.
- A small spray bottle of rinseless wash solution. I mix a batch from my bulk concentrate and fill a 4-ounce bottle. Water alone can leave spots; this solution safely breaks down the mess. The bottle I use in my F-150 is the same one in my 911.
- Two or three plush microfiber towels in a zip-seal bag. Use the good towels. I keep the 500 GSM towels I trust on the Tesla’s paint. The bag keeps them clean and ready. Two towels are the minimum.
- A travel-size quick detailer. This is for the final wipe, not the initial clean. It adds lubrication after the dropping is gone. Pick a spray wax type for a little protection.
The 60-Second Field Guide
Next time you see it, do not rub. Follow these steps. I timed it. It works.
- Spray. Completely soak the dropping with your rinseless wash solution. Drench it. Let it sit for thirty seconds. You are neutralizing the acid and softening the deposit.
- Soak and Lift. Take your first microfiber towel. Fold it into a clean pad. Gently lay it over the wet area. Press down softly. Let the towel soak up the solution and the softened mess. Lift the towel straight up. The goal is to pull the dropping away, not slide it across the paint.
- Wipe Clean. Grab your second, dry towel. Give it one light spray of quick detailer. Gently wipe the area once. Use a straight line. This removes any final film and leaves a protected surface.
That is all it takes to prevent a permanent stain. Toss the used towel in the bag to wash later. Refill the spray bottle when it gets low. Now you are ready. You will see that bird dropping and feel calm, not panic.
Final Thoughts on Bird Dropping Removal
Always attack bird droppings fast with a lubricant like detail spray or quick wax to lift them without grinding grit into your paint. I keep a bottle in my black BMW for this exact reason, as delay guarantees a swirl-filled correction I do not want to do.
Leave it untreated, and the acid will etch a cloudy stain into your clear coat forever.
Related Guides and Information
- How To Get Bird Poop Off Car | Chemical Guys
- 8 tips to clean bird poop off car paint – McCarthy Collision Center Blog
- How to Get Bird Poop Off a Car | Northside Ford
- How to Remove Bird Poop from Your Car: Safe and Effective Methods
- r/cars on Reddit: How to properly remove bird’s poop from your car?
- Paint-safe ways to remove bird poo from your car | Shell Australia
- 11 Quick & Effective Ways to Get Bird Poop Off Your Car
Max is an automotive enthusiast having worked as a car mechanical and in interior detailing service for over 25 years. He is very experienced in giving your old car, a new fresh vibe. He has detailed many cars and removed very tough smells and stains from all kinds of cars and models, always ensuring that his work and advice helps his customers. He brings his first hand experience to his blog AutoDetailPedia, to help readers breath new life into their car interiors.