How Do You Remove Bug Stains, Splatter, and Insect Damage from Car Paint Without Scratching It?
You see those baked-on bug guts on your bumper and worry that cleaning them will scratch your paint. I feel that tension every summer with my white Tesla Model 3, where bug splatter on the flat front end looks terrible and can stain fast.
I will guide you through the safe removal process I use on all my cars. We will cover why bug residue etches paint, the right cleaners to use, the soaking technique for stubborn stains, safe wiping methods, and how to protect your paint afterwards.
Use the wrong method, and you will grind the bug bodies into your clear coat, creating swirls and permanent etched marks that only a polisher can fix.
Key Takeaways: Your Bug Removal Cheat Sheet
This is your quick guide to doing it right.
- Soften the splatter with a dedicated bug remover or a lubricant like car wash soap. Let it sit for a few minutes.
- Gently wipe with a clean, soft microfiber wash mitt using plenty of soapy water as a lubricant. Never scrub dry guts.
- For tough spots, reapply remover and use a soft microfiber towel folded into quarters to gently “roll” the residue away.
- Wash the entire area normally after removal to clean off any remaining residue.
- Always apply a fresh coat of wax or sealant to the cleaned paint to protect it for next time.
The job is moderate in difficulty, mainly requiring patience. Plan for 30 to 60 minutes to properly clean a full front end.
The single most important rule is to soften the bugs first. Scrubbing dry, crusty bug guts is a sure way to scratch your clear coat. Your three essential tools are a bug remover or lubricant, a soft microfiber wash mitt, and a quality spray wax or sealant for protection when you are done.
Why Bug Guts Are More Than Just a Nuisance
You finish a long drive and your front bumper is a mess. It is more than just ugly. That mess can hurt your paint. People ask me all the time, “Do bugs damage car paint?” The answer is yes. Can bug guts damage car paint? Absolutely, yes.
It is not like spilling water. It is a chemical event. When a bug hits your paint, its body ruptures. The fluids inside are slightly acidic. They also contain proteins and other organic matter. In the sun and heat, this mixture bakes onto your clear coat. It bonds to it.
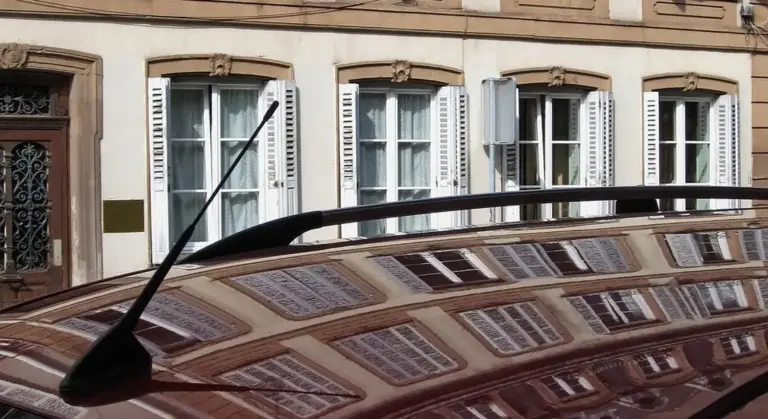
Run your finger over a bug splatter that has been on there for a week. It feels like gritty, dried cement. That is not sitting on top of the paint. It is fusing with it. My white Tesla Model 3, with its flat front bumper, is a bug magnet. After a highway trip, the bumper looks like it has the measles. If I leave it, those spots get harder and darker.
Not all bugs are the same. A common moth leaves a chalky smear. Annoying, but usually easy. Then you have the heavy hitters. Love bugs swarm in parts of the country and leave a sticky, tar-like paste. Stink bugs release a nasty fluid when crushed that can stain paint a yellowish-brown. These are the ones that cause real headaches.
The Acidic Truth: How Bugs “Eat” Into Your Clear Coat
Think of your clear coat as a hard, shiny plastic shell over your color paint. Bug fluids are not strong enough to melt it like battery acid. Instead, they slowly break down the surface over days and weeks. It is a stain that etches in.
The acidic proteins bond to the clear coat. As they bake in the sun, they harden and become part of the surface. If you let them sit long enough, you can wipe away the chunky part, but a faint shadow or stain remains in the clear coat. That stain is permanent damage, and removing it would require professional polishing to level the clear coat again. Timely removal stops this bonding process before it becomes a permanent mark.
Love Bugs, Stink Bugs, and Beetles: The Worst Offenders
You need to know your enemy. Moths and gnats are lightweights. The real problems come from bigger, juicier insects.
Love bugs get their name from how they mate while flying. They are a plague in some states. Their bodies are full of a sticky, acidic fluid. A common myth is that love bugs eat car paint. They do not actually eat it. The damage comes from their body fluid, which is so acidic and sticky that it can etch the clear coat and stain it if not removed quickly. A swarm can ruin a front end in one trip.
Stink bugs are different. Their defense mechanism is to release a foul-smelling liquid. This liquid is a potent stain agent. Stink bug stain removal is tricky because the stain can set quickly and penetrate. It often needs a dedicated stain remover or a stronger cleaner used with care.
Large beetles and grasshoppers are physical hazards. Their hard shells can cause micro-chips in the paint on impact. Their guts are thick and glue-like, requiring more soaking time to soften safely.
Your Bug-Fighting Arsenal: Safe Products vs. Scratch Risks
You cannot fight bug guts with your bare hands. You need a plan and the right tools. Think of your products in three roles: pre-soak solvents to melt the mess, washing lubricants to lift it away safely, and decontamination tools for the stubborn leftovers.
I always advocate for pH-neutral, paint-safe formulas. Your car’s clear coat is a delicate plastic layer. Harsh alkaline or acidic cleaners can dull it over time. Household dish soap, while tempting, strips protective waxes and sealants, leaving your paint vulnerable for the next bug attack.
Some alternatives are outright dangerous. Can bug spray damage car paint? The answer is a firm yes. Commercial insect repellents and insecticides contain solvents like DEET or ethanol designed to dissolve organic matter. On your paint, they act like a harsh paint thinner, potentially softening the clear coat and leaving permanent, cloudy stains. Do not use them, as they are among the substances and methods that can damage car paint.
For cost-effectiveness, a diluted rinseless or waterless wash concentrate in a spray bottle works as a gentle pre-soak. For heavy, baked-on splatter, a dedicated bug remover is worth the investment. It’s formulated with stronger, paint-safe solvents and often includes lubricants. The dedicated product saves you time and elbow grease, which has its own value.
Chemical Bug Removers and Pre-Soaks: The First Line of Defense
These products are your best friend. They work by using specialized solvents to dissolve the hard, crusty protein and carbohydrate matrix that makes bug guts so adhesive. They turn a concrete-like splatter back into a goo you can rinse away.
The key is dwell time. Spray it on a cool, dry panel and let it sit. Watch the product work. It should bead up and start to break down the residue. Never let a chemical pre-soak dry completely on the paint, as concentrating the solvents can lead to etching or staining. After a few minutes, rinse it off with a strong stream of water. Much of the mess will just wash away, but if it doesn’t, you might need to remove stains and contaminants from car paint manually.
For beginners, I recommend a simple spray-on, rinse-off product. You apply it to the dry car before you start your normal wash. This method minimizes physical contact and dramatically reduces the scrubbing needed later. On my white Tesla’s flat front bumper, this step handles 90% of the problem before my wash mitt even gets wet. It’s a great technique to clean your car’s exterior safely.
Clay Bars and Synthetic Decontaminants: When to Escalate
Sometimes, a bug leaves a tiny, hard speck of its shell or a stain that rinsing won’t remove. Run your clean hand over the spot. If it feels gritty or rough, the residue is embedded. This is when you need mechanical decontamination.
A clay bar or a synthetic clay mitt gently shaves those bonded contaminants level with the paint surface. Traditional clay bars are excellent for precision work on small, stubborn spots, while a synthetic clay mitt is far safer and easier for large, bug-covered areas like an entire hood or bumper. You glide the lubricated mitt over the paint, and it pulls out the embedded particles, safe for your car’s paint.
Remember, claying is a paint-leveling step. It is abrasive on a microscopic level. It is not your first resort for fresh bugs. Always try a chemical pre-soak and a proper wash first. I only bring out the clay mitt on my black BMW or the Porsche’s PPF after a long road trip, when I know standard washing left behind contaminants I can feel.
The Toolbox: Mitts, Towels, and Buckets
Your tools are as important as your chemicals. For the bug-covered front end, mandate a soft, dedicated microfiber wash mitt. Its deep piles safely encapsulate loosened debris, lifting it away from the paint. A sponge or a rough towel just grinds those particles in, creating swirls.
Always use a grit guard at the bottom of your wash bucket. As you rinse your mitt, the guard traps the heavy dirt and bug bits at the bottom, preventing you from reloading your mitt with abrasive sludge. This one tool prevents countless scratches.
Finally, use a separate, clean, and ultra-soft drying towel. A damp, high-pile microfiber drying towel gently absorbs water without dragging any remaining fine particles across your paint. A good drying towel glides over the surface, pulling water off instead of pushing potential grit around. This final step ensures your bug-removal work leaves a flawless, scratch-free finish.
The Gentle Wash: How to Loosen Bugs Without Scratching
This is where you can save your paint or ruin it. The difference is in your technique. Bugs are abrasive. If you rub them across your clear coat dry, you are sanding it. Your only job here is to soften the bugs and let them slide off, using plenty of lubricant to float them away from the surface. Here is the core procedure I use on my white Tesla after a long highway drive.
- Always pre soak the bugs. Never start with a dry surface.
- Use a dedicated, clean wash mitt for this task, not a sponge.
- Work with a bucket of soapy water and a second, clean bucket with rinse water (the two bucket method).
- Use straight line wiping motions, not circles. Circles can create swirl marks.
- Rinse your mitt in the clean water bucket after every single pass across the paint.
- Apply zero pressure. Let the weight of the wet mitt do the work.
The two bucket method is non negotiable for bug duty. Your mitt will be full of gritty bug parts after one swipe. Dunking it in your soap bucket just puts that grit back into your wash solution. Rinse it clean first, then get fresh soap.
Step 1: The Critical Pre Soak
Patience here prevents scratches later. On a hot hood, bugs bake on almost instantly. You need to rehydrate them. I use a dedicated bug remover spray on the worst spots. For general splatter, a thick layer of car wash suds works fine.
Spray or apply your lubricant generously over the entire affected area. Do not scrub. Then, take a clean, plush microfiber towel, soak it in your wash solution, wring it out so it is just damp, and lay it over the pre soaked bugs. This keeps the area wet and lets the chemicals or soap work. Covering the area with a damp towel for five to ten minutes softens even the most stubborn, sun baked bug remains. On a black car like my BMW, this step is mandatory to avoid instant swirls.
Step 2: The Lubricated Wipe Down
After the soak, remove the covering towel. Do not let the area dry. Immediately go in with your well soaked wash mitt, loaded with fresh soapy water. Glide the mitt over the surface in those straight lines.
Pay close attention to what you feel. Your mitt should glide silently. If you hear a scraping sound or feel any tugging, stop. That is the sound of scratching. The moment you feel resistance, lift the mitt away, reapply your bug remover or soap to that spot, and let it soak for another minute. Do not press harder. The goal is to lift, not grind. You will see the bugs melt into the mitt. Rinse the mitt thoroughly after every pass to eject that debris.
Step 3: The Final Rinse and Inspection
Once all visible bug matter is gone, you need a proper rinse. Remove the nozzle from your hose, if you can. Let the water flow in a wide, gentle stream from the top of the panel down. This allows the water to “sheet” off, pulling most droplets with it and minimizing spots.
Now, inspect your work with your hand, not just your eyes. Rinse your hand in clean water. With the panel still wet and slick, lightly run your fingertips over where the bugs were. Your clean, wet hand will feel any leftover gritty contamination that your eyes might miss. If it feels perfectly smooth, you succeeded. If you feel bumps, you may need to use a detailing clay bar on that section, but that is a process for another day. For now, dry the vehicle completely with a clean drying towel.
Tackling the Tough Ones: Stink Bug and Love Bug Stain Removal
Most bugs come off with a good soak and wash. Stink bugs and love bugs are different. People ask me about them all the time. These pests leave stains that laugh at a simple car shampoo. Removing these stains requires more patience and a shift in your chemical approach. You cannot treat them like regular bug splatter.
Let’s clear up a common hack you might see online. Do dryer sheets clean bugs off car? The short answer is yes, but you should never do it. A dryer sheet is a thin, abrasive material designed for a hot, tumbling dryer. On your car’s clear coat, it acts like fine sandpaper. It will scratch. I tried it once on a test panel years ago. The scratches were immediate and obvious under the light. It is a bad shortcut that creates more work.
Why Stink Bug Residue is a Special Kind of Evil
A stink bug does not just stain your paint. It attacks it. When crushed or stressed, it releases a corrosive, oily liquid from its thorax. This fluid is a defense mechanism. On your car’s paint, it leaves a distinct yellow or brownish ring. The center might look etched. I see it every summer on the flat front bumper of my white Tesla. The stain is not just on the surface, it is often already working into the clear coat. If left for days in the sun, it can permanently etch, leaving a dull spot no amount of washing can fix.
Because of its oily, acidic nature, a standard bug remover might not cut it. You often need a dedicated tar and bug remover, which is formulated to break down complex organic soils. For a more DIY approach, a wipe with isopropyl alcohol diluted 1:1 with distilled water can work. Use extreme caution with any strong solvent. Test it in an inconspicuous area first, work quickly, and never let it dry on the paint.
The Step-by-Step for Stubborn Stains
When you find a love bug swarm or those dreaded stink bug rings, follow this focused procedure. Do not rush.
- Perform an Extended Pre-Soak. After your initial rinse, liberally spray a dedicated bug remover or your prepared detailer’s spray directly onto the stains. Let it dwell for five to ten minutes. You want to see the product dissolving the crust.
- Gentle Agitation with a Dedicated Tool. Take a clean, soft microfiber towel-do not use your wash mitt. Fold it into a pad. Gently, using light pressure, wipe the soaked area. The goal is to help the chemical work, not scrub. Use a fresh section of the towel for each pass.
- Immediate Rewashing. After agitating, immediately wash the entire panel with your soapy wash mitt as part of your normal two-bucket wash. This removes any leftover residue and the chemical cleaner itself.
- Inspect and Escalate. After washing and fully drying the car, feel the stained area with the back of your hand. If it is smooth, you won. If you can still feel a roughness or see a shadow, the next step is to use a detailing clay bar on the spot. If the visual stain remains after washing and claying, the bug’s acid has likely etched the clear coat. At that point, removing the damage requires a light polish to level the clear coat surface again.
Common Mistakes That Scratch Your Paint (Paint Damage Prevention)
I see it every summer. Someone comes to me with a beautiful car covered in fine scratches on the hood and bumper. They just wanted to clean off some bug guts. A five-minute job turned into a five-hour paint correction. Here are the top errors that make that happen.
- Rubbing bugs when they are dry and hard. This is the fastest way to add hundreds of micro-scratches to your clear coat.
- Grabbing the first tool you see in the kitchen. That sponge or paper towel is a paint destroyer in disguise.
- Reaching for a household cleaner or insect repellent. These chemicals can permanently damage your paint’s finish and surrounding trim.
Each mistake bypasses the simple, safe process in favor of a quick fix that always ends with a damaged finish.
Rubbing Dry Bugs: The #1 Cause of Scratches
Imagine dragging a small piece of gravel across your paint. That is what you are doing when you scrub a dried bug. Their bodies harden into a crust that is fused to your clear coat. The shell fragments and trapped road grit act like fine sandpaper. Every wipe grinds this abrasive mixture into the soft paint surface.
My white Tesla shows bug splatter like a map. The flat front bumper is a target. I learned the hard way on an old car that quick, dry wipes left a haze of scratches visible in the sun. The single most important rule for bug removal is to soften them first, turning that abrasive crust back into a removable gel.
Using the Wrong Tools: Kitchen Sponges, Stiff Brushes, and Paper Towels
Your paint is softer than you think. A kitchen sponge might feel soft to your hand, but under a microscope, it’s a landscape of hard, plastic loops. These loops are fantastic at trapping tiny, hard particles of dirt. When you rub, you are not cleaning with the sponge. You are sanding with the trapped grit.
Compare that to a clean, high-quality microfiber towel. Proper microfiber is split into millions of tiny, soft fingers. These fingers gently lift and encapsulate debris without grinding it. A stiff brush or a paper towel, which is made of wood pulp, has none of this gentle lifting action. It just scours the surface. Using any abrasive material on paint is an invitation for swirl marks, the very thing I fight constantly on my black BMW.
Applying Household Chemicals or Insect Sprays
This is a critical warning. Do not spray household insect killer or general-purpose cleaners on your car. Bug spray damages car paint because it contains powerful solvents designed to penetrate insect exoskeletons, and these solvents will also eat into your clear coat and plastic trim. They can cause permanent staining, clouding, and chemical etching that requires professional compounding to remove. Understanding how to safely use chemicals on car paint helps prevent such damage and keeps your finish protected.
Similarly, do not use dish soap as a car wash solution. It is a degreaser formulated to strip oil and food from plates. On your car, it will violently strip all the protective wax or sealant you have applied. Over time, it dries out rubber seals and leaves plastic trim looking faded and chalky. Your car’s surfaces need specific, pH-balanced chemicals, not kitchen shortcuts. From a car paint safety perspective, choose products designed for automotive finishes. These soaps are formulated to be gentle on wax, seals, rubber, and plastic trim.
The Bug Removal Protocol: Your Step-by-Step Checklist
Follow these steps in order. Do not skip ahead. This method prevents the scratches and swirls that happen when you rush or use the wrong tool.
- Immediate Post Drive Rinse (If Possible)
- Gather Your Safe Products and Tools
- Pre Soak the Entire Affected Area
- Wash with the Two Bucket Method
- Clay if Necessary
- Dry Thoroughly and Apply Protection
This sequence guarantees a safe, thorough clean and ends with a protective step that makes your next bug cleanup much easier.
Step 1: Immediate Post Drive Rinse (If Possible)
The best time to remove bug splatter is before it becomes bug stain. If you get home from a long drive and the front end is covered, go straight to a coin operated pressure wash bay.
Do not use the brush. Just use the pressure rinse. Hold the wand at an angle and blast the bulk of the fresh insects off. You are not doing a full wash. You are simply removing the acidic, sticky bodies before they bake onto the paint in the sun.
This five minute stop can save you an hour of serious cleaning later, especially on flat surfaces like the front bumper of my Tesla Model 3.
Step 2: Gather Your Safe Products and Tools
Do not start until you have everything within arm’s reach. Scrambling for a towel with soapy hands leads to mistakes. Here is your checklist.
- A dedicated bug remover spray or a pH neutral car wash soap for pre soaking.
- Car wash shampoo (not dish soap).
- Two buckets, each with a Grit Guard at the bottom.
- One high quality wash mitt (I use a microfiber chenille mitt).
- Several soft, clean microfiber towels for wiping and buffing.
- A large, clean drying towel (a waffle weave or plush microfiber).
Step 3: Pre Soak the Entire Affected Area
This is the most important step for baked on bugs. Do not scrub yet.
Spray a generous amount of bug remover over the entire front end bumper, hood, grill, mirrors. If you prefer not to use a dedicated bug remover, you can coat the area with a thick layer of your car wash suds. The goal is to rehydrate and loosen the remains. This prep also makes the car exterior easier to clean of bug residue. For a detailed guide on removing bugs from the car exterior, follow the next steps.
For really stubborn areas, lay a soaked microfiber towel over the sprayed section. This keeps the product wet and working. Wait five to ten minutes. You should see the bug residue start to dissolve and drip.
Let the chemical do the work so your mitt does not have to.
Step 4: Wash with the Two Bucket Method
Now you wash the entire car, starting with the pre soaked bug areas. Fill one bucket with soapy water. Fill the second bucket with clean water only. This is your rinse bucket.
Wash a two foot by two foot section of the hood. Then, before dunking back into the soap, rinse your mitt thoroughly in the clean water bucket. Rub it against the Grit Guard to release any trapped debris. This step prevents you from washing your paint with a dirty mitt.
Only then do you reload with fresh soap and move to the next section. Work from the top down. The bugs on the lower bumper will be the last thing you wash.
I use this method on every car, but it is non negotiable for my black BMW. The two bucket method is the single biggest thing you can do to prevent swirls during a wash.
Step 5: Clay if Necessary
After the wash, run your clean hand over the cleaned paint where the bugs were. Does it feel perfectly smooth, like glass? Or does it have a gritty, rough texture?
If it is rough, you have embedded contaminants or etched in bug juice that washing could not remove. You need to clay the paint.
Spray a detailed clay lubricant generously on a small section. Gently glide the clay bar back and forth. You will feel it gripping and pulling the contaminants out. Knead the clay frequently to expose a fresh, clean surface. If you drop it, throw it away.
Claying is a paint saving step that removes contaminants you cannot see, but it must be done with ample lubricant to avoid marring the clear coat.
Step 6: Dry Thoroughly and Apply Protection
Use your drying towel to pat the paint dry. Do not drag it. Lingering water spots from bug acid can etch the paint.
Now, seal your work. While the paint is clean and bare, apply a spray wax or a spray sealant. Mist it on a panel and buff it off with a clean microfiber. This adds a slick, protective layer over the clear coat.
This layer is your secret weapon. On my Porsche 911, I use a spray sealant over its Paint Protection Film. The bugs wipe right off the next time. On my Ford F 150’s hood, a spray wax makes the next roadside cleanup simple.
Applying protection right after a deep clean is how you build a defense system, making future maintenance washes quick and safe.
Safe Bug Removal: The Last Word
The most important rule is to always soak and dissolve bug residue with a dedicated cleaner before touching it. I keep my Tesla’s flat front bumper clean by never letting dried splatter meet a dry towel.
Scrub bugs off without softening them first, and you will scratch your clear coat, leaving behind visible swirls that dull the paint.
Further Reading & Sources
- r/AutoDetailing on Reddit: Whats the best way to remove bugs and stains like these off someones car?
- Protect Your Car: Tips to Prevent Bug Damage to Paint
- How to Remove Dead Bugs, Sap & Tar From Car | Direct Auto Insurance
- Amazon.com: 3D Bug Remover – All Purpose Exterior Cleaner & Degreaser to Wipe Away Bugs on Plastic, Rubber, Metal, Chrome, Aluminum, Windows & Mirrors, Suitable for use on Car Paint, Wax & Clear Coat : Automotive
- Bug Remover
Max is an automotive enthusiast having worked as a car mechanical and in interior detailing service for over 25 years. He is very experienced in giving your old car, a new fresh vibe. He has detailed many cars and removed very tough smells and stains from all kinds of cars and models, always ensuring that his work and advice helps his customers. He brings his first hand experience to his blog AutoDetailPedia, to help readers breath new life into their car interiors.