How Do You Paint a Car at Home with a Professional Finish?
Staring at your car’s faded paint and worrying that a DIY job will look worse than the chips and scratches? I’ve felt that same knot in my stomach before spraying my first panel on my Jet Black BMW.
Based on my hands-on experience with everything from single-stage restoration on my Miata to maintaining PPF on my 911, this article will teach you the realistic steps. We will cover critical surface decontamination, choosing between basecoat and single-stage systems, achieving proper paint mil thickness, and wet sanding for a glass-smooth clear coat.
Rush the process or skip a step, and you will lock imperfections like dust and orange peel permanently into your paint.
Is Painting a Car Yourself Realistic? The Garage-Project Reality Check
Can you paint a car at home? Yes, absolutely. I’ve done it in my own garage. Can you legally paint a car in your garage? In most places, yes, but you are responsible for containing the overspray and fumes. Your neighbors and local environmental regulations will not appreciate a cloud of metallic basecoat drifting over the fence. This is a garage-project, not a driveway spectacle. If you haven’t tried it before, make sure you know how to spray paint a car at home properly.
A true DIY full respray, changing a car’s color entirely, is a monumental task. It involves removing trim, door handles, and often the windshield to do it right. It demands a flawless, dust-free environment for days. For a first-timer, it’s the hardest path. More realistic is tackling a single panel. Repainting a replacement bumper or a hood with clear coat failure is a perfect project. Restoring the single-stage paint on a classic, like my ’95 Miata, is another great goal. You’re not blending into existing clear coat, you’re working on a defined, manageable area. That’s a window into the diy car painting difficulty—the finish really depends on patient prep, dust control, and precise technique.
Set your expectations. This is not a Saturday afternoon job. For a single hood, block off two full weekends. One for prep, one for paint. Skill matters, but patience matters more. Environmental factors are your enemy. Dust will find your wet paint. Cold paint doesn’t flow. High humidity causes blushing, a milky haze in the clear. You must control your space. Allow each coat to dry for the recommended wait time before applying the next. Rushing coats invites dust, runs, and poor adhesion.
The single biggest reason a DIY paint job fails is rushing the prep work. A gorgeous spray job over poorly sanded, contaminated surface will look gorgeous for a week, then peel. The paint is only as good as the foundation. Sanding is everything.
The DIY Painter’s Arsenal: Tools, Chemicals, and a Safe Space
You cannot cheat the tool list. This is what you need to gather before you sand a single inch.
- HVLP Spray Gun: High Volume Low Pressure is mandatory for efficient, controllable material application. You need different tip sizes: a 1.8mm tip for primer and a 1.3mm or 1.4mm tip for basecoat and clear.
- Air Compressor: It must deliver enough CFM (continuous air flow) to keep up with your gun. A tiny pancake compressor will fail.
- Sanding Progression: For repairing existing clear coat, you’ll need 320-grit for feathering edges, 500-grit for smoothing, and 800-grit for final surface prep before primer or basecoat. Have a sanding block for flat surfaces.
- Respirator: A basic dust mask is worthless. You need a dual-cartridge respirator with organic vapor cartridges (pink ones) to protect your lungs from isocyanates in clear coat. This is non-negotiable.
- Tack Cloths: Sticky cheesecloth wipes to remove the last bits of dust before paint. Use them gently.
- Chemicals: A dedicated wax and grease remover (like Prep-All), panel wipe, and quality primer, basecoat, and clear coat from a automotive paint supplier.
Your garage needs to become a temporary booth. Sweep and hose down the floor the day before to settle dust. Cover the floor with plastic sheeting. Hang plastic from the ceiling to create walls, creating a sealed area larger than your car. Lighting is critical, you need to see every flaw. Use portable work lights from multiple angles.
Ventilation is your biggest challenge. You need to move air without creating a dust storm. I run a box fan in a rear window, fitted with a basic furnace filter to catch overspray, pushing air out. I crack the main garage door just an inch at the opposite end to allow clean air to seep in slowly. It creates a gentle, controlled cross-flow.
Safety is not a suggestion. Wear your organic vapor respirator the entire time you are spraying and for a while after, even if you’re just using waterborne paint. Isocyanates are dangerous. Wear nitrile gloves and coveralls. Have a fire extinguisher rated for chemical fires within reach. No sparks, no heaters, no pilot lights. When you’re working with automotive paints, follow chemical safety guidelines. Always read and follow the Safety Data Sheet for car paints to ensure safe handling and disposal. Inform your neighbors if you’re sharing a wall. Understand that overspray is your legal responsibility; if it settles on someone’s property, you are liable for the damage.
The Protocol: The Non-Negotiable Order of Operations for Prep
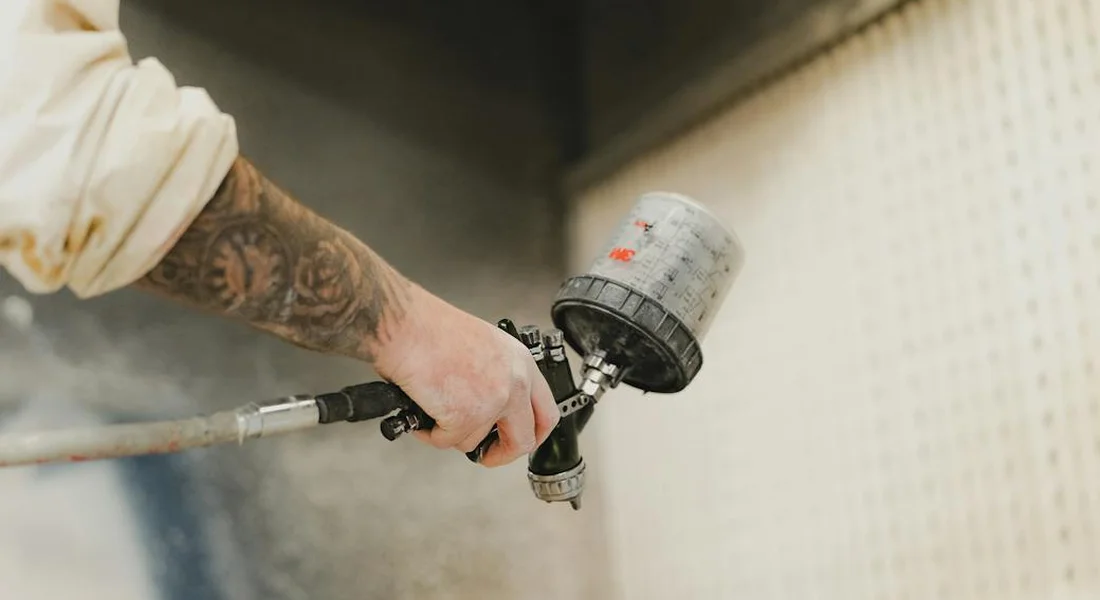
Good paint cannot hide bad prep. I learned this the hard way on my old Mazda Miata’s fender. The order you work in is not a suggestion. It is a law. Skip a step, and you will see your mistake forever, shining through the final clear coat. Follow this checklist in order, without deviation, especially when performing paint correction.
Step 1: Complete Disassembly
You cannot paint what you cannot reach. This step separates a proper job from a visible, amateur one.
- Remove door handles, side mirror caps, and badging.
- Take off headlights, taillights, and marker lights if your project requires it.
- Pop off trim pieces, belt moldings, and wiper arms.
- Bag and tag every screw, bolt, and clip in labeled zip-top bags. Your future self will thank you.
Step 2: Deep Clean & Decontaminate
Your surface must be surgically clean. This is beyond a car wash.
- Start with a heavy-duty wash using a degreasing soap to strip old waxes and oils.
- Perform a chemical decontamination with an iron remover spray. Watch it turn purple as it dissolves embedded brake dust.
- Follow with a clay bar treatment. The paint should feel like smooth glass under your hand. Any grit left will be sanded into the surface later.
Step 3: Mechanical Repair (Dents, Rust)
Fixing the shape comes before fixing the color. Paint will not fill a dent.
- Use body hammers, dollies, and stud welders for dents. I spend more time here on my F-150 than any other step.
- For rust, you must cut out every speck. Treating surface rust is a temporary fix. Grind it back to clean, shiny metal and use a rust converter primer.
Step 4: Strip & Sand – The Foundation
This is where I often get the question: “Can I skip sanding?” The answer is a firm no. In sand car paint prep, you build the mechanical bite by scuffing the surface just enough for the primer to grab. Without it, painting over an unsanded, glossy surface is the fastest way to guarantee peeling, fisheyes, and orange peel. Modern paint needs a mechanical “tooth” to grip. Without it, adhesion fails. It might look okay for a month, then a chip will lift a whole sheet of paint off.
Your tools matter here. You are not just sanding, you are creating a uniform surface.
- For large, flat panels like hoods and doors, use a hard sanding block. It keeps the surface perfectly flat and prevents low spots. My BMW’s hood demands this.
- For curved fenders, bumpers, and complex contours, use a flexible foam sanding pad. It conforms to the shape without creating flat spots. The Porsche’s rear quarter panels are a test of this technique.
- Start with a coarse grit (like 320 or 400) to remove clear coat and level primer, then work up to your final guide coat grit (often 500-600 for basecoat). Always sand in crosshatch patterns.
Step 5: Masking – The Art of Fine Lines
Masking is not just slapping on blue tape. It is precision.
- Use a high-quality, fine-line tape for sharp edges. Cheap tape bleeds.
- For body lines, “break” the tape on the edge itself. Do not run it over a curve.
- Mask off areas at least 18-24 inches around your work zone. Overspray is a fine mist that travels much farther than you think.
- Cover the entire vehicle and floor with plastic sheeting. I use the 3M liquid masking system for wheels and tight spaces-it’s a game-changer.
Step 6: Wipe Down & Tack
The final step before paint. One speck of dust can ruin a panel.
- Use a dedicated wax and grease remover (like Prep-All) with clean, lint-free towels. Wipe one direction, flip the towel, wipe again. Never use a circular motion.
- Immediately before spraying, go over every square inch with a tack cloth. This sticky cheesecloth grabs the micro-dust the cleaner missed.
- The surface must be so clean you would feel comfortable performing surgery on it. Only then are you ready for paint.
Spray Gun Technique: The Motion That Makes the Magic
Holding a spray gun feels awkward at first. It is not like painting a wall. The motion is a slow, consistent dance. You are laying down a wet film, not dusting a surface. Let’s break it into stages.
The Stages: Primer, Sand, Basecoat, Clearcoat
Think of these as four separate jobs with a common technique.
- Primer: This is your forgiving layer. It fills minor sand scratches. Apply 2-3 medium-wet coats, letting it flash off between each. Then, sand it smooth with 500-600 grit.
- Basecoat: This is your color. It must cover completely but should not be laid on too thick. Apply in multiple light-to-medium “mist coats” until you achieve full, even color with no thin spots. Let it dry to a dull matte finish.
- Clearcoat: This is your finish. It must be wet, glossy, and flowed on evenly. This is where technique is everything. Usually 2-3 coats.
The Core Technique: Pattern, Overlap, Distance, Edge
These four principles apply to every stage of spraying.
- Spray Pattern: Test on cardboard first. Adjust your gun for a horizontal oval pattern that is even from top to bottom.
- Overlap (50% Rule): Start your pass off the panel, trigger on, move across, trigger off past the edge. Each subsequent pass should overlap the previous one by 50%. This eliminates stripes.
- Consistent Distance (6-8 inches): Lock your arm. Any closer, and you will get runs. Any farther, and you get dry, sandy texture (orange peel). The contour of the panel dictates this-maintain the distance as you move over curves.
- Maintaining a “Wet Edge”: You must keep the leading edge of your paint wet. Work in manageable sections (like one door at a time). If you pause too long, the edge will dry, creating a visible line when you resume.
Handling Complex Areas
Flat hoods are easy. The real test is the tricky stuff.
- Door Jambs & Edges: Paint the inner edges and jambs first, before the outer face. Use a reduced overlap and sometimes a narrower fan pattern. Lightly coat edges-paint naturally builds up and runs on edges first.
- Tight Corners: Reduce air pressure slightly and get closer. You may need to use a more circular, targeted motion. Be careful of bounce-back and accumulation.
- Bumpers & Complex Curves: Move your body with the contour. Imagine the gun nozzle is always pointing perpendicular to the surface. This often means bending your knees and waist through the entire pass.
Detailer’s Pro-Tip: Technique Tweak
Your wrist is not a pivot point. It is a weak link. For a smooth pass, plant your feet, and use your entire arm and torso to move the gun. Start your movement before you pull the trigger, and follow through after you release it. The motion should originate from your shoulder, with your arm acting as a steady, linear guide. This is the secret to that factory-robot consistency. When I’m working on the long flank of the Odyssey or the sweeping fender of the 911, this full-body movement is what keeps the coat even from one end to the other. Your wrist alone will create an arc, leaving the middle of the panel thicker than the ends.
Wet Sanding and Polishing: Transforming Orange Peel into Glass
You just finished spraying. The color looks great, and the clear coat is on. You walk up to admire your work and see it. The surface looks like the skin of an orange. Do not panic. This is normal. Orange peel texture is a standard result from a spray gun, and the final, glass-smooth finish is created not with the gun, but with abrasives and a polisher.
My 1995 Miata’s single-stage paint had severe orange peel after I resprayed the hood. It looked decent from five feet away, but up close it was wavy and dull. Wet sanding fixed it.
The Wet Sanding Process: Patience is Your Tool
You only sand the clear coat. Never sand through it. If you see color on your sandpaper, you have gone too far and must respray that area. Go slow.
- Let the clear coat cure fully. For a 2K (two-part) clear, wait at least 24-48 hours in a warm, dry space.
- Start with 1500 or 2000 grit sandpaper. I use 2000 grit for mild peel. Soak the paper in clean water with a drop of dish soap for 15 minutes.
- Keep the surface and the paper wet. Use a spray bottle with water. This lubricates the cut and flushes away debris.
- Use a soft sanding block. Move it in straight, consistent strokes with light pressure. Do not use your fingers, as they create low spots.
- Sand a small 2×2 foot area. Your goal is to turn the glossy, textured surface into a uniform, dull matte finish. Wipe it dry to check. If it’s evenly dull, you are done sanding that spot.
Checking for breakthrough is simple: if your sanding slurry (the cloudy water) stays white or gray, you are safe. If it takes on the color of your paint, stop immediately.
Restoring the Gloss: Compounding and Polishing
You now have a perfectly flat, utterly dull surface. This is where the magic happens. You will use a dual-action polisher. It is safer for beginners than a rotary buffer.
- Compounding Stage: Use a medium-cut compound and a firm foam cutting pad on your polisher. This removes the sanding scratches from the 2000-grit paper. Work in small sections, keeping the polisher moving. The gloss will start to return, but the surface will still be hazy.
- Polishing Stage: Switch to a fine polishing compound and a soft foam finishing pad. This step removes the haze left by the compound and brings out the deep, reflective gloss. The surface will go from hazy to wet-looking.
For a new paint job with fresh clear coat, you often need only a one-step correction. A one-step uses a fine polish or an all-in-one product that has very light cutting ability. It cleans up the sanding marks and leaves a high gloss. This is in contrast to compounding, which is more aggressive and used for deeper imperfections.
I use a two-step process on my black BMW or after a full repaint because it guarantees the deepest, most flawless reflection, but a one-step is a valid time-saver on a fresh, soft clear coat with minimal defects.
Common DIY Painting Problems and How to Fix Them
Things go wrong. I have made every mistake in the book. The key is knowing why it happened and how to fix it without starting over. Here are the usual suspects.
Runs and Sags
This is thick, dripping paint. It looks terrible.
- Cause: Moving the spray gun too slowly, holding it too close to the panel, or applying too heavy a wet coat.
- Fix: Do not touch it. Let it dry completely, for at least a few hours. Once hard, gently sand the run flat with 800 or 1000-grit sandpaper. Be careful not to sand through to the layer below. Then, reapply a light coat of color or clear over the sanded area, feathering it out.
Dry Spray
The paint feels rough and sandy, like dust stuck to the surface.
- Cause: Holding the gun too far away, moving it too fast, or low air pressure. The paint droplets dry before they hit the surface.
- Fix: Sand the rough texture smooth with 1500-grit sandpaper. Then apply another coat, this time adjusting your technique: get closer, move slower, ensure proper air pressure.
Fisheyes
Small, crater-like holes that appear in the wet paint.
Fisheyes are almost always caused by silicone or oil contamination on the surface, like a wax or grease you missed during cleaning. They are a nightmare.
- Fix: Let the paint dry. Sand the entire affected area down. Then, thoroughly clean the panel with a wax and grease remover. Wipe it with one clean towel, then follow with a fresh towel and fresh cleaner. Do not skip this. Respray.
Dust Nibs
Tiny pieces of dust or lint stuck in the paint. They are very common in home garage jobs.
- Cause: Dust in the air, on your clothes, or on the car itself before painting.
- Fix: After the final coat is fully dry, sand the nibs flat with 1500 or 2000-grit sandpaper. Then use your polisher with a fine polish to remove the sanding marks and restore gloss. This is a standard part of final finishing.
Poor Adhesion (Peeling or Flaking)
The new paint chips or peels off easily.
- Cause: Painting over an unsanded, glossy surface. You cannot paint over clear coat or old glossy paint without proper sanding. It has no “tooth” for the new paint to grip.
- Fix: Sand the entire area with 400-600 grit sandpaper to create a matte, scratched surface. This is called “scuff sanding.” Clean it thoroughly, then repaint.
Fading or Chalking Paint
This usually happens months later. The color loses its shine and turns chalky.
This is not a spray technique error. It is almost always due to using a clear coat without sufficient UV inhibitors, or skipping clear coat entirely on a basecoat. Single-stage paints can fade too. A quality 2K clear coat is your paint’s sunscreen.
The Final Wait: Drying vs. Curing
This trips up many DIYers. Drying means the solvents have evaporated and the paint is dry to the touch. It may feel hard. Curing is a chemical process where the paint molecules fully cross-link and reach maximum hardness and durability.
You can wet sand and polish once the clear coat is dry and hard, usually after 24-48 hours. Understanding car paint cure time helps you plan the next steps. This timing matters for when you can safely move on to finishing and protection. But you must wait for it to fully cure before applying a wax or sealant, which can trap solvents and prevent proper curing. For a 2K clear, wait at least 30 days. Touch the paint with the back of your hand. If it no longer smells like chemicals, it is likely cured. Patience here protects your investment.
Final Thoughts on DIY Car Painting
From correcting the swirled black paint on my BMW to reviving the single-stage red on my Miata, I know the professional result hinges on one non-negotiable act: flawless surface preparation. Your paint will only be as good as the clean, smooth, and contaminant-free canvas you provide for it. In automotive paint, surface preparation means a clean, scuff-ready base achieved by sanding, degreasing, and priming.
Neglect the thorough degreasing, sanding, and masking detailed here, and you will be left with a finish prone to peeling, fisheyes, and early failure.
Citations and Authoritative Sources
- Painting a Car at Home Part 1: Preparation, Preparation, Preparation | Articles | Grassroots Motorsports
- “HOW TO PAINT A CAR”- AT HOME-BY YOURSELF! – YouTube
- The Poor Mans Paint Job : 5 Steps (with Pictures) – Instructables
- r/projectcar on Reddit: How can I paint my own car if I don’t have a garage?
Max Gunther
Max is an automotive enthusiast having worked as a car mechanical and in interior detailing service for over 25 years. He is very experienced in giving your old car, a new fresh vibe. He has detailed many cars and removed very tough smells and stains from all kinds of cars and models, always ensuring that his work and advice helps his customers. He brings his first hand experience to his blog AutoDetailPedia, to help readers breath new life into their car interiors.