How Do You Remove Scratches from Car Trim and Molding Without Damaging the Finish?
Those faint scuffs on your plastic trim catch your eye every time you walk up to the car, and you are right to be cautious about fixing them.
This article will teach you my hands on method for a flawless repair. We will cover identifying the type of trim you have, selecting a safe product that works, the correct buffing technique by hand, and how to protect the surface afterward.
Use an abrasive meant for paint here, and you will permanently haze the plastic, leaving a blotchy finish that looks worse than the scratch.
Key Takeaways: What You’ll Learn
Before you touch a single product, understand the scope of the job.
The single most important factor is correctly identifying your trim material. Using a plastic polish on a rubber seal will do nothing. Using a heavy abrasive on faded plastic will destroy it.
First, Figure Out What You’re Working On: Trim Material ID
This is not a step you skip. Getting it wrong can turn a light scratch into a permanent, cloudy blemish. I learned this the hard way on the pillar trim of my old Honda, using too aggressive a pad on soft plastic. Here is how you figure it out.
Run your fingernail gently across the surface and feel the texture. Listen to it. Does your nail glide quietly over a hard, smooth surface? That’s likely hard plastic or painted trim. Does it make a soft, rubbery sound and give slightly? That’s vinyl or soft rubber. A sharp, metallic *ting*? That’s chrome or metal.
The Four Main Types of Trim
- Hard Plastic (Interior/Exterior): Your dashboard, A-pillar trim, most bumper covers, and rocker panel moldings. It feels rigid and unyielding. Scratches here often feel like grooves you can catch a nail in.
- Soft Rubber/Vinyl (Mostly Exterior): Your door seals, window seals, and the flexible bumper trim on many SUVs and trucks. It feels supple. Scratches here are usually superficial scuffs that don’t dig deep.
- Chrome (Exterior): Window trim, grill accents, badges. It is cold, hard, and reflective. Scratches are often fine swirls or deep gouges.
- Painted Trim (Exterior): Trim that matches your car’s body color, like on some wheel arches or lower door moldings. It is painted just like your hood or fender. Treat it as you would your car’s clear coat.
Exterior plastics face the sun and elements daily. UV damage causes fading, making the plastic brittle and chalky. This brittle plastic is more prone to scratching and harder to correct. My F-150’s bumper trim is a perfect example, faded from dark black to a dull grey. Interior plastics, like those in the Odyssey, are shielded from UV but face different enemies like crayons and shoe scuffs.
A common question is whether interior and exterior trim need the same care. The answer is no. The methods can be similar, but the products are different. Exterior trim needs UV protectants. Interior trim needs products that are non-greasy and safe for cabin air. Never use a heavy exterior dressing on your dashboard, it will cause a dangerous glare.
The Detailer’s Arsenal: Tools & Chemicals You’ll Need
Working on trim is different than working on paint. The materials are softer, the shapes are more complex, and a mistake is harder to fix. Having the right gear for the job is your first line of defense. I organize my kit into three categories: cleaning, polishing or filling, and protecting.
Cleaning
You must start with a perfectly clean surface. Any dirt left behind will become sandpaper under your polishing pad.
- All-Purpose Cleaner (pH-neutral): For general grime. A neutral pH is safe on all materials and won’t dry out plastics.
- Dedicated Plastic Cleaner: For textured or porous trim. These are designed to lift oils and residues from deep within the grain without leaving a shine.
- Soft-Bristle Detail Brushes: A set with different shapes and sizes. You need these to agitate cleaner into the tiny grooves and crevices that towels can’t reach.
- 300+ GSM Microfiber Towels: You want thick, plush towels. Thin, scratchy shop towels will leave their own fine marks on soft plastic and chrome.
Polishing & Filling
This is where you address the scratch itself. Your choice here depends on the scratch depth and the trim material.
- Fine Plastic Polish (Non-Abrasive): This is a very mild product meant to smooth the surface of clear-coated plastics or glossy black trim, not remove material. Think of it as a gentle eraser for fine scuffs.
- Dedicated Chrome Polish: Never use a plastic or paint polish on chrome. A proper chrome polish is formulated for that specific metal finish and is much less abrasive.
- Quality Trim Restorer (“Back-to-Black” type): These are not polishes. They are dressings that contain dyes or pigments to replenish faded color and fill in shallow scratches on porous, textured plastic. They make scratches disappear by coloring them in.
- Foam Applicator Pads: Use soft, clean foam pads for hand application. They give you control over pressure and product placement.
Here’s a key distinction: a polish smooths the surrounding surface to make a scratch less visible, while a restorer fills and recolors the scratch itself. On the faded grey trim of my old F-150, a restorer was the only thing that worked. On the glossy black window trim of my BMW, a fine polish was necessary.
Protecting
If you don’t protect your work, the scratches and fading will come right back. Sunlight is your enemy.
- Trim Sealant or Ceramic Trim Coating: This is your top-tier protection. It creates a durable, sacrificial layer that shields against UV rays and contaminants. It makes future cleaning much easier.
- UV-Protectant Spray for Interiors: For interior plastic, rubber, or vinyl. This adds a layer of UV blockers to prevent the dashboard and doors from cracking and fading.
Tool Specifics
For large, flat trim sections (like a bed rail), a low-speed polisher with a 3-inch backing plate and a 3mm throw, paired with a very soft foam pad, can save time. I might use this on the long trim of the Odyssey. For beginners, or on complex shapes around badges and lights, hand application is safer and gives you better feedback. You will feel the surface through your fingers.
The Universal Starting Point: How to Clean Trim for Scratch Repair
Polishing over dirt is the fastest way to ruin your trim. You will grind that grit into the surface, creating a hundred new tiny scratches worse than the one you’re trying to fix. This step cannot be rushed.
Follow this sequence every time:
- Spray your chosen cleaner liberally onto the trim section.
- Agitate with a soft-bristle brush. Work the cleaner into every groove, edge, and texture. Let the bristles do the work of lifting the embedded dirt.
- Wipe clean immediately with a damp, plush microfiber towel. Fold the towel to a clean side frequently. Rinse it out if it gets too dirty.
- Dry thoroughly with a second, dry microfiber towel. Any leftover moisture will dilute your polish or restorer, making it ineffective.
A truly clean, dry trim surface will have a consistent color and a uniform, slightly grippy or matte feel to it, with no visible film or residue. Run your clean, dry fingers over it. It should feel like the material itself, not like it’s coated in slick grime.
Special Note on Chrome
Chrome is easily scratched. Always use a cleaner specifically labeled for chrome or polished metals. Spray it on the towel first, not directly on the chrome, to control the application. Wipe gently in one direction to avoid creating swirls.
Detailer’s Pro-Tip: The Fingernail Test
Before you choose your repair method, diagnose the scratch. This takes two seconds.
Gently run the tip of your fingernail across the scratch, perpendicular to its direction.
- If your nail catches in the groove, the scratch is too deep to safely polish out. You have reached the base plastic or metal. Attempting to polish it level would require removing too much surrounding material. You will need a filling and coloring method, like a trim restorer.
- If your nail glides over it without catching, the scratch is superficial, likely only in the clear coat or top layer. A fine polish can smooth the edges of the scratch, making it reflect light more evenly and become far less visible.
I use this test on every scratch, from the deep gouges on the Odyssey’s bumper to the fine key marks on the BMW’s door trim. It tells me exactly what I’m up against.
Method 1: How to Fix Scratches on Plastic Car Trim
This method is for the hard stuff. Think unpainted black bumper strips on a truck, mirror caps, or the textured plastic panels inside your car. The plastic on my 2018 Ford F-150’s front bumper sees this treatment often. The goal is to make scratches disappear or hide them without making the surface shiny and unnatural.
For Light Scratches (The Polishing Method)
These are the marks you can feel with your fingernail but they don’t catch. They look like faint spiderwebs. This is about physically smoothing the surface back down.
- Clean it perfectly. Use isopropyl alcohol (IPA) diluted 1:1 with water on a clean microfiber. This removes wax, grease, and dirt so you can see the true damage. Let it dry.
- Use a dedicated plastic polish. Do not use regular car paint polish here. A plastic polish is formulated to be gentler. Squeeze a dime-sized amount onto a soft foam applicator pad.
- Work it in. Apply the polish using moderate pressure and small, overlapping circular motions. You want to create a little friction. Cover the entire scratched area and a bit beyond. Work in small sections, about the size of a mirror cap.
- Let it haze and wipe it off. The polish will turn clear and start to dry to a haze. Take a fresh, clean microfiber towel and wipe the residue away using a light, straight-line motion.
- Inspect under good light. Move the panel into sunlight or use a bright LED work light. Look across the surface, not directly down at it. This is how you see if the scratches are gone or just reduced. Repeat the process if needed, but know when to stop.
This is the core of how to get scratches out of plastic car trim by hand. It takes patience, not force.
For Deeper Scratches or Faded Color (The Filling Method)
Some scratches are too deep to safely polish out. More often, the whole trim piece is faded to a dull grey. This happens to exterior plastics after years of sun. A trim restorer is your best friend here. To keep the look, you’ll want to clean, restore, and protect faded black plastic trim.
These products don’t remove scratches. They work by dyeing the plastic back to a deep black and filling in micro-scratches to create a smooth, dark surface that hides deeper imperfections. It is like conditioner for dried-out material.
- Start with a deep clean. Scrub the trim with a dedicated all-purpose cleaner and a soft brush to remove oxidation and grime. Rinse and dry thoroughly.
- Apply the trim restorer. Use the included applicator or a foam pad. Apply the product in even, linear strokes along the length of the trim. Avoid globbing it on. You want a thin, even coat.
- Let it cure completely. Do not touch it. Do not get it wet. Park the car in a garage if possible. Most products need 4-12 hours to fully bond and set. This curing time is what makes the restoration last more than a week.
On my grey Honda Odyssey’s interior panels, a good trim restorer made faded switch surrounds look new again by masking fine scuffs and restoring the color.
Method 2: How to Fix Scratches on Rubber and Flexible Trim
This is a different world. Door seals, window weather stripping, and the flexible ends of bumper covers are not hard plastic. They are designed to bend and seal. Treating them like hard plastic will ruin them.
Never use abrasive polish, heavy friction, or direct heat from a heat gun on these materials. You will melt, distort, or shred them.
The Right Process for Rubber and Soft Trim
- Deep clean with a dedicated rubber cleaner. A general-purpose cleaner might dry the rubber out. A product made for rubber will lift dirt from the pores without damaging the material. Scrub gently with a soft brush, then wipe clean.
- Apply a rubber protectant with UV blockers. This step is magic. A high-quality rubber conditioner will be absorbed. It replenishes oils, makes the material pliable again, and restores a dark, uniform color. As the rubber plumps up from the conditioner, minor surface scratches often recede visually or disappear entirely. The UV protection prevents the fading that makes scratches stand out.
- For stubborn scuffs (use extreme caution). A white scuff on a black door seal can be maddening. A damp magic eraser (melamine foam) can sometimes lift it. Use the lightest pressure imaginable. Make one pass, then check. Immediately after, you must apply the rubber conditioner from Step 2 to replenish what the abrasive foam removed.
A Critical FAQ: Can You Use a Heat Gun on Rubber Trim?
You will see videos suggesting a heat gun can “heal” rubber scratches. I strongly advise against this. The risk is too high. Rubber and flexible plastics have a very low melting point. It is easy to overheat a small spot in seconds.
You might cause permanent discoloration, a shiny melted spot, or even make the material brittle and crack. The safe, reliable method is cleaning and conditioning. It works every time without the danger of ruining a critical weather seal on your door.
How to Remove Scratches from Chrome and Painted Trim
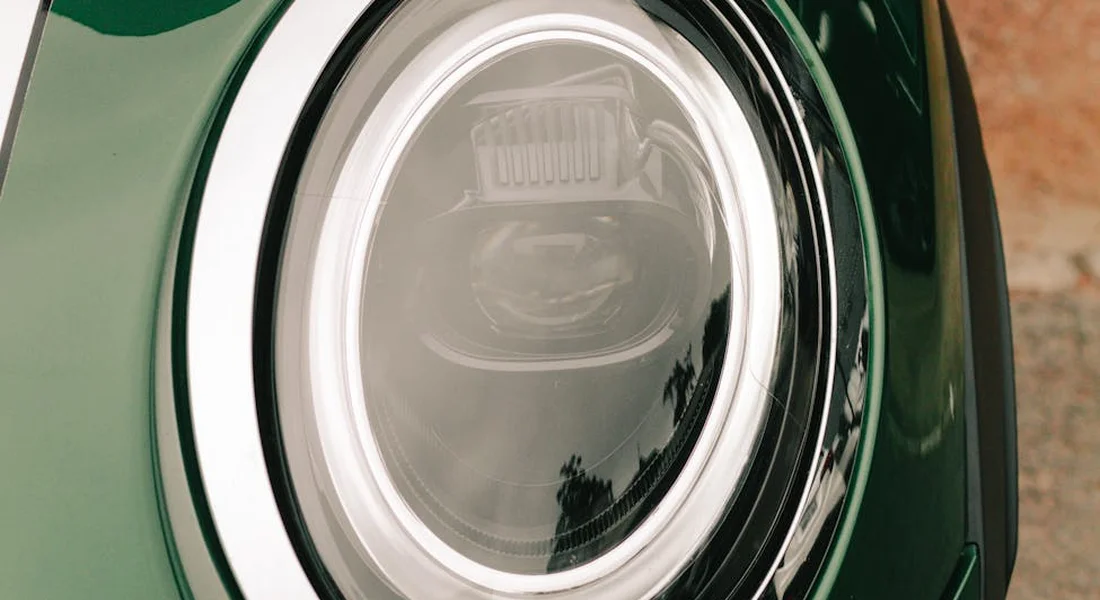
This trim looks like solid metal, but it usually isn’t. Most modern chrome and painted trim pieces are plastic or metal with a thin, shiny layer on top. You’re not polishing raw metal. You’re fixing the clear protective coat.
The rule is simple: work like you’re handling the world’s most delicate clear coat. Go too aggressive and you’ll burn right through that top layer, leaving a dull, cloudy patch that can’t be fixed.
For Chrome Trim
Think of chrome trim as having a skin. That skin is a clear coat, just like your car’s paint, but thinner. You only want to polish that skin, not remove it.
I start with a clean, soft microfiber towel. I apply a tiny dot of a very fine metal polish, like Meguiar’s Ultimate All Metal Polish, or even a light finishing compound meant for paint. I use my fingertips to feel the surface.
- Apply the product to the cloth, not directly to the trim.
- Use the weight of your hand. No extra pressure.
- Rub in small, tight circles over the scratched area.
- Wipe the residue away frequently to check your progress.
- Stop the moment the scratch fades. Do not keep polishing a shiny spot.
On my Ford F-150’s chrome bumper, this method takes off fine lines from brush washes. It brings back a crisp reflection without making the chrome look hazy or worn.
For Painted Trim (Like Black Mirror Caps or Body-Colored Pieces)
This is paint, just like your hood or doors. The process is identical. You must use the least aggressive method first and always tape off adjacent surfaces.
For light scratches, a hand-applied polish is your best friend. A product like Chemical Guys VSS Scratch & Swirl Remover works well by hand. Apply it to a foam applicator and work it in with moderate pressure. It’s an effective method to remove minor scratches in a DIY way.
If hand polishing doesn’t work, you can use a machine. This is where you need caution.
- Use painter’s tape to mask off any unpainted plastic or rubber next to the trim.
- Choose a fine abrasive compound, like Sonax Perfect Finish.
- Use a dual-action polisher with a soft foam polishing pad.
- Set the machine to a low speed (speed setting 2 or 3 out of 6).
- Keep the polisher moving. Never let it sit in one spot on the thin trim paint.
- After one or two passes, stop, remove the tape, and inspect.
Machine polishing trim is an advanced move because the paint is often thinner than on body panels. I practice this on my BMW’s black window trim. The goal is to remove the defect, not all the paint.
FAQ: How to Remove Scratches from Alloy Wheel Rims?
This question fits perfectly here. Most modern alloy wheels are not bare metal. They have a painted or powder-coated finish, often with a clear coat on top. You treat them exactly like painted trim.
Clean the wheel thoroughly first. A scratched rim is usually covered in brake dust. Use a dedicated wheel cleaner. For the scratch repair itself, follow the painted trim steps.
Use a light polish by hand. If the scratch is deeper, a small polisher can help. Tape off the tire so compound doesn’t stain the rubber. For light scratches, you can use a rubbing compound to repair scratches on the wheel surface. This step helps smooth the finish before polishing. My Porsche’s wheels get this treatment for light curb marks. For deep gouges that hit the bare metal, that’s a job for a professional wheel repair shop.
When Scratches Beat You: Knowing When to Call a Pro
You can’t win them all. I’ve tried. Part of being good at this is knowing when to put the bottle down and make a call.
Here are the clear signs the scratch is beyond a simple fix:
- You can feel a deep gash with your fingernail, and you see a different color or material underneath (white plastic under black paint, for example).
- The trim piece is physically cracked or broken.
- The scratch is on a delicate matte, brushed, or textured finish. Trying to polish it will make it shiny and look mismatched.
- You already tried to fix it and made it worse. This is common. You now have a hazy, discolored, or melted spot next to the scratch.
A professional has tools and materials we don’t keep in our garage.
They might wet-sand an area to level a deep scratch before polishing. For cracked plastic, they can use plastic welding to fuse it back together. For discoloration or scratches across a large trim section, they might dye or re-texture the entire piece to make it uniform. Sometimes, the most cost-effective and perfect solution is simply to replace the trim part.
There is no shame in calling for backup. My 1995 Miata’s cracked dash trim is sitting right there, waiting for a professional restoration. I know my limits. Getting a perfect result sometimes means knowing when your hands aren’t the right ones for the job.
Keep It Looking New: How to Protect Trim After Scratch Removal
You just smoothed out those scratches. The trim looks uniform and clean. If you stop here, you have done only half the job. Protecting the trim is the final, non-negotiable step that makes your repair last. Without a barrier, UV rays, road grime, and simple washing will bring the faded, chalky look back faster than you think. I learned this the hard way on my Ford F-150’s bumper trim. I spent an hour restoring it, left it unprotected, and two months later it looked worse than when I started.
Shielding Exterior Plastics and Rubber
For exterior pieces like bumper trim, window seals, and wheel arch moldings, you need a dedicated protectant. A simple dressing that just makes it look shiny is not enough. You want a product designed to bond and protect.
- Trim Sealant: These are usually cream or liquid formulas. You apply a thin layer to clean, dry trim. They soak in and create a durable, matte finish that resists water and UV damage. I use one on my F-150’s black plastic every six months. It keeps the color deep and makes dirt rinse off easier.
- Ceramic Coating for Trim: This is the next level. These are specialized silica-based coatings made for plastics and rubber. They form a hard, sacrificial layer on top of the material. This layer takes the abuse from the sun, salt, and contaminants instead of your trim. On my Porsche’s black trim, a ceramic coating means water beads up and dust doesn’t stick as badly for over a year.
The key for both is surface prep. The trim must be perfectly clean and completely dry. Any residue underneath will be sealed in, ruining the look and the bond.
Guarding Interior Surfaces
Inside your car, the sun is the main enemy. Dashboards, door panels, and other plastic or vinyl trim fade and become brittle. This drying-out process makes any existing micro-scratches more visible and the surface easier to scratch again. It’s one of the causes of scratches on car surfaces.
A quality interior UV-protectant spray is not a fancy air freshener, it is a necessary sunscreen for your car’s cabin. I use one on the grey plastic in my Honda Odyssey every time I do a deep clean. It leaves a natural, non-greasy finish that prevents the plastic from drying out and fading. For materials like the “vegan leather” in my Tesla, I use a formula made for synthetic upholstery that protects without making the surface slick.
Apply it to a clean microfiber cloth first, then wipe it onto the surface. This avoids overspray on windows and gives you more control. A light, even coat is all you need.
Smart Maintenance to Prevent New Scratches
How you wash is just as important as what you protect with. Automatic car wash brushes are brutal on trim. They grab at edges and grind dirt across the surface, creating fine scratches that will eventually need fixing again.
Wash your trim gently by hand. Use a soft wash mitt and plenty of soapy water to lubricate the surface. Dry it thoroughly with a clean, plush microfiber towel. Dragging a dry towel over dry trim is a sure way to add swirls. This simple routine, along with your trim sealant, will keep exterior pieces looking new for years. It is a small habit that saves you a big restoration job later.
Smart Steps for Lasting Trim Care
The single most important thing is to always test your product on a hidden spot first. This two-minute check saves you from ruining the entire piece and ensures compatibility.
Without this test, you risk chemical burns or discoloration that no amount of buffing can reverse.
Industry References
- r/Detailing on Reddit: Anything I can do about scratches on this interior?
- How To Remove Scratches From Plastic Car Interior (Best Ways)
- Here’s how you remove scratches from your car’s interior trim
Max Gunther
Max is an automotive enthusiast having worked as a car mechanical and in interior detailing service for over 25 years. He is very experienced in giving your old car, a new fresh vibe. He has detailed many cars and removed very tough smells and stains from all kinds of cars and models, always ensuring that his work and advice helps his customers. He brings his first hand experience to his blog AutoDetailPedia, to help readers breath new life into their car interiors.