Can You Actually Remove Scratches from Your Car’s Glass and Headlights?
Seeing that fine scratch catch the light every time you drive can make a clean car feel ruined. You worry it will spread, get worse, or even compromise your safety.
This guide will walk you through the process from start to finish, covering how to tell which scratches you can fix, the specific tools and compounds that work, the step-by-step technique for each surface, and how to avoid making the problem worse.
Attempting this without the right knowledge can turn a small, shallow mark into a permanent, clouded blemish that requires costly replacement.
Assessing the Scratch: What Can You Actually Fix?
Start with the fingernail test. Drag your fingernail gently across the scratch. If it catches or drops into a groove, the scratch is deep. If it slides over smoothly, you are dealing with a surface mark.
Can scratched car glass be repaired? Yes, but only if the scratch is shallow enough that your nail does not catch. The same rule applies to windshields. Surface scratches can often be removed completely, while deep gouges typically cannot. It’s important to know the limitations of DIY repair methods.
You must understand the material. Car windows are glass, a hard material requiring specialized abrasive polishes. Headlights are plastic polycarbonate, a softer material that needs sanding and sealing. The methods are not interchangeable.
Set realistic expectations now. On my black BMW, a deep key scratch remained visible after every attempt to fix it. But the fine swirls from improper washing vanished with polish. Deep gouges that catch a nail are often permanent, but surface marks can disappear with the right approach.
Reading Your Glass: Windshield vs. Side Window Scratches
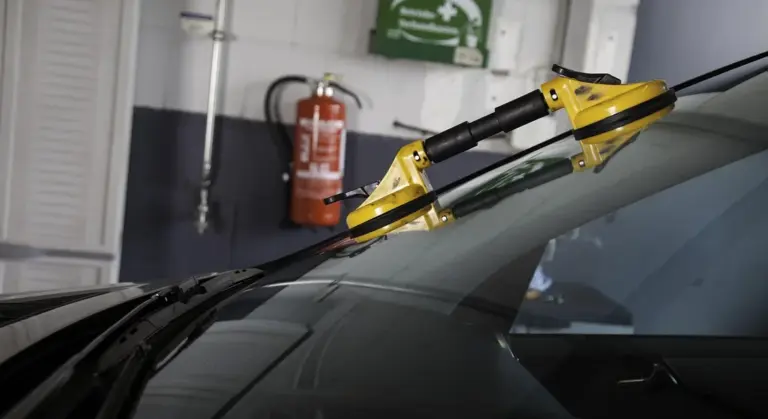
A windshield has two layers of glass with a plastic layer in between, but scratches only affect the outer glass. A deep scratch here is dangerous. It can scatter light from oncoming headlights, creating a blinding starburst effect at night. I see this often on my Ford F-150’s windshield after highway drives. Sometimes, even repairs for scratches on car windows aren’t enough to fully restore clarity.
Side window scratches usually have a different cause. They often come from fine grit and sand trapped in the window seals over time. These scratches are typically shallower and more uniform. On my Honda Odyssey, the rear windows had these shallow lines, and they were much easier to correct than a windshield gouge. They were caused by the same kind of car scratches but less severe.
Reading Your Headlights: Scratches, Haze, or UV Damage?
Most people call it a scratch, but it is usually not. That cloudy, yellowed look on old headlights is widespread UV oxidation. The sun breaks down the plastic, creating a network of micro-pits that scatter light. My 1995 Mazda Miata’s headlights were so hazy they looked frosted.
You need to diagnose correctly. A new headlight, like on my Tesla Model 3, might have a genuine clear coat scratch from road debris. An old headlight has that overall yellowed haze. The restoration process for widespread UV damage is completely different from polishing out a single clear coat scratch.
Your Scratch-Removal Arsenal: Tools & Chemicals
Gather your tools before you start. Always wear safety glasses and nitrile gloves. You are working with fine abrasives and chemicals, and protection is not optional.
Your toolkit splits in two: one for glass, one for headlights. I keep them separate in my shop to avoid mixing compounds. Naturally, you will see products labeled as car scratch repair kits, paste, or spray. Choose based on your specific job.
The Glass Repair Kit
For polishing glass, you need the right abrasives and machines. Do not use paint products on glass.
- Cerium oxide powder: The standard abrasive for glass. You mix it with water to create a polishing slurry.
- Distilled water: Tap water contains minerals that can leave white residue on your glass.
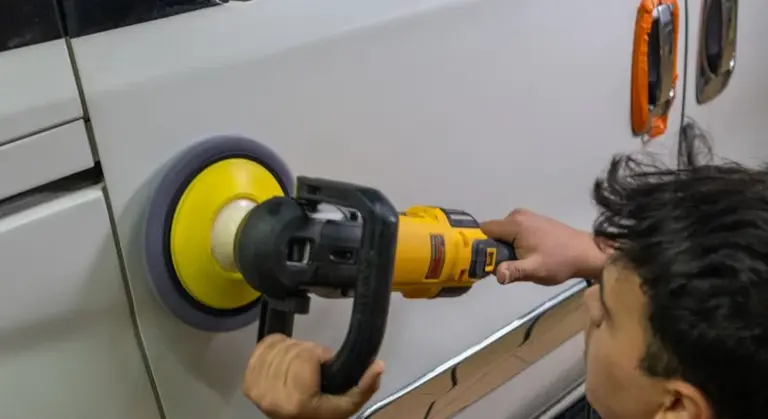
- Variable-speed polisher: A dual-action polisher gives you the control needed for safe glass work.
- Dedicated glass polishing pads: These are typically firm, flat foam pads designed to withstand the heat of glass polishing.
- High-GSM microfiber towels: For wiping away residue and achieving a crystal-clear finish.
For beginners, a specialty glass scratch remover kit is a smart all-in-one option that includes the correct paste and pads. It takes the guesswork out of mixing ratios, so you can focus on removing those scratches effectively.
The Headlight Restoration Kit
Restoring plastic headlights is a process of sanding, polishing, and sealing. You cannot skip steps.
- Sandpaper: You need a full range. Start with 800 grit for heavy oxidation, then move to 1000, 1500, 2000, and finish with 3000 grit for a smooth base.
- Headlight polishing compound: This is a fine abrasive compound that removes the sanding marks and restores optical clarity.
- UV-blocking sealant: This is the most critical step. It protects the bare plastic from the sun, or the haze will return in months.
- Masking tape: Use painter’s tape to protect the paint surrounding the headlight lens.
You will see two main types of sealant. Car scratch repair spray sealants are easy to apply evenly, which I use on family vehicles like the Odyssey, but wipe-on coatings often provide thicker, more durable protection for a show car like my Porsche 911.
The Non-Negotiable Detailer’s Specs
These specifics separate a good result from a great one. They come from years of trial and error in my own garage.
- Microfiber towels must be 500+ GSM for a lint-free finish on glass. Thinner towels leave behind fibers that ruin clarity.
- Use a Grit Guard in your rinse bucket. It traps abrasive particles at the bottom so you do not drag them back onto your work surface.
- For a polisher, a 8mm-15mm throw is versatile for headlights. It provides enough motion for effective cutting without the risk of burning the plastic.
- All chemicals should be pH-neutral. This protects adjacent paint, rubber seals, and trim from accidental damage during the repair process.
The Step-by-Step Protocol: Order of Operations
Forget winging it. This is the detailer’s method, a strict checklist I follow on every car in my shop, from my kid-hauling Honda Odyssey to my garage-kept Porsche. Skip a step, and you risk making the scratches worse or ruining the finish. Do it in order, and you control the outcome.
The Glass Scratch Removal Protocol
Glass is harder than paint, but it can be polished. The goal is to abrade the high points of the scratch down to the depth of the lowest point, without creating new defects. This is the exact process I used on the deep wiper scratches on my BMW’s windshield. Polishing scratches on car window glass can restore clarity. The next steps cover how to polish car window glass safely and effectively.
- Decontaminate. Wash the window with car shampoo and water, then use a detailing clay bar. Any grit left on the surface will be ground into the glass by the polisher, turning a small scratch into a large haze. I knead the clay frequently and use plenty of lubricant spray.
- Mix & Apply. I use a small plastic cup. Add a teaspoon of cerium oxide powder and slowly mix in distilled water until it forms a thin, creamy paste, like melted ice cream. Apply a few dime-sized dots of this paste onto the dry glass within your work area.
- Polish. Fit a dedicated foam glass polishing pad to a rotary or forced rotation dual-action polisher. Start at 1000 RPM. Spray the paste dots with a mist of water from a spray bottle to activate them. Keep the pad and glass surface wet at all times by misting every 30 seconds; the water is your lubricant and coolant. Polish in overlapping passes until the paste turns clear.
- Inspect & Seal. Wipe the area completely clean with a damp, plush microfiber towel. Shine a work light across the surface at a sharp angle. Run your fingernail over the scratch. If it doesn’t catch, you’re done. Immediately apply a hydrophobic glass sealant to the entire pane to protect your work and improve water beading.
The Headlight Scratch Removal Protocol
Headlight plastic is soft and scratches easily. Sunlight then turns those scratches into a yellow, foggy mess. Cleaning and restoring yellowed headlights taught me this protocol is about removing old plastic to expose new, clear plastic underneath.
- Protect & Prep. Use painter’s tape to mask off the paint, hood, and bumper around the headlight. Clean the lens thoroughly with isopropyl alcohol to remove all wax, grease, and road film. Any contamination will clog your sandpaper instantly.
- Sand. This is a wet-sanding process. Start with 800-grit sandpaper on a soft block, spraying the lens and paper constantly with water. You must progress through each grit sequence: 800, 1000, 1500, 2000, 3000. Do not skip grits. Sand until the entire surface has a uniform, frosted look with no deep scratches visible.
- Polish. Use a dual-action polisher with a firm foam cutting pad. Apply a dedicated headlight restoration compound or heavy-cut polish. Work the polish over the entire lens in slow, overlapping sections until the haze is gone and clarity returns.
- Protect. Clean the polished lens again with isopropyl alcohol. You have one hour, max, to apply a UV-blocking headlight sealant. The fresh plastic is now vulnerable to the sun. A spray wax or carnauba wax will not provide enough protection; you need a dedicated lens coating.
Technique Tweak: Pro Tips for Perfect Results
Knowing the steps is one thing. Executing them with a pro’s touch is another. Here is how I feel and see my way to a perfect finish.
Mastering the Glass Polish
On my Tesla’s large, flat windshield, control is everything. Glass polishing is about managing friction.
Your arm speed should be painfully slow. Move the polisher no faster than one inch per second. I count “one-one-thousand” for each inch I move. This slow pace gives the cerium oxide time to work and prevents localized heat buildup that can crack the glass.
Use firm, consistent pressure, but let the weight of the tool and the abrasive do the cutting. If you lean on the polisher, you will stall the pad and create hot spots. The right pressure feels like you’re firmly spreading peanut butter on toast.
Lighting is your truth-teller. Shut off the garage overheads. Shine a bright LED flashlight or work light at a 10-degree angle to the glass. Deep scratches will shadow black. As you polish, they will fade to gray and then disappear. If new, fine haze marks appear, you’re moving too fast or using too much pressure.
Mastering the Headlight Sanding
Sanding is a brute-force step that demands a surgeon’s precision. My rule for the Odyssey’s battered lights is simple: eliminate all traces of the previous step.
Use a cross-hatch pattern. Sand in straight, parallel lines left-to-right with your 800-grit paper. When you switch to 1000-grit, sand in straight lines up-and-down. This changing direction makes it easy to see when you’ve sanded away all the deeper scratches from the prior grit.
Keep the surface dripping wet. The water lubricates the sandpaper, carries away spent plastic debris, and prevents the paper from loading up. I keep a spray bottle in one hand and constantly mist the area. If you hear a squeaking sound or see dry patches, you need more water immediately.
Wipe and check often. After 20-30 seconds of sanding with a new grit, wipe the lens completely dry with a clean, lint-free towel. Hold it under a light. You are looking for a perfectly even, matte finish with no remaining deep grooves. If you see streaks or deeper scratches, keep sanding with that same grit until they are gone. Only then do you move to the next, finer paper.
When to Call a Pro and How Much It Costs
After detailing my BMW’s black paint, a friend asked me to look at a deep scratch on his windshield. I ran my fingernail across it. The nail caught. I looked at him and told him to call a professional. Knowing the line between a DIY fix and a pro job saves you time, money, and prevents you from making a small problem much worse. Let’s talk about money and practical limits.
Making the DIY vs. Pro Decision
Think of it like this: polishing is removing a layer to make the surface even again. If the scratch is shallower than the layer you can safely remove, you can fix it. If it’s deeper, you cannot. Cutting and polishing car paint scratches follows the same logic: you remove only a thin layer to blend the scratch with the surrounding finish. If the damage goes beyond what you can safely remove, other repair steps are needed.
You can confidently tackle these jobs yourself:
- Light wiper haze or shallow scratches you can’t feel with your fingernail.
- The overall yellow haze and mild surface pitting on plastic headlights.
- Superficial marks on side or rear windows from brushes or debris.
Pick up the phone and call a professional for these:
- Any scratch on glass you can feel catch your fingernail. Glass is hard. Removing that much material safely requires serious tools.
- Extensive windshield damage, especially in the driver’s sight line. A pro can assess optical clarity.
- If you lack the tools, a ventilated space, or the confidence to run a polisher on curved glass.
Let’s be clear about scratch repair paste or pens. On a deep glass scratch, they are a temporary fill, not a removal. They work by depositing a resin that fills the gap and mimics the refractive index of glass, making the scratch less visible to your eye. It can help for a while, but it is not a permanent correction. On my old Miata’s headlights, I used a kit. On a deep windshield scratch, I would not. For a more durable fix, rubbing compound can be used to physically level the surface and reduce shallow scratches. It’s a common next step before polishing to restore clarity.
Decoding the Price Tag: Kits, Services, and Estimates
Everyone wants to know what it costs. The answer depends entirely on what you have and what you need done.
For the DIY route, a quality kit for headlights or glass will run you between $30 and $60. This gets you the specific compounds, pads, and often a backing plate for your drill. It is a great investment if you have multiple vehicles. My F-150 and Odyssey headlights need a refresh every few years, so my kit paid for itself.
Professional service is priced by the job and complexity. Here are real world figures from my network of detailers and glass specialists:
- Professional glass polishing for wiper scratches starts around $150 per windshield. Deep scratch removal costs more.
- Professional headlight restoration ranges from $80 to $150 per pair. This usually includes sanding, polishing, and a durable UV-resistant coating.
Finding the right person is key. Do not go to a generic mechanic. Search for “auto detailing” or “paint correction” shops in your area, then call and ask if they offer glass or headlight polishing. A good shop will happily show you before and after photos of their actual work. This is the best proof they know what they’re doing.
If you search “car scratch repair cost reddit,” you’ll see wild guesses. The real cost hinges on your vehicle’s make, the severity of the damage, and your local market. A simple headlight restore on a Civic costs less than a full windshield polish on a Porsche with a steeply raked windshield. Get a physical estimate. A trustworthy pro will look at it first, especially for small scratches.
Final Thoughts on Glass and Headlight Scratch Repair
The single most important rule is to test the scratch with your fingernail before you touch it with any polish. If your nail catches, the damage is too deep for a DIY fix and you need a professional to avoid compromising safety or optics.
Polish a deep scratch yourself, and you will likely create a permanent, vision-distorting haze that requires a full replacement.
Deep Dive: Further Reading
- Amazon.com: Headlight Scratch Removal
- r/AutoDetailing on Reddit: Headlight restoration kit and scratches
- Headlight Lens Scratch Remover and Restoration Products for Cars
- Requesting advice on removing very fine scratches on areas of my headlight lens | Auto Geek Online Auto Detailing Forum
- From Toothpaste To Eraser, Simplest Ways To Make Car Headlights Scratch-Free | Lifestyle News – News18
Max Gunther
Max is an automotive enthusiast having worked as a car mechanical and in interior detailing service for over 25 years. He is very experienced in giving your old car, a new fresh vibe. He has detailed many cars and removed very tough smells and stains from all kinds of cars and models, always ensuring that his work and advice helps his customers. He brings his first hand experience to his blog AutoDetailPedia, to help readers breath new life into their car interiors.