How Do You Wash a Car Wrap Without Ruining It?
You just spent good money on a vinyl wrap, and now the thought of scratching or dulling it with a bad wash makes you nervous.
Washing a wrapped car uses the same gentle principles as paint care, but with a sharper focus. This guide will walk you through why hand washing is non-negotiable, what soaps and tools are safe, the crucial drying step, and how to add protection for the long haul.
Ignore these steps and you will accelerate the wrap’s failure, leaving it stained, scratched, or peeling before its time.
Key Takeaways: The Vinyl Wrap Wash Protocol
Your goal is simple. You need to clean the surface without scratching it, without forcing water under the vinyl’s edges, and without dulling its special finish.
Think of it as a gentle routine, not a heavy cleaning. Here is the entire method in a nutshell.
- Hand wash only. Automatic brushes and aggressive touch washes are your wrap’s enemy.
- Use a dedicated, pH-neutral car wash soap. Dish soap and all-purpose cleaners will strip the protective top coat over time.
- Your tools must be impeccably clean. A single piece of grit trapped in a wash mitt becomes a sanding block.
- Dry with a soft, clean microfiber towel using a gentle blotting or dragging motion. Never scrub.
- Work in the shade on a cool surface. Hot vinyl is more susceptible to damage.
- Always pre-rinse to flush away loose abrasive dirt before your wash mitt touches the surface.
The whole process takes about the same time as a careful hand wash on paint, but it demands more discipline to avoid bad habits. It is easy to do right, and just as easy to do wrong.
Why a Vinyl Wrap Needs a Different Kind of Wash
Washing your wrapped car the same way you wash painted panels is a fast track to ruining its look. Factory clear coat is a hard, baked-on layer designed to be polished. A vinyl wrap is a soft, flexible film with a delicate laminated top coat. For best results, use a wax or polish designed specifically for vinyl wraps to protect the film and maintain shine. Avoid generic waxes meant for paint, which can dull or damage the wrap over time.
That softness is the whole point. It allows the material to conform to curves. But it also means it scratches far more easily than paint. A dirty mitt, a gritty towel, or a brush at a drive-thru wash will leave fine scratches called “micro-marring” that cloud the finish.
Aggressive chemicals are another threat. Harsh soaps and solvents can degrade the wrap’s top coat, causing permanent gloss loss or even discoloration. I learned this the hard way years ago using a strong bug remover on a wrapped bumper. It left a permanent dull spot.
Then there are the edges. Every panel has seams where the vinyl terminates, often tucked under a door handle or along a body line. High-pressure water or aggressive wiping can creep under those edges, starting the lifting process. Once a edge lifts, dirt gets in and it rarely lays back down perfectly.
Washing a wrap is not like cleaning a concrete patio. It is more like cleaning the lens of a high-end pair of sunglasses. You use gentle solutions, soft materials, and precise motions. You would not scrub your sunglasses with a brush and dish soap.
Your wrap’s finish type changes the rules slightly too. A high-gloss wrap will show every single swirl mark under direct sun, just like my black BMW’s paint. A satin finish hides swirls better but can be stained more easily by certain products. A true matte wrap has a porous texture that can trap contaminants, and you can never use a wax or sealant meant for glossy surfaces on it. You must treat each according to its nature.
The Order of Operations: Your Wrapped Car Wash Checklist
Follow this sequence exactly. It is designed to lift dirt away without grinding it into the vinyl.
- Gather Safe Supplies & Choose Location
- Pre-Rinse & Snow Foam Soak
- Two-Bucket Hand Wash
- Gentle Final Rinse
- Pat-Dry & Air Dry
- Apply Spray Sealant (Optional)
Do this first. Working in direct, hot sunlight is a mistake. The vinyl heats up, soap dries too fast, and you can create streaks or even weaken the adhesive. Find a cool, shaded spot to work, and have every tool laid out before you get the car wet.
Start with a gentle stream of water from your hose. You are not blasting. You are flooding. Rinse from the top down. This loosens and removes the layer of loose grit. Next, apply a thick layer of pH-neutral snow foam or shampoo suds. Let it dwell and slide dirt off the surface. On my Model 3, this step pulls most of the bug splatter right off the flat bumper before I ever touch it.
This is non-negotiable. Fill one bucket with clean wash solution. Fill the other with plain water for rinsing your mitt. Work panel by panel, top to bottom. Dunk your clean wash mitt in the soap bucket, wring it gently, and wash a section using straight-line motions. Before re-dunking in the soap, swish the mitt in the rinse bucket over the grit guard. This single habit prevents scratching more than any other.
Use your hose without a nozzle, or with a wide flood setting. Let the water sheet off the vinyl. Do not use a pinpoint jet. Start at the roof and let the water flow down, carrying suds with it. Pay extra attention to crevices and seams where soap can hide.
Do not drag a dry towel across the wrap. Use a clean, plush drying towel. Lay it flat on a panel and pat or gently pull it to absorb water. For my Porsche 911, I often just pat it dry and let the remaining moisture air dry in the shade. Dragging creates micro-scratches you will see in the sun.
Once completely dry, a spray sealant made for vinyl wraps adds protection. It makes the next wash easier. Mist it on a fresh microfiber towel, not directly on the car, and apply in a cross-hatch pattern. This gives you a uniform layer without risk of streaking on the matte or glossy finish. Regular wash and proper maintenance help keep the wrap looking its best. For ongoing care, use a wrap-safe wash routine to maintain the vinyl’s color and finish.
Gathering Your Arsenal: The Right Tools for the Job
Using the wrong tool can ruin a wrap fast. Here is what you need and why.
The Must-Have Wash Soap
You need a pH-neutral car shampoo. Think of it as a mild conditioner for the vinyl. It cleans without stripping. Do not use dish soap or strong degreasers. They are made to cut grease on plates. They will also strip any protective sealant and can dry out the vinyl over time. Some brands make cleaners specifically for vinyl wraps; they are a safe bet and worth the investment for peace of mind.
Microfiber: Your First Line of Defense
Your towels matter. A good wash mitt feels like a thick bathrobe. It holds soap and lifts dirt into its fibers. A bad towel feels like a scratchy shop rag. It will leave swirl marks. You need a high-pile, clean wash mitt and dedicated drying towels. I keep a set of black towels that are for my wrapped cars only. They never touch wheels, engines, or door jambs. This prevents contaminating your wrap’s surface with embedded metal or brake dust particles.
Bucket & Grit Guard System
You need two buckets. Each needs a grit guard at the bottom. This plastic grate traps dirt. When you rinse your mitt, the dirt falls through the guard and stays at the bottom of the bucket instead of floating back up. It is a simple system that works. For wrap care, skipping this is like washing a delicate plate in the same dirty water you used for a muddy boot.
The Pressure Washer Question
Many people ask, “Can you pressure wash a wrapped car?” You can, but you must be very careful. If you use one, keep the pressure washer on its widest fan pattern, usually 40 degrees. Maintain at least 12 inches of distance from the surface. Never, ever aim the stream directly at the edges of the wrap or any seams. The force can lift the vinyl. For most home washers, a garden hose with a gentle nozzle is safer and gets the job done perfectly. I use a pressure washer on my F-150’s undercarriage, but for the wrap on my 911, the hose is my tool of choice—it’s much gentler than most pressure washers used for car washes.
Step-by-Step: How to Wash a Vinyl Wrapped Car Safely
Forget everything you think you know about washing paint. A vinyl wrap is a thin, delicate film. Treat it like the skin of a new phone screen, not like heavy armor. I learned this with my own Porsche 911, the “Garage Queen.” Its full wrap is an investment I protect with a gentle, methodical wash routine. This checklist will keep your wrap looking sharp for years, especially since it debunks many vinyl wrap myths.
Step 1: The Pre-Soak & Gentle Rinse
Start in the shade, on a cool surface. Never in direct sun. The heat bakes soap and water onto the vinyl, causing streaks and premature drying that leads to spotting.
Your first job is to soften and float away surface grit without touching it. Fill a foam cannon or sprayer with a pH-neutral car shampoo and water. Coat the entire car in a thick, shaving cream-like foam. Let it dwell and drip for three to five minutes. You’ll see the dirt start to slide down with the suds.
Now, take your hose with a regular nozzle, not a pressure washer. Pressure washers can lift edges and damage the vinyl’s adhesive. Start at the roof and rinse down the sides, using a gentle fan spray. The goal is to rinse away the majority of loosened dirt before your wash mitt ever touches the surface.
Step 2: The Two-Bucket Contact Wash
You need two buckets. One with fresh soapy water. One with clean water for rinsing your mitt. Use grit guards in the bottom of both. This is non-negotiable for any car, but critical for wraps.
Use a soft, clean microfiber wash mitt. Dunk it in the soap bucket and let it soak up the lubricant. Start with the roof, working panel by panel. Use straight-line strokes with the weight of your hand, not your arm. No circles. No scrubbing. Imagine you are wiping dust off a fine painting.
After you clean one section-like the driver’s door-rinse the mitt thoroughly in the clean water bucket. Swirl it on the grit guard to release any trapped particles. Then, reload it with fresh soap from the first bucket. Move to the next panel. This two-bucket method prevents you from grinding dirt back into the vinyl, which causes fine scratches called micro-marring.
Be extra cautious on sharp body lines, spoilers, and wrapped emblems. These are high-tension areas. Use even lighter pressure, gently wiping along the contour, not across it.
Step 3: The Flood Rinse & Dry
Do not use a spray nozzle for the final rinse. Remove it completely. Let the water flow from the open hose in a wide, gentle sheet. Start at the top of the car and let the water cascade down the panels. This “sheeting method” pulls most of the water off the car, minimizing droplets that cause spots.
For drying, grab a large, clean, plush drying towel. Do not drag it across the surface. Gently lay it flat on a panel and pat or blot the water away. Lift it, move to a dry section of the towel, and repeat. A second, smaller towel is perfect for wicking water out of door seams and around trim. Dragging a towel on a wrap, even a clean one, can create fine scratches over time, so blotting is the safest technique.
Step 4: Adding Protection (The Final Touch)
People often ask, “Do I need to wax a wrap?” The answer is no, but you should protect it. Traditional carnauba paste waxes, rubbing compounds, and any polish are strictly forbidden. They can stain, discolor, or create a blotchy finish on the vinyl.
Instead, use a spray-on ceramic sealant or a detail spray made specifically for vinyl wraps. These products provide a protective layer that shields against UV rays, which cause fading and brittleness. They also make future washes easier by causing water to bead and dirt to release more readily. A quality spray sealant is the best friend your wrap will ever have, offering safety and easier maintenance without any risk, especially when you apply vinyl wrap on car parts that are exposed to harsher conditions.
Paint Damage Prevention: The “Never Ever” List for Wraps
Washing a wrap correctly is one thing. Avoiding catastrophic mistakes is another. This list comes from seeing heartbreak in my shop. Follow the steps above, but first, swear off these practices completely.
Automatic Car Washes are Your Enemy
Do not take your wrapped car through any automatic wash, even a “touchless” one. The high-pressure spray in touchless units can force water under the vinyl edges, weakening the adhesive. Tunnel washes with brushes or cloth strips are a death sentence. They grind dirt into the surface and will scratch the finish deeply. They can also catch and peel edges. To keep the wrap looking pristine, learn how to wash clean vinyl wrapped car safely with a gentle hand wash. A proper routine uses microfiber, mild soap, and minimal contact to protect the finish. When you search for a “car wash for wrapped cars near me,” the only safe answer is your own driveway or a trusted hand-wash specialist who understands vinyl.
Banned Chemicals & Abrasives
Vinyl is sensitive to solvents. The following products must never touch your wrap:
- Bug and tar removers
- Wheel cleaners (even pH-neutral ones unless confirmed safe)
- All-purpose degreasers or cleaners
- Glass cleaners with ammonia or alcohol
- Anything labeled as a “solvent”
Also, never use any abrasive product. This includes polish, rubbing compound, “cleaner” waxes, or any liquid with “cutting” or “correcting” properties. They will permanently ruin the matte or gloss finish of the vinyl film.
Environmental & Tool Hazards
The environment and your tools can be just as damaging as the wrong soap.
Washing in direct, hot sun is a hazard. It causes soap and water to dry almost instantly, leaving mineral deposits etched into the wrap that are very hard to remove.
Your tools matter. Never use stiff bristle brushes, kitchen scrub pads, abrasive sponges, or old, crusty towels. They scratch. Use only fresh, clean microfiber towels and soft wash mitts.
Be mindful of fluids at the gas station. If you spill gasoline, oil, or brake fluid on the wrap, wipe it off immediately with a wet towel. Do not let these fluids sit and penetrate the vinyl.
Caring for Matte, Satin, and Gloss Finishes
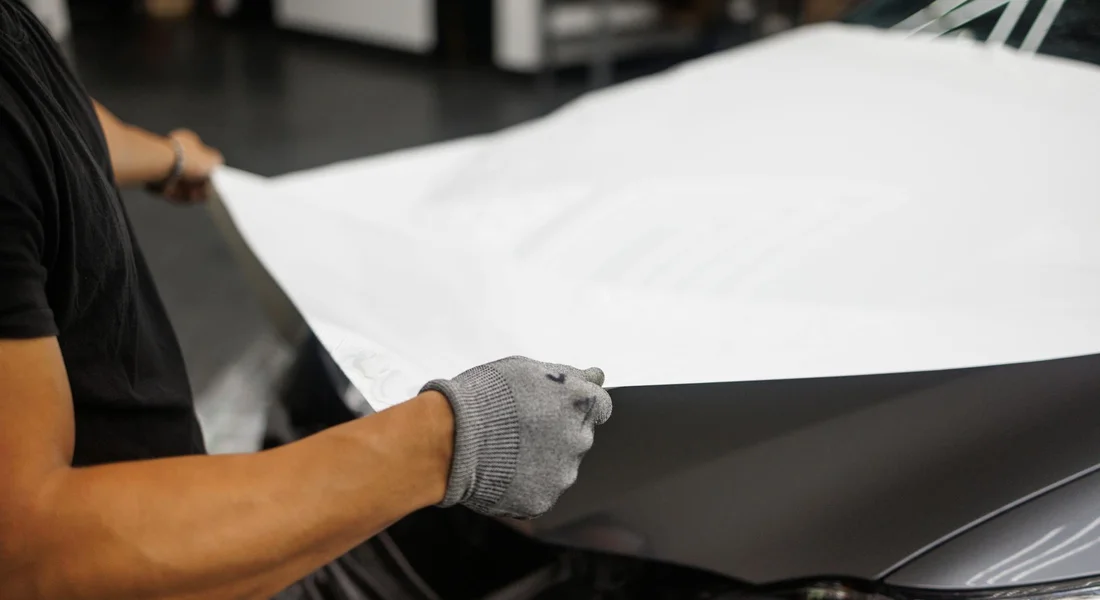
All vinyl wraps need thoughtful care, but a matte finish is the most fragile of the bunch. Think of it like a nice suede jacket versus a leather one. That flat, non-reflective surface is beautiful, but it demands a specific routine—especially compared to its glossy counterparts.
The Special Rules for Matte & Satin Wraps
The biggest rule is this: never use a standard gloss product on a matte or satin wrap. Any wax, sealant, or spray detailer made for shiny paint will leave permanent, glossy stains on the matte vinyl. I learned this the hard way on a customer’s satin-gray van where a stray droplet of my favorite spray wax created a shiny spot that wouldn’t budge. You must use cleaners and detailers labeled specifically for matte finishes.
Your wash soap matters, too. A gentle, pH-neutral matte-specific shampoo won’t leave any residue that could alter the finish. Drying is not just important, it is urgent. Water spots can etch into the porous matte surface faster than into clear coat, leaving dull mineral deposits that are tough to remove. As soon as you rinse a panel, dry it completely with a clean, soft drying towel.
Maintaining a Gloss Wrap
A gloss wrap can look just as deep and wet as the finest paint job. My friend’s red Porsche 911 has a gloss wrap, and it shines. But that shine means it shares a weakness with my black BMW. A gloss wrap will show every fine swirl and wash mark just like black paint, turning it into a “swirl magnet” under the sun. The gentle wash technique I use on the BMW is your best defense here.
You can use traditional waxes or sealants for protection on a gloss wrap, but the real secret is in the wash. Preserve that factory-fresh shine by never dragging dirt across the surface. Let the soap and water do the lubricating work, and your clean mitt or towel simply glides the grime away without scratching.
Maintenance Between Washes: Keeping Your Wrap Fresh
You might ask how often a wrapped car needs a full wash. There is no single answer, but I recommend a schedule. For a daily driver like my Honda Odyssey, a bi-weekly wash is good. For a garage-kept car, once a month works. Washing every two to four weeks prevents contaminants like road film, tree sap, and bird droppings from bonding to the vinyl and becoming permanent stains. Bird droppings, in particular, are acidic and can stain or even degrade the wrap material if left too long.
Between washes, light dust or pollen does not require a full wash. You can do a safe “quick detail.” Here is how.
- Use a spray bottle filled with a wrap-safe detailer or a rinseless wash diluted for quick detailing.
- Spray a light mist onto a fresh, clean microfiber towel, not directly onto the wrap.
- Gently wipe the dusty area, flipping the towel to a clean side often.
- Use a second dry microfiber to buff off any light residue if needed.
This method lifts dust without grinding it in. Proper, consistent care is not just about looks. Gentle washing and sensible maintenance directly extend the life of your wrap, keeping the color vibrant and the edges tight for years, not just months. It protects your investment and keeps your car looking the way you imagined it when you first had it wrapped.
Keeping Your Wrap Looking New
The best thing you can do for your vinyl wrap is to keep it clean with a gentle, two-bucket wash using a pH-neutral shampoo. This simple routine prevents abrasive dirt from grinding into the film and avoids the harsh chemicals that cause fading and brittleness. Treat the vinyl like a delicate, painted surface, not a piece of plastic trim.
Ignore this, and you will watch your vibrant color or sleek satin finish become dull, chalky, and cracked years before its time.
Industry References
- r/CarWraps on Reddit: Washing your wrapped car Question
- How to Clean & Maintain Car Wrap | 3M United Kingdom
- Tips on Cleaning a Wrapped Car (#41) | Australia, New Zealand | Arlon Graphics
- HOW TO WASH A CAR WRAP AND MAINTAIN IT AFTER – Ceramic Pro Vasai