How Do You Use Chemicals Safely on Car Paint Without Causing Damage, Swirl Marks, or Fading?
You grab a bottle to clean your car, but a quiet fear hits: will this stuff ruin the paint? I get it, because I’ve watched harsh formulas turn a glossy finish into a cloudy, scratched mess.
This guide walks you through my proven, safe methods. We will cover decoding chemical labels, matching products to your paint type, using the right application tools, and mastering the rinse to lock in shine.
Use chemicals the wrong way, and you will grind swirls into the clear coat or bleach the color right out of the paint.
Key Takeaways: The Short List for Safe Paint Chemistry
Think the strongest chemical gets the job done fastest. I used to think that too. It often leads to a dull, damaged finish.
Safe chemical use is not about the bottle’s label, but how you mix it, apply it, and remove it. Dilution, timing, your tools, and your technique form the real recipe for success.
My golden rule, learned from fixing mistakes on my black BMW, is simple. Always start with the mildest product and gentlest method. You can always step up if needed, but you can’t undo a harsh chemical’s bite.
These steps are not optional. They are the foundation.
- Proper Dilution: More concentrate is not more power. It’s waste and risk.
- Work in the Shade: Sun bakes chemicals onto paint, causing permanent stains and rapid drying.
- Use Clean, Soft Tools: A dirty mitt or a stiff brush will scratch, no matter how gentle your soap is.
We’ll get into the specifics for degreasers on wheel wells, streak-free glass, and engine bay cleaning. The same core rules apply to them all.
What Are You Actually Cleaning? Understanding Your Car’s Paint
You are not cleaning the red or the black. You are cleaning a protective layer on top of it. Modern paint is like a hard candy shell over the chocolate.
The color coat is your chocolate. The clear coat is that thin, glossy shell. Swirl marks and scratches live entirely in this clear coat layer. They are not in your car’s color. On my black BMW, every tiny scratch catches the light, creating those frustrating spiderwebs. That’s why wax care matters—using the right wax and application technique can reduce wax swirl marks and scratches. We’ll cover this topic in the next steps.
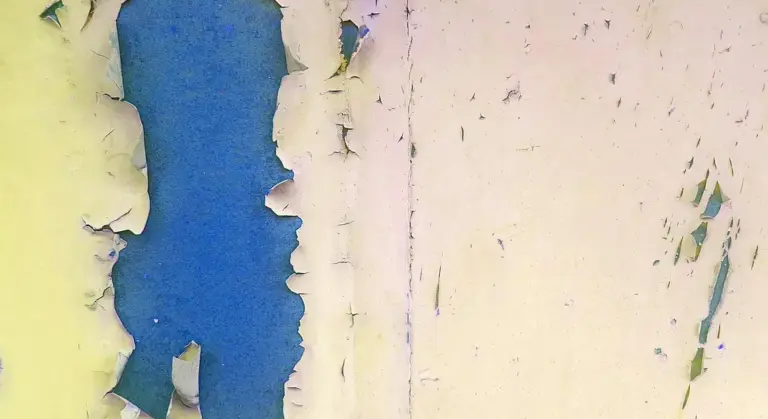
Fading, or oxidation, is that clear coat breaking down. Sunlight and pollutants wear it thin. It loses its clarity and turns hazy. On my old Miata, the single-stage red paint didn’t just get hazy, it turned a pinkish color because the color pigment itself was degrading. Repairing sun damage fading car paint is a common next step. There are options from polishing and clear-coat touch-ups to a full repaint that can restore the color and gloss.
That Miata teaches a key lesson. Most cars have that two-layer candy shell system. Some older cars, like my Miata, have single-stage paint where the color and protection are one layer. It reacts differently. It can stain easier, and when you polish it, your towel turns the color of the car.
Treat every car as if its clear coat is delicate and thin. Because it is. Every drop of chemical sits on this surface. Your safety plan starts with respecting that and using safe chemicals for the car paint and clear coat.
How to Choose Paint-Safe Chemicals: Reading Between the Lines
Think of your car’s clear coat like your own skin. You would not wash your face with dish soap or engine degreaser. Car paint needs the same thoughtful care. The pH level of a chemical tells you its personality on this scale.
A pH of 7 is neutral, like pure water. Your car wash shampoo should be neutral or very close to it. It cleans without stripping.
Alkaline products (pH above 7) are great cutters. They break down grease, road film, and biological stains. A dedicated traffic film remover or a light all-purpose cleaner falls here. They are powerful but can dull waxes and dry out paint if left too long.
Acidic products (pH below 7) are dissolvers. They eat away at mineral deposits, rust stains, and brake dust. Wheel cleaners are often acidic. They are brilliant for their job but harsh on everything else, including unprotected paint and bare metal.
Your first rule is to use chemicals made for automotive finishes, not the all-purpose bottle under your sink. A reputable detailing brand formulates for safety. A general cleaner formulates for power. The difference shows in swirl marks and faded trim.
Every professional product has a Safety Data Sheet (SDS). It is a legal document that lists hazards. You can find it on the manufacturer’s website. Do not get intimidated. Skip to Section 9 for physical and chemical properties. Look for the pH. Look for warnings about metals or plastics. It tells you what you are really working with.
Now, the direct answers you need.
Can you use degreaser on car paint? Not straight from the bottle. A heavy-duty alkaline degreaser will strip every bit of protection and can haze the clear coat. I use a diluted all-purpose cleaner on lower rocker panels of my F-150 for mud and tar, but I rinse it immediately. I never use it on the whole painted surface.
Can glass cleaner damage car paint? Yes, if it contains ammonia or solvents. These can streak into trim and degrade wax. Use a dedicated automotive glass cleaner or a simple mixture of isopropyl alcohol and water. Spray it on the towel, not the glass, to control overspray.
Dilution ratio is your most powerful safety tool. More chemical is rarely better. My black BMW, the “Swirl Magnet,” taught me this. I once mixed a panel wipe too strong. It left faint, cloudy etching in the clear coat that needed polishing to remove. Always start with the manufacturer’s recommended dilution. Use a dedicated measuring cup. Your paint will thank you.
Finally, fading is ultraviolet light breaking down paint pigments. A chemical can help prevent this. Look for sealants, ceramic coatings, or waxes that list UV inhibitors. They act like sunscreen for your car’s color. Sunlight’s UV radiation drives that fading. That’s why UV inhibitors in sealants, coatings, or waxes help protect your car’s color. My red Miata’s restoration relied on a UV-blocking sealant to keep its single-stage paint from turning pink again.
The Safe Chemical Application Protocol: A Detailer’s Order of Operations
Mixing up these steps is how swirls and stains happen. Follow this order every time. It is not a suggestion.
Step 1: The Pre-Soak & Rinse
Do not touch a dry, dirty car. Your goal is to rinse away loose grit. Use a neutral pH shampoo in a foam cannon or a bucket. The thick foam slides dirt off the surface. I do this on my salt-covered F-150 every spring. It loosens the grime so my wash mitt does not grind it in. Rinse thoroughly from the top down.
Step 2: The Contact Wash
This is where most swirls are born. You need two buckets. One with your shampoo solution. One with clean rinse water. Each bucket gets a grit guard at the bottom. After you wipe a section of the car with your high-quality microfiber wash mitt, you rinse it in the clean water bucket. The grit falls to the guard. You then reload with clean soap from the first bucket.
The two-bucket method is the single most effective habit to prevent scratches. It keeps your mitt clean. Work from the roof down, in straight lines, with light pressure. The dirtiest parts (lower doors, bumpers) are saved for last.
Step 3: Chemical Decontamination
After washing, you might feel tiny bumps. This is bonded contamination. A chemical decon tackles it. An iron remover dissolves tiny brake dust particles embedded in the paint. Spray it on a cool, wet surface. It will turn purple as it works. Rinse it off after the recommended dwell time.
A traffic film remover cuts road tar and sap. My Honda Odyssey’s sliding door gets a lot of this. Apply it, let it dwell, but do not let it dry. Rinse completely. These products are stronger than shampoo, so work panel by panel and keep the car wet.
Step 4: Mechanical Decontamination
Some grit remains. This is for the clay bar or synthetic clay towel. You must use ample lubricant. A quick detailer spray or diluted wash solution works. The lubricant lets the clay glide and pick up contaminants without scratching. Gently glide the clay back and forth. You will hear a slight squeak when it is clean. Fold the clay frequently to expose a clean surface. This step makes the paint feel like glass.
Step 5: Polishing & Correction
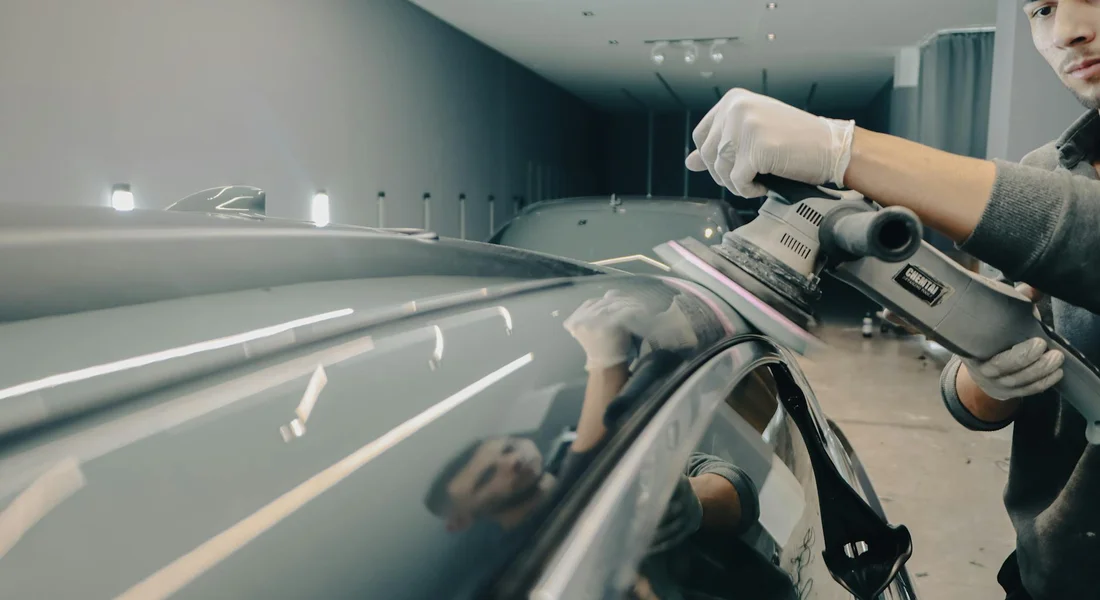
If your paint has swirls, oxidation, or etching, this is the step to fix it. It is a repair process, not a cleaning step. You use a machine polisher with a compound or polish to remove a microscopic layer of clear coat and level the defects. This is how I brought the deep gloss back to my BMW’s black paint. It requires practice and is a separate topic from safe chemical use. If your paint is already defect-free, you skip this and move to protection.
Step 6: Protection
Every previous step prepared a perfectly clean canvas. Now you apply your shield. Whether it is a synthetic sealant, ceramic coating, or a natural wax, it must bond to bare paint. Any leftover dirt or oil will block that bond. Apply your chosen product thinly and evenly to one panel at a time. My Porsche’s Paint Protection Film gets a ceramic topper for easy cleaning. My Miata gets a hearty sealant for UV protection. This layer is what repels water, resists stains, and provides that deep shine.
Skipping straight to wax without proper cleaning just locks contaminants under your protection, guaranteeing a dull finish. To prep properly, use a pre-wax cleanser or paint cleaner to lift grime. This ensures the surface is ready for wax. Follow the order. Your results will prove it works.
Paint Damage Prevention: Common Mistakes That Cause Swirls and Fading
I learned most of this the hard way. My black BMW is a permanent record of every shortcut I ever took. Avoiding damage isn’t about magic products. It’s about avoiding simple, common errors.
Mistake: Washing in Direct Sunlight or on Hot Paint
Think of your car’s paint like your skin on a hot day. Water and soap dry almost the instant they hit the surface. This leaves behind concentrated soap residue and minerals from your water, which bake into the clear coat as stubborn streaks and water spots. Always work in the shade on a cool surface to give yourself time to rinse chemicals away before they can dry and cause damage.
Mistake: Using Dirty Towels, Sponges, or Brushes
Your wash mitt isn’t the problem. The invisible dirt trapped in it is. That dirt is abrasive grit. When you rub it across the paint, you’re essentially sanding your clear coat with thousands of tiny particles. This creates the spiderweb scratches we call swirl marks. You must use a dedicated, clean microfiber wash mitt and the two-bucket method (one for soap, one for rinse) to trap grit away from your paint. I keep a separate set of towels just for my wheels, because brake dust is the worst grit of all.
Mistake: Improper Dilution of Concentrates
More is not better. A wheel cleaner diluted too strong will eat into your clear coat. A paint prep solution too weak won’t strip old wax, making your new sealant fail. Follow the bottle’s dilution instructions precisely using a dedicated measuring cup, never a guess. For heavy degreasers on paint, you often need to dilute them far more than the label suggests for other uses.
Mistake: Letting Chemicals Dry on the Paint
This is the silent killer. Wheel acid, iron removers, bug sprays, even shampoo suds. When they dry, they become active on the surface far longer than intended. This can etch the clear coat, leaving dull, permanent marks. Work on one panel at a time, and never let a chemical sit to the point where it starts to dry or change color. Keep the surface wet and rinse it thoroughly.
Mistake: Using Aggressive Chemicals on Delicate Areas
Chemicals are formulated for specific surfaces. Tire shine will leave shiny, oily streaks on paint. A standard glass cleaner with ammonia will permanently stain and dry out matte black plastic trim. Read the label and use the right tool for the job. If it says “for tires,” it does not belong on your paint.
Mistake: Not Rinsing Thoroughly Between Chemical Steps
Imagine washing your hair with shampoo, then applying conditioner without rinsing. It doesn’t work. Detailing is the same. If you use an iron remover (which turns purple) and then spray on a tar remover without rinsing, you’re mixing chemicals on the paint with unknown results. Always do a complete, thorough rinse with clean water after using any dedicated chemical before moving to the next product. This prevents cross-contamination and unexpected reactions.
Specific Chemical Scenarios: Your Burning Questions Answered
You have the bottle in your garage right now. Here’s what you actually need to know.
Can I use a degreaser like Super Clean or LA’s Totally Awesome on car paint?
Yes, but you must treat it with extreme respect. These are powerful, alkaline cleaners. For painted surfaces, I use a dilution of at least 10:1 (water to product), and often 15:1 for newer paint. Spray it on a cool, wet panel, agitate gently with a microfiber, and rinse it off completely within 60 seconds. Never let it dry. Test in an inconspicuous area first. It will strip any wax or sealant, so plan to re-protect the area afterwards.
Is it safe to use glass cleaner on car paint?
No. Do not use it as a quick detailer. Even ammonia-free versions contain solvents and surfactants meant for glass. On paint, glass cleaner will likely strip your protective wax or sealant and can smear badly on modern soft clear coats. It offers zero lubrication, so you risk creating swirls. Use a product designed for painted surfaces.
What about cleaning an engine block?
This is about protecting the painted surfaces around the block, like the fenders, firewall, and hood. “Engine degreasers” are for the block and components. Before you spray any degreaser, pre-rinse the entire engine bay with low pressure water, then liberally spray the surrounding painted surfaces with your regular car wash solution to act as a barrier. After applying the degreaser, rinse the entire area thoroughly, focusing the degreaser rinse away from the paint. Dry the painted surfaces immediately.
How to handle a broken window with paint-safe tape.
If you need to tape plastic over a broken window, use a true automotive painter’s tape like 3M blue tape. It has a low-tack adhesive designed for short-term use on paint. Duct tape or masking tape will leave a horrible residue. Apply it to clean, dry paint, and remove it as soon as possible by pulling it back on itself at a 45-degree angle, not straight up. Any leftover adhesive should be removed with a dedicated adhesive remover for car paint, not scraped off.
Dealing with bug splatter (Tesla) and road tar (F-150).
For the bug splatter on my Tesla’s flat front end, I use a dedicated bug and tar remover. I spray it on, let it dwell for the recommended minute or two (never letting it dry), and then gently wipe it away with a soaked microfiber towel. The key is to soften the bugs without scrubbing, as their crushed bodies can be abrasive. For the thick road tar on my F-150’s rocker panels, I apply a tar-specific solvent with a microfiber applicator, allowing it to dissolve the tar so it can be safely wiped away. For both, I immediately wash and re-wax the area, as these strong solvents leave the paint bare.
Beyond the Paint: Protecting Yourself and Your Car’s Other Surfaces
Thinking about your paint is smart. Your hands, lungs, and the other materials on your car deserve the same consideration. Safe chemical use is a two-part job: protecting you and protecting everything the chemicals might accidentally touch.
Personal Protective Equipment (PPE): Your First Line of Defense
I never detail without gloves. My hands are my tools, and harsh degreasers or acidic wheel cleaners don’t care about your skin. A box of disposable nitrile gloves is cheap insurance against chemical burns and dried-out skin. For your eyes, a simple pair of safety glasses stops a accidental spray-back from turning into a trip to the emergency room. I learned that lesson years ago with a strong bug remover.
For serious jobs in tight spaces, a respirator isn’t overkill-it’s necessary. If you’re using a heavy-duty interior cleaner or an acid-based wheel brightener inside your garage with the door closed, the fumes can be overwhelming. A basic respirator with organic vapor cartridges lets you work safely without getting lightheaded. My rule is simple: if the smell makes you step back, you should be wearing a mask.
Safe Chemical Handling: From the Shelf to the Drain
How you store and get rid of chemicals matters just as much as how you apply them. Keep all your bottles out of direct sunlight and away from extreme heat or cold. A hot garage can change a product’s chemistry, making it less effective or even dangerous. Always, always read the label for storage tips.
When you’re done, the rinse water and dirty towels are now contaminated. I use a large, absorbent mat under the car to catch the initial runoff. For the final dirty water, never let it run straight into a storm drain. Wash your car on a grassy area if you can, so the ground can filter the water, or collect it with wet/dry vacuum for proper disposal. It’s a small step that makes a big difference for the local waterways.
Protecting Trim, Plastic, and Rubber
This is where a lot of swirl marks on paint actually start. A strong cleaner or polish can dry out black plastic trim, leaving ugly white stains or a faded, chalky look. On my Ford F-150, the textured black running boards are a prime target for overspray.
The fix is easy. Before you apply any chemical to a painted panel next to trim, pre-treat the trim. Wipe a light coat of a dedicated trim protectant or even a simple spray wax (made for plastics) onto the rubber and plastic. This creates a barrier. If a chemical does get on it, you can wipe it off before it soaks in. For precision work like polishing, a roll of painter’s tape is your best friend for masking off sensitive areas.
Keeping Chemicals Off Glass and Wiper Blades
Wax or sealant on glass creates a hazy, smeary nightmare when it rains. Compound or polish residue on windshield wipers will ruin the rubber, making them chatter and streak. I make it a habit to clean glass first with a dedicated glass cleaner. That removes any oils so I can see what I’m doing. Then, before I polish or wax the surrounding paint, I wipe the wiper blades clean with isopropyl alcohol and fold them away from the windshield.
A quick wipe of the glass with a clean, damp microfiber after you’re done with the paintwork catches any stray product before it dries. On my Tesla, with its massive glass roof, this final check is a non-negotiable part of the process.
A Final, Empathetic Note
This might feel like a lot of rules. It’s not. It’s just a good routine. When I started, I ruined trim on my old Honda and got polish in my eye. You learn. Start with one new safety habit each time you wash your car. Be patient with yourself. Your paint, your health, and your whole car will be better for it.
Final Thoughts on Chemical Safety for Your Paint
Your single best defense is always the chemical itself-choose the mildest product for the job and apply it with the right tool. Let that principle guide every choice, from your pH-neutral shampoo to your final spray sealant, and you will protect your vehicle’s finish for years.
Ignore these steps, and you will be chasing swirl marks, etching, and a dull, faded clear coat instead of enjoying a brilliant shine.
Further Reading & Sources
- Health Risks Associated with Auto Body Painting Materials
- Automotive Coatings – American Chemistry Council
- Health Risks Associated With Auto Body Painting Materials | It Still Runs
- Water-Based Automobile Paints Potentially Reduce the Exposure of Refinish Painters to Toxic Metals – PMC
- What Substances Can Damage Car Paint
- Safety and Sustainability with Automotive PaintColorBlog – First Auto Color
Max Gunther
Max is an automotive enthusiast having worked as a car mechanical and in interior detailing service for over 25 years. He is very experienced in giving your old car, a new fresh vibe. He has detailed many cars and removed very tough smells and stains from all kinds of cars and models, always ensuring that his work and advice helps his customers. He brings his first hand experience to his blog AutoDetailPedia, to help readers breath new life into their car interiors.