How Do You Repair Scratches, Clean, and Restore Plastic Car Bumpers Without Damaging the Finish?
That fresh scratch on your bumper is more than a cosmetic flaw; it’s an open door for grime and UV damage if handled poorly. I’ve felt that same hesitation, staring at a scuffed bumper on my F-150 and wondering if a DIY fix would make it worse.
Let me show you the exact process I use, from my daily drivers to my show cars. We will cover the safe way to clean without harming existing coatings, how to repair scratches from light scuffs to deeper gouges, and the methods to restore a deep, lasting shine.
Use harsh chemicals or the wrong buffing pad, and you can permanently haze the plastic, leaving it looking dull and aged.
Key Takeaways: Your Bumper Fix Cheat Sheet
Before we start, let’s set realistic expectations. This isn’t a five-minute wipe down. It’s a proper fix. I keep this list on a notecard in my shop to remind myself and my clients what they’re signing up for.
- Overall Difficulty: Medium. You need patience, not a professional certification.
- Time Commitment: 1 to 3 hours for a single bumper. Rushing causes more damage.
- Cure Times Matter: Some plastic restorers and paints need 24 hours to fully harden. Plan your workday around this.
- Core Principle: Diagnose first, then treat. You wouldn’t slap a bandage on a broken arm.
The order you do things is non-negotiable. Skip a step and you’ll seal in dirt or make scratches worse. Here is the strict sequence:
- Assess & Clean
- Decontaminate
- Repair Scratches
- Restore & Protect
First, The Diagnosis: What Kind of Plastic and Scratch Are You Dealing With?
Can a plastic car bumper be repaired? Yes, absolutely. I’ve fixed hundreds. But the method depends entirely on two things: the type of plastic and the depth of the scratch. That includes repair scratches on a car bumper, which can range from a quick polish for minor scuffs to more involved fixes for deeper gouges. Understanding the bumper material helps ensure a seamless finish.
Start with the fingernail test. Gently drag your fingernail across the scratch. Does it catch? If your nail drops into the groove, that scratch is through the clear coat and into the color layer or plastic itself. If your nail glides right over it, you’re only dealing with a surface mark in the clear coat. This test tells you if you need a simple polish or a full touch-up.
Next, identify the plastic. You have two main types:
- Painted Plastic: This is your car’s color. The bumper is primed, painted, and cleared just like the metal body. My Honda Odyssey’s grey bumper is a perfect example. A scratch here means you’re fixing paint, not raw plastic.
- Raw, Unpainted Plastic: This is often textured black trim. Think of the lower bumper covers or wheel arches on my Ford F-150. Sun and chemicals turn it from a rich black to a faded, chalky grey. Here, you’re restoring the plastic’s color and flexibility, not a painted surface.
For this guide, you don’t need to know if it’s polypropylene or polyurethane. Just know if it’s painted or not. That decision changes your entire product shelf. Treat a painted bumper like paint. Treat a raw plastic bumper like, well, plastic.
The Safe Cleaning Protocol: How to Clean Plastic Bumpers Without Damage
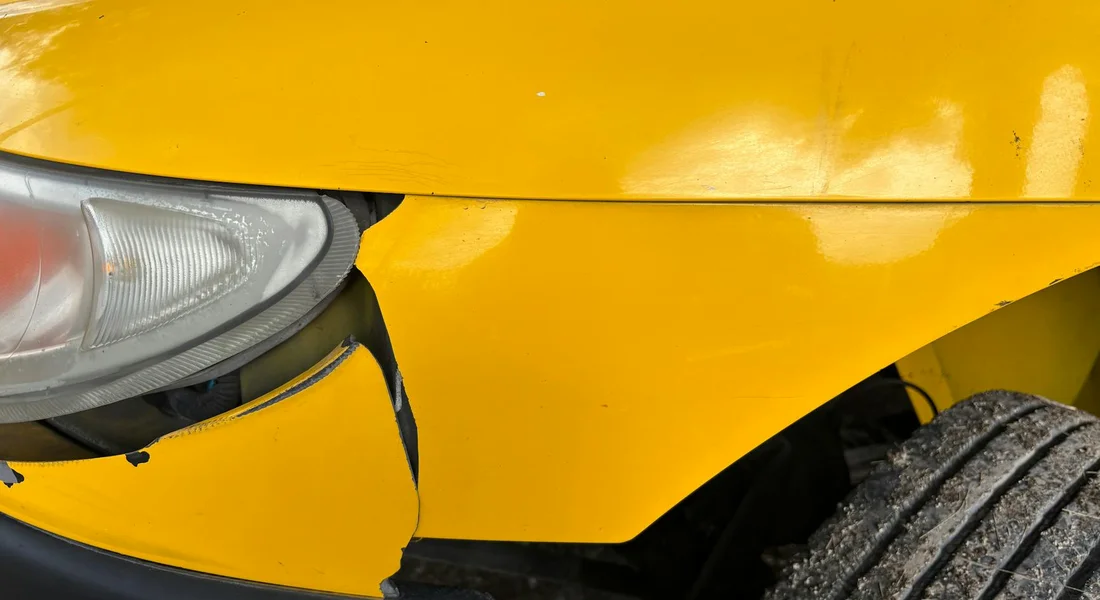
Forget about scratches for a minute. Your first job is to get the bumper clean. I mean really clean. A proper wash fixes about 90 percent of what people think is damage. This is true for shiny painted bumpers and the rough, unpainted plastic trim. If the scratches persist, you might need a paint touch-up for bumper scratches.
Let’s talk about how to clean black plastic car bumpers. You need to be kind to them. Harsh degreasers or strong all purpose cleaners are the enemy. They suck the natural oils right out of the plastic. What’s left is a dry, chalky, faded shell. I made this mistake on my Ford F 150. After one wash with a powerful cleaner, the dark grey trim looked pale and powdery. It was a struggle to restore them.
Here is the safe method I use on every vehicle in my driveway.
- Start with a gentle, pH neutral car shampoo. Mix it in a bucket of cool water.
- Use a soft, plush microfiber wash mitt. Soak it in the soapy water.
- Wash the bumper using the two bucket method. One bucket has your soapy water. The other has clean water to rinse your mitt after each pass. This traps dirt and keeps you from grinding it into the surface.
- Rinse everything off with a steady stream of clean water.
Painted plastic bumpers, like the front end of my Tesla, often have invisible grime. After the wash, spray on an iron remover. It will react with brake dust and turn purple. Rinse it off. Then, use a detailing clay bar on the painted sections. Gently slide the lubricated clay over the paint to pull out stubborn contaminants that washing alone cannot remove. Listen to me on this. Never drop the clay bar. If it hits the ground, throw it away. A dirty clay bar is a scratch maker.
Common mistakes that will set you back.
- Using dish soap. It strips away protective waxes and dries out plastics.
- Washing in direct sun. Water and soap dry too fast, leaving ugly spots.
- Using abrasive pads on textured plastic. They fray the surface and trap more dirt next time.
DIY Scratch Repair: Your Toolkit for Every Type of Mark
With the bumper clean and dry, you can see the real problem. Follow this guide based on what you find.
For Light Scuffs and Swirls on Painted Plastic:
These are the fine spiderwebs you see in sunlight. They feel smooth to your fingernail. My black BMW 3 Series is covered in them. Its bumper was a swirl mark museum from bad washes.
A mild polishing compound is your tool. Put a dime sized drop on a soft foam hand applicator. Work it in small, overlapping circles. For a bigger area, a dual action polisher saves time. Your first move is always a test spot in a hidden corner to check for haze or damage. If you use the polisher, keep the speed low. I use setting 3 or 4. You must keep the pad moving. Stopping creates heat. Too much heat can melt or burn the plastic. I learned this the hard way on my BMW, leaving a cloudy patch I had to fix all over again.
For Deeper Scratches (that catch your nail) on Painted Plastic:
If your nail catches in the groove, the scratch is deep. It has gone through the clear coat. Bumper scratch repair kits are built for this. A typical kit has a cleaner, a filler, color paint, and a clear coat. The good part is they are cheap and easy to find. The bad part is color matching is often imperfect, and the finish can look bumpy.
For a single chip or a precise scratch, I go for OEM touch up paint from the dealer. It comes in a little bottle with a brush. You dab it into the scratch, let it dry, and add another layer. It takes patience. When you’re addressing paint chips, this same method works well. Apply thin layers until the chip is filled and smooth.
People ask about bumper scratch repair cost. A DIY kit costs between twenty and fifty dollars. A professional repaint for a whole bumper can run five hundred to a thousand dollars. For a few deep scratches, DIY is fine. For long gashes, a pro might be worth it.
For Faded, Chalky, or Stained Unpainted Plastic:
This is not a scratch repair. This is a restoration. Unpainted plastic, like the trim on my F 150, gets beaten by the sun. It turns grey and chalky. You have three choices, each lasting longer than the last.
Surface cleaners just wipe off dirt. They do not last. Dye based restorers have pigments that soak into the plastic. They bring back the deep color for several months. Ceramic trim coatings are the top choice. They create a hard shield that can protect the plastic for a year or more.
My F 150’s trim was a faded mess. I used a dye based restorer. After a thorough clean, I applied it with a foam pad. The grey trim turned a rich, dark charcoal right before my eyes. A simple wipe on product is fast but needs redoing every season, while a ceramic coating demands more prep work for a result that lasts.
Restoration and Protection: Making Your Fix Last
You just cleaned or fixed a scratch. The job is not done. Protecting the surface is what turns a quick fix into a long term solution. Without it, sun, dirt, and weather will undo your work fast.
For painted plastic bumpers, like the ones on my BMW or Ford, you need a barrier on top of the clear coat. I use a spray sealant. It goes on fast and bonds well to plastic. A good spray wax works too, especially on my F 150 when I need protection fast after washing off mud. Apply your sealant to a cool, shaded surface with a clean microfiber cloth, wiping it on thin and even. You will see the paint pop with a deeper gloss, and water will bead up for months.
Unpainted black trim is different. That grey plastic on older cars fades because the sun eats the oils inside. For unpainted trim, you must use a dedicated UV protectant trim sealant, not regular wax. These products soak in, restoring the dark color and blocking ultraviolet rays. The trim on my Odyssey used to look chalky. A trim sealant brought it back to a rich, dark grey and kept it that way.
If you hate the idea of new scratches, there is a stronger option. Paint Protection Film, or PPF, is the ultimate shield against scratches and chips. It is a clear, durable vinyl layer applied to the paint. The front bumper of my red Porsche 911 is covered in it. Road grit and bug splatter wash right off without leaving a mark. It is an investment, but for a car you love, it saves the paint underneath.
Simple habits keep your bumper looking good. Wash with a two bucket method and a soft mitt to prevent new swirl marks. Dry with a plush drying towel to avoid water spots. For unpainted trim, reapply your trim sealant every few months, or whenever water stops beading. Park in the shade when you can. These small steps make a big difference.
When to Call a Professional Detailer or Body Shop
There is no shame in calling for help. Knowing your limits keeps your car from worse damage. Stop the DIY project if you see a large, deep gash down to the colored plastic, a physical crack, or clear coat that is peeling off in sheets. These are body shop territory. If your hands are shaky or you just feel unsure, that is your sign to hire a pro.
People often search for “scratch repair near me” and get confused. You need the right expert. A skilled detailer specializes in paint correction, which is polishing out scratches in the clear coat. Understanding the scratch repair paint correction workflow helps you know what to expect at each step. It covers assessment, polishing, and protection, guiding you to the right service. They use machines to remove haze and swirls, like I did on my black BMW. A body shop technician fixes structural damage and resprays paint. For a deep scratch that catches your fingernail, start with a detailer. For a crack or a dent, go straight to a body shop.
Costs vary by city and shop. A professional polish for a bumper might cost $150 to $300, while a full respray at a body shop can range from $500 to over $1000. The price depends on paint color, labor rates, and how much blending is needed. Get a few estimates. A good pro will explain exactly what they will do for the money. If you’re trying to figure out the cost to paint a bumper, remember that these factors can significantly affect the final price.
Putting the bottle down and making a phone call is smart. Recognizing when a job is beyond your tools or confidence is the mark of a car owner who truly cares. Your vehicle will thank you, and you will have peace of mind.
Long-Term Care for Restored Plastic Bumpers
From my kid-hauler Odyssey’s scuffed bumper to the 911’s sleek rear valence, the key is always the same: clean with plastic-safe products, repair scratches methodically, and lock in your work with a quality sealant. This routine keeps the material supple and the color true, turning a weekend project into a lasting fix.
Forget the sealant, and UV rays and road chemicals will quickly bring back the haze, forcing you to start all over again.
Related Guides and Information
- Plastic Bumper Repair : 6 Steps (with Pictures) – Instructables
- Amazon.com: Plastic Bumper Repair Kit
- r/projectcar on Reddit: Repair of a bumper cover
- r/Autobody on Reddit: How to repair bumper plastic
- How to Repair Flexible Bumpers – A guide from 3M
- Can you properly fix a plastic bumper that has a rip in it?| Grassroots Motorsports forum |
- Can a cracked bumper be repaired without replacing it entirely, such as using epoxy? – Quora
Max Gunther
Max is an automotive enthusiast having worked as a car mechanical and in interior detailing service for over 25 years. He is very experienced in giving your old car, a new fresh vibe. He has detailed many cars and removed very tough smells and stains from all kinds of cars and models, always ensuring that his work and advice helps his customers. He brings his first hand experience to his blog AutoDetailPedia, to help readers breath new life into their car interiors.