How Much Does It Cost to Paint a Car Bumper? (Complete Price Guide for DIY, Professional & Insurance)
That fresh scrape on your bumper has you worried about the repair bill. I’ve been there, staring at my own BMW’s black paint or my F-150’s bumper, wondering where to even start.
In this guide, I’ll walk you through the real cost of a DIY bumper paint job, what professional auto body shops typically charge, and how insurance claims process and pay for bumper repairs.
Go in blind, and you risk a paint job that doesn’t match, wears poorly, and hurts your car’s value.
Key Takeaways: Bumper Painting Costs at a Glance
Before we get into the weeds, here is the basic financial landscape for a bumper repaint.
| Method | Typical Cost Range | What You Get |
| DIY (Your Garage) | $150 – $600 | Materials only. Your labor is free, but the risk of a poor finish is high. |
| Professional Body Shop | $300 – $1,500+ | Labor, expertise, warranty, and a factory-like finish (at the high end). |
| Insurance Claim | Your Deductible | Full professional repair, but you pay your policy’s deductible amount. |
I need to be straight with you. Painting a bumper is a high skill, equipment heavy job. A perfect DIY result is very rare on your first try.
The actual painting is the final 20% of the job. The other 80% is the meticulous prep work and the patience required for proper curing. That silent, time consuming prep is what you are really paying a professional to do.
The Real Cost of a Professional Bumper Paint Job
When a shop gives you an estimate, they are billing for several key things. It is not just a can of paint.
- Labor Hours: This is the biggest cost. A technician must disassemble (remove trim, lights, sensors), repair dents, sand, mask, clean, and spray. This can be 4 to 8 hours of skilled labor.
- Paint Materials: Basecoat, primer, and clear coat are expensive. Quality paint can cost $200 per pint or more for some colors.
- Clear Coat: This is the durable, glossy top layer. A good shop applies multiple coats and uses a high solid content clear for longevity.
- Shop Supplies: This line item covers sandpaper, masking tape, plastic sheeting, tack cloths, cleaner, and adhesion promoter.
There is a massive gap between a basic “spray and pray” shop and a quality detail or body shop.
A cheap shop might scuff the old paint and spray over it. A quality shop will strip it to bare plastic, apply a flexible primer and adhesion promoter, color sand between coats, and blend the new paint into the fenders and quarter panels for an invisible match.
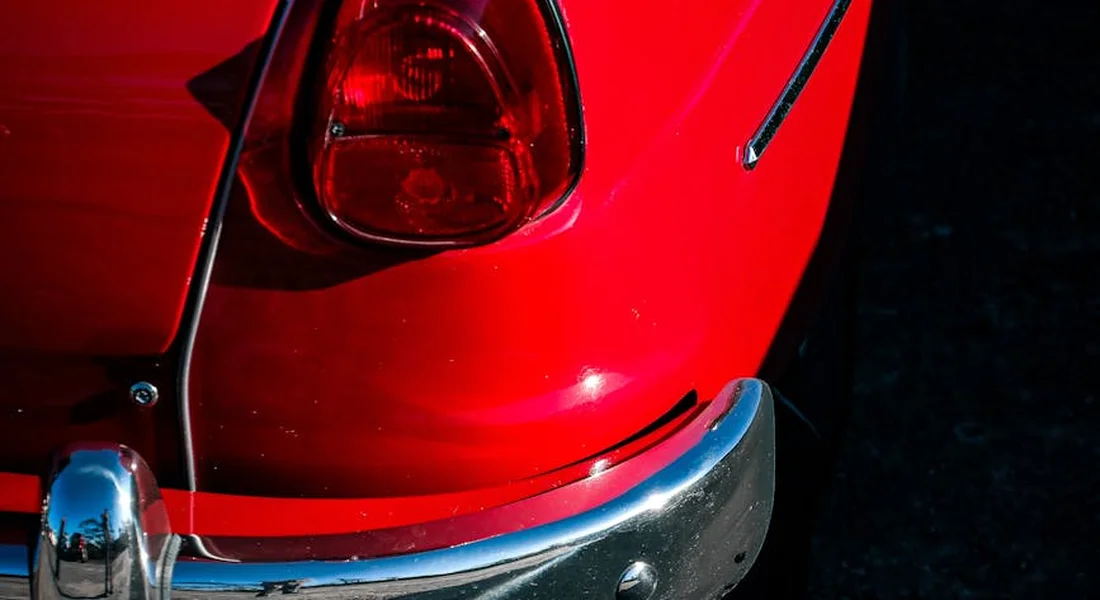
The color of your car is a major price factor. A plain white is simplest. A metallic or pearl tri coat (like many white, red, or silver cars) costs more because it has multiple layered color coats. Reds are often more expensive due to pigment cost and fade factors.
Bumper material matters too. Most modern bumpers are flexible plastic. They require special flexible primer and adhesion promoter so the paint does not crack when the bumper bends. This adds cost.
People often ask how long do car paint jobs take. For a single bumper done right, plan on 2 to 3 days at a professional shop. The paint and clear coat need proper time to flash and cure between layers. Rushing this leads to soft paint, solvent pop, or poor adhesion.
What a Pro Does That You Probably Can’t
Here are the critical steps a professional takes that most DIY attempts will miss or shortcut.
- Proper Substrate Repair: They fix dents and deep scratches with plastic welding or filler so the surface is perfectly smooth before any paint is applied.
- Plastic Adhesion Promoter: This is a clear chemical primer that bites into the plastic. Skipping it is a guarantee your paint will peel off in a year.
- Professional Environment: A spray booth is a sealed, dust free, temperature controlled room with massive exhaust fans. It is impossible to replicate this in a driveway. Dust and bugs love wet paint.
- Precision Color Matching: Pros use a spectrophotometer to scan your car’s faded paint, then a computer formula adjusts the new paint to match perfectly. A can of touch up paint from the auto parts store will never match.
- Paint Blending: They do not just paint the bumper. They feather the new color into the adjacent panels (fenders, hood) so the color transition is seamless to the human eye.
My Jet Black BMW 3 Series is the perfect example of why this matters. Black, especially BMW’s metallic Jet Black, shows every flaw. A bumper painted off the car, even with the “right” code, will look like a different shade under light. Only blending makes it disappear. This is the difference between a repair you see and one you do not.
The DIY Bumper Painting Price Tag: Tools, Time, and Truth
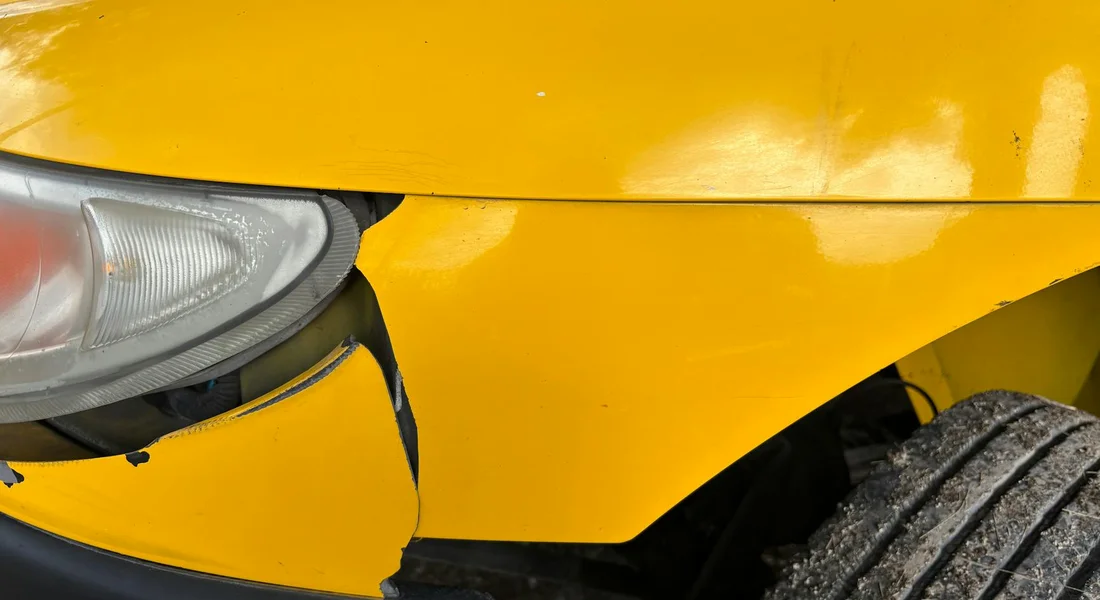
Let us get real about what a proper DIY paint job on a bumper actually costs. I am not talking about a rattle can from the parts store. I mean the full process that has a chance of looking decent and lasting more than one season. For my BMW’s front bumper, the one I call the “Swirl Magnet,” I wanted it done right. The real cost is in all the little things you forget to buy.
Here is a full breakdown of what you will need for a proper one-bumper project.
- Prep & Sanding Supplies: Sandpaper (you will need multiple grits: 400, 600, 800, 1000, 1500, 2000, 3000). A sanding block or dual-action sander. Tack cloths to wipe dust. A gallon of wax and grease remover. Painter’s tape and masking paper or plastic. Figure $75 to $125.
- Safety Gear (Non-Negotiable): A proper respirator with organic vapor cartridges. Nitrile gloves. Safety glasses. This is about your health. About $40 to $60.
- Paint Materials: Adhesion promoter for plastic. Aerosol or liquid primer. Your basecoat paint (color). Aerosol or liquid clear coat. If you buy pint kits from an automotive paint supplier, this is $150 to $300 depending on your car’s color.
- Application & Finishing Tools: An HVLP spray gun and a capable air compressor if you are not using aerosols. Microfiber towels for wiping. A polisher and compounds for the final wet sanding and buffing stage. If you do not own these, renting or buying entry-level tools adds $200 to $500.
A real DIY attempt on a single bumper can easily cost between $500 and $1,000 once you tally every supply, and that is before you account for any mistakes.
The Product Tier List for DIY Bumper Paint
Not all paint jobs are the same. Your goal defines your budget and your result. I have tried methods across this spectrum on my own cars.
Budget/Drive-Through Tier: This is the aerosol can touch-up paint you find at an auto parts store. It costs $15 to $30. I keep one for my Miata’s small rock chips. It is only good for spots smaller than a dime. Trying to cover a whole bumper will look blotchy, will not have proper UV protection, and will fail quickly. It is a temporary fix, not a repair.
Enthusiast Tier: This is the minimum for a real, lasting result. It involves an HVLP spray gun, a decent compressor, and proper automotive paint systems mixed for your car’s code. You buy primer, basecoat, and clear coat in liquid form from a supplier like Sherwin-Williams or PPG. The paint alone is $150+. The spray equipment is another $300+ if you are starting from zero. This tier requires a clean, dust-controlled space like a garage, and a willingness to learn spray technique. My F-150’s bumper was done at this level.
Show Car Tier: This approaches a professional shop setup. Think professional-grade spray guns like SATA, a large air compressor with a dryer, a dedicated spray booth or a meticulously sealed garage, and high-end polishers like Rupes for the final finish. The paint is custom-mixed, often with premium ceramic clear coats. The investment here is several thousand dollars, justified only if you plan to paint multiple cars or demand absolute perfection. This is the level I use for corrective work on the Porsche’s panels.
The Hidden Cost: Your Time and the Learning Curve
Money is one thing. Your hours are the true investment. People ask “how long do it take to paint a car” bumper, and the honest answer is measured in days, not hours. Rushing guarantees a bad finish.
Let us walk through the clock for a first-time DIYer doing it right.
- Removal & Prep (4-6 hours): Safely removing the bumper. Deep cleaning it with degreaser. Sanding the entire surface. Masking off areas. Wiping it down with tack cloths. This step is 80% of the work.
- Priming & Painting (3-5 hours, plus dry time): Applying adhesion promoter and primer. Sanding the primer. Applying the basecoat in multiple light coats. Applying the clear coat. Each layer needs proper flash-off time. You need a clean, still environment the whole time.
- Finishing (4-8 hours): This is where “how long detailing a car take” comes into play. After the clear coat fully cures (often 24-48 hours), you will likely need to wet sand to level orange peel, then use a polisher and compound to restore gloss, then apply a protective sealant. This is a full detailing session by itself.
Your first attempt will almost certainly have flaws like orange peel texture, runs in the clear coat, dust nibs stuck in the paint, or a slight color mismatch. Painting plastic bumpers is hard. The shape has curves and edges that catch too much paint. The flexible plastic requires specific products. Matching modern metallics or tri-coat pearls (like my Tesla’s white) is a skill in itself. Be ready to accept a “10-foot job” where it looks great from 10 feet away, but shows its DIY origins up close. That is not failure, that is a realistic win for a first-timer.
Paint Damage Prevention: Common DIY Bumper Painting Mistakes
Painting a bumper yourself can save you real money. I’ve done it in my own garage. But I’ve also made the mistakes that teach you what not to do. A bad paint job looks worse than a scuffed bumper. Here are the classic errors that ruin a project before the first coat is even dry.
1. Skipping the Adhesion Promoter
Your car’s bumper isn’t metal. It’s plastic. Spraying primer or paint directly onto bare plastic is like painting over a greasy pan. The paint will seem fine at first. In a few months, it will crack and peel off in sheets. I learned this the hard way on an old bumper for my 2018 F-150. You must use a plastic adhesion promoter as a bridge between the bare plastic and your primer; it’s a non-negotiable step. It’s a simple spray can step. Clean the plastic, spray a light mist of promoter, let it get tacky, then start your primer.
2. Painting in a Dusty Garage
Your garage floor has dust. Your workbench has dust. The air itself has dust. All of it wants to land in your wet paint. I made this mistake on my first Miata bumper, and the finish felt like sandpaper. You need to control your environment by wetting the floor to trap dust and working in still air. Turn off fans and HVAC. Let everything settle for an hour before you start spraying. A makeshift spray booth with plastic sheeting helps more than you think.
3. Improper or Skipped Sanding
Sanding is boring. It’s also the foundation. If you don’t sand the old paint smooth, every scratch will telegraph through your new layers. If you skip sanding between primer and base coat, the finish will be rough and won’t stick well. Always sand with the correct grit, moving up progressively from 400 to 800 or higher for a smooth base, and never skip sanding between coats. Your hand should glide over the surface feeling nothing but smoothness.
4. Forgetting the Clear Coat
The color coat, or base coat, is not durable. It’s dull and soft. I’ve seen DIY jobs stop here, and the color fades in weeks. Clear coat is the protective, glossy shield for your color; skipping it guarantees a fast failure. Apply it in multiple light, even layers. It’s what gives that deep, wet look and protects against UV rays and minor scratches.
5. Rushing Cure Times
Paint and clear coat feel dry to the touch in an hour. They are not cured. Reassembling the bumper or exposing it to weather too soon will cause dents, imprints, and softening. Follow the product’s full cure time religiously, even if it means leaving the bumper untouched for several days. Patience is the final, most important tool in your kit.
The Non-Negotiable: Your Safety
These paints and solvents are dangerous. The fumes can give you a headache at best and cause long-term harm at worst. The particulates are terrible for your lungs. Always wear a proper, sealed respirator with organic vapor cartridges, not just a dust mask, and work in a highly ventilated area. I keep a dedicated respirator on my detailing shelf just for paint work. Your health is worth the $40 investment.
Insurance Claims for Bumper Paint: When It Makes Sense
Let’s talk about insurance. It’s there for a reason, but using it for paintwork is a specific calculation. From my time in shops, I saw many people get this wrong, either filing when they shouldn’t or being afraid to file when they should.
Insurance typically steps in for sudden, specific incidents. Think about a fender-bender in a parking lot, a hit-and-run, or deliberate vandalism like a keyed bumper. If the damage is a direct result of a covered event-an accident, a collision, or malicious acts-your policy will usually cover the repaint after you pay your deductible. It’s not for general wear, sun fade, or rock chips accumulated over years.
Here’s the part you must understand clearly. Your deductible is your financial responsibility. If your deductible is $1,000 and the repair estimate is $1,200, you’re paying $1,000 and the insurance covers $200. You must decide if that makes sense. More importantly, filing a claim can affect your premium at renewal. A single claim might be forgiven, but a second can label you a higher risk. I’ve had clients see their rates jump 20% or more after a small claim they’d have been better off handling themselves.
If you decide to proceed with a claim, do not just go to the first shop the insurance appraiser suggests. Get at least two, preferably three, written estimates from reputable body shops you trust. This isn’t just about price. When you get those estimates, ask pointed questions. Will they remove the bumper to paint it? A proper job requires removal to paint the edges and avoid overspray on adjacent panels. What quality of paint will they use? Insist on OEM-quality materials-the same type of basecoat, clearcoat, and primers the factory uses. Some insurance-driven shops may use lesser “capable” equivalents to save money, which can affect color match and long-term durability.
For small scratches, scuffs, or scrapes that only break through the clear coat, paying out-of-pocket is almost always the smarter long-term move. Consider the math: a $400 scratch repair avoids a $1,000 deductible and potential premium increases for years. My F-150’s bumper has a scrape from a trail gate. It’s noticeable to me, but not worth a claim. I’ll touch it up and live with it, saving my insurance for a real catastrophe. Treat your insurance like a safety net for major falls, not a convenience for stubbed toes.
The Waiting Game: How Long Until Your Bumper is Really Done?
You just got your bumper back from the shop or finished the last coat in your garage. It looks wet and perfect. Your first instinct is to touch it. Don’t. This is the most critical phase, where patience separates a good job from a ruined one. Understanding the paint curing process is what protects your investment.
Dry to the Touch vs. Fully Cured: The Critical Difference
Think of it like baking cookies. When you pull them from the oven, they’re firm but still soft and gooey inside. Leave them on the rack, and they harden up. Car paint works the same way.
“Dry to the touch” means the solvents have evaporated enough for a thin skin to form. It might feel dry in a few hours. This is a trap. The paint underneath is still soft. You can easily leave a fingerprint dent that won’t ever buff out.
“Fully cured” means the paint has undergone its full chemical cross-linking process. It has reached its maximum hardness and durability. This takes time, and you cannot rush it. Knowing the difference between dry and cured is the single most important thing to remember after a paint job.
Your Fresh Clear Coat is Incredibly Soft
Modern paint jobs use a clear coat layer for protection and gloss. When fresh, this clear coat is soft, like stiff jelly. It is susceptible to everything.
- A careless sleeve brushing against it can create a fine scratch.
- A bug impact at highway speed can dent the surface.
- Washing it with any pressure or a mitt will mar it instantly.
- Putting tape on it for a bra or stripe can pull the coating right off.
I learned this the hard way on my black BMW. I got a small chip touched up and figured it was fine after two days. I gently wiped off some dust with a clean microfiber. The result was a hazy, scratched patch that needed a full polish to fix. Treat fresh paint like wet paint for much longer than you think is necessary. If you’re dealing with repair touch up paint chips, take your time with prep and layering. A careful approach now prevents costly polishing later.
Realistic Timelines: When is it Safe?
So, how long car paint cure? The answer depends on temperature, humidity, and the paint system used. Here are the rules I follow in my shop. If you’re looking to dry car paint fast, controlling temperature and airflow can shave hours off the surface dry time. Small tweaks to humidity and fan speed help keep the final finish pristine.
For safe handling and minimal risk, you need 24 to 48 hours in a warm, dry environment. This means the car should sit in a garage, not outside where dew or rain can settle on the soft surface. After this period, you can usually drive the car carefully.
But you must avoid washing, waxing, or sealing it. For that, you need to wait for full hardness.
How long after painting car can you drive it without worry? The full cure timeline is measured in weeks, not days. Most paint is about 90% cured in 30 days. It reaches full, rock-hard cure around the 90-day mark. Only then should you apply a wax, sealant, or ceramic coating. Applying anything before the solvents have fully gassed out will trap them and cause cloudiness or adhesion failure. Understanding car paint cure time helps you plan when to apply finishes and protection. Knowing this timing also informs when coatings can be safely applied without risking cloudiness.
Does Car Paint Darken As It Cures?
Yes, it can. This is a subtle but important point, especially for DIY color matching. As the solvents evaporate and the paint film shrinks very slightly, the color can shift. This is most noticeable with bright single-stage reds, like the classic red on my 1995 Miata. A freshly sprayed panel might look slightly brighter or more orange. As it cures over a month, it deepens into its true, final color.
This is why professional shops never match paint to a freshly sprayed test card. They sand a small area and polish it to simulate a cured finish, or they use a fan deck of fully cured color samples. If you’re doing a spot repair, expect the color to change a shade as it cures, so perfect color match on day one might not be perfect on day thirty.
For modern basecoat/clearcoat systems, the color shift is less drastic but still possible. The main takeaway is to judge the color match after the repair has fully cured, not when it’s fresh out of the booth.
Regional Price Variations: What to Expect Near You
Where you live is one of the biggest factors in your final bill. This isn’t just a guess. I see it when I talk to other detailers and body shop owners at trade shows. A shop’s biggest costs are rent, utilities, and paying their technicians a fair wage. All of that is tied directly to your local cost of living.
In a major metropolitan area like New York City, Los Angeles, or Toronto, you are paying for the shop’s sky-high overhead. Labor rates here can be double what they are in a rural town. The paint materials cost the same, but the expertise and the business rent are premium. For a standard bumper repaint, don’t be surprised if prices in these hubs start 40-50% higher than the national averages we talked about earlier.
Move outside the city center, into the suburbs or a smaller city, and prices often become more reasonable. Shops here still have skilled painters, but their business costs are lower. This is where you frequently find the best balance of quality and value.
In truly rural areas, prices can be the lowest. The trade-off here is often availability-you might have one or two shops serving a huge area, and their specialty might be farm truck repairs, not color-matching a modern tri-coat pearl. Always ask to see examples of their finished paint work, not just collision repair.
Location-Based Cost Snapshots
While I won’t invent specific numbers, the pattern holds globally based on economic factors.
In a place like Ontario, Canada, expect to pay rates influenced by both urban centers and severe weather. Shops in the Greater Toronto Area command city prices. Across the province, the need for corrosion-resistant materials and dealing with road salt damage can be factored into the job.
In a major international city like Chennai, India, the range is vast. You can find very economical options, but for a factory-quality finish on a modern car, seek out shops that service luxury dealerships. Their labor rates and material standards will align more with global quality expectations.
The core idea is the same whether you’re in Melbourne, Manchester, or Munich. High-cost city equals higher shop rate. Your local economy sets the baseline.
How to Search for “Bumper Painting Cost Near Me” the Right Way
Typing that phrase into a search engine is just the first step. Making sense of the results is what matters.
First, understand that a great detailer is not always a great painter, and a great body shop is not always a great detailer. You are looking for paint and refinishing expertise. When you look at online reviews, ignore the comments about how fast they did an oil change or how nice their waiting room is.
Look for these clues instead:
- Photos of completed paint work, especially bumper repairs, in their gallery or reviews.
- Specific praise for color matching, especially on complex shades like metallics, pearls, or reds.
- Mentions of proper prep work-sanding, priming-not just a quick spray-over.
- Reviews that mention working with insurance companies, as this often indicates established procedures.
Call the top two or three shops. Ask them directly: “Can you walk me through your process for painting a bumper that’s already off the car?” Listen for steps like cleaning, degreasing, sanding, applying a primer surfacer, and using a clear coat. That prep is the core of surface preparation in automotive paint. A thorough surface prep is what ensures the paint sticks and lasts. If they gloss over prep, consider it a red flag.
The cheapest estimate you find locally might save you money now, but a poor paint job will haunt you with premature fading, peeling, or a mismatched color. Paying a bit more for a shop with a proven track record in paint is almost always the smarter long-term play for your car’s appearance and value. Understanding the professional car paint cost helps you compare options beyond the sticker price. A higher upfront cost can reflect quality prep, materials, and a longer-lasting finish.
Bumper Size & Vehicle Type: From Miata to F-150
Not all bumpers are created equal. The vehicle you drive is the single biggest factor in determining a fair price for a repaint. I’ve worked on them all, from tiny sports cars to massive trucks, and the difference in time, material, and skill is staggering.
Starting with the simplest case, my 1995 Mazda Miata’s front bumper is a detailer’s dream for a DIY project. It’s small, lightweight, and has relatively gentle curves. You use maybe half the paint you would for a modern sedan. Removing it is often just a handful of bolts and plastic clips. For a DIY spray job, this is where you can get surprisingly good results with careful prep and a hobbyist spray gun. A professional shop will also charge less for this bumper simply because it consumes less of everything time, tape, and material.
Now, look at my 2018 Ford F-150. Its front bumper is a beast. It’s not just large; it’s often a textured, matte black plastic that requires specific adhesion promoter for paint to stick correctly. The surface area is huge, demanding more primer, more basecoat, and more clear coat. Removing it is a heavier job, sometimes involving fog lights, sensors, and brackets. The sheer mass and complex texture of a full-size truck bumper add significant labor and material cost, pushing the price well above a simple car bumper.
Complexity matters as much as size. The bumper on my Porsche 911 is a sculpture. It’s woven with sharp body lines, deep air intakes, and subtle curves that play with light. Painting this seamlessly so the color and clear coat flow perfectly over every contour requires an artist’s touch. Masking off those ducts is tedious. Achieving a perfect match on a metallic or tri-coat red is a high-skill task. For vehicles with complex aerodynamic shapes, you pay for the technician’s advanced skill in managing paint texture and thickness across challenging surfaces. It’s not just about the application but mastering smooth car paint techniques that ensure an even finish.
This rule extends to SUVs and minivans like my Honda Odyssey. Their bumpers are tall and broad. More square footage means more paint material, period. They also often wrap around the sides, requiring extensive masking of fenders and wheel wells to blend the repair if you’re not removing the part. The larger the panel, the higher the material cost and the greater the chance of a visible flaw like a run or dust nib, which means more time spent wet-sanding and polishing after the paint cures.
Your Best Path Forward: A Detailer’s Honest Advice
Look at your car. Be honest about what it is. This is the single most important step.
My 2019 Honda Odyssey, the kid hauler, has a scuffed rear bumper. For that vehicle, a careful DIY spray can job is a completely valid, satisfying project. A small color mismatch on a bumper already covered in juice box stickers and shopping cart dings is not a tragedy. The goal there is protection from rust and a presentable look, not concours perfection. If you have a similar older daily driver, the DIY route can save you real money and give you pride in a job done yourself.
Now, look at my Tesla or the Porsche. Their bumpers are not just painted panels; they are part of the car’s cohesive aesthetic. Modern whites, tri-coat reds, and metallics are a nightmare to match without a professional mixing booth and spray gun. For any car newer than five years, or with a complex color, a professional painter is almost always the correct financial decision when you factor in the cost of your time and potential do-overs. There are professional affordable car paint services that balance quality and cost. These options can help you maintain the finish without overspending. A bad paint job lowers your car’s value and is all you’ll see every time you walk up to it.
A Smart Compromise: Split the Job
There is a fantastic middle path that gives you professional color and lets you apply your detailing skills to guarantee a perfect finish.
Have a reputable shop handle the prep, priming, and painting of the bumper. Once you get it back, you take over. New paint from any shop, even a good one, will have minor texture or dust nibs. This is normal.
Your job is the final paint correction (learn more about the car paint correction process) and protection. Wait for the paint to fully cure (ask the shop for their recommended time, usually 30-90 days). Then, perform these steps yourself:
- Decontaminate the new paint with an iron remover and a gentle clay bar.
- Using a dual-action polisher, a fine finishing polish, and a soft foam pad, carefully level the surface. You are just knocking off the high points, not cutting deep.
- Wipe down with a prep spray to remove all polishing oils.
- Apply your chosen protectant. This is where you shine. A DIY ceramic coating or a high-grade synthetic sealant will lock in that flawless, corrected finish better than any shop’s quick wax.
This hybrid approach saves money on the labor-intensive paint work and ensures the finished surface meets your detailing standards for slickness and protection. You become the quality control for the final, most visible layer.
Make the Choice That Fits Your Life
I have painted bumpers in my garage. I have also written checks to professionals. There is no single right answer, only the right answer for your specific car, your current skill level, and the money you have ready to spend.
Do not stretch your budget thin for a perfect pro job on a car that doesn’t need it. Do not gamble with a rattle can on a car whose finish you truly care about. Assess the situation without ego. Whether you choose DIY, professional, or the split-job compromise, the goal is the same: a bumper you’re happy to look at, protected from the elements, that keeps your whole car looking its best. That is always a win.
Making Your Bumper Paint Decision
Your final price comes down to balancing your budget with your expectations for a perfect, lasting finish. A professional respray is often the most reliable value, while DIY demands honest self-assessment of your skill and patience.
Choosing the wrong path can lead to a patchy mess that peels in a season or a wasteful overspend, not to mention the safety risks of improper chemical handling.
Industry References
- r/S2000 on Reddit: What is a realistic price to pay to have your front bumper painted?
- What is the average cost for paint matching front and rear …
- How much should it cost to repaint a front car bumper? Mine has some scratches on it and I’m not sure what is a good price. – Quora
- Navigating Bumper Paint Costs: A Guide To Paying for Mobile Bumper Repair – Bumper Buddies
Max is an automotive enthusiast having worked as a car mechanical and in interior detailing service for over 25 years. He is very experienced in giving your old car, a new fresh vibe. He has detailed many cars and removed very tough smells and stains from all kinds of cars and models, always ensuring that his work and advice helps his customers. He brings his first hand experience to his blog AutoDetailPedia, to help readers breath new life into their car interiors.