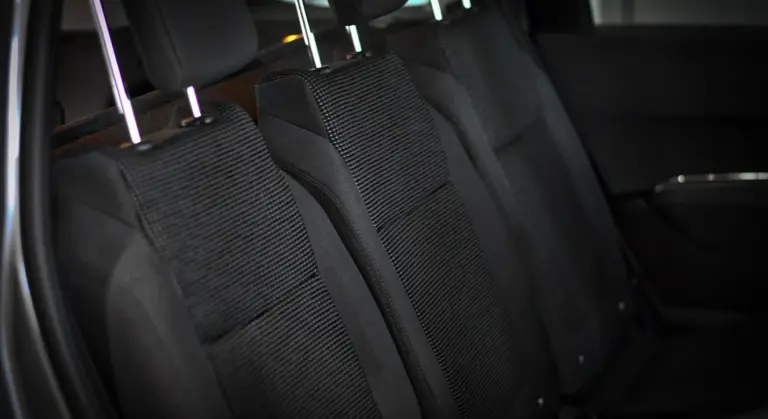
How Do You Clean Vomit and Stains from Car Upholstery?
Finding vomit on your car seat is a real problem. You need to clean it right, not just wipe it up.
I will show you what works, from my time cleaning my Honda Odyssey. We will cover the fast first step, picking the right cleaner for cloth or leather, how to scrub without damage, and killing the smell completely.
Handle it poorly, and the stain will set, the fabric will rot, and the odor will never leave.
Key Takeaways: Your Game Plan for a Messy Situation
You just got the call. There was an incident in the back seat. I have been there with my grey Honda Odyssey more times than I care to remember. Your mind races. Take a breath. Here is your plan.
- Act Fast. Time is your enemy. The longer it sits, the deeper it soaks and the worse the odor sets.
- Blot, Don’t Rub. Rubbing is grinding. It pushes stains deeper into the foam and spreads them wider. Press and lift.
- Use the Right Cleaner. Not all cleaners are equal. An enzyme-based cleaner is your best weapon against organic messes and smells.
- Extract Thoroughly. Cleaning is about what you remove, not what you apply. You must pull the broken-down gunk back out.
- Dry Completely. Trapped moisture breeds mildew and a whole new, worse smell. You need airflow.
Difficulty: Moderate. It tests your patience more than your skill. Rushing will make it worse.
Critical Tools: Nitrile gloves, a stack of cheap microfiber towels or paper towels, a plastic scraper or old credit card. For a real, lasting clean, a wet/dry vacuum or a dedicated extractor is highly recommended. My little portable extractor earned its keep ten times over on the Odyssey’s cloth seats.
The Protocol: Your Order of Operations
This is your checklist. Do not skip steps. I learned this the hard way after a “quick clean” left a faint sour smell in my truck for weeks.
Step 1: Safety & Setup.
- Drive the car to a shaded, ventilated spot. Open all the doors. You need fresh air.
- Put on those gloves. This is non-negotiable.
- Gather everything you need before you start: towels, scraper, cleaner, brush, vacuum. You do not want to run inside with soiled gloves.
Step 2: Remove Solids.
This is as unpleasant as it sounds. Use a flat, stiff plastic item. I keep a dedicated vinyl scraper in my kit. Gently lift and scoop the bulk material onto a paper towel or bag. The goal is to get the big stuff off without mashing it into the fabric. Treat it like you’re cleaning wet sand off a delicate surface.
Step 3: Initial Blot & Soak.
Grab a wad of dry paper towels or a dry, cheap microfiber. Place it over the wet stain and press down with the palm of your hand. Hold pressure. You will see the liquid wick up into the towel. Lift, move to a dry spot on the towel, and press again. Repeat until you are not pulling up much more moisture. You are soaking up the contaminant, not spreading it.
Step 4: Clean & Break Down.
Now apply your cleaner. For vomit, an enzyme cleaner is the top choice. It eats the organic proteins that cause stains and odors. Spray it liberally over the affected area, slightly beyond the visible stain. Let it dwell for 5-10 minutes. Do not let it dry.
Take a soft-bristled detailing brush (like a boar’s hair or soft nylon brush) and gently agitate the area. You are working the cleaner into the fibers. Gentle circles are fine, but avoid aggressive scrubbing. The chemicals need time to work.
Step 5: Extract & Rinse.
This is the most important step. If you leave cleaner and dissolved vomit in the seat, it will turn sticky and smelly.
- With an extractor/wet-dry vac: Use the upholstery tool. Go over the area multiple times, spraying a little clean water as a rinse and immediately sucking it back out. Suck until you hear no more water coming up.
- Without a vacuum: Soak a microfiber towel in clean water, wring it out so it’s just damp, and press it into the area to rinse. Then, use a dry towel to blot and pull the moisture out. You may need to do this many, many times. It is a workout.
You are done extracting when the water you pull up looks clear and smells only of your cleaner, not the mess.
Step 6: Dry & Deodorize.
You cannot skip this. Leave the doors open. Point a fan at the seat. In a pinch, a portable space heater on a low, cool setting several feet away can help circulate air. If you have a dehumidifier, run it nearby.
If after 24 hours a faint odor remains, use an odor neutralizer spray designed for interiors. Do not use a perfume-y air freshener to mask it. You need to neutralize the odor molecules. A light mist over the area, followed by final drying, usually finishes the job.
Gearing Up: What You’ll Need to Get the Job Done
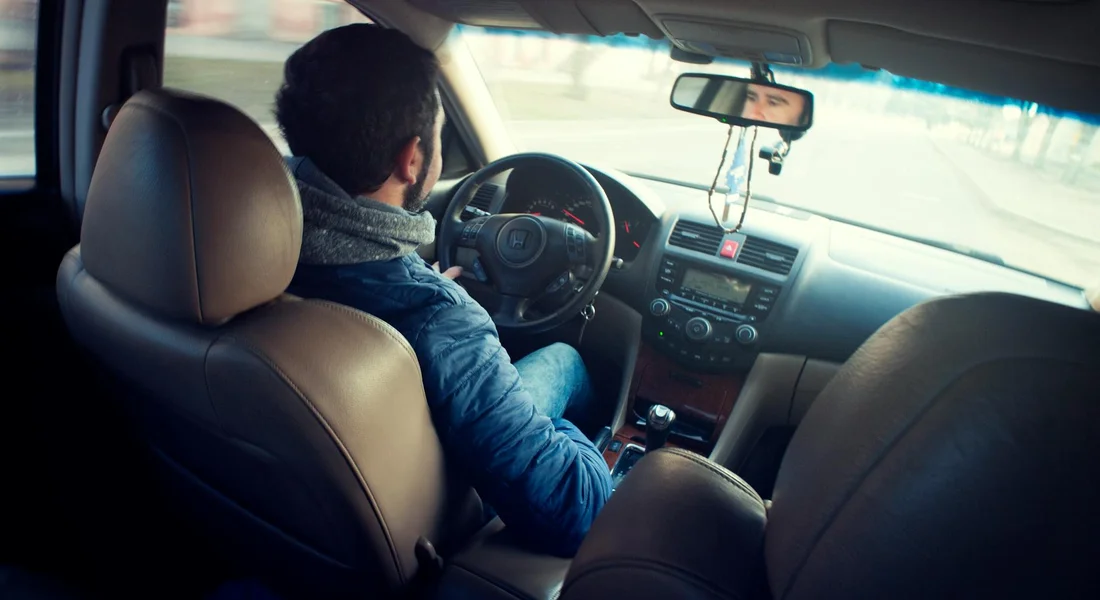
Open the doors and take a breath. I have been here many times with my grey Honda Odyssey, the official “Kid Hauler.” The first rule is to not panic. The second is to have your tools ready before you start. Scrambling for supplies lets the stain set. Here is what you actually need.
Your basic kit is simple. Gather these first.
- Nitrile Gloves: Put them on. Every time. This is not just for the mess. It protects your skin from cleaning chemicals.
- Microfiber Towels (lots): I use a full bag of the thick, plush ones. You need them for blotting, wiping, and drying. Cheap, flat towels just push the liquid around.
- Soft Bristle Brush: A detailing brush or a clean, soft toothbrush. This agitates the cleaner gently. You do not want to scrub the fabric apart.
- Plastic Scraper or Card: An old gift card or a plastic putty knife. Use it to carefully lift off any solid matter first. Never use metal. It cuts.
Choosing the right cleaner matters more than anything else. Using the wrong one can ruin your seats.
For Fabric Upholstery and Carpet
- Enzymatic Cleaner: This is the pro choice for vomit. Enzymatic cleaners contain live bacteria that eat the proteins and organic matter, which eliminates the stain and the source of the odor permanently. It is like a targeted cleanup crew for your seats.
- Diluted All-Purpose Cleaner (APC): Mix it about 10 parts water to 1 part APC. It is a good general cleaner after the main stain is gone. Always test it on a hidden seam first to check for color fading.
- Carpet Shampoo: For a final, deep clean on fabric seats. It creates foam to lift out any last bits of dirt the enzymatic cleaner left behind.
For Leather or Synthetic Leather (Like Tesla’s “Vegan Leather”)
- pH-Balanced Leather Cleaner: Made specifically for these surfaces. It cleans without stripping the protective coatings. My BMW’s leather and the Tesla’s seats feel supple, not stiff, after using it.
- Mild Soap Solution: A few drops of clear dish soap in a gallon of warm water works in a pinch. You must avoid harsh degreasers, ammonia, or vinegar on real leather, as they will dry it out, crack it, and cause expensive damage.
Household Options If You’re in a Bind
- Dish Soap (Like Dawn): Excellent for cutting through oils. Use a tiny amount. You will need to rinse very thoroughly to avoid sticky residue.
- White Vinegar Solution: Mix equal parts water and distilled white vinegar. It is a natural deodorizer. The sharp smell disappears as it dries.
- Baking Soda Paste: Mix baking soda with a little water to make a spreadable paste. Pat it on a dry stain, let it sit for an hour, then vacuum. It soaks up odors well.
If you detail cars often or have a family like mine, better tools are worth the investment.
Pro-Level Gear for Deep Cleaning
- Wet/Dry Vacuum: Even a small shop-vac is a game changer. It pulls moisture from deep in the seat foam. This is the single best tool for preventing smells.
- Portable Carpet Extractor: Think of a little shampooer for your car. It sprays cleaning solution and sucks it back up immediately. Perfect for large fabric areas.
- Steam Cleaner: Uses hot vapor to sanitize and loosen stains without harsh chemicals. I use it on sensitive materials and for killing germs. It is very effective.
Technique Tweak: The Art of Extraction, Not Just Cleaning
Spraying cleaner on a stain is the easy part. The real work, the secret to a clean that lasts, is getting all that liquid and dissolved mess back out of the seat. Leftover moisture is your enemy. It sinks into the foam pad underneath, where it will smell and eventually grow mold. I learned this the hard way after a milk spill in the Odyssey came back sour a week later. No amount of cleaning could get rid of the lingering smell.
Start with the “press and lift” method. You can do this with just a towel and a brush.
- Take a clean, dry microfiber towel and wrap it tightly around the head of your soft bristle brush.
- Press the wrapped brush down firmly onto the damp, cleaned area. Hold it for a second.
- Lift the brush straight up. Do not scrub or wipe. You are wicking the moisture upward into the towel.
- Unfold the towel to a dry section and repeat. Keep going until the towel comes up mostly dry.
If you have a wet/dry vacuum, use it right. Poor technique traps water inside the seat.
- Use the upholstery attachment. Make short, overlapping passes across the stain area. Do not let the vacuum sit in one spot.
- Hold the nozzle flat against the fabric, but do not press down so hard you seal it completely. You should hear a slight hiss of air moving. This means it is pulling moisture up, not just compressing the wet seat.
- Run the vacuum over the area on dry suction mode until no more moisture appears in the hose or tank. This often takes three or four passes.
Finish with the touch test. Press the back of your hand against the seat. It should feel cool, but not clammy or wet. If it feels damp, you are not done. Keep extracting. True dryness is what guarantees the job is finished.
How to Clean Vomit from Fabric Car Seats and Upholstery
Cleaning vomit from fabric is a process. You must be methodical. I know from my 2019 Honda Odyssey, the grey kid hauler. It has seen every kind of spill. Follow these steps to get it clean and odor free. The same method also helps remove vomit odor and stains from a car interior.
- Remove any solid pieces with a plastic bag over your hand or a dull plastic scraper. Do not scrape hard. You just want to lift the chunks away without grinding them in.
- Blot the wet area with a stack of clean, dry microfiber towels. Press down firmly to soak up the liquid. Keep swapping to a dry spot on the towel until it stops transferring moisture.
- Spray the stain with cool, clean water from a spray bottle. This dilutes what is left. Blot again.
- Soak the area with a dedicated enzymatic cleaner. This is the most important step. The enzymes eat the odor causing bacteria. Let the cleaner dwell on the fabric for at least 15 minutes. For a bad smell, let it sit longer.
- Gently agitate the area with a soft bristle brush, like a detailing brush. Use small circles to work the cleaner into the fibers. Do not scrub aggressively.
- Extract the cleaner and residue. Use a wet dry vacuum or an upholstery extractor. Pull the trigger and slowly go over the spot multiple times until you see clear water being pulled out.
- Let the seat air dry completely. Open all the doors to get air moving. You can point a fan at the seat. Do not use the car until it is totally dry to the touch.
An enzymatic cleaner is the only product that attacks the source of the smell, not just masks it. Without it, a faint sour smell, similar to sour milk odor, will come back on a warm day.
People often ask, “What household products work for cleaning vomit from car interiors?” In a pinch, a dilute dish soap solution can clean. Mix a teaspoon of mild dish soap into a quart of cool water. Spray it on, blot, and rinse with a cloth dampened with plain water. After the area is fully dry, sprinkle a thin layer of baking soda over it. Let it sit for a few hours, then vacuum it up. The baking soda can help absorb lingering odors. For tougher vomit stains or odors on upholstery, more targeted approaches can help. We’ll outline those in the next steps.
Another good question is, “Should you use a steam cleaner on vomit in a car?” Yes, but only after you remove all solids. A steam cleaner is a fantastic tool for sanitizing and helping lift stains from deep fibers. The heat kills germs and loosens the mess. You must warn about heat on delicate fabrics. Some car upholstery is thin. Test the steam on a hidden seam first. Use a lower temperature setting and keep the nozzle moving to avoid soaking or burning the fabric. To decide the best approach, look into steam cleaning methods for car seats. Different techniques, like handheld steamers or portable steam cleaners, can affect stain removal and fabric safety.
How to Clean Vomit from Leather and Synthetic Leather Seats
Pouring water or using a harsh all purpose cleaner on leather will permanently damage its protective coating and dye. I have seen leather turn stiff and discolored from one bad cleaning. Treat it with care.
The process is gentler. Start by blotting up all moisture with dry microfiber towels. Do not wipe. Next, dampen a fresh microfiber towel with a dedicated leather cleaner. Wring it out so it is barely damp. Wipe the soiled area gently. Follow immediately with a dry towel to remove any leftover dampness. Leather must be dried quickly to prevent moisture from seeping into the material underneath.
Once the seat is completely dry, you need to apply a leather conditioner. Conditioning restores oils and prevents the leather from cracking and becoming stiff after a deep clean. Use a clean applicator pad and apply a thin, even coat over the entire seat panel.
For “Vegan” or synthetic leather, like in my white Tesla Model 3, it is more forgiving. Stains do not sink in as easily, but they can still set. Use the same gentle blot method. Clean with a mild interior cleaner or diluted leather cleaner, then wipe dry immediately. You do not need a conditioner, but a synthetic protectant can help shield the surface from future spills. If you need to clean stains from leather car seats, this approach translates well to real leather too.
Getting Rid of the Smell of Vomit in Your Car
A smell that sticks around is a message. It means something is still there, hiding. You got the stain out, but tiny bits of organic residue or bacteria are living in the fabric or the foam underneath. That sour, acidic odor comes back, especially on a warm day. It’s a common fight in my grey Honda Odyssey, the Kid Hauler.
How can you get the smell of vomit out of car fabric? You have to attack what you cannot see, deep in the seat. A surface wipe is not enough. The odor usually lives in the cushion padding below the seat cover. Even if you manage to remove visible stains, some nausea-causing odors can be stubborn and linger.
Your first move is to go back to the scene. Re-inspect the area you cleaned. Press on it with a clean, white paper towel. If the towel comes away damp or with any hint of color or smell, the job is not finished.
You need to re-extract. Pull out your sprayer and extractor again. This time, flood the area generously with your cleaning solution, focusing on letting it soak down into the foam. An enzyme-based cleaner is your best friend here. These cleaners use natural bacteria to actually eat the organic waste causing the smell. Let it dwell for ten minutes. Then, extract every bit of moisture you can pull up.
Once the area is clean and damp from extraction, do not let it air dry yet. This is your window. Apply an odor-neutralizing spray directly to the damp fabric. Look for a product labeled as a neutralizer or an eliminator, not a fragrance or perfume. A perfume just masks the problem for a day. A neutralizer breaks it down on a chemical level.
For smells that just will not quit, you have two good options. Place an open box of baking soda in the footwell near the seat. Leave it for several days. It will passively absorb lingering odors from the air. For the nuclear option, consider a professional ozone treatment. A small ozone generator is placed in the closed car and run for about an hour. Ozone gas oxidizes and destroys odor molecules. It is very effective, but it is a last resort and must be done following all safety warnings about ventilation.
When to Call a Professional Detailer
Do car detailers clean vomit? All the time. It is a regular part of interior detailing. There is no shame in calling for backup. My rule is simple. If you have tried once and failed, or if the situation fills you with dread, make the call. Their tools and experience change the game.
Call a pro if the stain is old and set. Call if the smell persists after your best DIY effort. Definitely call if you do not own a quality extractor. Trying to scrub a stain like this deeper into the foam is worse than doing nothing. You should also call a pro if the mess is on a sensitive area like a cloth headliner or seats with complex electronics and ventilation systems. Soaking those can cause electrical faults.
How much does it cost to clean vomit from a car? For a focused clean of one seat area, expect a range of $150 to $300 or more. The final price depends on the severity, the size of the vehicle, and your location. You are paying for their industrial-grade hot water extractors, powerful air moviers for drying, and professional-grade chemicals. You are paying for them to take the problem away completely.
A quick note. A drive-thru car wash will not help you. Do car washes clean vomit? No. They are for exteriors only. Their equipment and staff are not designed or trained for interior biohazard cleanup. Taking this job to them is a waste of your time and money.
How to Prevent Stains (and Future Panic)
You are asking the right question. The single best way to prevent a permanent stain is to remove as much of the material as possible, as quickly as possible. Stomach acid and pigments in vomit begin to chemically bond with fabric fibers and dyes the longer they sit. Heat from the sun or your car’s heater accelerates this process, baking the stain in.
The “Sick Kit”: Your First Line of Defense
After one particularly memorable trip in the Odyssey, I assembled a kit that lives in every family vehicle I own. It is not fancy. It is for damage control.
- A large, sealable plastic bag (like a gallon freezer bag): This is for the soiled towels, not the vomit. It contains the mess and odor until you can properly deal with it.
- Several old, thick microfiber towels or cheap shop towels: You need absorbent material you are not afraid to throw away. The goal is to blot, not rub.
- A 16 oz spray bottle of plain distilled water: Water is your primary tool for dilution and flushing. Distilled prevents mineral deposits.
- Travel-size packs of disinfectant wipes: For cleaning hands, hard surfaces, and leather/vinyl seat surfaces quickly.
- Emesis bags (disposable vomit bags): These are the real secret. Keep a few in the seat pocket. If you get a warning, it can catch the majority of the mess before it ever touches your upholstery.
Barriers are Better than Cleanup
My grey Honda Odyssey, the “Kid Hauler,” taught me this lesson. For high-risk situations, a physical barrier is the most effective prevention. I use heavy-duty, waterproof seat covers that are easy to remove and hose off. A good seat cover is a sacrificial layer that you clean instead of your expensive seat foam and fabric. Look for ones that fit snugly and have a soft backing that will not scratch leather. Remember, no cover is perfect. Liquids can still find a seam, so the kit is still your backup plan.
The Core Principle: Act Fast, Think Later
When it happens, do not panic about doing a perfect detail job on the side of the road. Your only mission is to prevent the stain from setting. Pull over safely. Put on some gloves if you have them. Use the towels to scoop and blot up the solid material. Then, spray the area generously with your plain water and blot again. You are diluting the acids and flushing them from the surface fibers. This five-minute roadside blot will make the deep clean you do at home faster, more effective, and far less disgusting. You are not cleaning it now. You are just buying yourself time.
Keeping Your Seats Clean for the Long Haul
From cleaning up after my kids in the Odyssey, I know that acting fast is non-negotiable. Blot, don’t rub, and use a cleaner that’s tough on stains but gentle on your upholstery.
Neglect that quick response, and you’ll be fighting a set-in stain and a stubborn odor for years.
Research and Related Sources
- How To Clean Vomit From Car Seats, Upholstery, and Surfaces » Safe in the Seat
- How to Clean Vomit From Your Car Interior | Thompson Sales
- How to remove vomit from car seat | Turtle Wax
- How to Get Stains & Odors Out of Car Seat Fabric | ARM & HAMMER™
- How To Clean Vomit From Your Car | Chemical Guys
- How to Remove Vomit from Upholstery | COIT Stain Remover Guide
- Vomit Cleaning 101: A Comprehensive Guide for Car Owners and PRO’s
Max Gunther
Max is an automotive enthusiast having worked as a car mechanical and in interior detailing service for over 25 years. He is very experienced in giving your old car, a new fresh vibe. He has detailed many cars and removed very tough smells and stains from all kinds of cars and models, always ensuring that his work and advice helps his customers. He brings his first hand experience to his blog AutoDetailPedia, to help readers breath new life into their car interiors.